My First Time Making These
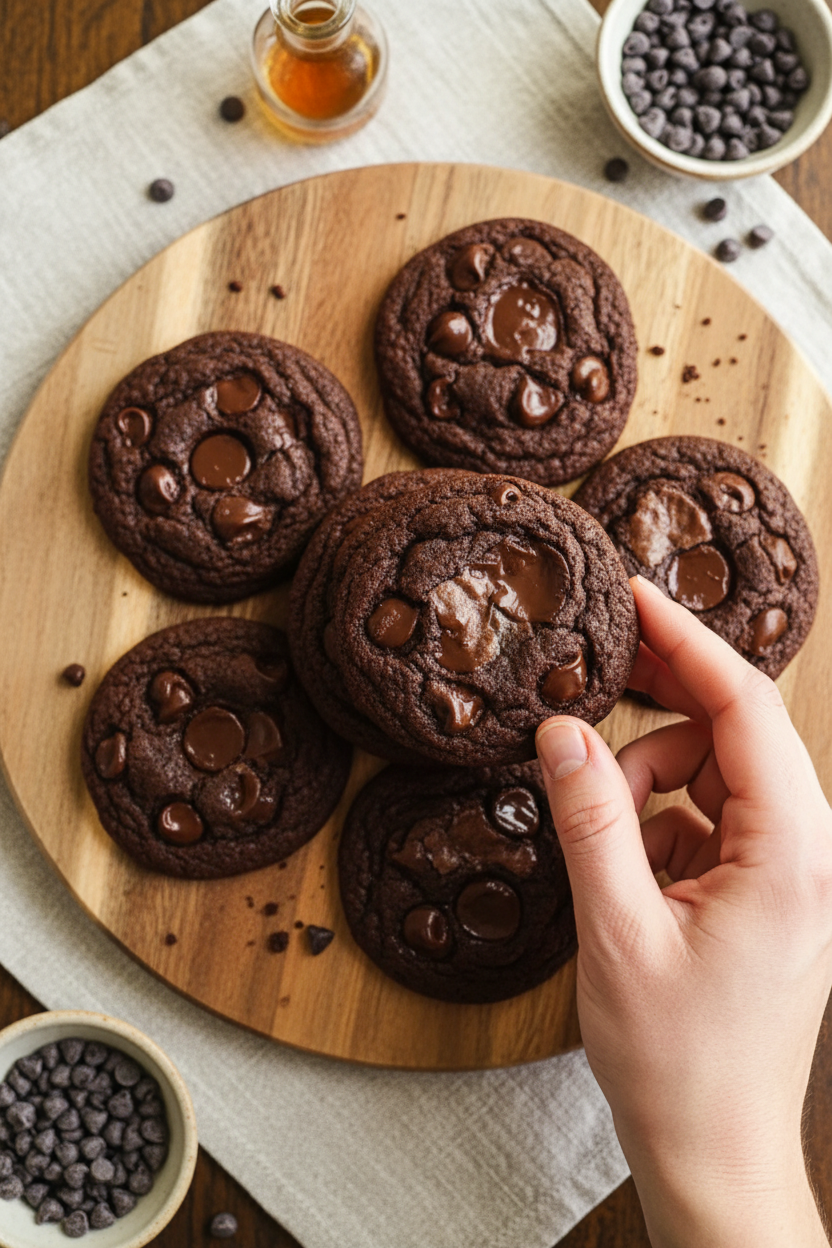
I still remember the day I first tried Irish cream brownie cookies. It was raining outside, and I wanted something sweet and warm. I had a little bottle of Irish cream left from a party. I thought, why not put it in cookies? I still laugh at that moment. The batter tasted so good I almost ate it all before baking. These cookies are like a brownie and a cookie had a baby. They are chewy in the middle and a little crisp on the edges. Doesn’t that smell amazing when they are baking? The whole kitchen fills with chocolate and a tiny hint of something cozy.Why the Chocolate Matters
You need bittersweet chocolate here, not just any chocolate bar. The 70% cacao kind gives a deep, rich taste. Regular milk chocolate would be too sweet and soft. This is why the cookie stays fudgy, not cakey. *Fun fact: Bittersweet chocolate has less sugar than semisweet, so it melts smoother in the dough.* If you only have salted butter, that is just fine. Skip the extra salt in the recipe. The salt in the butter will balance the sweetness. I have done this many times when I ran out of unsalted butter. It works every time. What kind of chocolate do you usually keep in your pantry? Bittersweet, semisweet, or just milk chocolate?The Little Trick with the Dough
Do not skip the chilling step. I know it is tempting to bake right away. But 15 minutes in the fridge stops the cookies from spreading into flat pancakes. When I forgot to chill the dough once, the cookies came out thin and crispy. My grandson still calls them “pancake cookies.” He loved them, but they were not what I wanted. Chilling also lets the flavors get friendly with each other. The Irish cream sinks into every bite. If you are using coffee or cream instead, it will still taste lovely. This is why the waiting is worth it.Simple Swaps for Everyone
You can make these cookies your own. No Irish cream? No problem. Use strong coffee or a splash of heavy cream with a little extra vanilla. My neighbor makes them with cold brew coffee, and they taste like a fancy coffee shop treat. Want to go vegan? Use flaxseed meal mixed with water for the eggs. Swap the butter for a vegan stick. The cookies will still be soft and chewy. My niece tried it last Christmas, and nobody could tell the difference. That is a win in my book. Have you ever tried swapping an ingredient in a recipe? What worked or what turned into a funny mistake?How to Tell When They Are Done
The timer is your friend, but your eyes are better. Bake them for 8 to 10 minutes. The edges should look set, but the centers will still look a little soft and puffy. Do not wait until they look fully baked. They will keep cooking on the hot baking sheet after you pull them out. Let them sit on the sheet for a full 10 minutes. I know it is hard to wait. I always sneak one early and burn my tongue. But those 10 minutes make the cookie firm up just right. This is why you get that perfect chewy center. Here is a quick poll: Do you like cookies gooey in the middle or crispy all the way through? I am team gooey, always have been.Why These Cookies Make You Happy
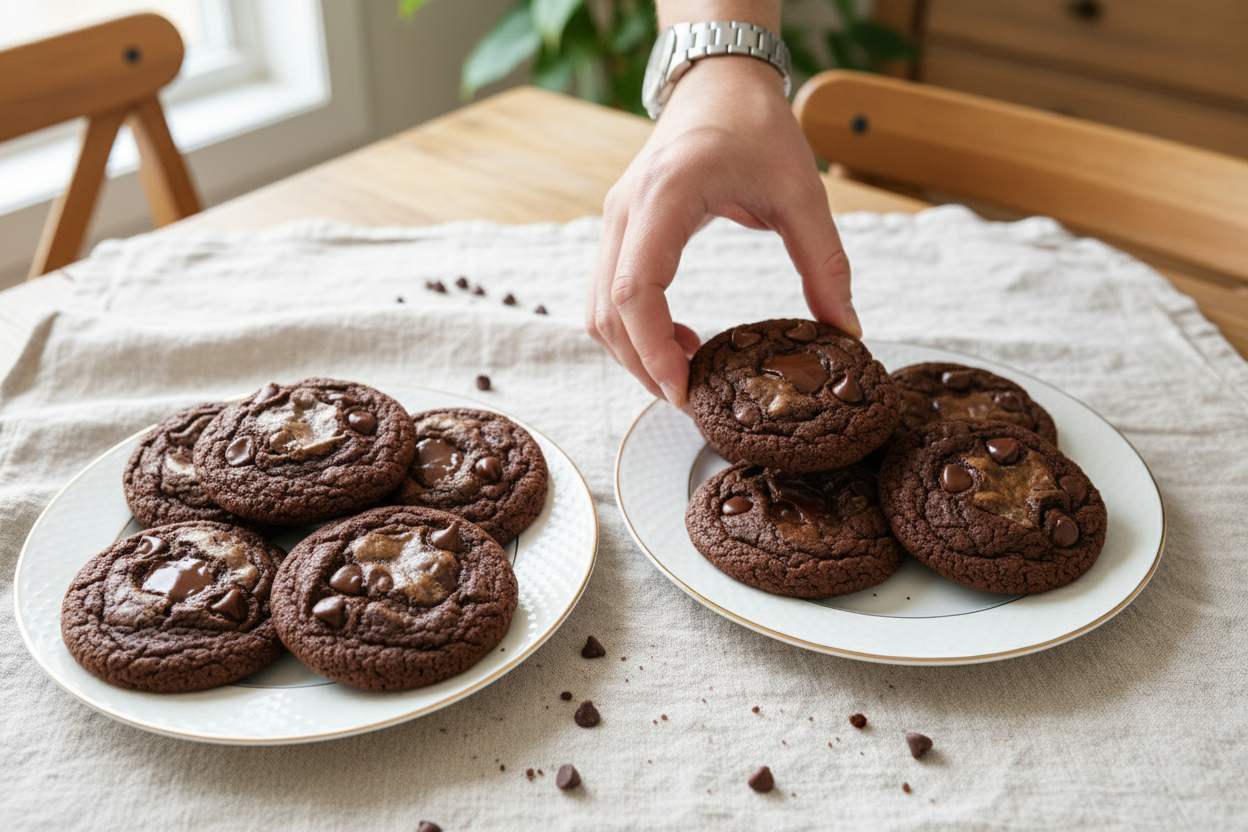
These cookies are not just a treat. They are a little hug on a plate. When you bake them, the smell brings people into the kitchen. My grandkids always come running when they smell chocolate and butter. It is a way to say “I love you” without words. Sharing food connects us. Even if you make them just for yourself, you are giving yourself a moment of joy. That matters. Life is busy, and a warm cookie can slow everything down for a minute. Tell me, who is the first person you would share these cookies with? A friend, your parents, or maybe just your own happy self?Ingredients:
| Ingredient | Amount | Notes |
|---|---|---|
| Bittersweet Chocolate (about 70% cacao) | 1.5 cups | |
| Unsalted Butter | 2 tablespoons | Can be swapped with salted |
| All-Purpose Flour | 5 tablespoons | Gluten-free flour works for a gluten-free version |
| Baking Powder | 0.25 teaspoon | Use baking soda in a pinch |
| Salt | 0.25 teaspoon | Omit if using salted butter |
| Brown Sugar (firmly packed) | 0.5 cups | |
| Large Eggs | 2 | Use flaxseed meal for a vegan variation |
| Irish Cream Liqueur | 3 tablespoons | Substitute with coffee or cream for a non-alcoholic option |
| Vanilla Extract | 0.25 teaspoon | Adds depth to flavor |
| Semisweet Chocolate Chips | 0.25 cups | Consider dark or white chocolate chips as alternatives |
My Sweet Memory with These Cookies
I still remember the first time I baked these Irish Cream Brownie Cookies. My kitchen smelled like a cozy coffee shop, and my granddaughter kept peeking in. “Is it ready yet, Grandma?” she asked. I laughed and told her patience makes the best cookies. Doesn’t that smell amazing, just thinking about warm chocolate?
These cookies are special because they taste like a fudgy brownie, but they have crispy edges. That crunch is my favorite part. I learned the hard way that chilling the dough is not a step to skip. One time I was too rushed, and my cookies turned into flat puddles. Now I always set a timer for 15 minutes.
Let me walk you through the simple steps. I promise you can do this, even if you never baked before. Just take it slow and enjoy the process. Here is how we make these little bites of heaven.
Step 1: Start by melting your chocolate and butter together. Place them in a microwave-safe bowl. Heat them in 30-second bursts, stirring each time, until smooth. Be careful not to burn it, or you will have to start over. Let it cool a little while you get the other things ready.
Step 2: In a small bowl, whisk the flour, baking powder, and salt together. Set this bowl aside for now. This is your dry team ready to join the party later. (Hard-learned tip: Always whisk your dry ingredients. It helps the baking powder spread evenly. Otherwise, you get a salty bite in one cookie.)
Step 3: Beat the brown sugar and eggs in a large bowl. Use a mixer or whisk by hand for about two minutes. You want the mixture to look a bit lighter and thicker. My son used to say it looks like caramel clouds. Do you think that is a good description? What’s your favorite kitchen smell? Share below!
Step 4: Slowly pour the cooled chocolate mixture into the egg mixture. Stir gently until it is all combined. Then add the Irish cream liqueur and vanilla extract. If you use coffee instead, it still tastes wonderful. I once made them for a party, and nobody even noticed the change.
Step 5: Add the dry ingredients a little at a time. Mix just until you do not see any flour streaks. Then fold in the chocolate chips with a spatula. Overmixing will make the cookies tough, so stop as soon as it looks like brownie batter. That is the secret to a soft center.
Step 6: Cover the bowl and pop it in the fridge for 15 minutes. This is a perfect time to wash your dishes or set out your baking sheets. When I was young, I used this time to sneak a few chocolate chips. Nobody ever caught me, but I bet my mom knew.
Step 7: Preheat your oven to 350 degrees and line your baking sheets with parchment paper. Roll the dough into tablespoon-sized balls. Place them two inches apart, then flatten them lightly with your palm. They will spread just a little, so give them some elbow room.
Step 8: Bake for 8 to 10 minutes. The edges should look set, but the centers will still be soft. Do not wait for them to look fully baked in the oven. They keep cooking on the hot sheet after you pull them out. Cool them on the sheet for 10 minutes, then move them to a rack.
Cook Time: 10 minutes
Total Time: 35 minutes
Yield: 18 cookies
Category: Dessert, Cookies
Three Fun Twists on This Recipe
Sometimes I like to change things up a little. These cookies are so forgiving, you can get creative. Here are three of my favorite twists. Which one would you try first? Comment below!
Spicy Chocolate Kick: Add a pinch of cayenne pepper and cinnamon to the dry ingredients. It gives a warm, gentle heat that makes the chocolate taste deeper. My neighbor calls them “Mexican hot chocolate cookies.”
Minty Fresh Brownie Bites: Swap the Irish cream for peppermint extract (use just 1/4 teaspoon). Fold in crushed peppermint candies instead of regular chips. They look so pretty with little red and white specks.
Peanut Butter Swirl Surprise: Warm up 3 tablespoons of peanut butter and drizzle it over the dough before baking. Use a knife to swirl it gently. It makes a beautiful pattern and tastes like a candy cup.
Serving and Sipping Suggestions
These cookies are wonderful on their own, but I love to dress them up. Place one cookie on a small plate with a scoop of vanilla ice cream. Drizzle a little chocolate syrup on top for a fancy touch. My grandchildren love it when I sprinkle sea salt flakes over the warm cookies.
For a drink, try a warm mug of spiced chai tea. The cinnamon and cardamom match the chocolate perfectly. If you want something grown-up, a small glass of cold milk is always a winner. But for special evenings, a sip of Irish cream on the rocks is lovely. Which would you choose tonight?
How to Store These Cookies for the Best Taste
Let the cookies cool all the way before storing. Put them in a tin or airtight container. They stay soft for about three days on the counter.
You can also freeze the dough. I once made a double batch and froze half for a rainy day. It saved me when friends showed up unexpectedly. Just roll the dough into balls and freeze them on a tray. Then pop them in a bag for up to three months.
To reheat, place a cookie in a warm oven for five minutes. It tastes just like fresh from the oven. Why does this matter? Storing well means you always have a homemade treat ready. Have you ever tried storing it this way? Share below!
Three Common Problems and Easy Fixes
First, cookies can spread too thin. This happens if the dough is too warm. Just chill it for twenty minutes next time.
Second, the centers might be raw. I remember pulling a tray too early once. The edges looked done but the middle was gooey. Let them cool on the sheet for ten minutes. They finish baking there.
Third, the flavor can taste flat. If you skip the salt or vanilla, it makes a big difference. Why does this matter? Fixing these problems helps you bake with confidence. And the cookies taste amazing every time. Which of these problems have you run into before?
Your Top Questions Answered
Q: Can I make these gluten-free? A: Yes. Swap the flour for a gluten-free blend. The cookies will still be chewy and rich.
Q: How far ahead can I make the dough? A: You can keep the dough in the fridge for up to two days. It gets even more flavorful.
Q: What if I don’t have Irish cream? A: Use strong coffee or cream instead. The cookies will still taste wonderful.
Q: Can I double the recipe? A: Yes. It works perfectly for a big batch. Just mix in a large bowl.
Q: Can I use milk chocolate? A: You can, but the cookies will be sweeter. I like the bittersweet for balance. Which tip will you try first?
A Sweet Goodbye from Lena’s Kitchen
I hope these cookies bring you joy. There is nothing like a warm batch right from your oven. They remind me of cozy Sunday afternoons with my family.
*Fun fact: These cookies taste even better the next day.* The flavors really bloom overnight. Please share your baking photos with us. Have you tried this recipe? Tag us on Pinterest! Happy cooking!
—Lena Morales.

Irish Cream Brownie Cookies for Ultimate Cravings
Description
Rich, fudgy brownie cookies infused with Irish cream liqueur and studded with chocolate chips.
Ingredients
Instructions
- Melt the Chocolate and Butter: In a microwave-safe bowl, combine bittersweet chocolate with unsalted butter. Microwave in 30-second intervals until smooth and fully melted. Let cool slightly.
- Combine the Dry Ingredients: In a bowl, whisk together all-purpose flour, baking powder, and salt. Set aside.
- Mix the Sugar and Eggs: Beat brown sugar and eggs until well combined and slightly lighter in color, about 2 minutes.
- Incorporate Chocolate and Flavors: Slowly add chocolate-butter mixture to the egg mixture. Stir in Irish cream liqueur and vanilla extract.
- Add the Dry Ingredients: Gradually mix in the dry ingredients until just combined. Fold in semisweet chocolate chips.
- Chill the Dough: Cover and refrigerate the dough for about 15 minutes.
- Preheat and Prepare Baking Sheets: Preheat oven to 350°F (175°C) and line baking sheets with parchment paper.
- Shape the Cookies: Roll dough into tablespoon-sized balls and place on baking sheets, lightly flatten each ball.
- Bake the Cookies: Bake for 8 to 10 minutes until edges are set but centers remain soft.
- Cool on the Baking Sheet: Let cookies cool on the baking sheet for about 10 minutes, then transfer to a wire rack.
Notes
- For best results, do not overbake. Cookies will continue to set as they cool. Store in an airtight container for up to 5 days.


Leave a Reply