The Night I Learned to Trust the Pan
The first time I tried sheet pan quesadillas, I was nervous. I stood there, staring at my tortillas, wondering if they would stay put. My grandma used to make quesadillas one at a time in a hot skillet. She would flip each one with a gentle wrist flick. I could never get that flick right. I burned more tortillas than I care to admit. So when I saw this recipe, I thought, “There has to be a trick.” And there is. You use a second sheet pan as a weight. It presses the whole thing flat and golden. I still laugh at that night I piled tortillas on like a puzzle and prayed they would hold. They did. And my kitchen smelled like a little celebration. Have you ever tried a wild cooking trick that actually worked? I would love to hear your story. Share it in the comments below.Why the Beef Needs to Sing First
You might be tempted to just toss everything into a bowl and skip the skillet. Please don’t. The beef needs time to get brown and crumbly. When you cook the onion and garlic with the beef, something magical happens. The heat wakes up their flavors. This is why the recipe asks you to simmer everything with taco seasoning and water. That little step turns plain meat into saucy, rich filling. It is worth the extra five minutes. **Fun fact:** The word “quesadilla” comes from the Spanish word “queso,” which means cheese. So every quesadilla is really a little cheese story wrapped in a tortilla.The Colorful Part That Makes You Smile
After the meat is done, you add corn and black beans. This is where the dish gets its cheerfulness. The corn is sweet and yellow. The beans are dark and soft. Together, they make each bite feel like a party in your mouth. You also throw in sliced green onions for a tiny crunch. Some people think vegetables are boring. But these are not boring. They are the quiet heroes that make the quesadilla filling juicy and bright. Doesn’t that sound amazing? Just imagine the colors on your plate. Red peppers, yellow corn, green onions, black beans. It is like a rainbow you can eat.How to Fold a Tortilla Blanket
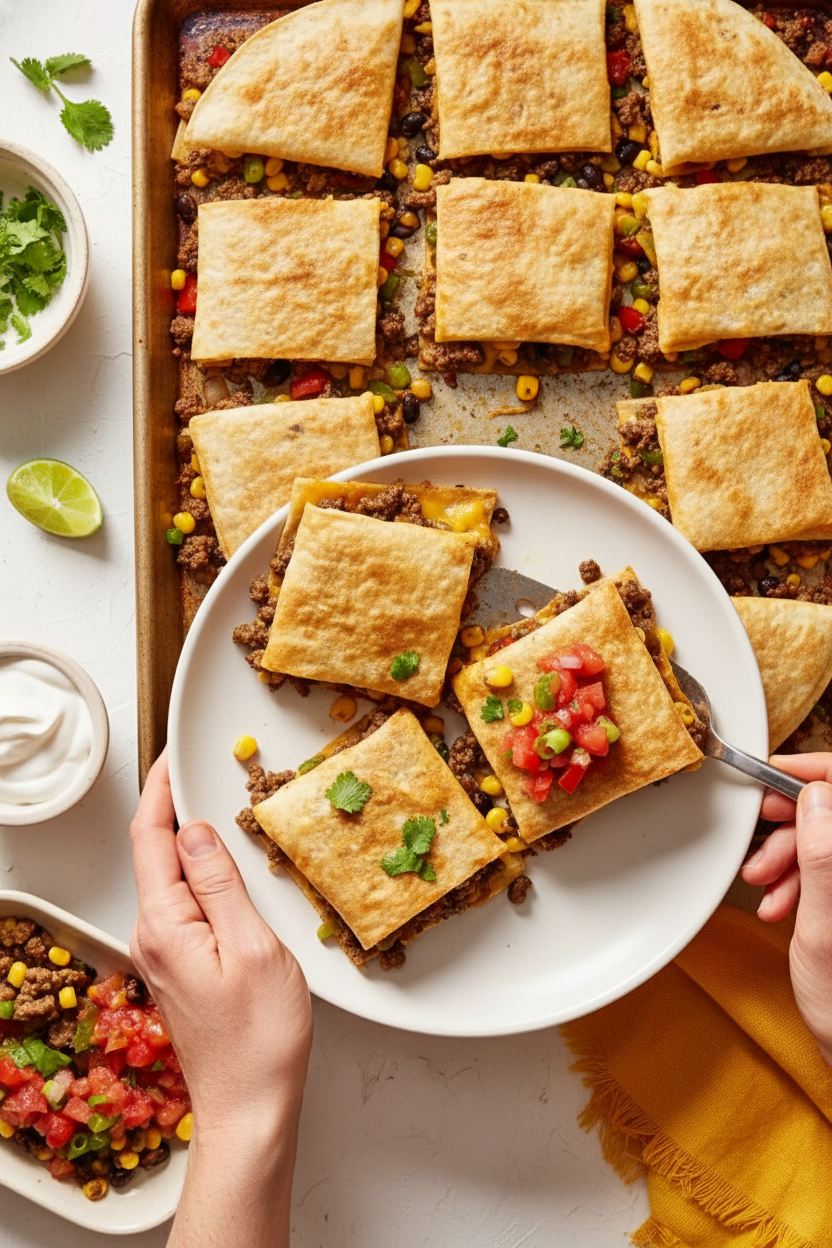
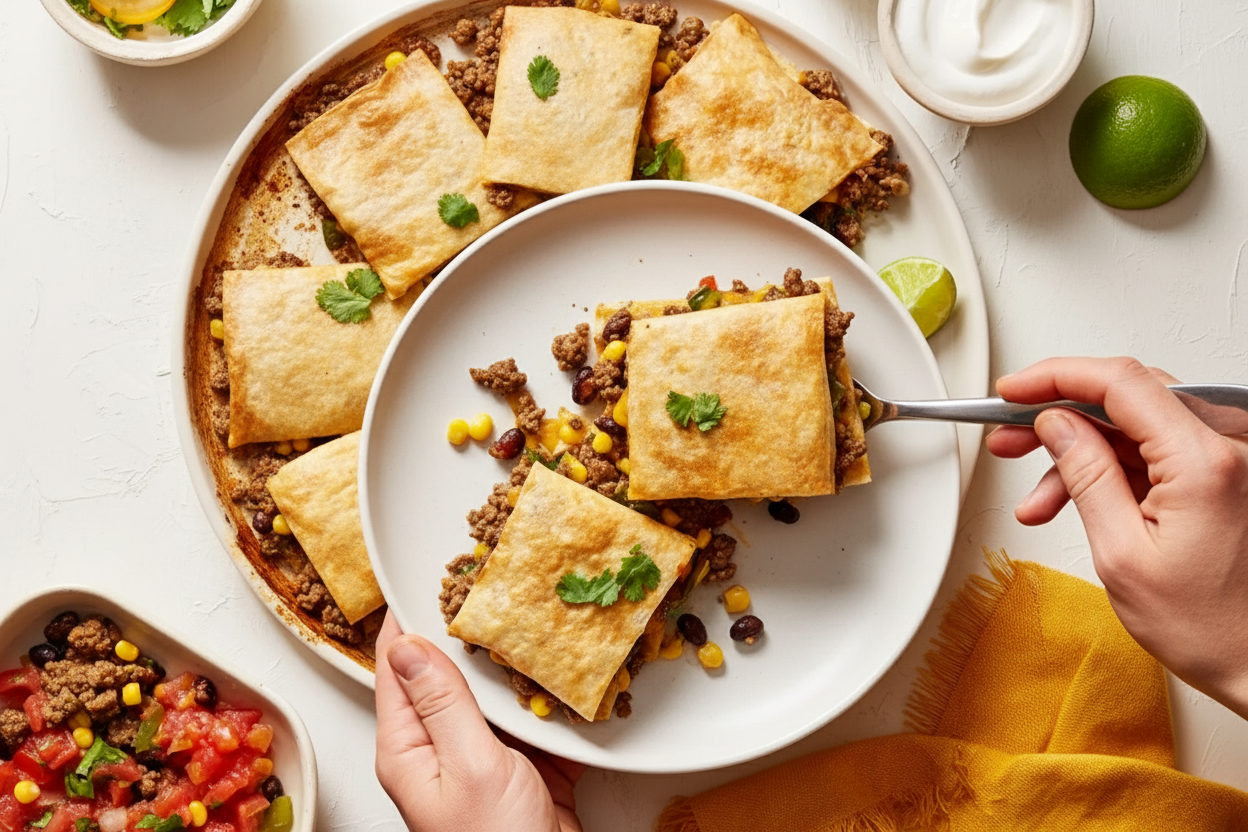
Now comes the fun part. You lay your tortillas on the sheet pan so they overlap like they are hugging each other. Half of each tortilla hangs over the edge. Then you put one tortilla right in the middle to fill any empty spots. Think of it like tucking a blanket over a mattress. You want no gaps. Then you pile all the beef and cheese on top. Finally, you fold the overhanging tortillas back over the filling like you are wrapping a gift. The last tortilla covers the center. This is why the recipe works. The tortillas seal everything inside. No filling falls out. Every bite is perfect.The Weight That Does the Heavy Lifting
You brush the top with olive oil and then place another sheet pan on top. It sounds strange, I know. But that weight presses the quesadilla flat. It keeps the tortillas touching the hot pan so they get crispy and golden. After fifteen minutes, you take the top pan off. Then you bake for five more minutes. That last blast of heat makes the top turn crunchy. It is like the quesadilla is saying, “Look at me now!” This matters because without the weight, the tortillas might puff up or curl. You would end up with uneven bites. Nobody wants a soggy corner. That pressing trick guarantees a uniform, crispy surface every single time.Cutting and Serving with Joy
When the quesadilla comes out of the oven, let it rest for five minutes. I know it is hard to wait. But if you cut too soon, the cheese will ooze out and make a mess. Use a sharp knife and slice it into squares. Serve it with salsa, sour cream, fresh cilantro, and lime wedges. The lime adds a little zing that cuts through the richness. This is the part where the meal becomes a memory. You are not just feeding people. You are giving them something they will ask for again.A Lesson in Patience and Love
Here is the truth. This recipe teaches you that good food does not have to be complicated. It just needs a few smart steps. Browning the meat builds flavor. Layering the tortillas creates a seal. Weighing the top pan gives you crunch. Each step is simple, but together they create something wonderful. That is how life works too. Small, loving actions pile up into something beautiful. Now I have a question for you. What is one dish you make that feels like a hug? I want to know. And if you try this sheet pan quesadilla, tell me how it turned out. Does your family fight over the crunchy edges like mine does?Ingredients:
| Ingredient | Amount | Notes |
|---|---|---|
| Ground beef | 1 pound | |
| Yellow onion, finely diced | 1 small | |
| Garlic, minced | 2 cloves | |
| Red bell pepper, diced | 1 | |
| Taco seasoning | 1 ounce | |
| Water | 1/3 cup | |
| Shredded cheddar cheese | 2 cups | |
| Shredded Monterey Jack cheese | 1 cup | |
| Frozen corn, thawed | 1 cup | |
| Black beans, drained and rinsed | 1 can (15 ounces) | |
| Green onions, sliced | 2 | |
| Large flour tortillas (10-inch diameter) | 8 | |
| Olive oil | 2 tablespoons | |
| Cooking spray | As needed | |
| Salsa | Optional garnish | |
| Sour cream | Optional garnish | |
| Fresh cilantro, chopped | Optional garnish | |
| Lime wedges | Optional garnish |
The Night I Learned to Trust a Sheet Pan
I still remember the first time I made quesadillas for my grandson’s sleepover. I flipped each one in a hot pan, one by one, and they kept falling apart. Flour tortillas flew everywhere like little landing pads. I laughed, but my kitchen looked like a taco truck had exploded. That night, I promised myself there had to be an easier way. This sheet pan trick was born from that messy, wonderful evening. Doesn’t that smell amazing already?
Now, I make these for every party and busy weeknight. The whole thing bakes together in one big pan with a second pan on top like a gentle, heavy book. It presses the tortillas right into the gooey cheese and beef. You get that crispy golden crust without standing over the stove. I call it my lazy genius move. It’s really just letting the oven do all the hard work while you relax. What is your favorite cheat in the kitchen? Share below!
Step 1: Preheat your oven to 425°F. That’s a nice hot oven, just like summer sun on a sidewalk. Line a big sheet pan with parchment paper so nothing sticks. You can also spray it with a little oil if you’re out of parchment. (Hard-learned tip: Parchment paper saves you from scrubbing melted cheese off the pan. Trust me on this one.)
Step 2: Grab a large skillet and set it over medium heat. Drop in your pound of ground beef and cook it until it’s brown all over, about five minutes. I like to break it into small crumbles with my spoon. Drain any extra fat, because nobody wants a greasy quesadilla. Think of it like giving the beef a little bath first.
Step 3: Add your diced onion, minced garlic, and chopped red bell pepper to the pan. Let them cook together for three or four minutes until soft and smelling wonderful. My mama always said cooking onions makes a house feel like a home. Sometimes I add a little extra garlic, just because garlic makes everything better.
Step 4: Sprinkle the taco seasoning over the beef and pour in the water. Stir it all together and let it simmer for two or three minutes until it thickens into a saucy, cozy mixture. Turn off the heat and give it a happy little stir. Your kitchen will smell like a tiny Mexican restaurant.
Step 5: Toss in the thawed corn, drained black beans, and sliced green onions. Mix everything up so each bite gets a piece of every color. I love how the yellow corn and black beans make the filling look like confetti. What’s your favorite color on a dinner plate? Share below!
Step 6: Now the fun part—building the tortilla blanket. Place six tortillas around the edges of your sheet pan, letting half hang over the sides. Put one tortilla right in the middle to cover any open spots. It’s like tucking everything into a giant, floury hug.
Step 7: Spread your beefy, bean-y filling evenly over the tortilla base. Then shower it with both cheeses, cheddar and Monterey Jack. Go ahead and be generous. Cheese is the glue that holds happy memories together. My grandson always sneaks extra shreds when I turn my back.
Step 8: Fold the hanging tortilla flaps inward toward the center, covering all that cheesy filling. Use that last tortilla to patch any bare spots and press everything down gently. You’re making a big, sealed pillow of deliciousness.
Step 9: Brush the top of the tortillas with olive oil or give them a coat of cooking spray. This is what makes them turn golden and crispy in the oven. Don’t skip it, or you’ll end up with pale, sad quesadillas. Nobody wants sad quesadillas.
Step 10: Place a second sheet pan on top of your quesadilla stack, like a lid. Bake for 15 minutes with the pan on top. Then carefully remove the top pan and bake for 5 more minutes until the tortillas are crisp and golden brown. Let it cool for five minutes before cutting into squares. The wait is the hardest part.
Cook Time: 20 minutes
Total Time: 40 minutes
Yield: 8 servings
Category: Dinner, Snack
Three Fun Twists to Try Tonight
Sometimes I get bored with the same old filling and like to shake things up. You can too, without any fancy tools or stress. Here are three easy ways to change the recipe and make it your own. Which one would you try first? Comment below!
Vegetarian Fiesta: Skip the beef and double up on black beans and corn. Add a can of drained diced tomatoes with green chiles for a zesty kick. It’s so colorful and filling, nobody will miss the meat.
Spicy Southwest: Throw in a chopped jalapeño with the onions and peppers. Use pepper jack cheese instead of Monterey Jack for extra heat. My brother-in-law says this one wakes up his taste buds like a fire alarm.
Breakfast Quesadilla: Swap the beef and beans for scrambled eggs and cooked bacon crumbles. Add a handful of shredded hash browns for crunch. I made this for a lazy Sunday and my family asked for it every weekend after.
How to Serve and Sip Alongside
These quesadilla squares are wonderful on their own, but a few sides make them a real meal. I like to serve them with a simple side salad of shredded lettuce and a squeeze of lime. A bowl of fresh salsa and a dollop of sour cream on the side let everyone build their perfect bite. Sprinkle chopped cilantro over the top for a pop of green.
For something cold and refreshing, pour tall glasses of horchata or a zesty limeade. If grown-ups want something warm, an ice-cold Mexican lager pairs beautifully with the cheesy, beefy filling. Which would you choose tonight?
Storing and Reheating Your Quesadillas Like a Pro
Leftover quesadillas are a little gift for future you. I once made a huge batch for a family dinner and tucked the extra pieces into the fridge. The next day, my grandson grabbed a cold square and declared it “better than pizza.” Store them in an airtight container for up to four days. Just place a piece of wax paper between each layer so they don’t stick. You can also freeze them for up to three months. Wrap each square tightly in plastic wrap, then pop them in a freezer bag. When you are ready, reheat them in a dry skillet over medium heat. This keeps the outside crispy and the cheese melty, just like the first time. Batch cooking saves you time on busy nights. It also means less food waste, which our wallets and the earth both love. Have you ever tried storing it this way? Share below!
Three Common Quesadilla Fixes for Home Cooks
Sometimes things do not go as planned. That is okay. I remember the first time I made these, my tortillas turned out soggy instead of golden. The fix was simple: I was not letting the filling cool before layering it. Hot filling makes steam, and steam makes soggy tortillas. Let your beef mixture rest for five minutes before you build. Another issue is filling spilling out during baking. I once had a big cheese escape across the pan. The trick is to fold the tortillas snugly and use the top sheet pan as a weight. This presses everything together so the fillings stay put. The last problem is uneven cooking. If your oven runs hot, check the quesadillas after ten minutes instead of fifteen. Why does this matter? Fixing these small things makes your meal look beautiful and taste better. It also builds your cooking confidence. You will learn to trust your own hands in the kitchen. Which of these problems have you run into before?
*Fun fact: Putting a second sheet pan on top is the same trick professional chefs use to get flat, even quesadillas every single time.*
Your Quesadilla Questions, Answered
Q: Can I make this gluten-free?
A: Yes. Use gluten-free flour tortillas and check your taco seasoning label.
Q: Can I make this ahead of time?
A: Absolutely. Assemble everything the night before and bake it fresh right before dinner.
Q: What if I do not have black beans?
A: Swap in pinto beans, kidney beans, or even leftover cooked rice for a different texture.
Q: Can I scale this recipe for a crowd?
A: Yes. Double the filling and use two sheet pans. Bake them one after the other.
Q: Any tips for extra crispiness?
A: Brush a little butter on the top tortilla before baking. It adds flavor and crunch.
Which tip will you try first?
A Warm Goodbye from Lena
Thank you for spending time in my little kitchen. I hope these sheet pan quesadillas bring smiles to your table. They are simple enough for a weeknight and special enough for a weekend treat. If you make them, I would love to see your creation. Have you tried this recipe? Tag us on Pinterest! Snap a photo and share it for the whole community to enjoy. Until next time, remember that good food does not have to be fancy. It just has to be shared. Happy cooking! —Lena Morales.
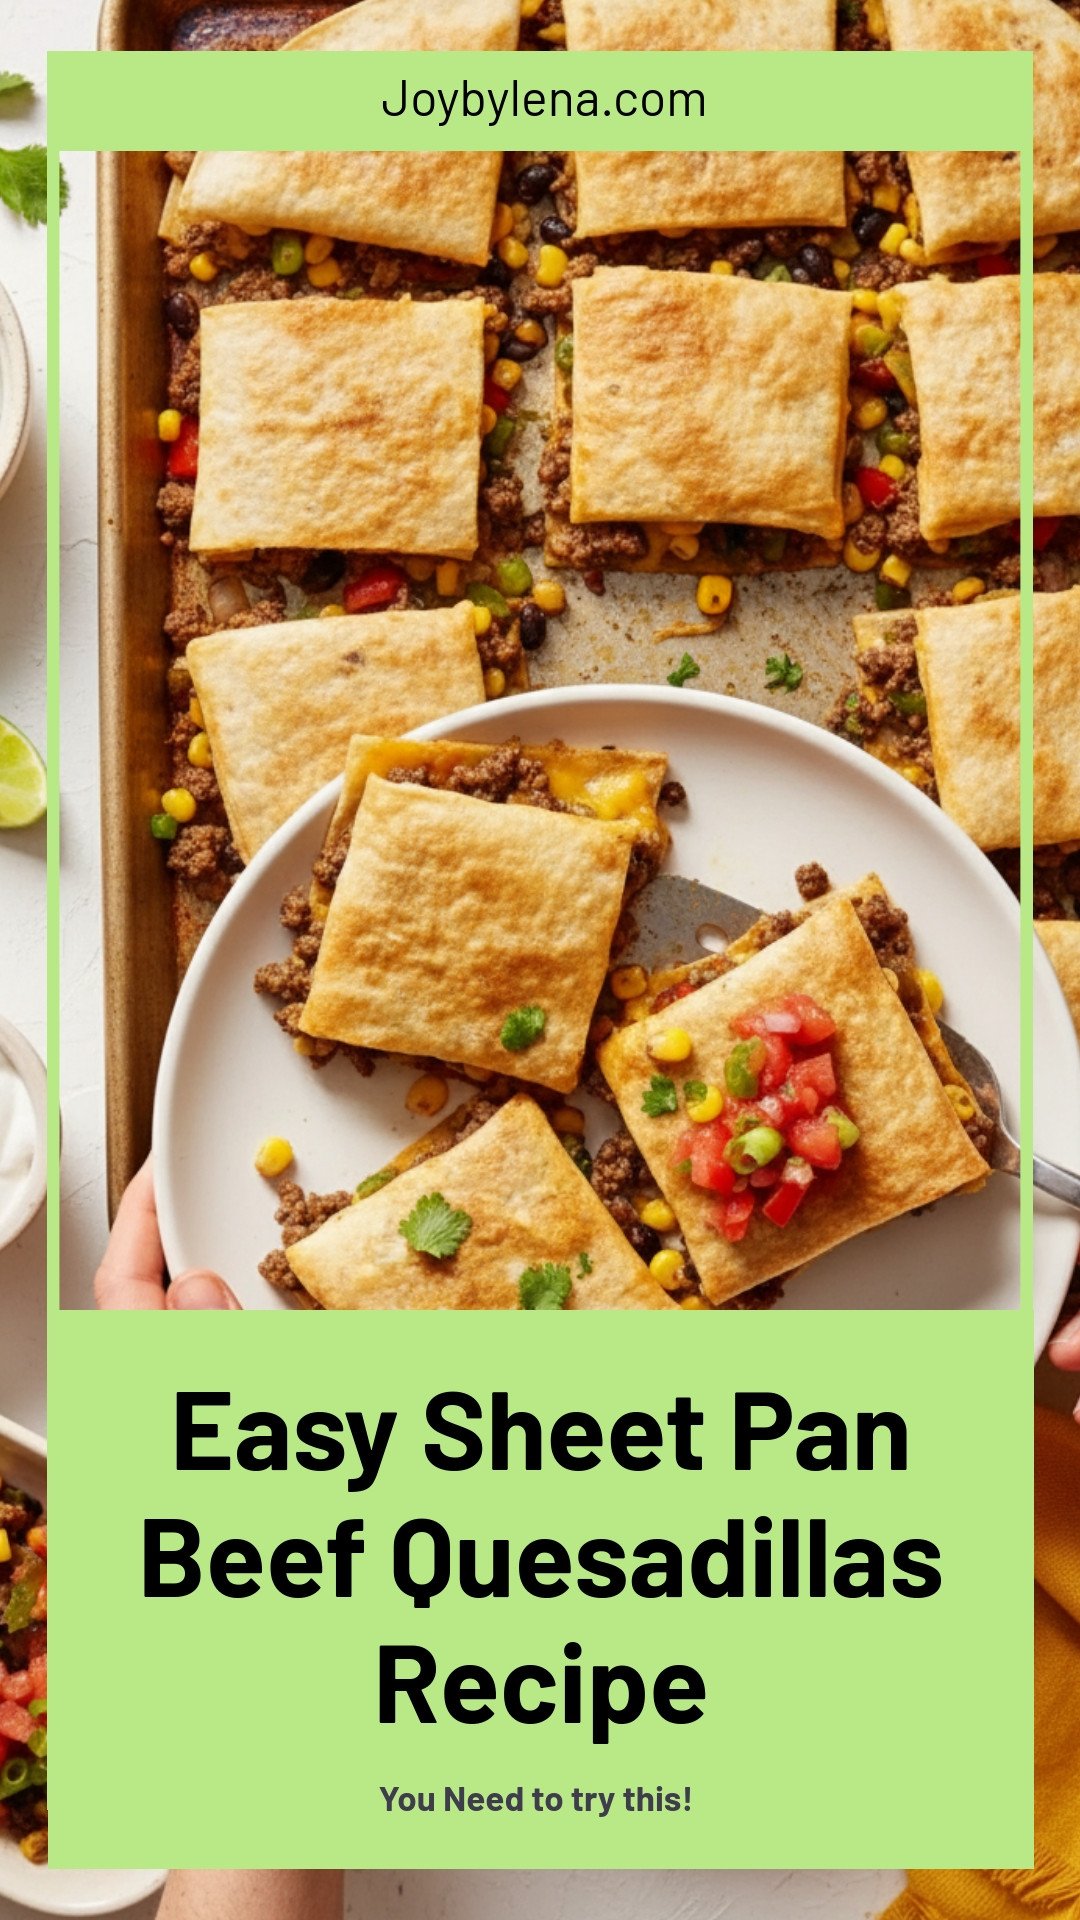
Easy Sheet Pan Beef Quesadillas Recipe
Description
Easy Sheet Pan Beef Quesadillas Recipe with seasoned ground beef, black beans, corn, and melted cheese baked to golden perfection.
Ingredients
Instructions
- Preheat oven to 425°F. Line a large rimmed sheet pan (approximately 18×13 inches) with parchment paper or lightly grease the surface.
- In a large skillet over medium heat, cook ground beef for about 5 minutes until fully browned. Drain excess fat as needed.
- Add yellow onion, garlic, and red bell pepper to skillet. Cook for 3 to 4 minutes until vegetables are softened.
- Stir in taco seasoning and water. Simmer mixture for 2 to 3 minutes until sauce thickens. Remove from heat.
- Add thawed corn, black beans, and sliced green onions. Mix thoroughly to combine all ingredients.
- Arrange 6 flour tortillas overlapping along the sheet pan edges, allowing half of each tortilla to hang over the side and centers to overlap, covering the pan’s entire base. Place 1 tortilla in the center to cover remaining gaps.
- Evenly distribute the beef and vegetable mixture over the tortilla base. Top with shredded cheddar and Monterey Jack cheese.
- Fold tortilla edges over the filling towards the pan’s center. Use the final tortilla to cover exposed areas and seal fully.
- Brush the surface with olive oil or spray with cooking spray to promote browning.
- Lay a second sheet pan atop assembled quesadillas as a weight. Bake for 15 minutes, then remove the top pan and continue baking for an additional 5 minutes until tortillas are golden and crisp.
- Allow baked quesadillas to cool for 5 minutes. Cut into squares using a sharp knife. Serve with salsa, sour cream, chopped cilantro, and lime wedges as desired.
Notes
- For extra crispiness, place under the broiler for 1-2 minutes after baking. Serve immediately.


Leave a Reply