The Day I Learned Scones Love a Hot Pan
I still laugh at the first time I made scones. I plopped them onto a cold baking sheet. They came out flat and sad, like little gray pancakes. My grandma peeked over my shoulder and sighed. “Child, a scone needs a hot bed to rest on,” she said.
That is why this recipe tells you to preheat the baking sheet in the oven. It gives the dough a nice hot shock when it lands. That shock makes the scones puff up tall and golden. It is like jumping into a warm pool instead of a cold one. Doesnt that sound better?
Why You Should Use Your Hands Like a Grandma
When I see a recipe that says “use your hands,” I smile. Some folks rush for a fork or a pastry blender. But your hands have heat and feeling. You can feel the butter turning into little sandy crumbs. That sandy texture is the secret to a flaky scone.
Here is why this matters. When you pinch the cold butter into the flour, you create tiny pockets. Those pockets melt in the oven and make the scone light and tender. If you overmix or use warm hands, the butter melts too soon. You end up with a brick instead of a cloud. Have you ever made that mistake too?
A Sweet Bite of History in Every Date
Dates have been around for thousands of years. People in the Middle East ate them for energy on long journeys. They are sticky sweet and soft like caramel candy. When I chop them for these scones, I always sneak a few pieces into my mouth. I cant help it.
This matters because dates do something special. They add sweetness without needing extra sugar. They also keep the scones moist for days, if they last that long in your house. *Fun fact: Date palms can live for over 100 years and keep making fruit the whole time.* Isnt nature amazing?
The Trick to a Golden, Crunchy Top
You will see that little egg yolk and splash of milk in the recipe. That is the “egg wash.” My friend Rosie used to skip this step because she was in a hurry. Her scones came out pale and soft on top, like bread rolls. She tried it once with the wash and never skipped it again.
The egg wash gives the scone a shiny, golden crust. It also helps the turbinado sugar stick. That sugar has big crystals that crunch between your teeth. It is like a tiny treasure on top. Doesnt that crunch sound good right now?
How to Know When Your Scones Are Done
I watch the edges first. When they turn a light brown, I peek at the bottom. The bottom should be golden, not white. Some people tap the top. If it sounds hollow, it is ready. I do that too, but mostly because it makes me feel fancy.
Here is why this matters. If you pull them out too soon, the inside is doughy and gluey. That is no fun. If you leave them too long, they become hard rocks. You want that sweet spot between 12 and 15 minutes. Every oven is a little different. What color do your scones usually turn out?
My Favorite Way to Eat a Date Scone
I like mine split in half with a pat of salted butter melting in the middle. My husband likes his with a drizzle of honey. My neighbor, old Mr. Chen, spreads cream cheese on his. Everyone has a favorite. That is the beauty of a simple scone.
You can also eat them plain with a cup of tea. The dates give enough sweetness on their own. I always keep a few in a jar on the counter. They make a good afternoon snack or a quick breakfast. How do you like to eat yours? I would love to hear your idea.
Ingredients:
| Ingredient | Amount | Notes |
|---|---|---|
| All-purpose flour | 2.5 cups | |
| Baking powder | 1.5 tablespoons | |
| White granulated sugar | ¼ cup | |
| Salt | pinch | |
| Unsalted butter, cold and cubed | 6 tablespoons | |
| Eggs | 2 | |
| Milk (whole milk recommended) | ⅔ cup | |
| Vanilla extract | 1 teaspoon | |
| Lemon juice | ½ tablespoon | |
| Chopped dates | ¾ cup | |
| Egg yolk | 1 | optional |
| Milk | splash | optional |
| Turbinado sugar | optional |
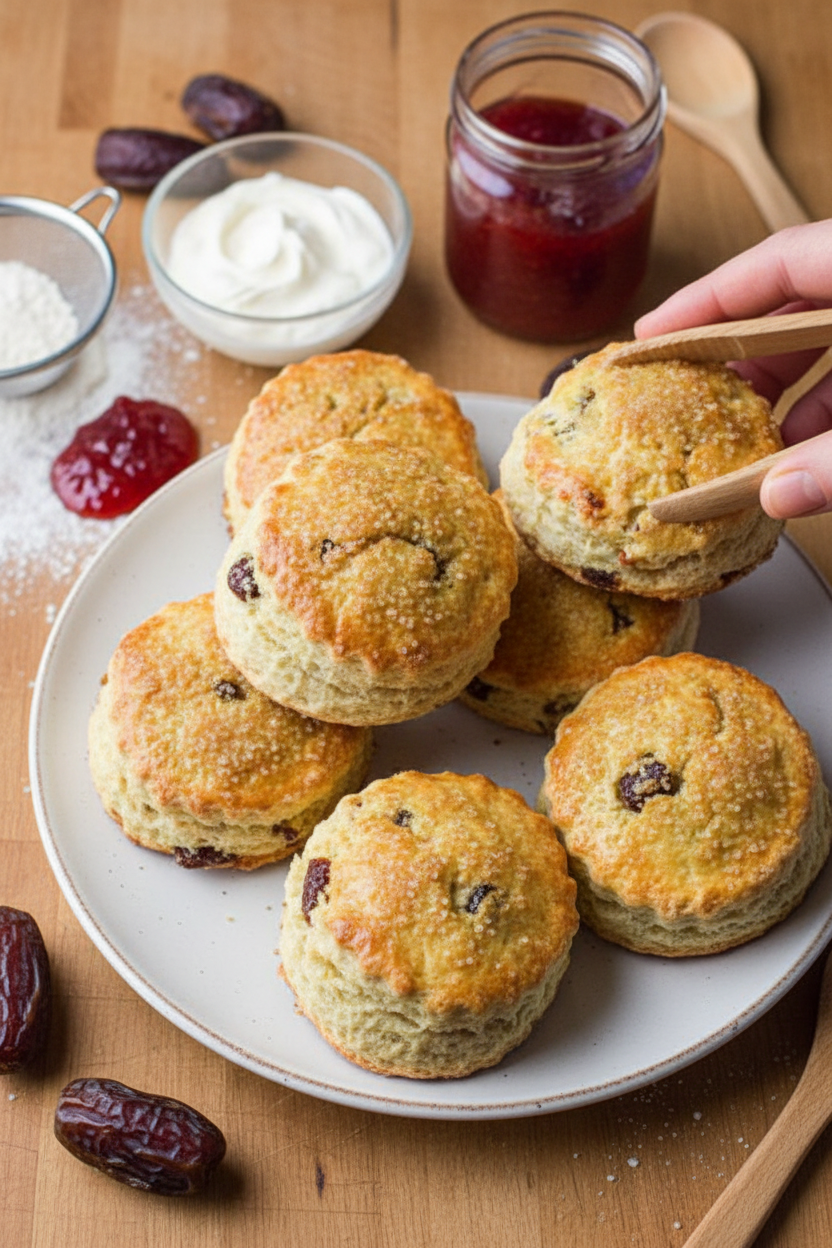
My Grandma’s Warm Date Scones
I still remember the smell of these scones coming from my grandma’s tiny kitchen. She’d pull them out of the oven just as I walked in from school. The whole house would smell like butter and sweet dates. Doesn’t that smell amazing? This recipe is simple and perfect for a lazy Sunday morning.
My grandma always said baking is about feeling the dough, not just following words. You have to get your hands a little messy. That is where the love goes in. And dates? They are like little pockets of sunshine in each bite. I still laugh at how I used to pick them out and eat them first.
Now I make these for my own family on chilly mornings. The recipe is sturdy and easy for a young baker to try. Just remember to be patient and not rush the butter. That is the secret to flaky layers. Let me walk you through it step by step.
Step-by-Step Baking Guide
Step 1: Turn your oven on to 425 degrees F. Put a baking sheet lined with parchment paper inside the oven to heat up. A hot sheet gives the scones a crispy bottom. (Hard-learned tip: Do not skip preheating the pan—cold pans make soggy bottoms!)
Step 2: In a big bowl, mix together 2.5 cups of flour, 1.5 tablespoons of baking powder, ¼ cup of white sugar, and a pinch of salt. Stir it all up with a fork. Then add 6 tablespoons of cold, cubed butter. Use your fingertips to rub the butter into the flour until it looks like coarse, sandy crumbs. This takes about two minutes.
Step 3: In a separate bowl, whisk together 2 eggs, ⅔ cup of whole milk, 1 teaspoon of vanilla, and ½ tablespoon of lemon juice. Stir until it is smooth. Then fold in ¾ cup of chopped dates. I once used wet dates and the dough turned into glue—so make sure your dates are dry and sticky, not wet. Do you like your dates big or small in scones? Share below!
Step 4: Make a well in the center of your flour mixture. Pour the wet date mixture into the well. Use a fork or your hands to mix it all together until a shaggy dough forms. Do not stir too much—just until it comes together. Overmixing makes tough scones, and nobody wants a tough scone.
Step 5: Tip the dough onto a floured counter. Knead it gently just 4 or 5 times to bring it into a ball. Pat it into a circle about 1 to 1.5 inches thick. Use a round cookie cutter to cut out scones. Press straight down—don’t twist the cutter—or your scones won’t rise tall.
Step 6: Place the scones onto the preheated baking sheet. In a small bowl, whisk together 1 egg yolk with a splash of milk. Brush this shiny wash over each scone top. Sprinkle a little turbinado sugar on top for crunch. Bake for 12 to 15 minutes, until golden brown and smelling like heaven.
Step 7: Let the scones cool on the sheet for at least 15 to 30 minutes. I know it is hard to wait, but they need to set inside. Serve them warm with a pat of butter or a drizzle of honey. Enjoy every crumb.
Cook Time: 12–15 minutes
Total Time: 40 minutes
Yield: 8 scones
Category: Breakfast, Snack
Three Fun Twists to Try
Orange and Cranberry: Swap the dates for dried cranberries and add the zest of one orange. It smells like Christmas morning. So bright and zesty!
Spiced Chai: Add 1 teaspoon of cinnamon, ½ teaspoon of cardamom, and a pinch of ginger to the dry mix. Pair with chopped almonds instead of dates. Tastes like a warm hug.
Chocolate Chip Dream: Replace the dates with ¾ cup of mini chocolate chips. Add an extra tablespoon of sugar. Perfect for after-school treats. Which one would you try first? Comment below!
How to Serve and Sip
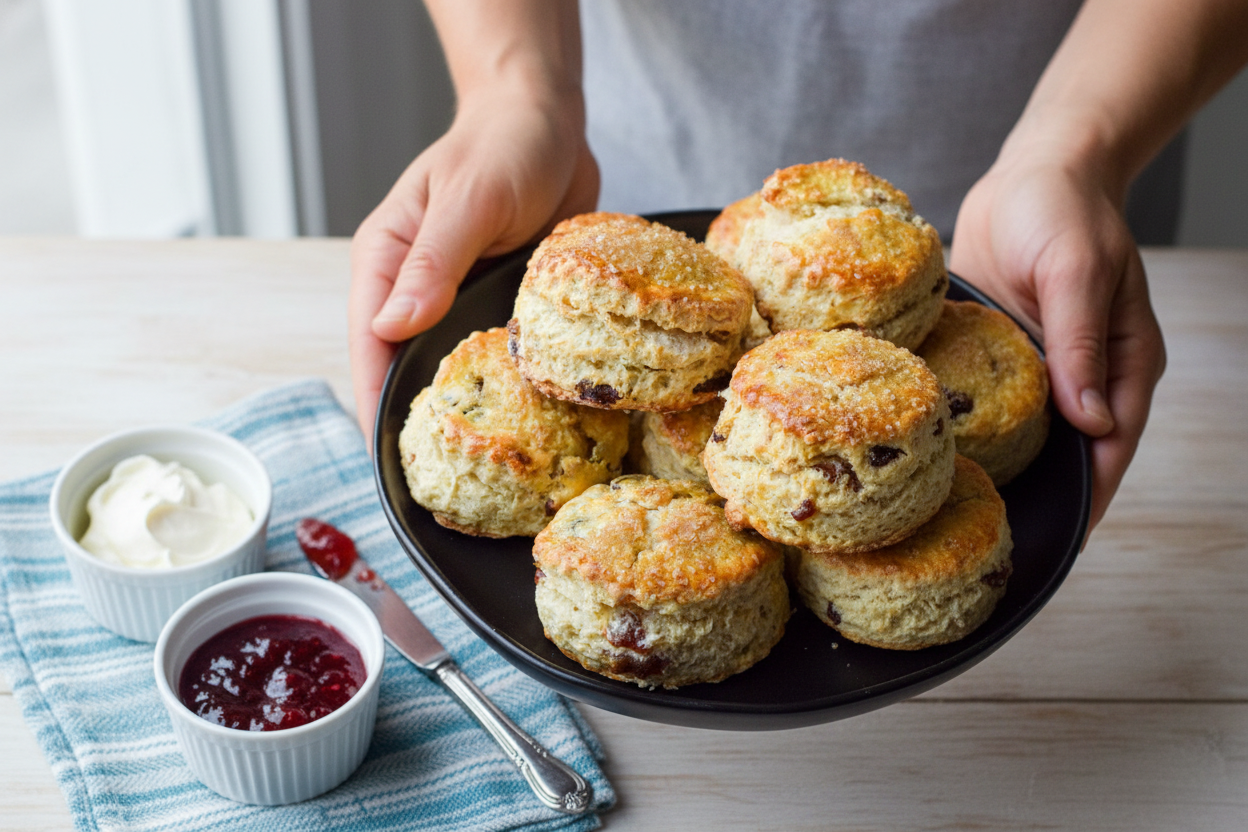
Split a warm scone in half and slather it with salted butter and a spoonful of raspberry jam. It tastes like a bakery treat. You can also drizzle it with honey and top with a dollop of clotted cream. So simple, so good.
For a cozy drink, pour a tall glass of cold milk. It cuts the sweetness perfectly. If you are having a grown-up night, try a cup of Earl Grey tea with a splash of vanilla. Which would you choose tonight?
How to Store and Reheat Your Date Scones
Let your scones cool completely before storing them. I learned this the hard way with my first batch. Warm scones trapped steam and turned soggy overnight. Now I always wait a full hour. Place them in an airtight container at room temperature. They stay fresh for up to two days. You can also freeze them for up to three months.
To reheat, pop a frozen scone in a 350-degree oven for five minutes. I remember my Abuela doing this with her pastelitos. The smell filled her tiny kitchen and made us all smile. The warmth brings back the flaky, buttery texture. Have you ever tried storing it this way? Share below!
Batch cooking these scones is a true time-saver. Make a double batch on Sunday, freeze half, and enjoy fresh scones all week. Why this matters: you save energy and avoid wasting food. It also means a warm treat is always two minutes away.
Three Common Scone Problems and Easy Fixes
The first problem is dry, crumbly dough. This happens when you add too much flour. I once pressed my dough so hard it cracked like desert mud. Fix it by using a light touch. Stop kneading as soon as the dough comes together. This keeps your scones tender.
The second problem is flat, wide scones. Your butter might have been too warm. Cold butter creates steam pockets that make scones rise tall. I remember when my niece’s scones looked like pancakes. We chilled the butter for ten minutes and they puffed up perfectly. Why this matters: tall scones have a better texture. They stay soft inside and crisp outside.
The third problem is burnt bottoms. Your baking sheet might be too hot or placed too low. Use a preheated sheet on the middle rack. This way the bottoms bake evenly without scorching. Which of these problems have you run into before?
Five Quick Questions About Date Scones
Q: Can I make these gluten-free? A: Yes. Swap the flour for a 1-to-1 gluten-free blend. The texture will be slightly softer.
Q: Can I prepare the dough ahead of time? A: Yes. Shape the scones and freeze them on a tray. Bake straight from frozen, adding two extra minutes.
Q: What can I swap for dates? A: Dried cherries, raisins, or chopped apricots work well. Use the same amount.
Q: How do I cut the recipe in half? A: Use one egg and half of everything else. Bake for the same time.
Q: Do I have to use turbinado sugar? A: No. Regular sugar or a sprinkle of cinnamon works fine too. Which tip will you try first?
A Warm Goodbye from Lena
Thank you for baking with me today. These scones remind me of lazy Sunday mornings with my family. The smell of dates and butter always brings everyone to the kitchen. I hope they do the same for you.
*Fun fact: Dates were called the “candy of the desert” by ancient traders. They are naturally sweet and full of fiber. So these scones have a little history in every bite. Have you tried this recipe? Tag us on Pinterest! I love seeing your golden, flaky creations. Happy cooking!
—Lena Morales

Date Scones Recipe Easy Homemade Baking Guide
Description
Easy homemade date scones recipe with a tender, flaky texture and sweet date pieces. Perfect for breakfast or tea time.
Ingredients
Instructions
- Preheat the oven to 425 degrees F. Place the parchment lined baking sheet in the oven to preheat as well.
- In a large mixing bowl combine flour, baking powder, sugar and a pinch of salt. Stir to combine. Then add 6 tablespoon of cold, cubed butter. Use your hands to pinch the butter into the flour until well incorporated with a sandy texture. Set aside.
- In a separate bowl whisk together eggs, milk, vanilla extract and lemon juice until well combined. Then stir in chopped dates.
- Use your hands to form a well in the center of the flour mixture then pour the milk mixture in. Cut the wet and dry ingredients until a dough is formed.
- Then tip the dough onto a floured surface and knead a few times (being careful not to overwork) to bring the dough together.
- Then use a rolling pin to carefully roll the dough out to 1 – 1.5 inch thickness. And use a round cookie cutter or biscuit cutter to cut out the scones.
- Arrange the scones on the preheated cookie sheet. In a small bowl whisk together 1 egg yolk with a splash of milk or cream. Then brush over the tops of the scones and sprinkle with a little turbinado sugar.
- Bake at 425 degrees F for 12-15 minutes until golden brown and cooked through. Allow the scones to cool for at least 15-30 minutes before serving. Enjoy!
Notes
- For best results, use cold butter and do not overwork the dough. Scones are best served warm with butter or jam.


Leave a Reply