The Day I Learned to Stop Peeking
My grandma always said, “A watched pot never boils, and a watched wrap never gets golden.” She was right. The first time I made these cheesy chicken wraps, I flipped them way too early. They fell apart in the skillet. It looked like a sad, cheesy mess. I still laugh at that. Now I set a timer. I let them sit for the full 3-4 minutes. When you finally peek and see that golden brown crust, it feels like a small victory. Have you ever ruined a meal by rushing it? I would love to hear how you fixed it.Why This Ooey-Gooey Filling Works
Here is the secret to the sticky, melty magic. It is the cream cheese. The cream cheese is the glue. It holds everything together so the wrap stays tight when you roll it. Without it, the cheese would just leak out and burn in the pan. *Fun fact: Cream cheese was invented by accident in 1872 in New York. A dairyman was trying to make a fancy French cheese and ended up with this spreadable dream instead.* This matters because a good texture makes a meal feel special. You want the filling to be soft and creamy, not dry and crumbly. That is why this recipe is so forgiving for a beginner cook.How I Learned to Love Garlic
I used to be scared of garlic. My mom would put whole cloves in the pan, and I thought they were little white snails. Now, minced garlic is my best friend in the kitchen. A full quarter cup smells like pure happiness. Doesn’t that smell amazing when it hits the hot oil? It fills the whole house. That scent means something delicious is coming. This matters because cooking is about waking up your nose before your mouth even takes a bite.A Shortcut That Saved My Tuesday
I keep a bag of pre-cooked shredded chicken in my freezer. It saved me on a busy night last week. The kids had homework, the dog needed a walk, and I had no energy. I just thawed the chicken, stirred it with the cheese, and wrapped. Ten minutes later, dinner was ready. No fuss. No crying. No ordering pizza. This is why I love recipes that use leftovers. Tell me: what is your favorite shortcut ingredient for a busy weeknight?The Secret to a Tight Roll
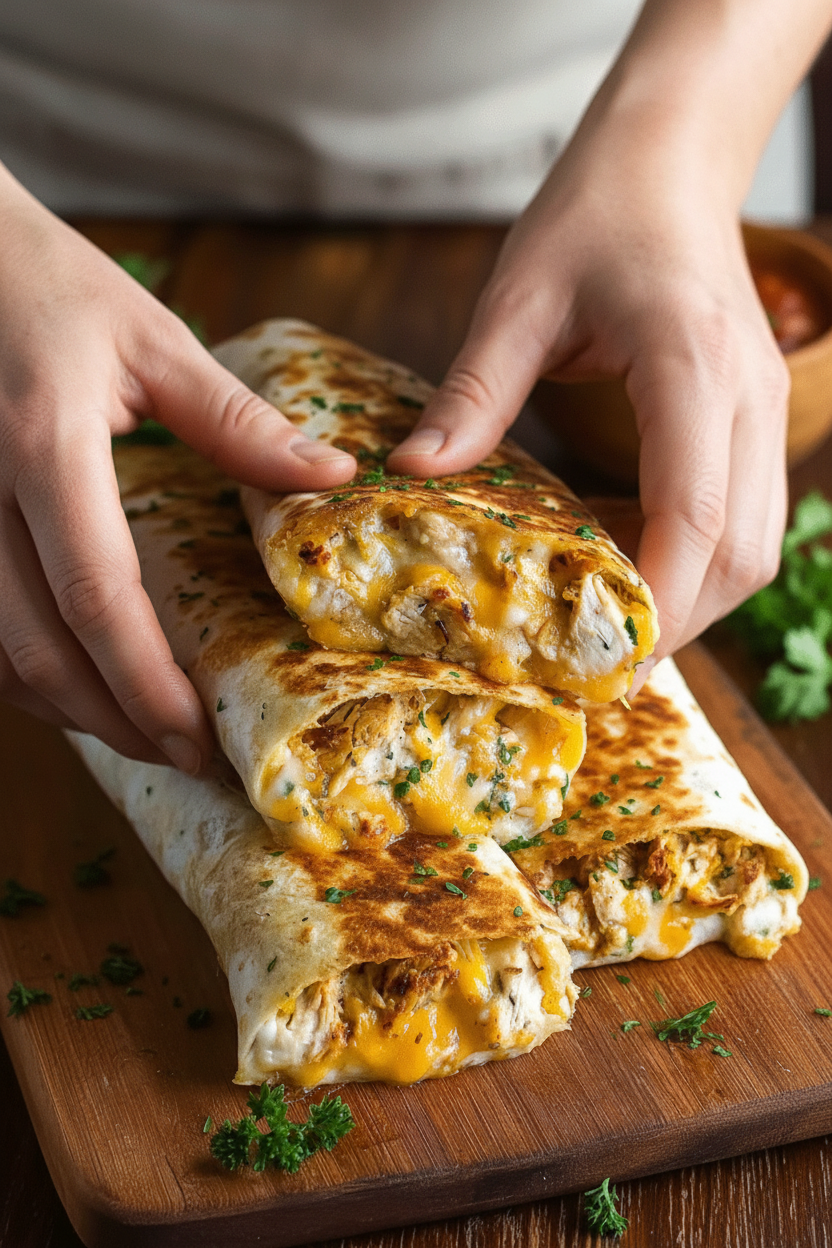
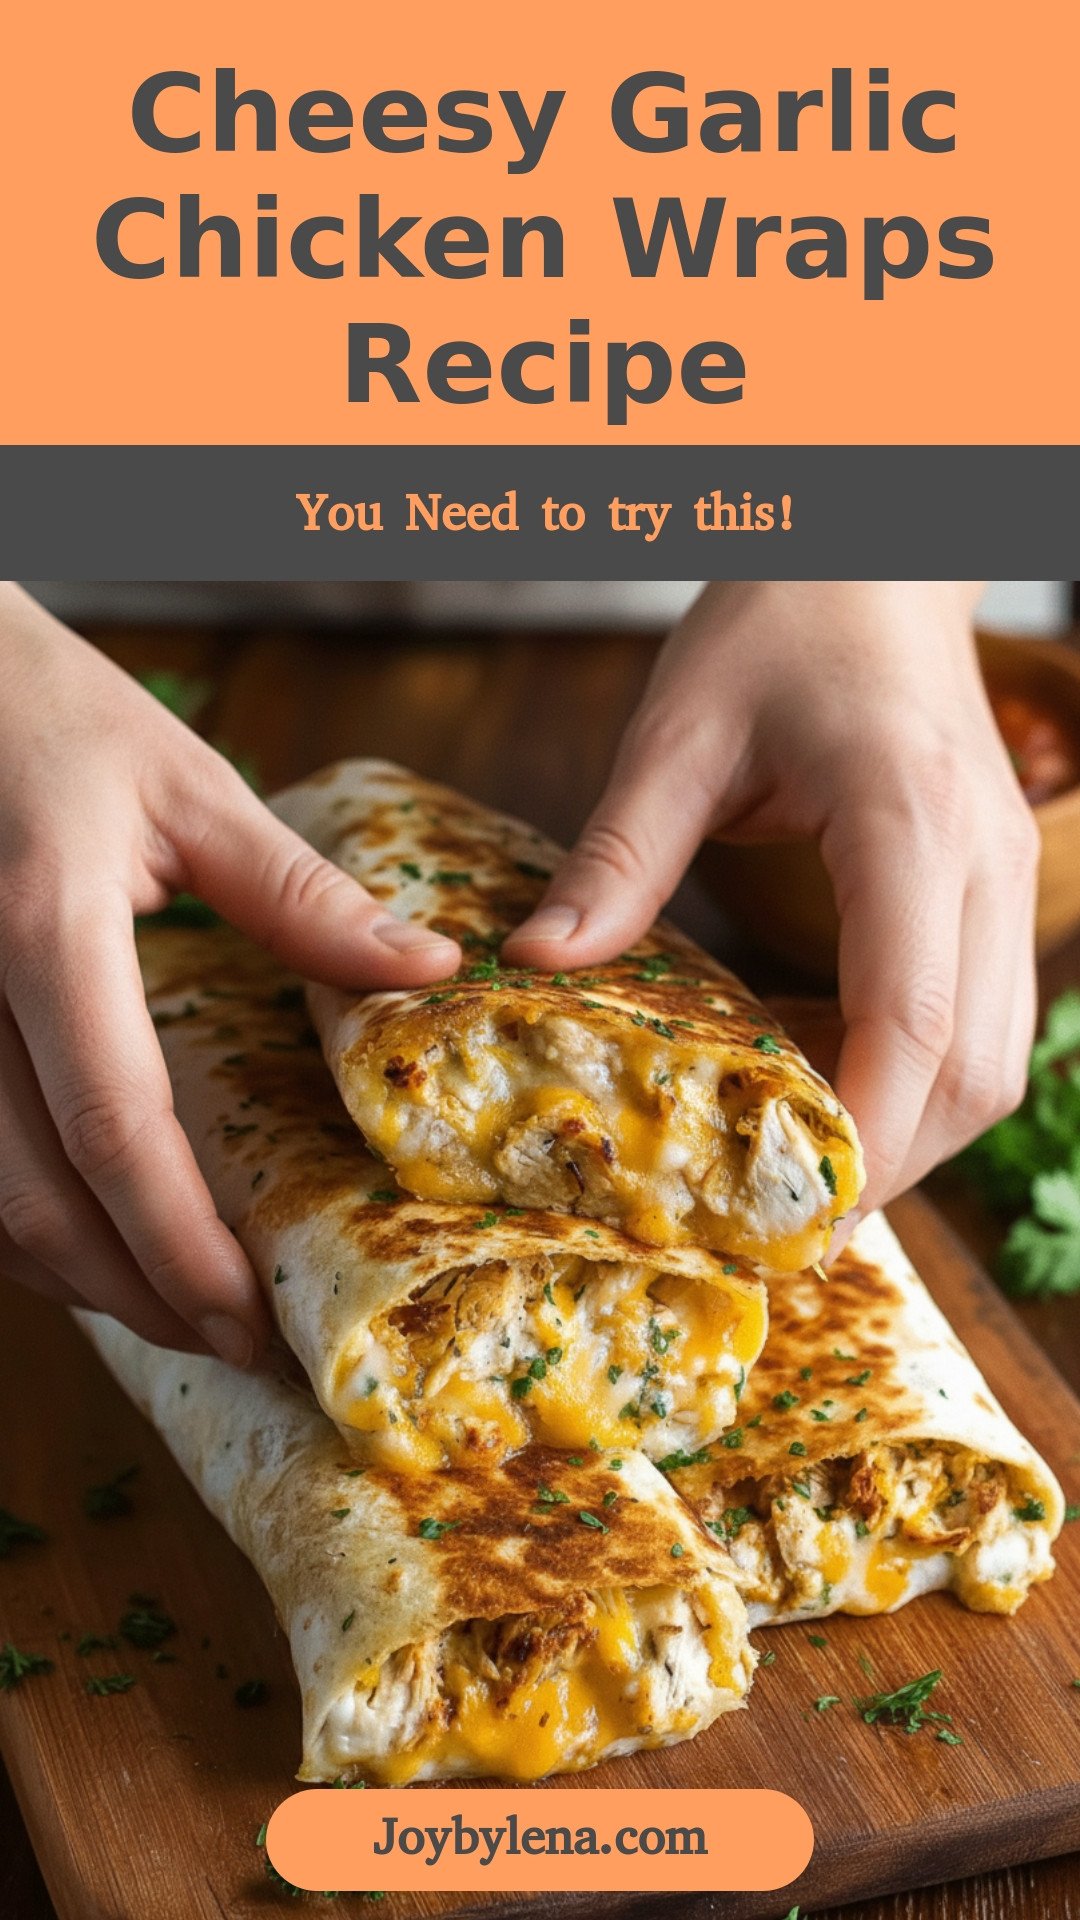
You must roll the tortilla tight like a sleeping bag. If you leave it loose, the filling falls out the ends. That is a sad wrap. I learned this trick from a lady at a taco stand in California. She rolled hers with a firm hand and a quick wrist. Here is a mini-poll for you: Do you warm your tortillas before rolling, or do you go in cold? I warm mine for ten seconds in the microwave. It makes them stretchy and less likely to tear. Why this matters? A tight roll means the cheese stays inside until the very last bite.Golden Brown and Ready to Share
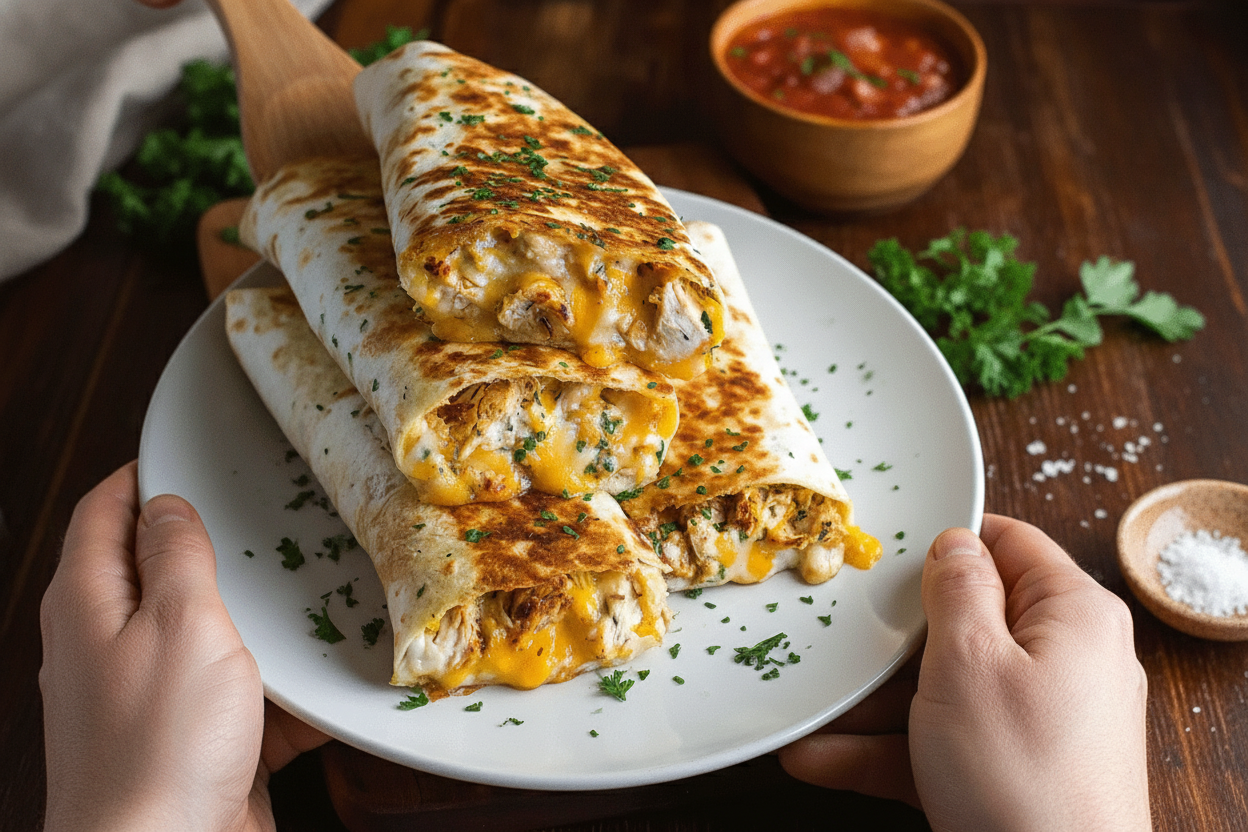
The best part is the flip. You slide a spatula under the wrap, take a deep breath, and turn it over. If you did it right, you see a beautiful, crispy tortilla. The other side is still pale, but it will catch up fast. I like to serve these with a little bowl of sour cream or ranch. My nephew dips them in ketchup, which I think is crazy, but he is happy. Have you ever tried a weird dip that actually tasted good? Let me know what it was.A Warm Kitchen Is a Happy Kitchen
This recipe is not fancy. It is not complicated. But every time I make it, someone walks into the kitchen and says, “What is that? It smells so good.” That is the real reason to cook. It brings people to the table without being yelled at. Why this matters: When you make something simple and tasty, you feel proud. You feel like you can do it again. And next time, you will. That is how you go from a beginner to a grandma who knows all the tricks.Ingredients:
| Ingredient | Amount | Notes |
|---|---|---|
| Cooked chicken, shredded | 2 cups | |
| Shredded mozzarella cheese | 1 cup | |
| Cream cheese, softened | 1/2 cup | |
| Garlic, minced | 1/4 cup | About 6-8 cloves |
| Fresh parsley, chopped | 1/4 cup | |
| Large tortillas | 4 | |
| Olive oil | 1 tablespoon | For cooking |
| Salt and pepper | To taste |
My Grandma’s Kitchen Secret for a Quick Dinner
I still remember the first time I made these cheesy garlic chicken wraps. My kitchen smelled so good that my neighbor knocked on the door! The secret is letting the cream cheese get soft before you mix it. That way, everything blends like a dream. Doesn’t that smell amazing?
I learned this trick from my own grandmother. She always said a good wrap starts with good chicken. So pull your leftover chicken from the fridge or grab a rotisserie one from the store. Either way works just fine.
The garlic is the star here. Mince it up fresh if you can. Pre-minced garlic from a jar tastes a little flat to me. Trust me, your fingers will smell like garlic for hours, but it is totally worth it.
Let me walk you through this simple recipe. I promise even a 12-year-old can make it with a little help from an adult. Grab your bowl and let us get started.
Step 1: In a large bowl, mix the shredded chicken, mozzarella cheese, softened cream cheese, minced garlic, and chopped parsley. Use a fork to mash everything together until it looks like a thick, chunky paste. I always stop to smell the garlic here — it makes my heart happy. (Hard-learned tip: Make sure your cream cheese is truly soft, or you will end up with lumpy bites.)
Step 2: Sprinkle in salt and pepper to your liking. Start with a pinch, then taste a tiny bit on a clean spoon. You can always add more, but you cannot take it out. My grandkids always argue over who gets the first taste test.
Step 3: Spread the chicken mixture evenly onto the center of each tortilla. Leave about an inch of space on the edges so nothing spills out when you roll. Use the back of a spoon to smooth it flat like you are buttering bread.
Step 4: Roll each tortilla up tight like a little sleeping bag. Tuck in the sides first, then roll from the bottom up. Press gently so the filling stays inside. What is your favorite thing to wrap inside a tortilla? Share below!
Step 5: Heat the olive oil in a skillet over medium heat. Place the wraps seam-side down so they do not unroll while cooking. Cook them for about 3 to 4 minutes per side, until they turn golden brown and crispy. The sound of that sizzle is music to my ears.
Step 6: Take the wraps out of the skillet and let them rest for one minute. Slice each one into rounds or diagonally like a fancy sandwich. Serve them warm while the cheese is still stretchy and soft.
Cook Time: 8 minutes
Total Time: 20 minutes
Yield: 4 wraps (serves 4)
Category: Dinner, Lunch, Snack
Three Fun Ways to Twist This Wrap
Sometimes I like to play with the flavors. Here are three twists my family loves. Try one and tell me which sounds best to you.
Spicy Fiesta Wrap: Add a chopped jalapeno or a big sprinkle of red pepper flakes to the filling. It gives the wraps a warm kick that wakes up your taste buds. My husband always asks for extra heat.
Veggie Lover’s Wrap: Swap the chicken for a can of drained black beans and some corn. Mix it with the same cheeses and garlic. It is just as creamy and filling, but completely meat-free.
Pesto Paradise Wrap: Spread a spoonful of basil pesto on the tortilla before adding the chicken mixture. The pesto adds a bright, herby flavor that smells like summer. My daughter says this is the only way she makes them now.
Which one would you try first? Comment below!
How to Serve and What to Sip
These wraps are lovely all by themselves, but a few sides make them a real meal. Serve them with a simple side salad of lettuce and tomatoes. Or dip the slices in a bowl of warm marinara sauce — my grandson calls it “pizza wraps.”
For a crunchy bite, add a handful of kettle-cooked potato chips on the plate. I also love to sprinkle a little extra fresh parsley on top before serving. It makes the plate look pretty and tastes fresh.
When it comes to drinks, try a cold glass of lemonade for a non-alcoholic choice. The tangy lemon cuts through the rich cheese perfectly. For grown-ups, a light beer or a glass of crisp white wine matches the garlic and herbs well.
Which would you choose tonight?
Storing Your Wraps: My Fridge and Freezer Secrets
These cheesy garlic chicken wraps are perfect for making ahead. I learned that the hard way. The first time I made them, I left them on the counter too long. The tortillas got soggy, and nobody wanted to eat them.
Now I store them differently. Place leftover wraps in an airtight container with a paper towel inside. The paper towel keeps them dry. They stay good in the fridge for up to three days.
Freezing works great too. Wrap each cooled wrap tightly in foil. Then put them all in a freezer bag. They will last for two months. To reheat, just pop a frozen wrap in a hot skillet for five minutes. The outside gets crispy again. Have you ever tried storing it this way? Share below!
Why this matters: Batch cooking saves time on busy weeknights. You can make a double batch and have dinner ready in minutes. It turns a good meal into a lifesaver.
Three Common Problems and Easy Fixes
Problem one: Your wraps fall apart while cooking. I remember when my first batch burst open in the pan. Cheese leaked everywhere. The fix is simple. Do not overfill the tortilla. Use about half a cup of mixture per wrap. Roll it tight like a burrito.
Problem two: The filling tastes bland. You need enough salt and pepper. I once skipped the salt to be healthy. My family called the wraps cardboard. Add a pinch at a time and taste as you go. That makes all the difference.
Problem three: The wraps burn on the outside but stay cold inside. Your skillet is too hot. Turn the heat down to medium. Cook them slowly for four minutes per side. The cheese melts perfectly this way. Which of these problems have you run into before?
Why this matters: Fixing these issues makes you a confident cook. You stop guessing and start knowing. Good technique means every wrap turns out golden and delicious.
Your Top Five Questions Answered
Q: Can I make these gluten-free? A: Yes. Use gluten-free tortillas. The rest of the ingredients are already gluten-free.
Q: Can I prep the filling ahead of time? A: Absolutely. Mix the chicken, cheese, and garlic up to two days early. Keep it in the fridge until you are ready.
Q: What can I swap for the chicken? A: Try cooked ground turkey or canned tuna. Both work great.
Q: How do I double the recipe? A: Just multiply every ingredient by two. Use two skillets or cook in batches.
Q: Can I add extra veggies? A: Sure. Chopped bell peppers or spinach make tasty additions. Which tip will you try first?
A Warm Goodbye From My Kitchen to Yours
Thank you for cooking along with me today. These cheesy wraps remind me of Sunday lunches with my grandkids. They would come running when they smelled the garlic cooking.
I hope these tips help you make perfect wraps every time. Cooking is about sharing small joys. Nothing beats a warm, crispy wrap made with love.
Have you tried this recipe? Tag us on Pinterest! I would love to see your beautiful creations. *Fun fact: Garlic gets sweeter and milder when you cook it slow.* Happy cooking! —Lena Morales.
Cheesy Garlic Chicken Wraps Recipe
Ingredients
Instructions
- In a large bowl, mix the shredded chicken, mozzarella cheese, cream cheese, minced garlic, and parsley. Make sure everything is combined well.
- Add salt and pepper to the chicken mixture based on your taste.
- Spread the chicken mixture evenly onto each tortilla.
- Roll each tortilla tightly to form wraps.
- Heat olive oil in a skillet over medium heat.
- Place the wraps seam-side down in the skillet. Cook until they are golden brown, about 3-4 minutes on each side.
- Remove them from the skillet, slice, and serve warm.


Leave a Reply