Chill Out for Better Cookies
I know waiting is hard. But chilling the dough does two important things. First, it stops the cookies from spreading into flat pancakes. Second, it gives the flavors time to get friendly with each other. This is why this matters: A cold dough means thicker cookies with chewier centers. If you are in a hurry, even twenty minutes in the fridge helps. Your patience will be rewarded. I once made a batch without chilling. They still tasted good, but they looked sad and flat. Now I always chill, even if I am craving cookies really bad. Do you ever struggle with waiting for cookie dough to chill? Tell me about your most impatient baking moment.One Batch, Many Happy Faces
The best part about these cookies is not the taste. It is watching people eat them. I made a batch for my mail carrier last week. He took one bite and just nodded slowly with a big smile. Cookies do something special. They make people stop and enjoy a small moment. That little pause matters a lot in busy days. These brown butter cookies are perfect for sharing. I always double the recipe because one batch disappears fast. Who would you bake a batch for this week?Ingredients:
| Ingredient | Amount | Notes |
|---|---|---|
| Unsalted butter | 1 cup (227 g) | browned |
| Granulated sugar | ¾ cup (150 g) | |
| Packed brown sugar | ¾ cup (165 g) | |
| Large eggs | 2 | room temperature |
| Pure vanilla extract | 2 teaspoons | |
| All-purpose flour | 2 ¼ cups (280 g) | |
| Baking soda | 1 teaspoon | |
| Salt | ½ teaspoon | |
| Semi-sweet chocolate chips | 1 ½ cups (270 g) |
The Cookie That Made My Neighbors Knock
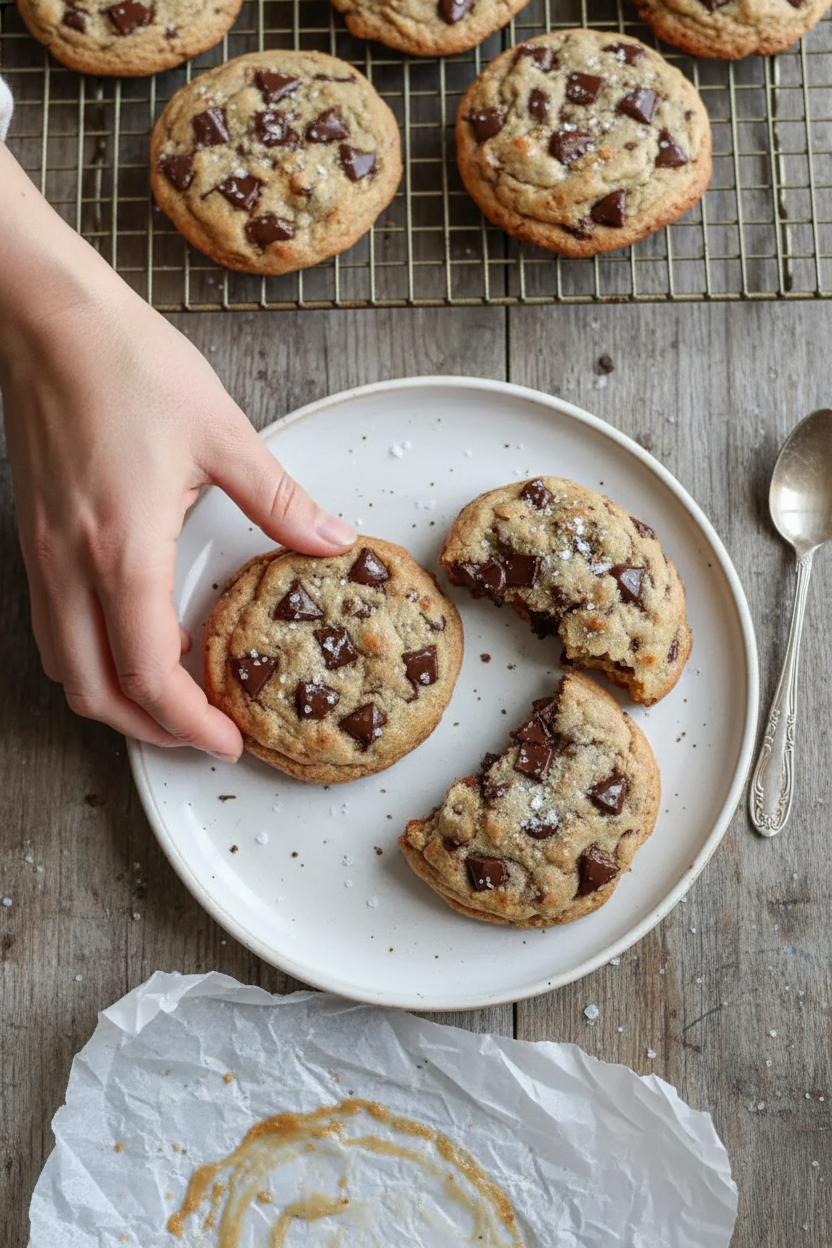
I still remember the first time I made these brown butter chocolate chip cookies. My kitchen smelled like toasted nuts and caramel, and I could not stop peeking into the oven. Doesn’t that smell amazing? The secret is browning the butter, which makes the cookies taste rich and fancy without any hard work. My neighbor Mrs. Perez actually knocked on my door to ask what I was baking. That is when I knew this recipe was special.
These cookies have gooey centers and crispy edges, just how my kids liked them. You need a heavy-bottomed pan for browning, so the butter does not burn. (Hard-learned tip: Do not walk away while browning the butter. It goes from golden to burned fast.) I learned that the hard way once, and my kitchen smelled sad for days. Now I stand right there, stirring and smiling, until it smells perfect.
Here is the full recipe, step by step. Gather your ingredients first: butter, sugars, eggs, vanilla, flour, baking soda, salt, and chocolate chips. Room temperature eggs mix better, so take them out early if you can. Now let us bake something wonderful together.
Step 1: Brown the butter in a heavy-bottomed saucepan over medium heat. Stir it gently as it melts, then watch it foam up like a little cloud. Keep stirring until it turns golden brown and smells like toasted nuts. Take it off the heat right away and pour it into a bowl to cool. It should be warm but not hot, about the temperature of a warm bath.
Step 2: In a large bowl, whisk the granulated sugar and brown sugar together. Pour in the cooled brown butter and stir with a wooden spoon until shiny and smooth. This part feels like making caramel, and I always lick the spoon a little. (Hard-learned tip: Make sure the butter is not too hot or the eggs will scramble later.)
Step 3: Crack in the eggs one at a time, beating well after each one. Add the vanilla extract and mix until the dough looks shiny and silky. This is when the kitchen starts to smell like a bakery. My grandson loves to help with this step because he gets to count the eggs. Do you let little helpers crack eggs too? Share below!
Step 4: In a separate bowl, whisk the flour, baking soda, and salt together. Slowly add this dry mix to the wet ingredients, stirring just until combined. Do not overmix or the cookies will be tough and sad. I stop as soon as I cannot see any white flour streaks. Simple is best here.
Step 5: Fold in the chocolate chips with a spatula until they are scattered all through the dough. Make sure every bite gets some chocolate. This is the time to sneak a few chips, and I always do. Now the dough is ready to scoop or chill.
Step 6: Chill the dough for at least 30 minutes if you have time. This stops the cookies from spreading into flat pancakes. The cold dough also makes the centers extra soft and gooey. (Hard-learned tip: If you skip chilling, bake one test cookie first to check the spread.) I chill mine while I wash the dishes and hum a little song.
Step 7: Preheat your oven to 350 degrees Fahrenheit. Scoop dough into 2-tablespoon balls and place them on parchment-lined baking sheets, two inches apart. Bake for 12 to 15 minutes. The edges should be golden, but the centers will look soft and puffy. They finish baking on the hot pan after you take them out.
Step 8: Let the cookies sit on the baking sheet for five minutes. Then move them to a wire rack to cool. If you want gooey centers, eat them slightly warm. I like mine with a glass of cold milk. What is your favorite way to eat cookies? … Share below!
Cook Time: 12–15 minutes
Total Time: 45 minutes (including chilling)
Yield: 24 cookies
Category: Dessert, Cookies
Three Fun Twists to Try
Sometimes I like to change things up a little. These three twists are simple and make the cookies feel brand new. Which one would you try first? Comment below!
1. Sea Salt and Toffee Crunch: Sprinkle flaky sea salt on top before baking. Add 1/2 cup crushed toffee bits with the chocolate chips. Salty-sweet is my favorite.
2. Orange and Dark Chocolate: Add 1 tablespoon of orange zest to the sugar and butter mix. Use dark chocolate chips instead of semi-sweet. The orange smell is like sunshine.
3. Peanut Butter Swirl: Drop small spoonfuls of creamy peanut butter on top of each dough ball. Swirl it gently with a toothpick. Bake as usual for a peanut butter surprise inside.
How to Serve and Sip
Serve these cookies warm on a pretty plate with a napkin. For extra fun, sandwich two cookies with a scoop of vanilla ice cream. I also like to crumble one over a bowl of yogurt for breakfast, shh, do not tell anyone.
For a drink, pour a tall glass of cold milk. That is the classic choice and never fails. Grown-ups might enjoy a small cup of hot coffee or a glass of red wine with dark chocolate notes.
Which would you choose tonight? Milk, coffee, or something else? I would pick milk every time, especially if I eat two cookies. Or three.
How to Keep These Cookies Fresh and Gooey
I remember my first batch of brown butter cookies. I left them out overnight, and they got hard. What a waste!
Here is the trick. Let the cookies cool fully. Then pop them in an airtight container with a slice of bread. The bread keeps them soft. Store them on the counter for up to three days. For longer, put them in the fridge for a week. You can also freeze the dough. Scoop it into balls, freeze on a tray, then toss the balls in a bag. Bake from frozen anytime.
To reheat, just zap one cookie in the microwave for ten seconds. It tastes like it just came out of the oven. This matters because fresh cookies make everyone smile. Batch cooking saves time for busy days. Have you ever tried storing it this way? Share below!
Three Common Cookie Problems and Fixes
Problem one: flat cookies. I once forgot to chill the dough. My cookies spread into big, thin pancakes. The fix is easy. Always chill the dough for at least thirty minutes. This keeps them thick.
Problem two: dry cookies. This happens when you overmix the flour. Stir gently until it just comes together. Why this matters: overmixing makes tough cookies. You want them soft, not like rocks.
Problem three: burned bottoms. Your oven might run hot. Use a light-colored baking sheet. Dark sheets cook faster on the bottom. I remember burning my first batch because I used a dark pan. Now I always line with parchment. Which of these problems have you run into before? Fixing these builds your cooking confidence because you learn how heat and mixing work.
Your Cookie Questions Answered
Q: Can I make these gluten-free? A: Yes. Swap the all-purpose flour for a 1-to-1 gluten-free blend. The texture will be a bit different but still good.
Q: Can I make the dough ahead? A: For sure. Chill the dough for up to three days. The flavor gets even better.
Q: Can I swap the chocolate chips? A: Absolutely. Try white chocolate, dark chocolate chunks, or even butterscotch chips.
Q: How do I scale the recipe? A: Cut everything in half for a small batch. Double it for a big party.
Q: Any optional tips? A: Sprinkle a little flaky sea salt on top before baking. It makes the sweet pop. Which tip will you try first?
From My Kitchen to Yours
I hope these cookies bring you as much joy as they bring my family. The smell of brown butter is pure magic. *Fun fact: Brown butter is just toasted milk solids. That toasty taste comes from a simple chemical reaction called the Maillard reaction.* It happens when you toast bread or sear meat too.
I love seeing your baking wins. Have you tried this recipe? Tag us on Pinterest! Share a photo of your gooey centers. I will cheer you on from my little kitchen. Happy cooking!
—Lena Morales
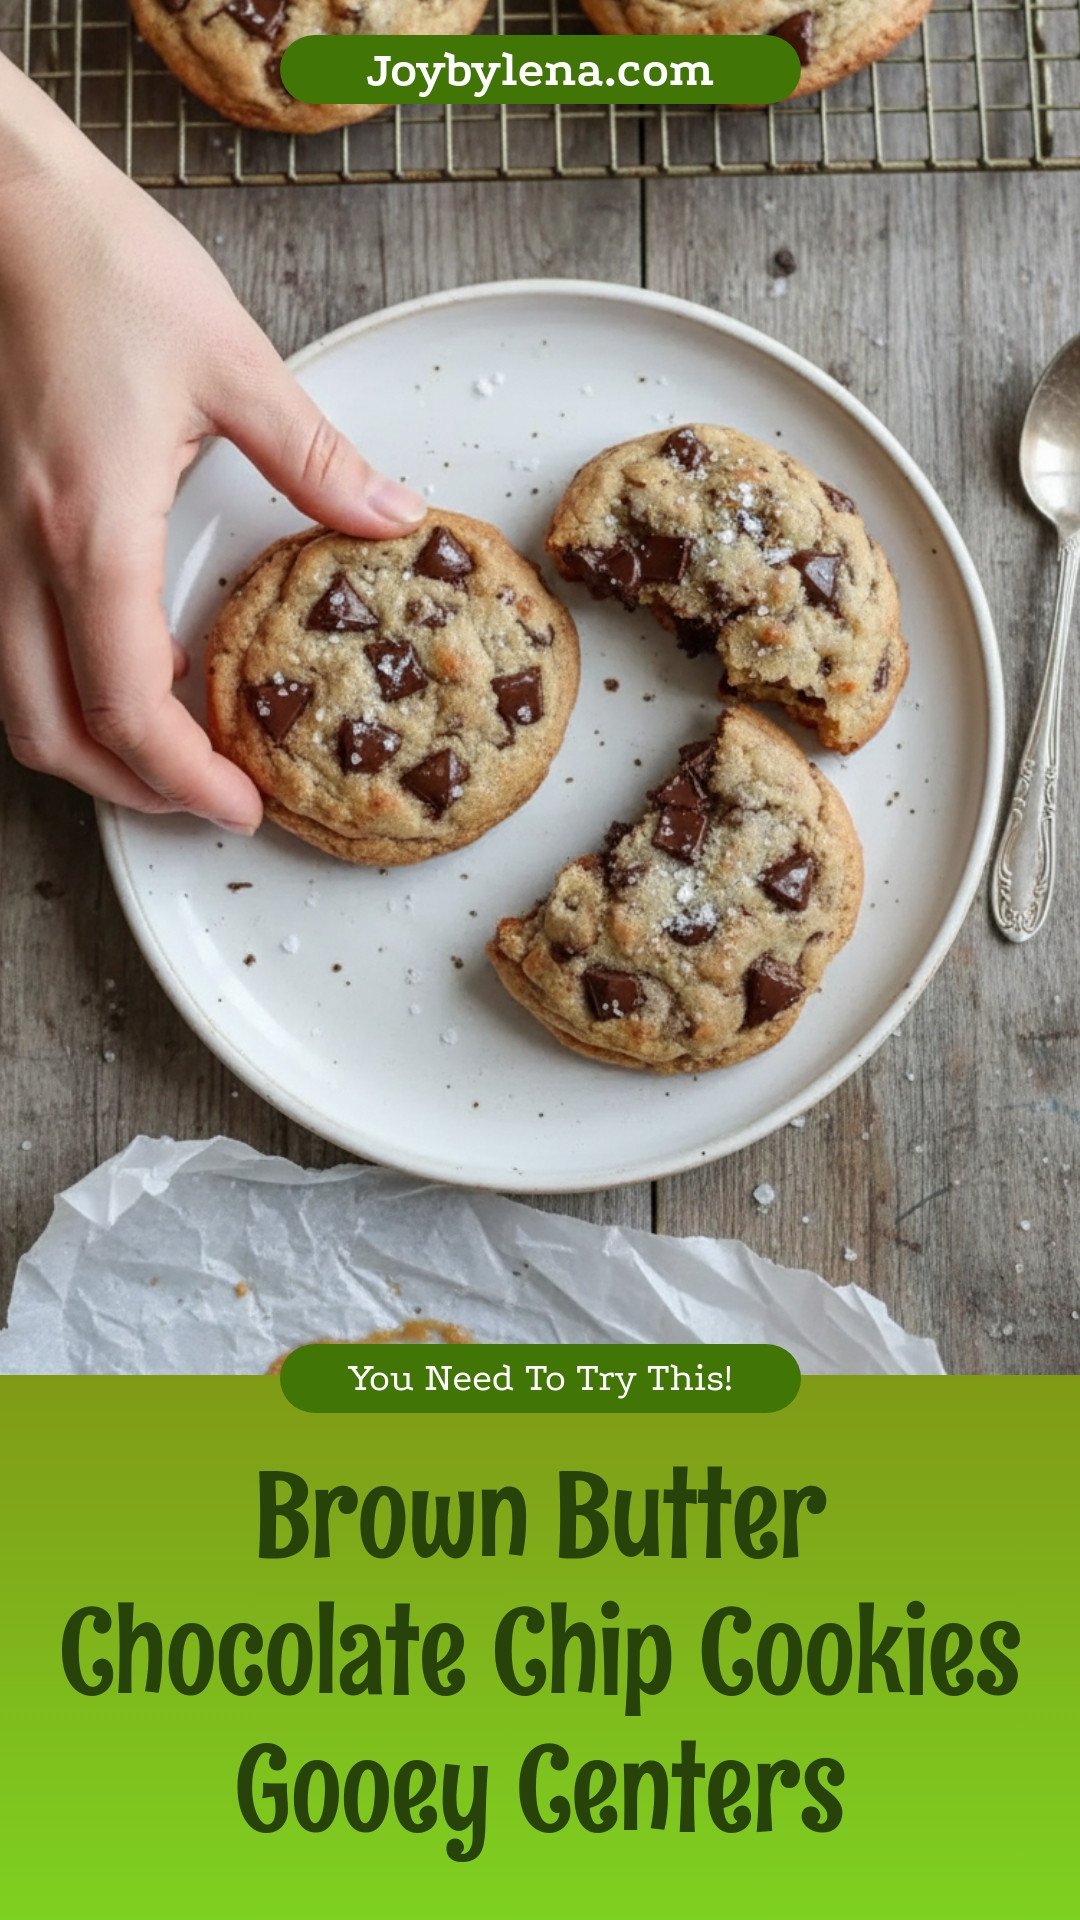
Brown Butter Chocolate Chip Cookies Gooey Centers
Description
Brown Butter Chocolate Chip Cookies Gooey Centers
Ingredients
Instructions
- Brown the butter: Place 1 cup (227 g) of unsalted butter in a heavy-bottomed saucepan over medium heat. Stir continuously as the butter melts, foams, and then turns a golden brown with a nutty aroma. Remove from heat immediately and transfer to a bowl to cool slightly (to about 110°F / 43°C).
- Combine sugars and browned butter: In a large bowl, whisk together 3/4 cup granulated sugar and 3/4 cup packed brown sugar. Pour in the browned butter and mix with a wooden spoon or spatula until fully combined and glossy.
- Add eggs and vanilla: Beat in two large eggs, one at a time, followed by 2 teaspoons of pure vanilla extract. Mix until shiny and smooth.
- Mix dry ingredients: In a separate bowl, whisk together 2 1/4 cups all-purpose flour, 1 teaspoon baking soda, and 1/2 teaspoon salt. Gradually add the dry mix to the wet ingredients, stirring gently until just combined. Avoid overmixing.
- Fold in chocolate chips: Stir in 1 1/2 cups semi-sweet chocolate chips evenly throughout the dough.
- Chill the dough (optional but recommended): Cover the dough and refrigerate for at least 30 minutes to control spreading and deepen flavor.
- Scoop and bake: Preheat oven to 350°F (175°C). Using a cookie scoop or spoon, drop 2-tablespoon-sized mounds onto parchment-lined baking sheets, spaced about 2 inches apart. Bake for 12–15 minutes until edges are golden but centers look soft.
- Cool on rack: Let cookies sit on the baking sheet for 5 minutes before transferring to a wire rack to cool completely or slightly warm if you prefer them gooier.
The Sugar Dance
This recipe uses two kinds of sugar. Granulated sugar makes the edges crisp. Brown sugar keeps everything soft and chewy. They work together like old friends. When you whisk the sugar into the warm brown butter, something magical happens. It gets all glossy and shiny like wet sand. That glossiness tells you the sugar is dissolving just right. I always stop and look at the bowl at this point. It is so pretty. Do you ever notice how ingredients change as you mix them? It is like watching a little science experiment in your kitchen.Chill Out for Better Cookies
I know waiting is hard. But chilling the dough does two important things. First, it stops the cookies from spreading into flat pancakes. Second, it gives the flavors time to get friendly with each other. This is why this matters: A cold dough means thicker cookies with chewier centers. If you are in a hurry, even twenty minutes in the fridge helps. Your patience will be rewarded. I once made a batch without chilling. They still tasted good, but they looked sad and flat. Now I always chill, even if I am craving cookies really bad. Do you ever struggle with waiting for cookie dough to chill? Tell me about your most impatient baking moment.One Batch, Many Happy Faces
The best part about these cookies is not the taste. It is watching people eat them. I made a batch for my mail carrier last week. He took one bite and just nodded slowly with a big smile. Cookies do something special. They make people stop and enjoy a small moment. That little pause matters a lot in busy days. These brown butter cookies are perfect for sharing. I always double the recipe because one batch disappears fast. Who would you bake a batch for this week?Ingredients:
| Ingredient | Amount | Notes |
|---|---|---|
| Unsalted butter | 1 cup (227 g) | browned |
| Granulated sugar | ¾ cup (150 g) | |
| Packed brown sugar | ¾ cup (165 g) | |
| Large eggs | 2 | room temperature |
| Pure vanilla extract | 2 teaspoons | |
| All-purpose flour | 2 ¼ cups (280 g) | |
| Baking soda | 1 teaspoon | |
| Salt | ½ teaspoon | |
| Semi-sweet chocolate chips | 1 ½ cups (270 g) |
The Cookie That Made My Neighbors Knock
I still remember the first time I made these brown butter chocolate chip cookies. My kitchen smelled like toasted nuts and caramel, and I could not stop peeking into the oven. Doesn’t that smell amazing? The secret is browning the butter, which makes the cookies taste rich and fancy without any hard work. My neighbor Mrs. Perez actually knocked on my door to ask what I was baking. That is when I knew this recipe was special.
These cookies have gooey centers and crispy edges, just how my kids liked them. You need a heavy-bottomed pan for browning, so the butter does not burn. (Hard-learned tip: Do not walk away while browning the butter. It goes from golden to burned fast.) I learned that the hard way once, and my kitchen smelled sad for days. Now I stand right there, stirring and smiling, until it smells perfect.
Here is the full recipe, step by step. Gather your ingredients first: butter, sugars, eggs, vanilla, flour, baking soda, salt, and chocolate chips. Room temperature eggs mix better, so take them out early if you can. Now let us bake something wonderful together.
Step 1: Brown the butter in a heavy-bottomed saucepan over medium heat. Stir it gently as it melts, then watch it foam up like a little cloud. Keep stirring until it turns golden brown and smells like toasted nuts. Take it off the heat right away and pour it into a bowl to cool. It should be warm but not hot, about the temperature of a warm bath.
Step 2: In a large bowl, whisk the granulated sugar and brown sugar together. Pour in the cooled brown butter and stir with a wooden spoon until shiny and smooth. This part feels like making caramel, and I always lick the spoon a little. (Hard-learned tip: Make sure the butter is not too hot or the eggs will scramble later.)
Step 3: Crack in the eggs one at a time, beating well after each one. Add the vanilla extract and mix until the dough looks shiny and silky. This is when the kitchen starts to smell like a bakery. My grandson loves to help with this step because he gets to count the eggs. Do you let little helpers crack eggs too? Share below!
Step 4: In a separate bowl, whisk the flour, baking soda, and salt together. Slowly add this dry mix to the wet ingredients, stirring just until combined. Do not overmix or the cookies will be tough and sad. I stop as soon as I cannot see any white flour streaks. Simple is best here.
Step 5: Fold in the chocolate chips with a spatula until they are scattered all through the dough. Make sure every bite gets some chocolate. This is the time to sneak a few chips, and I always do. Now the dough is ready to scoop or chill.
Step 6: Chill the dough for at least 30 minutes if you have time. This stops the cookies from spreading into flat pancakes. The cold dough also makes the centers extra soft and gooey. (Hard-learned tip: If you skip chilling, bake one test cookie first to check the spread.) I chill mine while I wash the dishes and hum a little song.
Step 7: Preheat your oven to 350 degrees Fahrenheit. Scoop dough into 2-tablespoon balls and place them on parchment-lined baking sheets, two inches apart. Bake for 12 to 15 minutes. The edges should be golden, but the centers will look soft and puffy. They finish baking on the hot pan after you take them out.
Step 8: Let the cookies sit on the baking sheet for five minutes. Then move them to a wire rack to cool. If you want gooey centers, eat them slightly warm. I like mine with a glass of cold milk. What is your favorite way to eat cookies? … Share below!
Cook Time: 12–15 minutes
Total Time: 45 minutes (including chilling)
Yield: 24 cookies
Category: Dessert, Cookies
Three Fun Twists to Try
Sometimes I like to change things up a little. These three twists are simple and make the cookies feel brand new. Which one would you try first? Comment below!
1. Sea Salt and Toffee Crunch: Sprinkle flaky sea salt on top before baking. Add 1/2 cup crushed toffee bits with the chocolate chips. Salty-sweet is my favorite.
2. Orange and Dark Chocolate: Add 1 tablespoon of orange zest to the sugar and butter mix. Use dark chocolate chips instead of semi-sweet. The orange smell is like sunshine.
3. Peanut Butter Swirl: Drop small spoonfuls of creamy peanut butter on top of each dough ball. Swirl it gently with a toothpick. Bake as usual for a peanut butter surprise inside.
How to Serve and Sip
Serve these cookies warm on a pretty plate with a napkin. For extra fun, sandwich two cookies with a scoop of vanilla ice cream. I also like to crumble one over a bowl of yogurt for breakfast, shh, do not tell anyone.
For a drink, pour a tall glass of cold milk. That is the classic choice and never fails. Grown-ups might enjoy a small cup of hot coffee or a glass of red wine with dark chocolate notes.
Which would you choose tonight? Milk, coffee, or something else? I would pick milk every time, especially if I eat two cookies. Or three.
How to Keep These Cookies Fresh and Gooey
I remember my first batch of brown butter cookies. I left them out overnight, and they got hard. What a waste!
Here is the trick. Let the cookies cool fully. Then pop them in an airtight container with a slice of bread. The bread keeps them soft. Store them on the counter for up to three days. For longer, put them in the fridge for a week. You can also freeze the dough. Scoop it into balls, freeze on a tray, then toss the balls in a bag. Bake from frozen anytime.
To reheat, just zap one cookie in the microwave for ten seconds. It tastes like it just came out of the oven. This matters because fresh cookies make everyone smile. Batch cooking saves time for busy days. Have you ever tried storing it this way? Share below!
Three Common Cookie Problems and Fixes
Problem one: flat cookies. I once forgot to chill the dough. My cookies spread into big, thin pancakes. The fix is easy. Always chill the dough for at least thirty minutes. This keeps them thick.
Problem two: dry cookies. This happens when you overmix the flour. Stir gently until it just comes together. Why this matters: overmixing makes tough cookies. You want them soft, not like rocks.
Problem three: burned bottoms. Your oven might run hot. Use a light-colored baking sheet. Dark sheets cook faster on the bottom. I remember burning my first batch because I used a dark pan. Now I always line with parchment. Which of these problems have you run into before? Fixing these builds your cooking confidence because you learn how heat and mixing work.
Your Cookie Questions Answered
Q: Can I make these gluten-free? A: Yes. Swap the all-purpose flour for a 1-to-1 gluten-free blend. The texture will be a bit different but still good.
Q: Can I make the dough ahead? A: For sure. Chill the dough for up to three days. The flavor gets even better.
Q: Can I swap the chocolate chips? A: Absolutely. Try white chocolate, dark chocolate chunks, or even butterscotch chips.
Q: How do I scale the recipe? A: Cut everything in half for a small batch. Double it for a big party.
Q: Any optional tips? A: Sprinkle a little flaky sea salt on top before baking. It makes the sweet pop. Which tip will you try first?
From My Kitchen to Yours
I hope these cookies bring you as much joy as they bring my family. The smell of brown butter is pure magic. *Fun fact: Brown butter is just toasted milk solids. That toasty taste comes from a simple chemical reaction called the Maillard reaction.* It happens when you toast bread or sear meat too.
I love seeing your baking wins. Have you tried this recipe? Tag us on Pinterest! Share a photo of your gooey centers. I will cheer you on from my little kitchen. Happy cooking!
—Lena Morales
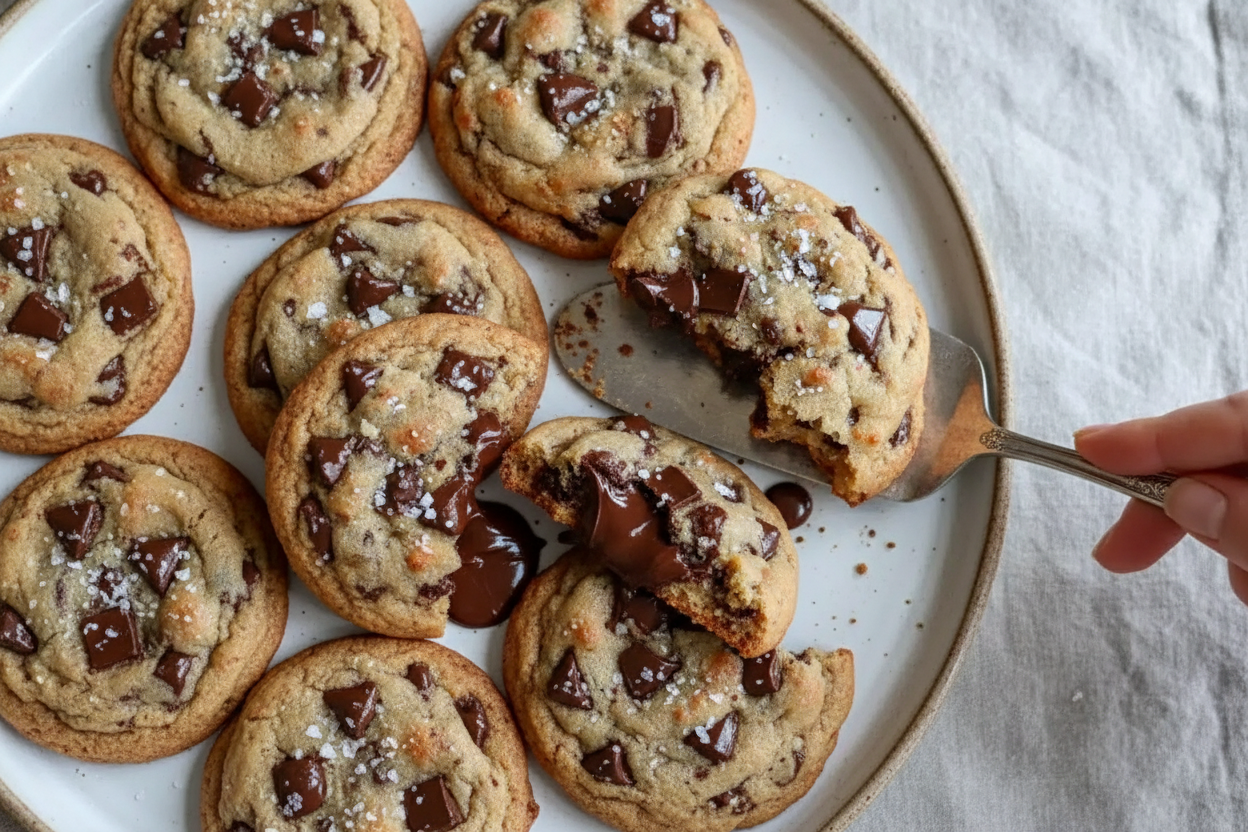
My Secret for Gooey Centers Every Time
Here is the trick nobody tells you. You need to pull the cookies out when the edges look golden but the centers still look soft and puffy. They will keep cooking on the hot pan. If you wait until the whole cookie looks done, it will be too crunchy. This is why this matters: A soft center is what makes people close their eyes when they take a bite. I have seen it happen a hundred times. What is your favorite part of a chocolate chip cookie? The crispy edge or the gooey middle?The Sugar Dance
This recipe uses two kinds of sugar. Granulated sugar makes the edges crisp. Brown sugar keeps everything soft and chewy. They work together like old friends. When you whisk the sugar into the warm brown butter, something magical happens. It gets all glossy and shiny like wet sand. That glossiness tells you the sugar is dissolving just right. I always stop and look at the bowl at this point. It is so pretty. Do you ever notice how ingredients change as you mix them? It is like watching a little science experiment in your kitchen.Chill Out for Better Cookies
I know waiting is hard. But chilling the dough does two important things. First, it stops the cookies from spreading into flat pancakes. Second, it gives the flavors time to get friendly with each other. This is why this matters: A cold dough means thicker cookies with chewier centers. If you are in a hurry, even twenty minutes in the fridge helps. Your patience will be rewarded. I once made a batch without chilling. They still tasted good, but they looked sad and flat. Now I always chill, even if I am craving cookies really bad. Do you ever struggle with waiting for cookie dough to chill? Tell me about your most impatient baking moment.One Batch, Many Happy Faces
The best part about these cookies is not the taste. It is watching people eat them. I made a batch for my mail carrier last week. He took one bite and just nodded slowly with a big smile. Cookies do something special. They make people stop and enjoy a small moment. That little pause matters a lot in busy days. These brown butter cookies are perfect for sharing. I always double the recipe because one batch disappears fast. Who would you bake a batch for this week?Ingredients:
| Ingredient | Amount | Notes |
|---|---|---|
| Unsalted butter | 1 cup (227 g) | browned |
| Granulated sugar | ¾ cup (150 g) | |
| Packed brown sugar | ¾ cup (165 g) | |
| Large eggs | 2 | room temperature |
| Pure vanilla extract | 2 teaspoons | |
| All-purpose flour | 2 ¼ cups (280 g) | |
| Baking soda | 1 teaspoon | |
| Salt | ½ teaspoon | |
| Semi-sweet chocolate chips | 1 ½ cups (270 g) |
The Cookie That Made My Neighbors Knock
I still remember the first time I made these brown butter chocolate chip cookies. My kitchen smelled like toasted nuts and caramel, and I could not stop peeking into the oven. Doesn’t that smell amazing? The secret is browning the butter, which makes the cookies taste rich and fancy without any hard work. My neighbor Mrs. Perez actually knocked on my door to ask what I was baking. That is when I knew this recipe was special.
These cookies have gooey centers and crispy edges, just how my kids liked them. You need a heavy-bottomed pan for browning, so the butter does not burn. (Hard-learned tip: Do not walk away while browning the butter. It goes from golden to burned fast.) I learned that the hard way once, and my kitchen smelled sad for days. Now I stand right there, stirring and smiling, until it smells perfect.
Here is the full recipe, step by step. Gather your ingredients first: butter, sugars, eggs, vanilla, flour, baking soda, salt, and chocolate chips. Room temperature eggs mix better, so take them out early if you can. Now let us bake something wonderful together.
Step 1: Brown the butter in a heavy-bottomed saucepan over medium heat. Stir it gently as it melts, then watch it foam up like a little cloud. Keep stirring until it turns golden brown and smells like toasted nuts. Take it off the heat right away and pour it into a bowl to cool. It should be warm but not hot, about the temperature of a warm bath.
Step 2: In a large bowl, whisk the granulated sugar and brown sugar together. Pour in the cooled brown butter and stir with a wooden spoon until shiny and smooth. This part feels like making caramel, and I always lick the spoon a little. (Hard-learned tip: Make sure the butter is not too hot or the eggs will scramble later.)
Step 3: Crack in the eggs one at a time, beating well after each one. Add the vanilla extract and mix until the dough looks shiny and silky. This is when the kitchen starts to smell like a bakery. My grandson loves to help with this step because he gets to count the eggs. Do you let little helpers crack eggs too? Share below!
Step 4: In a separate bowl, whisk the flour, baking soda, and salt together. Slowly add this dry mix to the wet ingredients, stirring just until combined. Do not overmix or the cookies will be tough and sad. I stop as soon as I cannot see any white flour streaks. Simple is best here.
Step 5: Fold in the chocolate chips with a spatula until they are scattered all through the dough. Make sure every bite gets some chocolate. This is the time to sneak a few chips, and I always do. Now the dough is ready to scoop or chill.
Step 6: Chill the dough for at least 30 minutes if you have time. This stops the cookies from spreading into flat pancakes. The cold dough also makes the centers extra soft and gooey. (Hard-learned tip: If you skip chilling, bake one test cookie first to check the spread.) I chill mine while I wash the dishes and hum a little song.
Step 7: Preheat your oven to 350 degrees Fahrenheit. Scoop dough into 2-tablespoon balls and place them on parchment-lined baking sheets, two inches apart. Bake for 12 to 15 minutes. The edges should be golden, but the centers will look soft and puffy. They finish baking on the hot pan after you take them out.
Step 8: Let the cookies sit on the baking sheet for five minutes. Then move them to a wire rack to cool. If you want gooey centers, eat them slightly warm. I like mine with a glass of cold milk. What is your favorite way to eat cookies? … Share below!
Cook Time: 12–15 minutes
Total Time: 45 minutes (including chilling)
Yield: 24 cookies
Category: Dessert, Cookies
Three Fun Twists to Try
Sometimes I like to change things up a little. These three twists are simple and make the cookies feel brand new. Which one would you try first? Comment below!
1. Sea Salt and Toffee Crunch: Sprinkle flaky sea salt on top before baking. Add 1/2 cup crushed toffee bits with the chocolate chips. Salty-sweet is my favorite.
2. Orange and Dark Chocolate: Add 1 tablespoon of orange zest to the sugar and butter mix. Use dark chocolate chips instead of semi-sweet. The orange smell is like sunshine.
3. Peanut Butter Swirl: Drop small spoonfuls of creamy peanut butter on top of each dough ball. Swirl it gently with a toothpick. Bake as usual for a peanut butter surprise inside.
How to Serve and Sip
Serve these cookies warm on a pretty plate with a napkin. For extra fun, sandwich two cookies with a scoop of vanilla ice cream. I also like to crumble one over a bowl of yogurt for breakfast, shh, do not tell anyone.
For a drink, pour a tall glass of cold milk. That is the classic choice and never fails. Grown-ups might enjoy a small cup of hot coffee or a glass of red wine with dark chocolate notes.
Which would you choose tonight? Milk, coffee, or something else? I would pick milk every time, especially if I eat two cookies. Or three.
How to Keep These Cookies Fresh and Gooey
I remember my first batch of brown butter cookies. I left them out overnight, and they got hard. What a waste!
Here is the trick. Let the cookies cool fully. Then pop them in an airtight container with a slice of bread. The bread keeps them soft. Store them on the counter for up to three days. For longer, put them in the fridge for a week. You can also freeze the dough. Scoop it into balls, freeze on a tray, then toss the balls in a bag. Bake from frozen anytime.
To reheat, just zap one cookie in the microwave for ten seconds. It tastes like it just came out of the oven. This matters because fresh cookies make everyone smile. Batch cooking saves time for busy days. Have you ever tried storing it this way? Share below!
Three Common Cookie Problems and Fixes
Problem one: flat cookies. I once forgot to chill the dough. My cookies spread into big, thin pancakes. The fix is easy. Always chill the dough for at least thirty minutes. This keeps them thick.
Problem two: dry cookies. This happens when you overmix the flour. Stir gently until it just comes together. Why this matters: overmixing makes tough cookies. You want them soft, not like rocks.
Problem three: burned bottoms. Your oven might run hot. Use a light-colored baking sheet. Dark sheets cook faster on the bottom. I remember burning my first batch because I used a dark pan. Now I always line with parchment. Which of these problems have you run into before? Fixing these builds your cooking confidence because you learn how heat and mixing work.
Your Cookie Questions Answered
Q: Can I make these gluten-free? A: Yes. Swap the all-purpose flour for a 1-to-1 gluten-free blend. The texture will be a bit different but still good.
Q: Can I make the dough ahead? A: For sure. Chill the dough for up to three days. The flavor gets even better.
Q: Can I swap the chocolate chips? A: Absolutely. Try white chocolate, dark chocolate chunks, or even butterscotch chips.
Q: How do I scale the recipe? A: Cut everything in half for a small batch. Double it for a big party.
Q: Any optional tips? A: Sprinkle a little flaky sea salt on top before baking. It makes the sweet pop. Which tip will you try first?
From My Kitchen to Yours
I hope these cookies bring you as much joy as they bring my family. The smell of brown butter is pure magic. *Fun fact: Brown butter is just toasted milk solids. That toasty taste comes from a simple chemical reaction called the Maillard reaction.* It happens when you toast bread or sear meat too.
I love seeing your baking wins. Have you tried this recipe? Tag us on Pinterest! Share a photo of your gooey centers. I will cheer you on from my little kitchen. Happy cooking!
—Lena Morales
The Day I Burned Butter on Purpose
The first time I tried browning butter, I thought I ruined it. I stared at the pot and saw little brown specks floating around. I almost threw it away. My grandmother laughed when I told her. She said those brown specks are little gifts of flavor. Now I look for them on purpose. Doesn’t that smell amazing when it happens? *Fun fact: Browning butter removes some of the water, which helps cookies stay chewy in the middle.* Have you ever tried browning butter before? What did you think the first time?Why Brown Butter Makes Everything Better
Regular butter is fine for cookies. But brown butter? It’s like butter that went to flavor school. The heat changes the milk solids into something nutty and toasty. This is why this matters: Brown butter adds depth without adding extra sugar or fancy ingredients. It makes a simple cookie taste like you worked all day. But really, it only takes five extra minutes. I still laugh at that time I burned butter on purpose for the first time. I called my neighbor so excited. She thought I lost my mind. Which flavor do you like more: nutty brown butter or plain butter? I would love to know.My Secret for Gooey Centers Every Time
Here is the trick nobody tells you. You need to pull the cookies out when the edges look golden but the centers still look soft and puffy. They will keep cooking on the hot pan. If you wait until the whole cookie looks done, it will be too crunchy. This is why this matters: A soft center is what makes people close their eyes when they take a bite. I have seen it happen a hundred times. What is your favorite part of a chocolate chip cookie? The crispy edge or the gooey middle?The Sugar Dance
This recipe uses two kinds of sugar. Granulated sugar makes the edges crisp. Brown sugar keeps everything soft and chewy. They work together like old friends. When you whisk the sugar into the warm brown butter, something magical happens. It gets all glossy and shiny like wet sand. That glossiness tells you the sugar is dissolving just right. I always stop and look at the bowl at this point. It is so pretty. Do you ever notice how ingredients change as you mix them? It is like watching a little science experiment in your kitchen.Chill Out for Better Cookies
I know waiting is hard. But chilling the dough does two important things. First, it stops the cookies from spreading into flat pancakes. Second, it gives the flavors time to get friendly with each other. This is why this matters: A cold dough means thicker cookies with chewier centers. If you are in a hurry, even twenty minutes in the fridge helps. Your patience will be rewarded. I once made a batch without chilling. They still tasted good, but they looked sad and flat. Now I always chill, even if I am craving cookies really bad. Do you ever struggle with waiting for cookie dough to chill? Tell me about your most impatient baking moment.One Batch, Many Happy Faces
The best part about these cookies is not the taste. It is watching people eat them. I made a batch for my mail carrier last week. He took one bite and just nodded slowly with a big smile. Cookies do something special. They make people stop and enjoy a small moment. That little pause matters a lot in busy days. These brown butter cookies are perfect for sharing. I always double the recipe because one batch disappears fast. Who would you bake a batch for this week?Ingredients:
| Ingredient | Amount | Notes |
|---|---|---|
| Unsalted butter | 1 cup (227 g) | browned |
| Granulated sugar | ¾ cup (150 g) | |
| Packed brown sugar | ¾ cup (165 g) | |
| Large eggs | 2 | room temperature |
| Pure vanilla extract | 2 teaspoons | |
| All-purpose flour | 2 ¼ cups (280 g) | |
| Baking soda | 1 teaspoon | |
| Salt | ½ teaspoon | |
| Semi-sweet chocolate chips | 1 ½ cups (270 g) |
The Cookie That Made My Neighbors Knock
I still remember the first time I made these brown butter chocolate chip cookies. My kitchen smelled like toasted nuts and caramel, and I could not stop peeking into the oven. Doesn’t that smell amazing? The secret is browning the butter, which makes the cookies taste rich and fancy without any hard work. My neighbor Mrs. Perez actually knocked on my door to ask what I was baking. That is when I knew this recipe was special.
These cookies have gooey centers and crispy edges, just how my kids liked them. You need a heavy-bottomed pan for browning, so the butter does not burn. (Hard-learned tip: Do not walk away while browning the butter. It goes from golden to burned fast.) I learned that the hard way once, and my kitchen smelled sad for days. Now I stand right there, stirring and smiling, until it smells perfect.
Here is the full recipe, step by step. Gather your ingredients first: butter, sugars, eggs, vanilla, flour, baking soda, salt, and chocolate chips. Room temperature eggs mix better, so take them out early if you can. Now let us bake something wonderful together.
Step 1: Brown the butter in a heavy-bottomed saucepan over medium heat. Stir it gently as it melts, then watch it foam up like a little cloud. Keep stirring until it turns golden brown and smells like toasted nuts. Take it off the heat right away and pour it into a bowl to cool. It should be warm but not hot, about the temperature of a warm bath.
Step 2: In a large bowl, whisk the granulated sugar and brown sugar together. Pour in the cooled brown butter and stir with a wooden spoon until shiny and smooth. This part feels like making caramel, and I always lick the spoon a little. (Hard-learned tip: Make sure the butter is not too hot or the eggs will scramble later.)
Step 3: Crack in the eggs one at a time, beating well after each one. Add the vanilla extract and mix until the dough looks shiny and silky. This is when the kitchen starts to smell like a bakery. My grandson loves to help with this step because he gets to count the eggs. Do you let little helpers crack eggs too? Share below!
Step 4: In a separate bowl, whisk the flour, baking soda, and salt together. Slowly add this dry mix to the wet ingredients, stirring just until combined. Do not overmix or the cookies will be tough and sad. I stop as soon as I cannot see any white flour streaks. Simple is best here.
Step 5: Fold in the chocolate chips with a spatula until they are scattered all through the dough. Make sure every bite gets some chocolate. This is the time to sneak a few chips, and I always do. Now the dough is ready to scoop or chill.
Step 6: Chill the dough for at least 30 minutes if you have time. This stops the cookies from spreading into flat pancakes. The cold dough also makes the centers extra soft and gooey. (Hard-learned tip: If you skip chilling, bake one test cookie first to check the spread.) I chill mine while I wash the dishes and hum a little song.
Step 7: Preheat your oven to 350 degrees Fahrenheit. Scoop dough into 2-tablespoon balls and place them on parchment-lined baking sheets, two inches apart. Bake for 12 to 15 minutes. The edges should be golden, but the centers will look soft and puffy. They finish baking on the hot pan after you take them out.
Step 8: Let the cookies sit on the baking sheet for five minutes. Then move them to a wire rack to cool. If you want gooey centers, eat them slightly warm. I like mine with a glass of cold milk. What is your favorite way to eat cookies? … Share below!
Cook Time: 12–15 minutes
Total Time: 45 minutes (including chilling)
Yield: 24 cookies
Category: Dessert, Cookies
Three Fun Twists to Try
Sometimes I like to change things up a little. These three twists are simple and make the cookies feel brand new. Which one would you try first? Comment below!
1. Sea Salt and Toffee Crunch: Sprinkle flaky sea salt on top before baking. Add 1/2 cup crushed toffee bits with the chocolate chips. Salty-sweet is my favorite.
2. Orange and Dark Chocolate: Add 1 tablespoon of orange zest to the sugar and butter mix. Use dark chocolate chips instead of semi-sweet. The orange smell is like sunshine.
3. Peanut Butter Swirl: Drop small spoonfuls of creamy peanut butter on top of each dough ball. Swirl it gently with a toothpick. Bake as usual for a peanut butter surprise inside.
How to Serve and Sip
Serve these cookies warm on a pretty plate with a napkin. For extra fun, sandwich two cookies with a scoop of vanilla ice cream. I also like to crumble one over a bowl of yogurt for breakfast, shh, do not tell anyone.
For a drink, pour a tall glass of cold milk. That is the classic choice and never fails. Grown-ups might enjoy a small cup of hot coffee or a glass of red wine with dark chocolate notes.
Which would you choose tonight? Milk, coffee, or something else? I would pick milk every time, especially if I eat two cookies. Or three.
How to Keep These Cookies Fresh and Gooey
I remember my first batch of brown butter cookies. I left them out overnight, and they got hard. What a waste!
Here is the trick. Let the cookies cool fully. Then pop them in an airtight container with a slice of bread. The bread keeps them soft. Store them on the counter for up to three days. For longer, put them in the fridge for a week. You can also freeze the dough. Scoop it into balls, freeze on a tray, then toss the balls in a bag. Bake from frozen anytime.
To reheat, just zap one cookie in the microwave for ten seconds. It tastes like it just came out of the oven. This matters because fresh cookies make everyone smile. Batch cooking saves time for busy days. Have you ever tried storing it this way? Share below!
Three Common Cookie Problems and Fixes
Problem one: flat cookies. I once forgot to chill the dough. My cookies spread into big, thin pancakes. The fix is easy. Always chill the dough for at least thirty minutes. This keeps them thick.
Problem two: dry cookies. This happens when you overmix the flour. Stir gently until it just comes together. Why this matters: overmixing makes tough cookies. You want them soft, not like rocks.
Problem three: burned bottoms. Your oven might run hot. Use a light-colored baking sheet. Dark sheets cook faster on the bottom. I remember burning my first batch because I used a dark pan. Now I always line with parchment. Which of these problems have you run into before? Fixing these builds your cooking confidence because you learn how heat and mixing work.
Your Cookie Questions Answered
Q: Can I make these gluten-free? A: Yes. Swap the all-purpose flour for a 1-to-1 gluten-free blend. The texture will be a bit different but still good.
Q: Can I make the dough ahead? A: For sure. Chill the dough for up to three days. The flavor gets even better.
Q: Can I swap the chocolate chips? A: Absolutely. Try white chocolate, dark chocolate chunks, or even butterscotch chips.
Q: How do I scale the recipe? A: Cut everything in half for a small batch. Double it for a big party.
Q: Any optional tips? A: Sprinkle a little flaky sea salt on top before baking. It makes the sweet pop. Which tip will you try first?
From My Kitchen to Yours
I hope these cookies bring you as much joy as they bring my family. The smell of brown butter is pure magic. *Fun fact: Brown butter is just toasted milk solids. That toasty taste comes from a simple chemical reaction called the Maillard reaction.* It happens when you toast bread or sear meat too.
I love seeing your baking wins. Have you tried this recipe? Tag us on Pinterest! Share a photo of your gooey centers. I will cheer you on from my little kitchen. Happy cooking!
—Lena Morales


Leave a Reply