
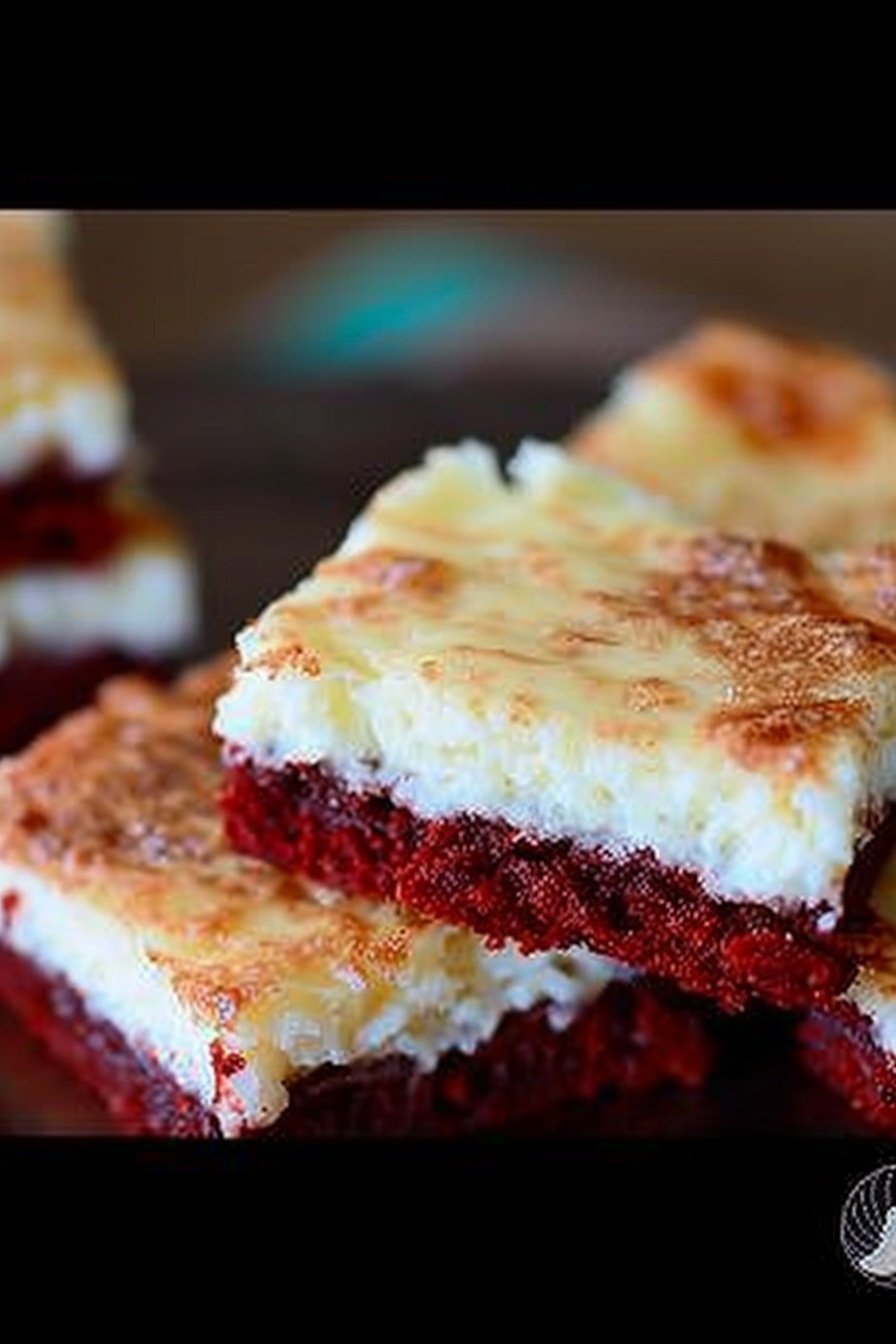
A Treat for Quiet Moments
Sometimes, you need a little sweet comfort all by yourself. This red velvet cheesecake bar is perfect for that. It feels like a warm hug on a quiet afternoon. I love having a square with a glass of milk.
It is my go-to treat when the house is finally calm. The rich red velvet and creamy topping just melt your worries away. What is your favorite quiet-time snack? I would love to know.
The Magic of the Crust
The crust is so simple to make. You just mix a box of cake mix with melted butter and an egg. Press it into the pan with your fingers. I still laugh at how messy my hands get.
Using your hands to press the crust matters. It connects you to the food you are making. You are putting your own touch into it. This makes the treat even more special.
A Creamy Dreamy Filling
Now for the best part, the filling. You beat the cream cheese until it is super smooth. Then you add the sugar and vanilla. Doesn’t that smell amazing?
Fun fact: The jiggly middle is a good sign! It means your bars will be creamy and not overcooked. This little trick matters because it keeps the dessert soft. Trust the jiggle.
My First Baking Adventure
I remember the first time I made these. I was so nervous about the jiggly middle. I almost left them in the oven too long. But I took them out, and they were perfect.
That taught me a good lesson. Sometimes, you have to trust the process. Have you ever been nervous to try a new recipe? What happened?
Why We Need Sweet Pauses
Life can be very busy and loud. Taking a moment for yourself is important. A small, homemade treat can make that moment feel sacred.
This is more than just a dessert. It is a way to be kind to yourself. Which do you prefer, sharing desserts or keeping them all for yourself? Be honest!

Ingredients:
| Ingredient | Amount | Notes |
|---|---|---|
| Red velvet cake mix | 1 (15.25-ounce) box | For the crust |
| Unsalted butter, melted | 1/2 cup (1 stick) | For the crust |
| Egg | 1 | For the crust |
| Cream cheese, softened | 1 (8-ounce) block | For the filling |
| Eggs | 2 | For the filling |
| Unsalted butter, melted | 1/2 cup (1 stick) | For the filling |
| Powdered sugar | 4 cups | For the filling |
| Vanilla extract | 1 teaspoon | For the filling |
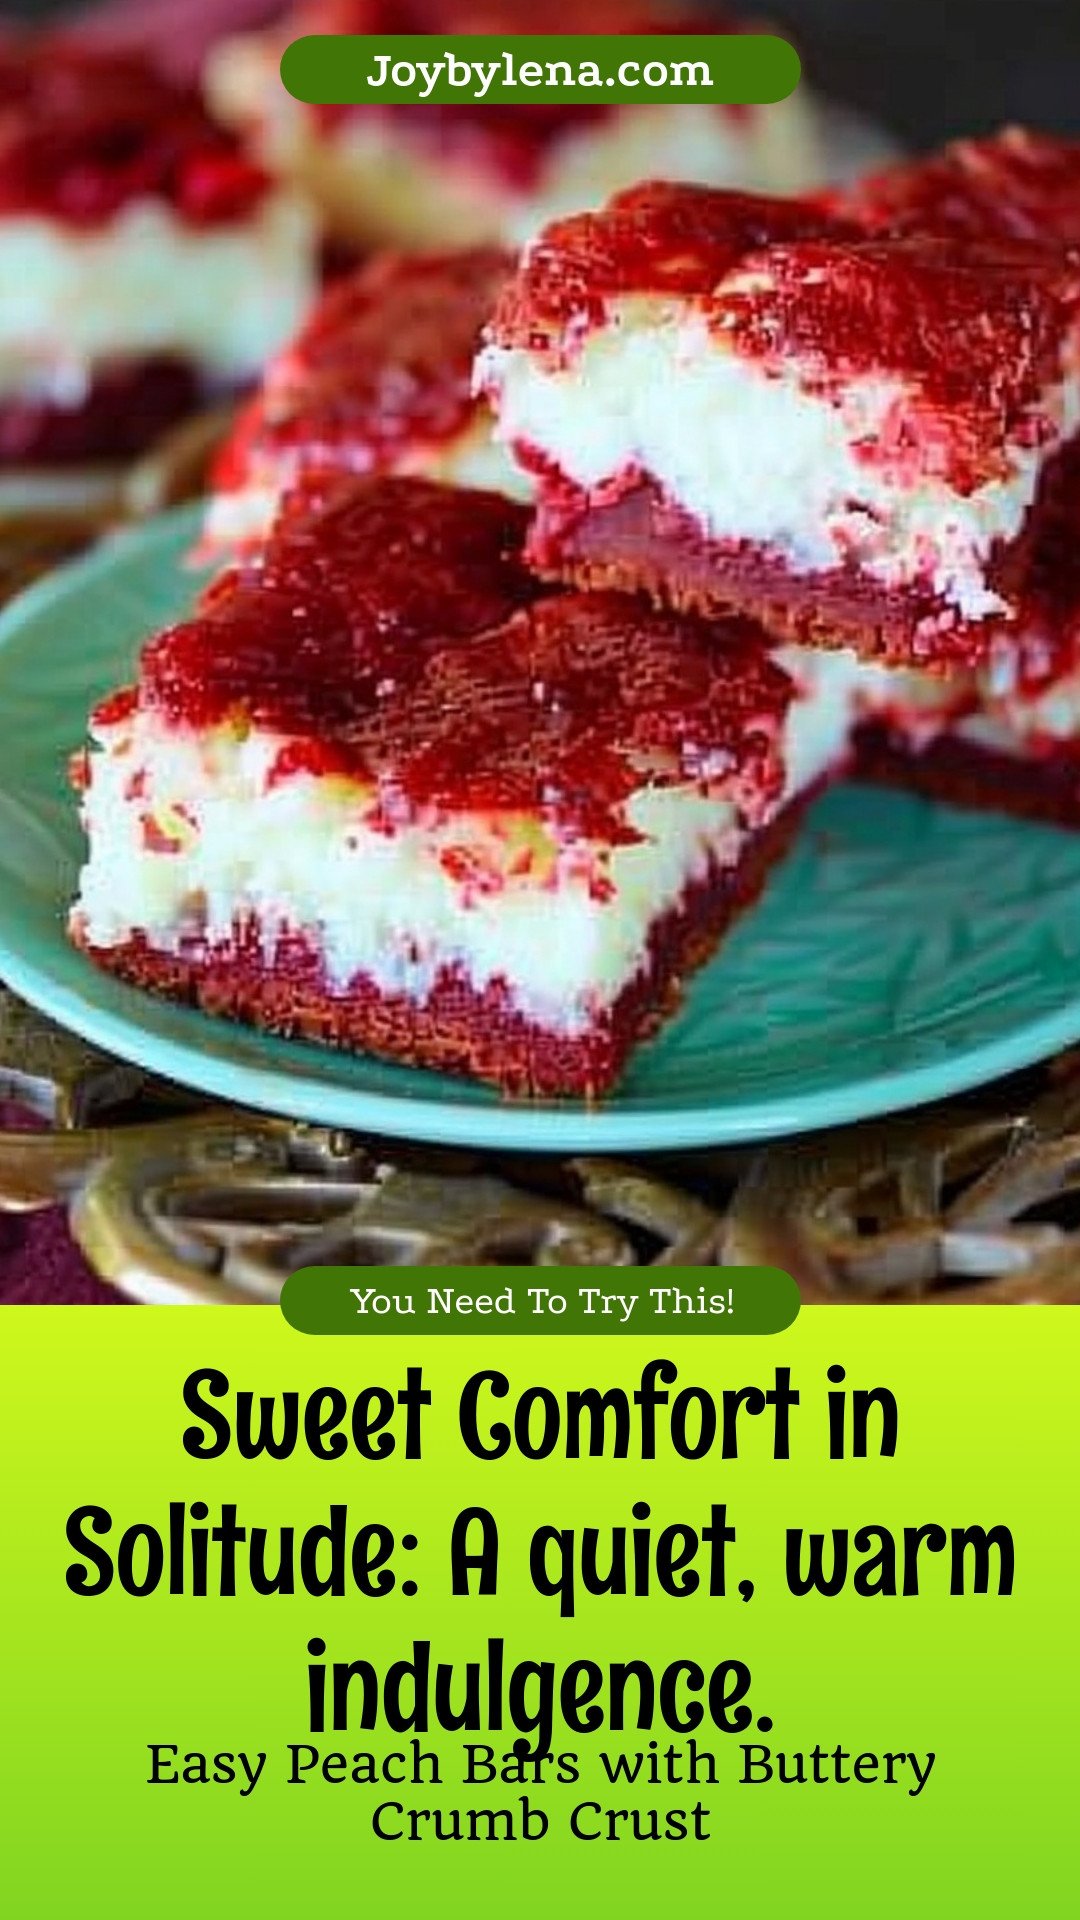
Sweet Comfort in Solitude
Sometimes, you just need a quiet moment for yourself. I feel that way, too. This recipe is my little secret for those days. It is a rich, red velvet bar with a creamy cheesecake top. It feels like a warm hug from the inside. Doesn’t that sound nice?
Making it is simple, I promise. We start with a crust made from a cake mix. It saves so much time. My grandson taught me that trick. I still laugh at that. He is a very smart cookie. Then we whip up the dreamiest filling. Your kitchen will smell amazing.
- Step 1: First, get your oven ready at 350°F. Spray your baking dish lightly. This keeps everything from sticking. I use my old glass dish for this. It has seen so many happy days.
- Step 2: Now, let’s make the crust. Stir the cake mix, melted butter, and one egg. It will be thick and a little sticky. Press it into the pan with your fingers. I like to make it nice and even. (A hard-learned tip: lightly wet your fingers to stop the dough from sticking!).
- Step 3: Time for the filling! Beat the cream cheese until it’s smooth. Then mix in the eggs and melted butter. Slowly add the powdered sugar. The vanilla goes in last. It makes the whole room smell wonderful. Pour this over your crust. What’s your favorite smell from the kitchen? Share below!
- Step 4: Bake it for about 45 minutes. The edges will look firm. But the middle should still have a little jiggle. That is the secret to a creamy center. Let it cool completely. This is the hardest part, waiting! But it is worth it.
Cook Time: 40–50 minutes
Total Time: 1 hour 5 minutes
Yield: 12 bars
Category: Dessert, Bars
Make It Your Own
This recipe is wonderful as it is. But you can also play with it. Here are a few fun twists I have tried. They always make it feel new and special.
- Chocolate Chip Joy: Stir a handful of chocolate chips into the red velvet crust. It adds little pockets of sweetness.
- Berry Swirl Surprise: Drop spoonfuls of raspberry jam on the filling. Then swirl it with a knife before baking.
- Nutty Crunch: Sprinkle chopped pecans on top right before it goes in the oven. They get all toasty and delicious.
Which one would you try first? Comment below!
Serving Your Sweet Creation
These bars are perfect all on their own. But sometimes, I like to dress them up a little. It makes my quiet treat feel extra special. Here is what I like to do.
Place a warm bar on a small plate. Add a dollop of whipped cream on the side. A few fresh raspberries look so pretty, too. For a drink, a cold glass of milk is my go-to. It is a classic for a reason. Or, for the grown-ups, a small cup of strong coffee pairs beautifully. Which would you choose tonight?
Keeping Your Sweet Comfort Fresh
This dessert is best enjoyed at room temperature. You can keep it covered on the counter for two days. For longer storage, the fridge is your friend. It will stay fresh there for up to a week.
I love making a double batch. I freeze half for a future treat. Just wrap the squares tightly in plastic wrap. Then place them in a freezer bag. They will be perfect for a month. *Fun fact: Freezing baked goods is like pausing time for flavor.*
To reheat, I place a square on a plate. I warm it in the microwave for just 15 seconds. This makes the center soft and warm again. I once served a cold square by mistake. My grandson said it was still good, but warm is better. Storing food well means a sweet treat is always ready. Have you ever tried storing it this way? Share below!
Easy Fixes for Common Baking Hiccups
Is your crust too crumbly to press down? This happens sometimes. Just add one more tablespoon of melted butter. Mix it in with your hands. This will help it stick together nicely.
Is the filling not smooth? Your cream cheese might be too cold. I remember when I used cold cream cheese. It left little lumps in my filling. Always let it sit out to soften first. This makes a silky, perfect filling every time.
Is the middle too jiggly after baking? Do not worry. It will firm up as it cools. Taking it out on time prevents a dry dessert. This matters because a perfect texture brings so much joy. Fixing small problems makes you a more confident cook. Which of these problems have you run into before?
Your Quick Baking Questions Answered
Q: Can I make this gluten-free? A: Yes, just use a gluten-free red velvet cake mix. It works just the same.
Q: Can I make it ahead? A: Absolutely. Bake it a day before you need it. The flavors get even better overnight.
Q: What if I do not have vanilla? A: You can leave it out. The dessert will still taste wonderful.
Q: Can I make a smaller batch? A: Sure. Halve all the ingredients. Use an 8×8 inch pan instead.
Q: Any optional tips? A: A dusting of powdered sugar on top looks pretty. It adds a little extra sweetness too. Which tip will you try first?
Share Your Sweet Comfort With Me
I hope this recipe brings you a quiet moment of joy. Food made with love is the best comfort. It is a little hug from your kitchen.
I would love to see your beautiful creations. Your version might give someone else a great idea. Sharing our cooking stories connects us all. Have you tried this recipe? Tag us on Pinterest!
Happy cooking! —Lena Morales.
Sweet Comfort in Solitude: A quiet, warm indulgence.:
Description
Discover your perfect moment of quiet bliss. Cozy self-care ideas and warm, comforting recipes for a peaceful solo retreat.
Ingredients
=== For the crust: ===
=== For the filling: ===
Instructions
- Preheat the oven to 350°F and lightly spray a 13×9-inch baking dish with nonstick cooking spray.
- In a large bowl, stir the cake mix, melted butter, and egg together to make the crust. Press the mixture evenly into the bottom of the pan.
- In a another large bowl, use a mixer to beat the cream cheese until smooth. Add the eggs and mix well. Add the butter and mix well. Gradually add the powdered sugar and mix until combined. Mix in the vanilla. Pour the filling mixture over the crust.
- Bake for 40 to 50 minutes or until the edges are just firm but the middle is still jiggly. Cool completely before slicing into squares.


Leave a Reply