My First Sourdough Mess
Let me tell you about my first sourdough starter. I named him Fred. Fred was very hungry. I almost threw him out twice. But I kept feeding him flour and water. One morning, he was bubbly and happy. I still laugh at that.
That is why this recipe matters. It uses that lively starter. It turns Fred into something wonderful. You are not just baking. You are keeping a tiny kitchen friend alive. Isn’t that a fun thought?
Why These Rolls Feel Special
These rolls are soft and taste a little tangy. The crust is golden and shiny. That comes from the butter brush at the end. Doesn’t that smell amazing? It fills the whole house with warmth.
This matters because good food is about feeling. A warm roll can make a simple soup feel like a feast. It turns a regular dinner into a small celebration. What is your favorite meal to eat with a warm roll? Tell me, I would love to know.
The Secret is in the Wait
You mix the dough and then you walk away. Let it sit overnight. This long wait is the magic. The starter works slowly. It makes the dough rise and develops the flavor. Patience is your most important ingredient.
In the morning, your dough will be puffy. It might have bubbles. That is a good sign! Fun fact: that slow fermentation is what makes sourdough easier for some people to digest. The waiting does the work for you.
Shaping Your Little Dough Balls
Next, you cut the dough into pieces. You shape them into balls. Cup your hand and roll them on the counter. This smooths the top and seals the bottom. It feels like playing with clay.
Place them in a buttered dish so they snuggle. As they proof again, they will grow into each other. When they bake, they pull apart so easily. Do you like your rolls pull-apart soft, or with more separate crusts? I am a pull-apart person myself.
The Best Part: Baking & Sharing
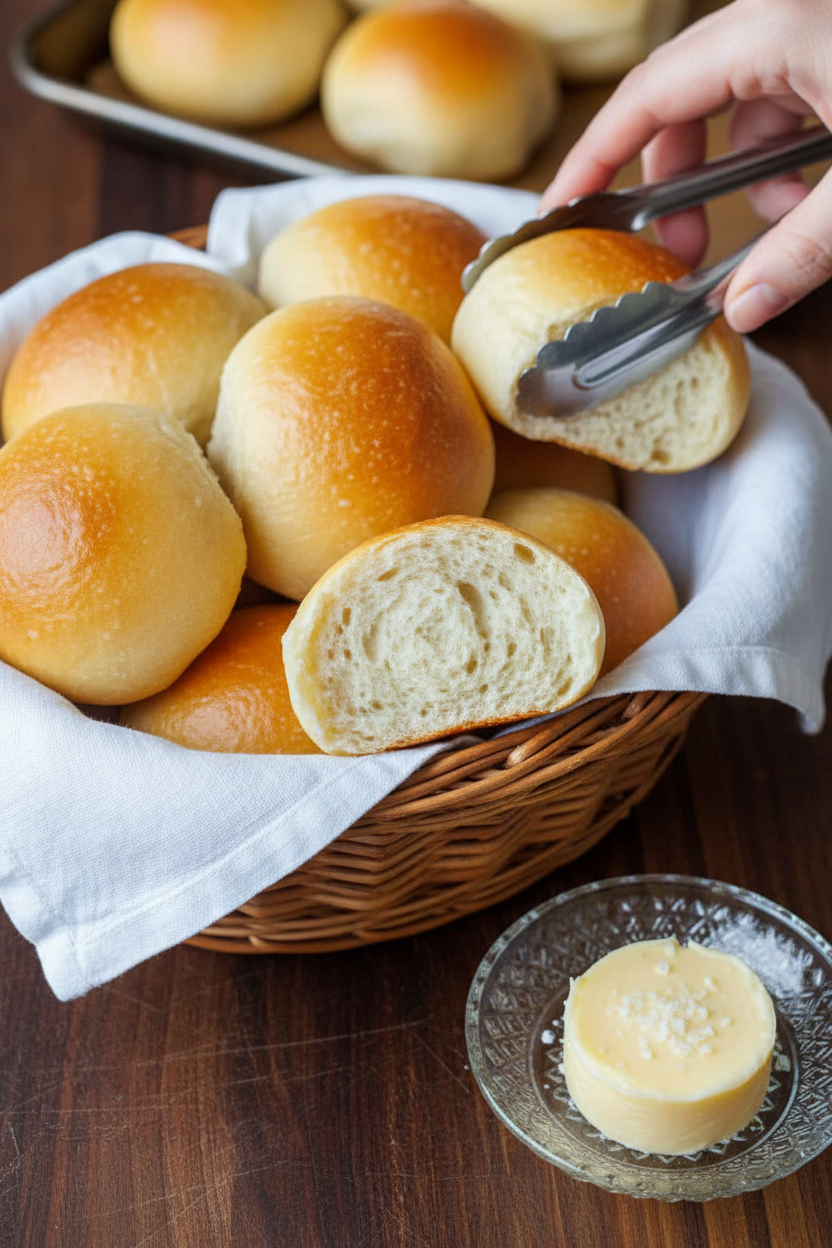
Watch them turn golden in the oven. That is the best part. Take them out and brush on melted butter. It sizzles a little. That butter gives them a beautiful glow and a rich taste.
Let them cool just a little. Then tear one open. The steam comes out. The inside is soft and perfect. Share them while they are warm. Does your family have a special bread or roll recipe passed down? I always love hearing about family food stories.
Ingredients:
| Ingredient | Amount | Notes |
|---|---|---|
| Unsalted butter, melted | 2 Tbsp | Plus more to brush the pan |
| Whole milk | 1 cup | Room temperature |
| Granulated sugar | 2 Tbsp | |
| Fine sea salt | 1 tsp | |
| Bread flour (or all-purpose flour) | 3 cups | |
| Active sourdough starter | ½ cup | |
| Salted butter | 1 tsp | To brush over baked rolls |
My Cozy Sourdough Dinner Rolls
Hello, my dear! Come sit. Let’s bake my favorite rolls. They use my sourdough starter, “Bubbles.” I’ve had him for years. Doesn’t that smell amazing? These rolls are soft and just a little tangy. They take time, but not much work. It’s like a sleepy friend rising overnight. I still laugh at that. Let’s begin.
Step 1
First, let’s wake up our dough. Mix the milk, melted butter, sugar, and salt. Stir until the sugar disappears. It should feel just a little warm. Now add the flour and your active starter. Mix it all up until it’s a shaggy mess. Cover it with a damp towel. Let it rest for 30 minutes. The flour is getting thirsty. (Hard-learned tip: Room temperature milk is key! Cold milk makes the dough grumpy and slow.)
Step 2
Time to knead! Use your mixer or your hands. Knead for about 10 minutes. You want a smooth, soft dough. It should feel like a baby’s cheek. Put it in a buttered bowl. Cover it again with that damp towel. Now, we walk away. Leave it on the counter overnight. It will grow so big! What do you think the starter eats in the flour to grow? Share below!
Step 3
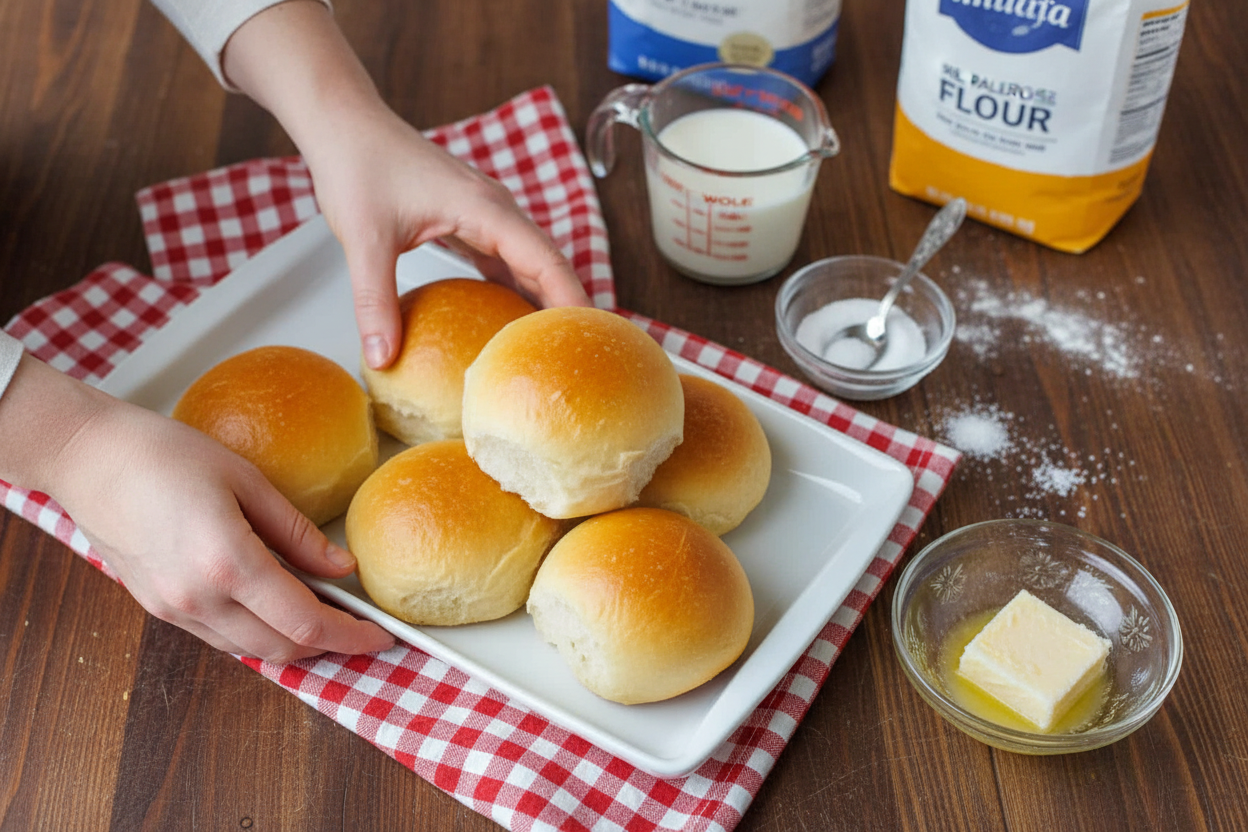
Good morning! See how puffy it is? Gently deflate it. Divide it into 12 pieces. Shape each into a ball. Cup your hand and roll it on the counter. This makes a nice tight skin. It gives them a great shape. Place all the balls in a buttered baking dish. They should be cozy, not crowded.
Step 4
Second nap time! Cover the dish. Let the rolls rise again. A warm spot is best. This takes 2 to 4 hours. They should double and feel puffy. Now, heat your oven to 375°F. Bake them high in the oven. This makes the tops a beautiful golden brown.
Step 5
They’re done when they sound hollow. Brush them with melted butter right away. Oh, that smell! It fills the whole house. Let them cool just a little. Then pull them apart. The steam whispers “eat me.” I always eat one straight away.
Cook Time: 30 minutes
Total Time: 12 hours 45 minutes (mostly hands-off)
Yield: 12 rolls
Category: Bread, Side Dish
Three Fun Twists to Try
Once you master the basic roll, try a twist! It’s so fun. My grandkids love helping with this part. Here are three simple ideas we adore.
Garlic-Herb Butter Swirl
Roll the dough flat. Brush it with garlic butter. Roll it up, slice, and bake. So fragrant!
Everything Bagel Topping
Brush rolls with egg wash before baking. Sprinkle with everything bagel seasoning. Crunchy and perfect.
Little Cheese Stuffed Rolls
Hide a small cube of cheddar inside each ball. A melty, happy surprise in every bite.
Which one would you try first? Comment below!
Serving Them Up With Love
These rolls make any meal special. I love them with a big pot of soup. They’re perfect for sopping up the last bits. Or, split them for mini sandwiches. A holiday dinner isn’t complete without them. Just a pat of good butter is heaven.
For drinks, I have two favorites. A cold glass of apple cider is so nice. For the grown-ups, a pale ale pairs wonderfully. The beer’s bitterness loves the roll’s soft tang. It just works. Which would you choose tonight?
Keeping Your Sourdough Rolls Fresh and Warm
Let’s talk about keeping these rolls lovely. First, cool them completely. Then, store them in a bread bag at room temperature for two days. For longer, freeze them! Wrap each roll tightly in plastic wrap. Pop them all into a freezer bag.
I once froze a whole batch for my grandson’s visit. He reheated one straight from the freezer. His smile was worth it! To reheat, wrap a frozen roll in foil. Warm it in a 300°F oven for 15 minutes. This brings back that soft, fresh-baked feel.
Batch cooking matters for busy families. A warm roll on a school night feels special. It turns a simple meal into a little celebration. Have you ever tried storing it this way? Share below!
Fixing Common Sourdough Roll Hiccups
Sometimes our dough needs a little help. If your rolls are too dense, your starter might be sleepy. Use it when it’s bubbly and active. This gives the dough power to rise high and light.
I remember when my first rolls spread out flat. My kitchen was too cold! Now I proof them in my oven with the light on. That gentle warmth makes all the difference. If your tops brown too fast, tent them with foil. This lets the inside cook without burning.
Fixing small issues builds your cooking confidence. You learn to listen to the dough. And perfect rolls mean better flavor and a happy table. Which of these problems have you run into before?
Your Sourdough Roll Questions, Answered
Q: Can I make these gluten-free? A: I don’t recommend it. Sourdough needs gluten’s structure to trap air and rise properly.
Q: How do I make them ahead? A: After shaping, cover the pan and refrigerate overnight. Let them warm up for an hour before baking.
Q: What if I don’t have bread flour? A: All-purpose flour works just fine! Your rolls will be slightly less chewy, but still delicious.
Q: Can I double the recipe? A: Yes, you can. Just mix it in two separate batches for best results.
Q: Any optional tips? A: A fun fact: brushing with butter right from the oven gives a soft crust. For a shiny top, brush with milk before baking. Which tip will you try first?
From My Kitchen to Yours
I hope you love making these rolls. Sharing food is how we share love. I would be so thrilled to see your creations.
Please show me your golden-brown rolls. Share a picture of your family enjoying them. Have you tried this recipe? Tag us on Pinterest! Your stories make my day brighter.
Happy cooking! —Lena Morales.

Sourdough Dinner Rolls (VIDEO): Sourdough Dinner Rolls Recipe Video Tutorial
Description
Soft, fluffy, and flavorful sourdough dinner rolls made with an active starter for a perfect homemade touch.
Ingredients
Instructions
- Make the Dough – In the bowl of a stand mixer or a large mixing bowl, add milk, butter, sugar, and salt, and stir together to dissolve the sugar.
- Knead the Dough – Add the flour and active sourdough starter and mix together with the paddle attachment or a firm spatula until well combined. Cover with a damp kitchen towel and rest for 30 minutes to allow the gluten to relax. Knead on speed 2 with the dough hook attachment for 10-12 minutes until you have a smooth, soft dough (or knead by hand for 8-10 minutes).
- First Proofing – Bulk Fermentation: transfer dough to a buttered mixing bowl, cover the dough with a damp kitchen towel and leave it on the counter overnight, 8-12 hours.* It should rise to nearly double in size.
- Form the Rolls – Divide the dough into 12 equal pieces (approximately 65g each) with a bench scraper or knife, and shape them into balls by pinching the sides together. Then, gently cup your hand around each ball and roll it over a clean, smooth work surface to tighten the outside of the rolls (this seals the seam on the bottom and gives the rolls better spring in the oven).
- Second Proofing – Place the rolls into a buttered 9×13 glass baking dish, cover with a damp tea towel, and proof until about doubled, about 2 hours in a warm place (80-90°F), or about 3-4 hours at room temperature, depending on the temperature of your room. You can make them ahead at this point – see make-ahead option below*.
- Bake – Preheat the oven to 375°F. Bake in the top third of the oven (this gives the tops better color) of a preheated oven for 25-30 minutes or until the tops are golden brown and the internal temp is 190°F. Brush the hot rolls with melted butter when they come out of the oven and serve.
Notes
- *Total time includes active prep and cook time but not the overnight proofing. For make-ahead option, after the second proofing, you can cover the shaped rolls and refrigerate for up to 24 hours. Let them sit at room temperature for 1 hour before baking.


Leave a Reply