My First Pierogi Disaster
I was about your age when I tried to make pierogi. My dough was too thick. I filled them too much. When I boiled them, they all burst open! My potato filling floated in the water like little clouds. I still laugh at that.
But you know what? We still ate them. They were messy but tasty. This matters because cooking is about trying. It is not about being perfect the first time. Have you ever had a kitchen disaster? What happened?
The Heart of the Matter: The Filling
Let’s start with the potato filling. Boil your potatoes until they are very soft. Mash them until they are smooth. Then, add the butter, cream cheese, and mozzarella.
Doesn’t that smell amazing? The cheese makes it creamy and a little stretchy. This is the cozy heart inside your dough pocket. Fun fact: Adding cream cheese to the filling is my own little trick. It makes them extra rich and happy.
The Dough That Holds It All
The dough is simple. You mix wet things, then add flour. The secret is warm water. It makes the dough soft and easy to roll. Let the dough rest for 30 minutes. This matters because resting makes it relaxed. It won’t fight you when you roll it thin.
If you don’t have a mixer, use a spoon and your hands. I always mix by hand. I like to feel the dough come together. Do you prefer using kitchen tools or your hands to cook?
Shaping Your Little Pillows
Roll the dough very thin. Use a cup to cut circles. Put a small scoop of filling in the middle. Too much filling and it might pop open, like mine did!
Pinch the edges tight. Then pinch them again. This double seal keeps the filling safe inside. You are making little stuffed pillows. It is a very peaceful job.
The Best Part: The Topping
While your water boils, cook the bacon. Get it nice and crispy. Then melt butter right in the pan with the bacon. This makes a magic sauce.
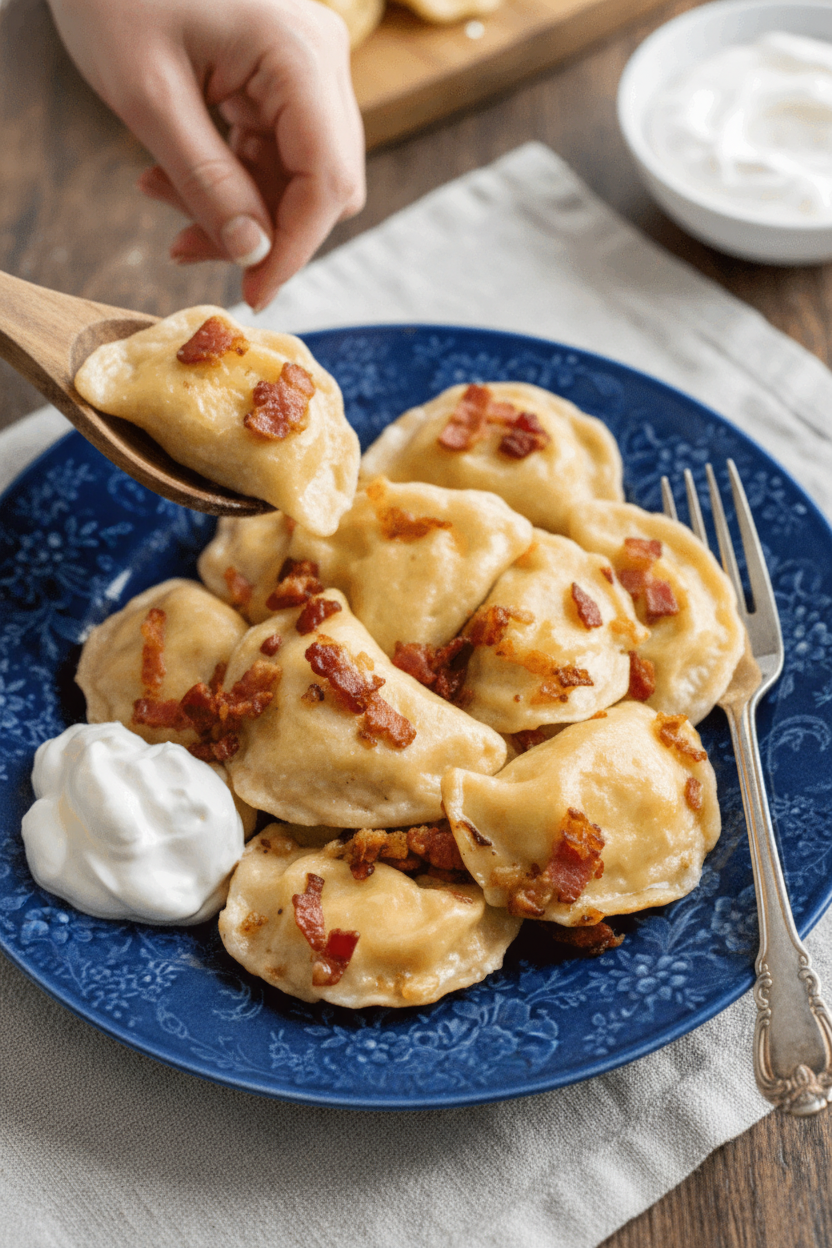
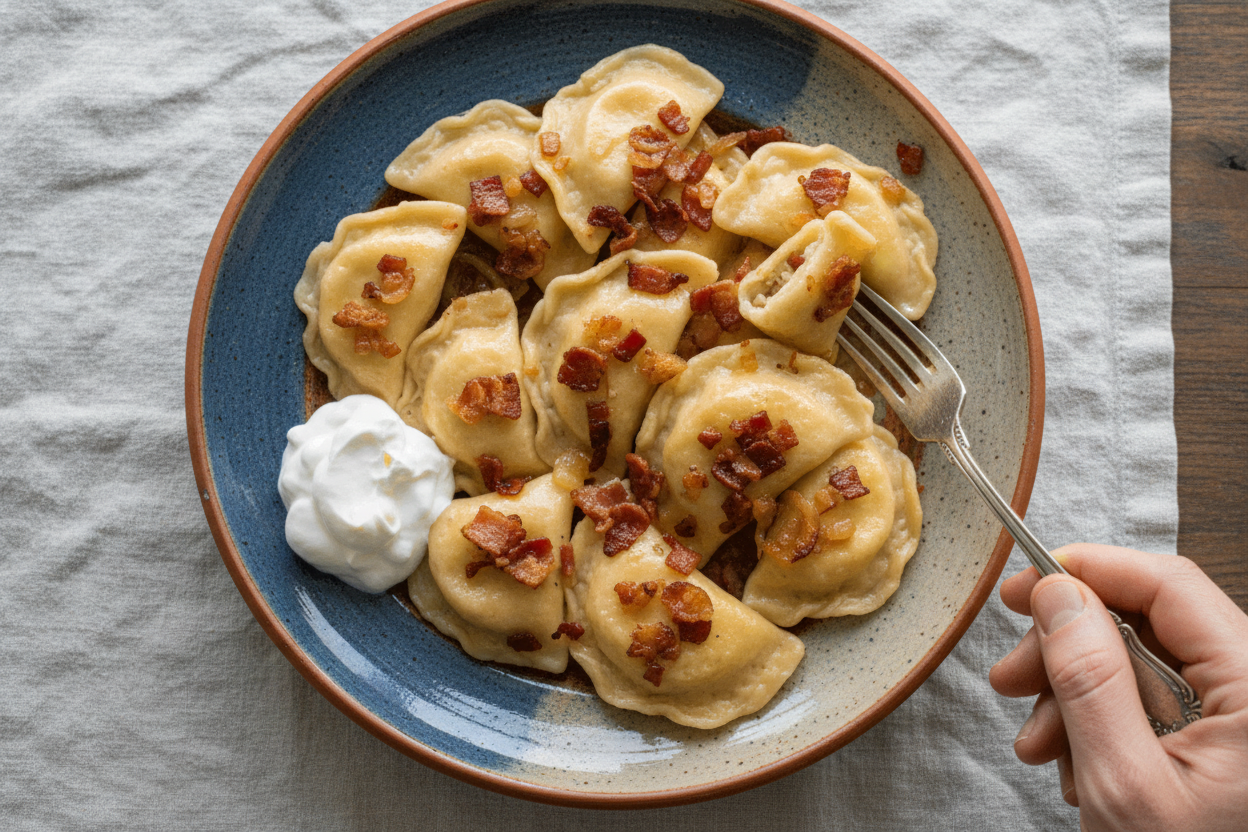
Boil the pierogi until they float. Then, put them in a bowl. Drizzle that buttery bacon over each layer. The fat keeps them from sticking. It also makes them taste incredible. Serve with a cool spoon of sour cream. What is your favorite thing to put on top of pasta or dumplings?
Ingredients:
| Ingredient | Amount | Notes |
|---|---|---|
| Russet potatoes, peeled | 2 lbs (5 medium) | For potato filling |
| Salt | 1/2 tsp | For potato filling |
| Unsalted butter, melted | 2 Tbsp | For potato filling |
| Cream cheese, softened | 2 oz | For potato filling |
| Mozzarella cheese, shredded | 3/4 cup | For potato filling |
| Warm water | 1 cup | For dough |
| Whole milk | 1/4 cup | For dough |
| Sour cream | 2 Tbsp | For dough |
| Extra light olive oil or vegetable oil | 3 Tbsp | For dough |
| Large egg | 1 | For dough |
| Fine sea salt | 1 1/2 tsp | For dough, plus more for cooking |
| All-purpose flour | 4 cups | Measured correctly, for dough |
| Bacon, chopped | 4 oz | For toppings (for 1/3 batch) |
| Unsalted butter | 2 Tbsp | For toppings (for 1/3 batch) |
| Sour cream | To serve | Optional, for toppings |
My Cozy Potato & Cheese Pierogi
Hello, my dear! Come sit. Let’s make pierogi. These are Polish dumplings, like little pillows of happiness. My friend Anya taught me this recipe years ago. We laughed so much, flour everywhere. I still laugh at that. Today, we’ll make the potato and cheese kind. They are so comforting. Doesn’t that smell amazing? Let’s begin together.
Step 1: First, make the filling. Boil your peeled potatoes until they are very soft. This takes about 25 minutes. Drain them and let them cool just a bit. Then, mash them until they are perfectly smooth. No lumps! Now, mash in the salt, melted butter, and cream cheese. Finally, stir in the shredded mozzarella. It will get all stretchy and wonderful. Set this bowl aside. It’s hard not to eat it with a spoon!
Step 2: Next, the dough. Whisk the water, milk, sour cream, egg, oil, and salt in a big bowl. It will look a little funny, but that’s okay. Now, add the flour slowly. Mix it with a spoon first, then use your hands. Knead it until it’s smooth and doesn’t stick. (A hard-learned tip: add the last bit of flour slowly. Too much makes tough dough!). Let the dough rest under a towel for 30 minutes. It needs a little nap.
Step 3: Time to shape our pierogi! Roll half the dough very thin on a floured counter. Use a cup to cut out circles. Place a small scoop of filling in each circle’s center. Fold the dough over to make a half-moon. Pinch the edges shut very tightly. I always crimp mine twice. This keeps the filling safe inside while they swim in the pot. See the little rows of dumplings? They look like happy smiles.
Step 4: While the water boils, cook your bacon topping. Chop bacon and cook it in a pan until crispy. Then, melt butter right into the bacon fat. Turn off the heat. This salty, buttery topping is the best part. Sweet or savory filling: which do you prefer? Share below! Now, boil the pierogi in salty water. They are done when they float to the top! This only takes about 2 minutes. Scoop them out and drizzle that glorious bacon butter all over.
Cook Time: 45 minutes
Total Time: 1 hour 30 minutes
Yield: About 40 pierogi
Category: Dinner, Comfort Food
Three Fun Twists to Try
Once you know the basics, you can play! Here are three ideas. Sweet Blueberry: Use mashed blueberries with a little sugar instead of potatoes. So good with sour cream. Forest Mushroom: Sauté chopped mushrooms and onions for a earthy, vegetarian filling. Summer Garden: Mix mashed potatoes with fresh chopped chives and cheddar cheese. Which one would you try first? Comment below!
Serving Your Little Masterpieces
Pierogi are a whole meal. I love them with a simple side. Try a crisp cucumber salad or some sautéed apples. A big dollop of cool sour cream is a must. For drinks, a cold glass of apple cider is perfect. For the grown-ups, a light lager beer pairs wonderfully. The bubbles cut through the richness. Which would you choose tonight?
Make Once, Enjoy Twice: Storing Your Pierogi
Fresh pierogi are a wonderful treat. But they are also perfect for making ahead. You can keep them in the fridge for two days. Just place them in a single layer on a tray. Cover the tray tightly with plastic wrap.
For longer storage, freeze them. Lay the uncooked pierogi on a baking sheet. Freeze them solid for about two hours. Then, pop them into a freezer bag. They will keep for months. This batch cooking saves a future busy night.
I once forgot to freeze them on a sheet first. They all stuck together in a big lump! Now I never skip that step. To reheat, just boil frozen pierogi straight from the freezer. It is so easy to have a homemade meal ready.
Having a ready-made meal matters. It means less stress on busy weeknights. You can enjoy your own cooking any time. Have you ever tried storing it this way? Share below!
Pierogi Pitfalls and Simple Fixes
Sometimes dough can be tricky. If your dough is too sticky, add a little more flour. Add just one tablespoon at a time. You want it soft but not sticky. This matters for easy rolling.
The filling might try to escape. If your pierogi open while boiling, the seal was not tight enough. Pinch the edges very well. Then, crimp them with a fork or your fingers. A good seal keeps the yummy filling inside.
They can also get soggy after cooking. I remember my first batch turned into mush. The secret is to drizzle that bacon butter between layers. This stops them from sticking and getting soggy. It also adds amazing flavor. Which of these problems have you run into before?
Your Pierogi Questions, Answered
Q: Can I make the dough gluten-free? A: Yes, use a good gluten-free flour blend. The texture will be a bit different but still tasty.
Q: How far ahead can I make them? A: You can make the filling one day ahead. Keep it covered in the fridge.
Q: What cheese can I swap for mozzarella? A: Farmer’s cheese or cheddar work great. Use what you love. Fun fact: In Poland, farmer’s cheese is the classic choice!
Q: Can I double this recipe? A: Absolutely! It is perfect for a big family meal or for freezing.
Q: Any optional tips? A: Sauteed onions are a delicious extra topping. Try them with your bacon. Which tip will you try first?
From My Kitchen to Yours
I hope you love making these little dumplings. Cooking is about sharing stories and full bellies. Your kitchen is filled with love and possibility. I would love to see your creations.
Share a photo of your finished pierogi plate. Let me know how your family liked them. Have you tried this recipe? Tag us on Pinterest! Thank you for cooking with me today.
Happy cooking!
—Lena Morales.

Pierogi Recipe (VIDEO): Pierogi Recipe Video How to Make Polish Dumplings
Description
Learn how to make authentic Polish Pierogi from scratch with this detailed recipe. These dumplings feature a soft, tender dough and a creamy potato and cheese filling, topped with crispy bacon and butter.
Ingredients
Ingredients for Potato Filling:
For the Pierogi Dough:
For the Toppings (For 1/3 batch):
Instructions
- How to Make Potato Cheese Filling: Place potatoes in a pot, add enough water to cover potatoes then bring to a boil over medium/high and continue cooking 25 minutes or until easily pierced with a fork. Drain and cool 5 minutes then mash potatoes until smooth. Mash in 1/2 tsp salt, 2 Tbsp melted butter and 2 oz cream cheese. Mash in 3/4 cup shredded mozzarella cheese. Partially cover and set aside while rolling out the dough.
- To Make Pierogi Dough: In the bowl of a stand mixer (or large mixing bowl if mixing by hand), whisk together 1 cup warm water, 1/4 cup milk, 2 Tbsp sour cream, 1 egg, 3 Tbsp oil, and 1 1/2 tsp salt until blended. Using the dough hook attachment (or wooden spoon if done by hand), add 2 cups flour and mix on speed 2 until incorporated. Add remaining flour 1/2 cup at a time, letting it incorporate before adding more. Add the last bit of flour, 1 Tbsp at a time, just until the dough no longer sticks to the sides of the bowl, or to your hands. Knead on speed 2 or by hand for 2-3 minutes until the dough is smooth and elastic. Cover with plastic wrap and let rest for 30 minutes.
- How to Mold Pierogi: Divide dough into 2 pieces. Cover the second piece and thinly roll the first piece out onto a floured surface to just under 1/8” thickness. Use a 3” diameter round cookie cutter to cut circles from the dough, keeping them as close as possible (collect scraps and keep covered to re-use). Add 1/2 Tbsp of potatoes over each round (a mini scoop makes portioning easy). To form pierogi, pull the 2 edges together and pinch tightly to seal. To ensure a tight seal, crimp the edges a second time with a pinch and twist motion. Cook or freeze pierogi for a future dinner (see freezing instructions in post).
- How to Make Bacon Topping: Make the topping before boiling pierogi so it’s ready to drizzle over pierogi to prevent sticking. In a medium skillet, saute bacon. Once crisp, melt in 2 Tbsp butter and remove from heat.
- How to Cook Pierogi: Bring a pot of water to a rolling boil and add 1 Tbsp salt. Add fresh or frozen pierogi in batches. Cook for about 2 minutes or until the water has returned to a boil and the pierogi float to the top. Remove to a bowl with a strainer or slotted spoon drizzling buttery bacon between layers.
Notes
- Serve warm with optional sour cream on the side. For freezing, place uncooked pierogi in a single layer on a baking sheet until solid, then transfer to a freezer bag. Boil directly from frozen, adding an extra minute or two to the cooking time.


Leave a Reply