Why We Brine a Turkey
Let me tell you a secret. A dry turkey is a sad turkey. Brining is like giving it a big, long drink. The salt water soaks deep into the meat.
It keeps every single bite juicy and tender. This matters because no one wants dry meat on a special day. It makes the cook look like a hero. Do you worry about your turkey drying out?
My First Brining Adventure
I tried brining years ago. I was so nervous. My pot was too small! I had to use a clean bucket from the hardware store.
My husband laughed. He said we were making turkey soup. But it worked. That was the best bird we ever had. I still smile thinking about that bucket. Have you ever had a kitchen experiment go a little funny?
The Simple Magic in the Pot
We warm the broth with herbs first. Doesn’t that smell amazing? It smells like a cozy holiday kitchen. The rosemary and sage are the stars.
Fun fact: The brown sugar isn’t just for sweetness. It helps make the turkey skin a beautiful golden brown later. This matters because we eat with our eyes first. A pretty turkey makes everyone happy.
Getting Your Turkey Ready for Its Bath
First, find the neck and giblets inside the bird. Take them out. They are usually in a little bag. Now, find a big pot or a very clean bucket.
Put your turkey in, breast side down. Make sure the salty water covers it all. The fridge is its home for the night. Do you have a big enough spot in your fridge? That’s always my puzzle!
The Most Important Step
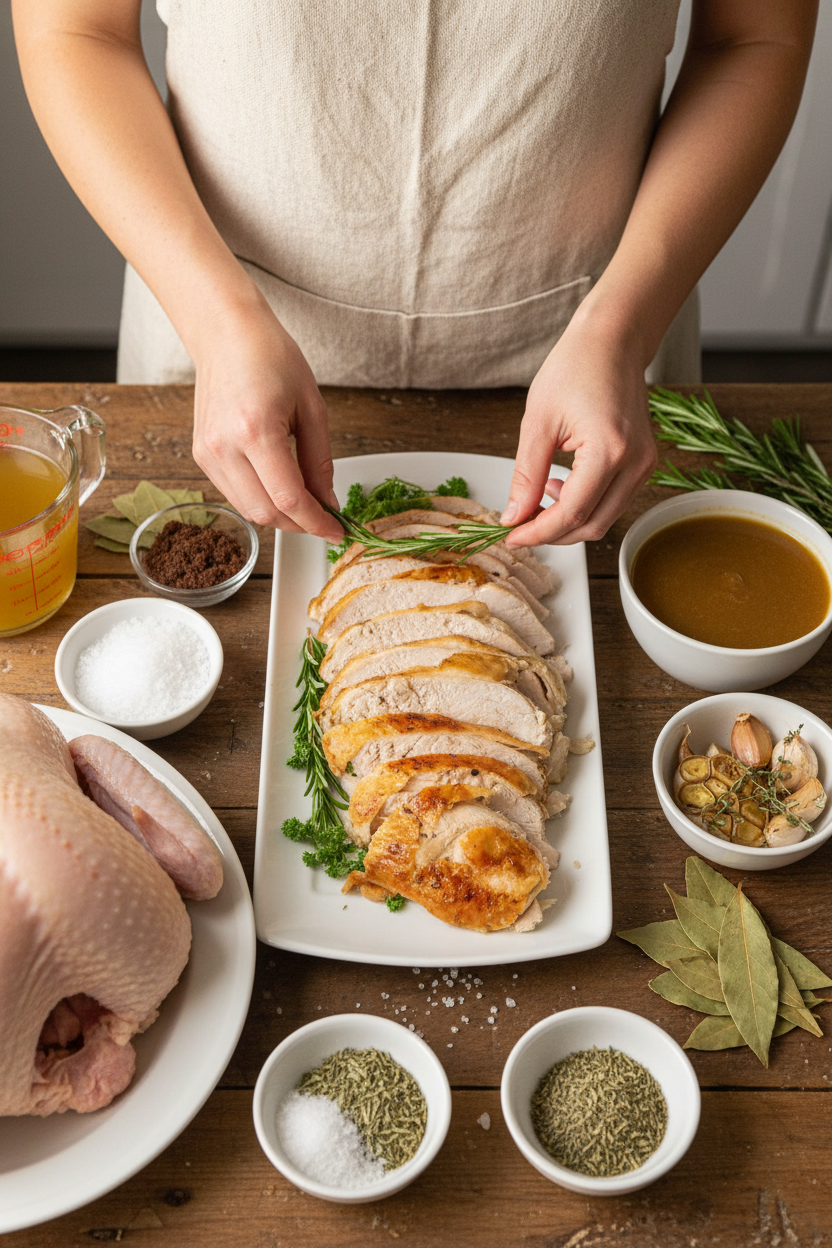
When you take the turkey out, pat it very dry. Use lots of paper towels. This is the key to crispy skin. Wet skin just steams.
Throw all that brine away. Its job is done. Now your turkey is ready for roasting. What’s your favorite part of the turkey? I’m a dark meat girl myself.
Ingredients:
| Ingredient | Amount | Notes |
|---|---|---|
| vegetable broth | 1 gallon | |
| poultry seasoning | 1 tablespoon | |
| dried rosemary | 1 tablespoon | |
| dried sage | 1 tablespoon | |
| dried thyme | 1 tablespoon | |
| bay leaves | 3 | |
| brown sugar | 1/4 cup | |
| sea salt | 1 cup | |
| cold water | 1 gallon | |
| turkey, thawed | 14-16 pound |
My Secret for the Juiciest Holiday Turkey
Hello, my dear. Come sit. Let’s talk turkey. I used to worry about dry, bland birds. Then I learned about brining. It’s like giving your turkey a long, flavorful bath. It makes every single bite so tender and juicy. My family cheers now when I bring it to the table. Doesn’t that smell amazing?
Gather your ingredients. It feels like making a cozy, savory tea for the turkey. That brown sugar is my little secret. It adds a gentle sweetness that balances the herbs. I still laugh at the year I used the entire pot of rosemary from my garden. The turkey was very fragrant!
Step 1: Pour one quart of broth into your pot. Add all those lovely dried herbs, the bay leaves, brown sugar, and salt. Warm it up until it simmers. Stir until the salt and sugar melt away. This makes the flavor magic. Let it cool for a bit. (Hard-learned tip: Don’t skip the cooling! A hot brine will start cooking the turkey skin.) Step 2: Get your turkey ready. Take out the neck and giblets inside. Find a bucket or pot big enough to hold everything. Pour your herby broth in. Add the rest of the cold broth and the gallon of cold water. Give it a good stir. Step 3: Gently place your turkey in, breast-side down. Make sure the salty water fills the cavity. The turkey should be completely covered. I tuck it in like a child. Then the whole pot goes into the fridge overnight. How long should a 12-pound turkey brine? Share below! Step 4: The next day, lift the turkey out. Let all that extra brine drip back into the pot. Throw the brine away. Use paper towels to pat the skin very dry. This helps it get crispy and golden in the oven. Now it’s ready for roasting! Cook Time: 3–4 hours (after brining)Total Time: 18 hours (includes brining)
Yield: Lots of happy servings!
Category: Holiday, Dinner
Three Fun Twists on the Classic Brine
Once you know the basics, you can play. I love adding different flavors. It makes each holiday meal special. Here are three ideas I’ve tried over the years. They each tell a different story.
Sunny Citrus: Add the peel of two oranges and a lemon to the warm broth. It makes the turkey taste bright and fresh.Maple Forest: Swap the brown sugar for real maple syrup. Use a few sprigs of fresh piney rosemary. It smells like a holiday walk.
Spicy Apple: Add two cups of apple cider and a teaspoon of black peppercorns. It gives a little sweet heat. Which one would you try first? Comment below!
Finishing Your Feast
That beautiful, juicy turkey needs friends on the plate. I always make creamy mashed potatoes. They are perfect for catching the gravy. A simple roasted vegetable, like carrots, is lovely too. The sweetness matches the turkey so well. For a fresh crunch, a green salad with apples is nice.
What to drink? For the grown-ups, a glass of chilled apple cider, maybe the sparkling kind, is wonderful. For everyone, I make a big pitcher of cranberry sparkle. Just mix cranberry juice with ginger ale. It’s so festive. Which would you choose tonight?
Storing Your Turkey for Later
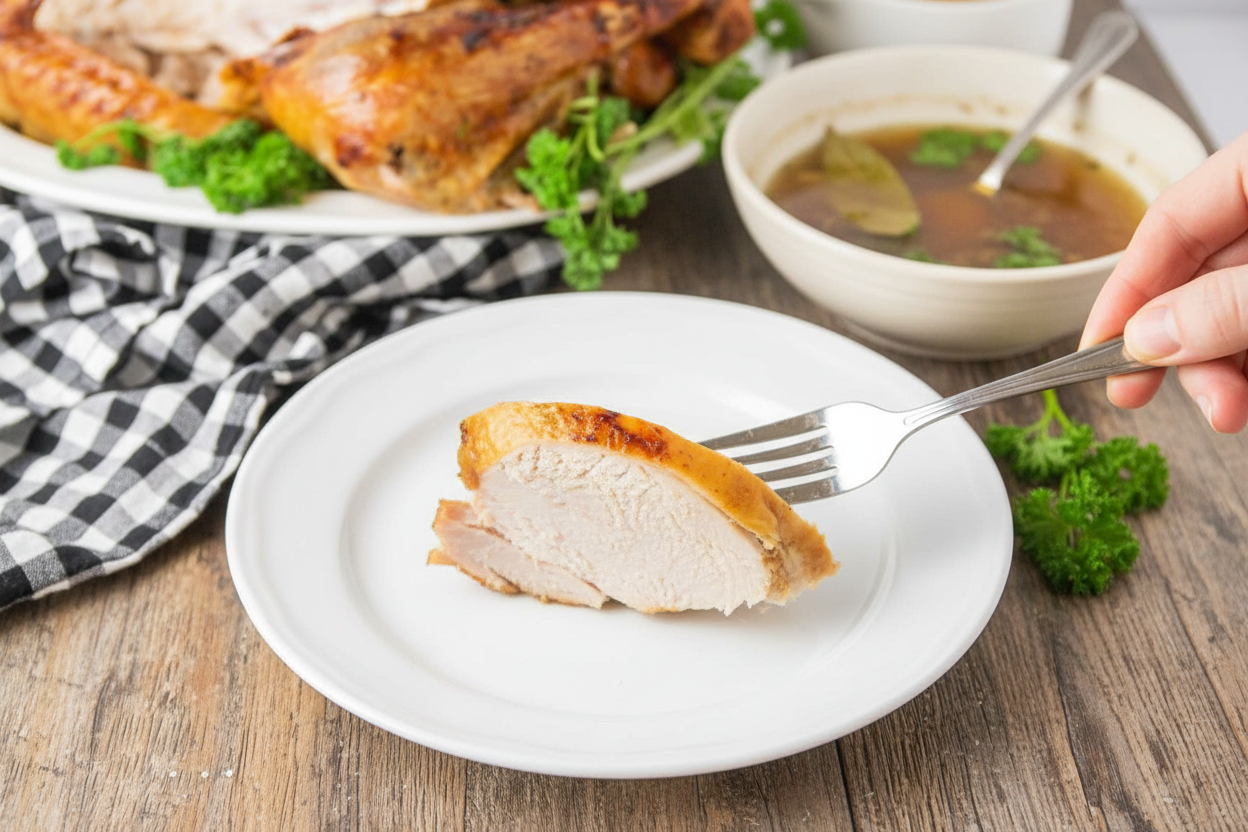
Let’s talk about leftovers. A juicy turkey deserves a good second life. First, let the meat cool completely. Then, store it in airtight containers. It will keep in the fridge for about four days.
For longer storage, the freezer is your friend. I pack slices with a bit of broth in a bag. This keeps them from drying out. They stay good for two months. My first big turkey, I froze everything! We had turkey soup for weeks.
Reheating is simple. Use the oven at a low temperature. Add a splash of broth or water to the pan. This keeps the meat moist and tender. Batch cooking like this saves you time later.
It matters because good food should never be wasted. A planned leftover is a gift to your future self. Have you ever tried storing it this way? Share below!
Simple Fixes for Common Turkey Troubles
Even grandmas have kitchen mishaps. Here are three common issues and easy fixes. First, a dry turkey. This often happens from overcooking. Use a meat thermometer for perfect timing.
Second, bland meat. The brine helps a lot. But seasoning under the skin matters too. I rub herbs and butter right on the breast. I remember when my first turkey was too plain. We used lots of gravy!
Third, a skin that isn’t crispy. Pat the turkey very dry before roasting. A dry skin gets beautifully golden and crisp. Getting these right builds your cooking confidence. It also makes your whole meal taste amazing. Which of these problems have you run into before?
Your Turkey Brine Questions, Answered
Q: Is this brine gluten-free? A: Yes, if your vegetable broth is gluten-free. Always check the label.
Q: Can I make the brine ahead? A: Absolutely. Mix it a day early. Keep it in the fridge until you need it.
Q: I don’t have sea salt. What can I use? A: Use kosher salt instead. Do not use table salt. It is too fine and salty.
Q: Can I brine a smaller turkey? A: Yes. Just cut the brine recipe in half. Use a smaller container too.
Q: Any optional tips? A: Try adding a sliced orange or lemon to the brine. It gives a lovely fresh note. *Fun fact: Brining works by letting salt and water soak into the meat.* Which tip will you try first?
From My Kitchen to Yours
I hope this recipe brings your family together. The best meals are shared with loved ones. I would love to see your beautiful bird on the table.
Share your cooking story with me. Did your family love it? Did you add your own special touch? Have you tried this recipe? Tag us on Pinterest! You can find me at @LenasCozyKitchen.
Thank you for letting me into your kitchen today. Happy cooking!
—Lena Morales.

Perfect Turkey Brine Recipe for Juicy Results
Description
This flavorful brine ensures a perfectly seasoned and incredibly juicy turkey every time.
Ingredients
Instructions
- Add 1 quart of vegetable broth to a medium pot over medium heat. Mix in the poultry seasoning, rosemary, sage, thyme, bay leaves, brown sugar, and salt. Bring the broth to a simmer, and simmer about 5 minutes, stirring to dissolve the salt. Remove from heat and let cool slightly.
- Prepare the turkey by removing the neck and giblets. Pour the broth with seasonings into a large stock pot or 4-5 gallon bucket, and add the remaining vegetable broth and cold water. Stir to combine.
- Place the turkey in the brine, breast side down, making sure that the cavity fills with brine and the brine covers the turkey. Refrigerate the turkey in the bucket overnight (a good rule of thumb is to brine for 1 hour per pound, so a 14 pound turkey should brine for about 14 hours).
- When ready to cook, remove the turkey from the brine, let the excess brine drain from the cavity, and discard the brine. Pat the turkey dry with paper towels before cooking.
Notes
- Nutrition information is an estimate for the entire brine recipe and is largely discarded. The values absorbed by the turkey will be significantly lower.


Leave a Reply