The Little Tarts That Could
I first made these for my grandson’s school fair. I was so nervous. Would the kids like them? They were gone in ten minutes. I still laugh at that.
These mini tarts are little bites of joy. They look fancy but are simple friends. Making them matters because it creates a happy memory. You can share that happiness with someone you love.
Grandma’s Shortcut Dough
Let’s talk about the crust. It is buttery and sweet. You just pulse everything in a food processor. The dough will feel like soft sand at first.
Then it comes together in your hands. Press it into the little muffin cups. Use your fingers to make a nest for the filling. Fun fact: pressing the dough halfway through baking keeps the shell perfect. What is your favorite kitchen tool to use? Mine is my old wooden spoon.
The Magic of the Filling
Now for the creamy heart of the tart. We mix heavy cream and mascarpone. Mascarpone is like a very rich, soft cheese. It makes the filling smooth and dreamy.
Add a little sugar and vanilla. Beat it until it forms soft peaks. Doesn’t that smell amazing? This filling matters because it’s not too sweet. It lets the fruit flavor shine through.
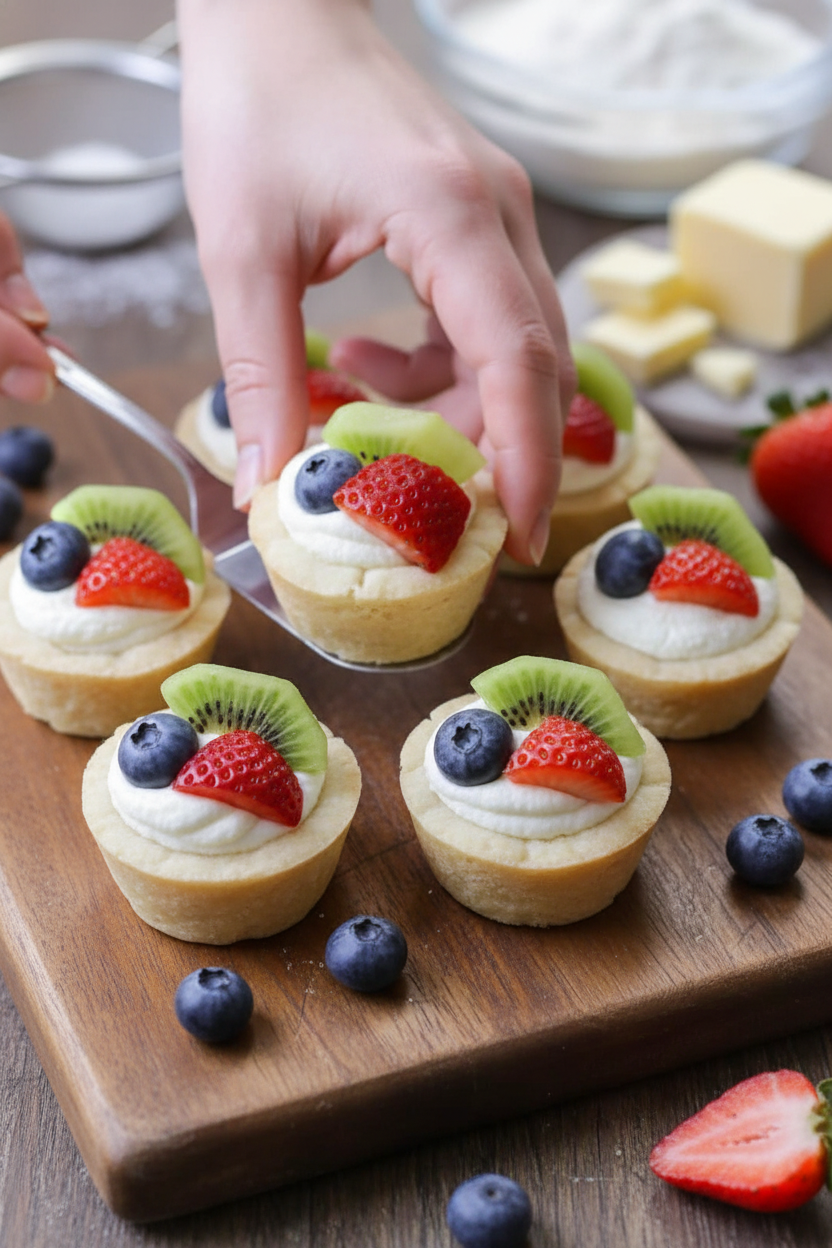
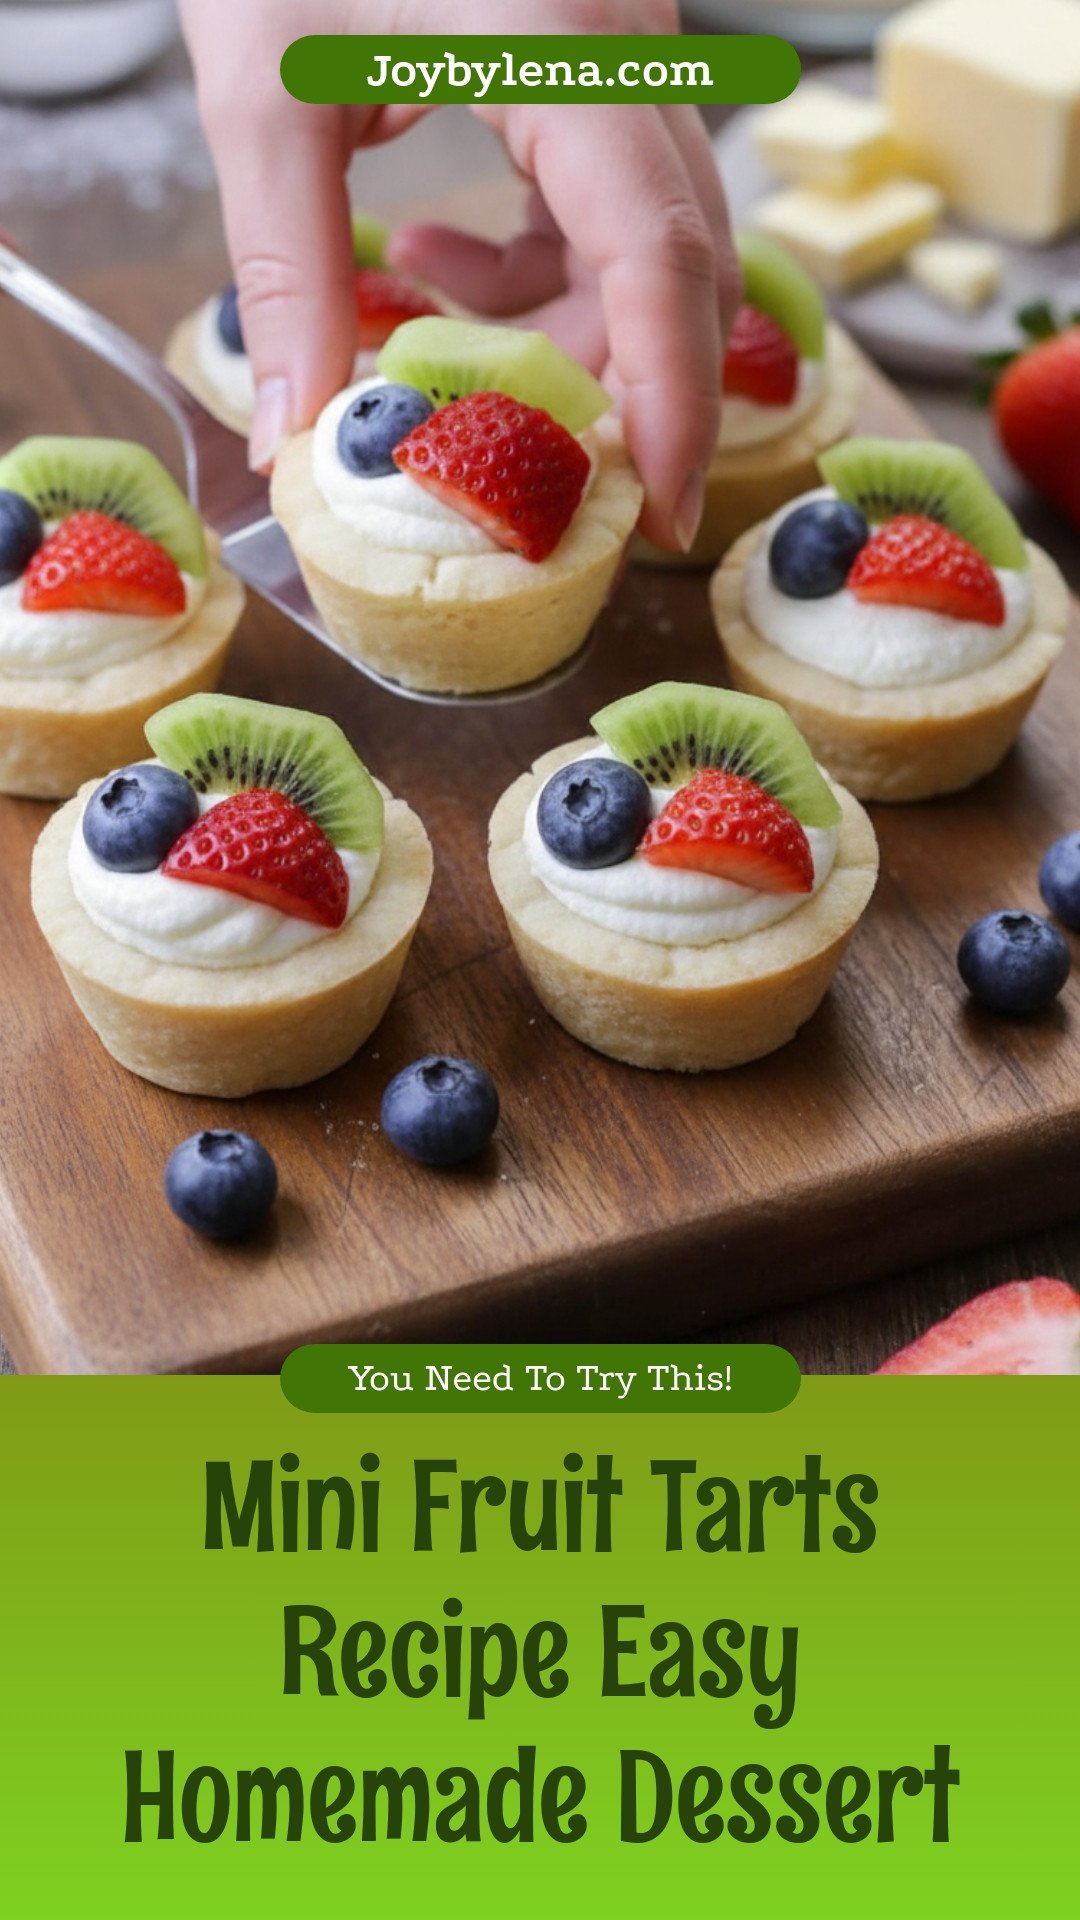
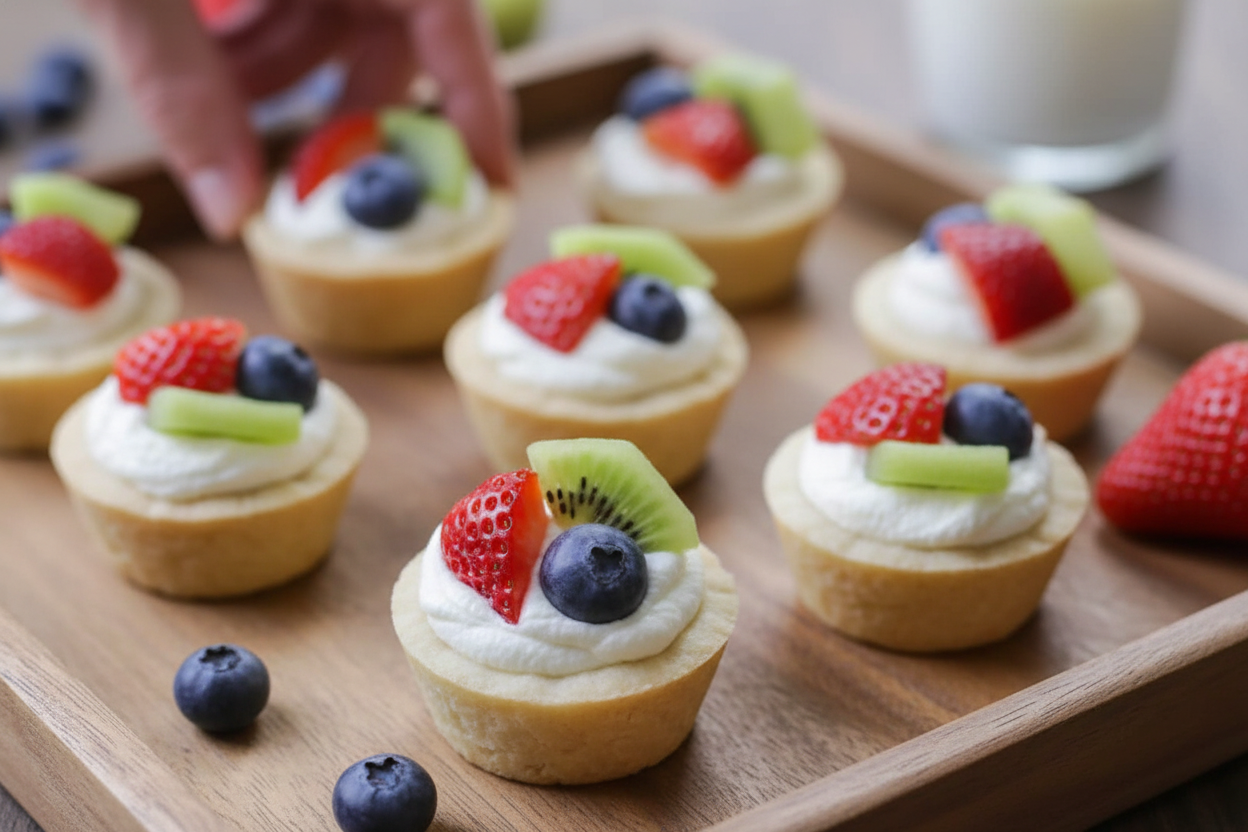
Your Fruit, Your Masterpiece
This is the fun part. Use any fruit you like. Sliced strawberries, blueberries, or kiwi pieces. I love using raspberries. Their color is so cheerful.
Add the fruit right before you serve them. This keeps everything fresh and pretty. What fruit would make you smile to see on a tart? Tell me your favorite.
Stories from the Kitchen Table
Food is more than just eating. It is about the stories we tell. My grandson now asks to make these tarts with me. We talk and laugh while we work.
That time together is the real recipe. It is the secret ingredient. So invite someone to join you. Who would you like to bake with this week? Share your plan with me.
Ingredients:
| Ingredient | Amount | Notes |
|---|---|---|
| All-purpose flour | 1 1/4 cups | For the tart shell |
| Powdered sugar | 2/3 cup | For the tart shell |
| Butter | 3/4 cup | Cut into small pieces, for the tart shell |
| Heavy whipping cream | 1/2 cup | For the filling |
| Mascarpone | 1/2 cup | For the filling |
| Powdered sugar | 2 tbsp | For the filling |
| Vanilla extract | 1 tsp | For the filling |
| Fruit | As needed | For topping (e.g., berries, kiwi) |
My Mini Sunshine Tarts
Hello, my dear! Come sit. Let’s make something sweet. These little tarts are like edible sunshine. They always make me smile. I used to make them with my grandkids. Their little fingers would sneak the fruit topping. I still laugh at that.
The secret is in the crust. It’s buttery and just crumbles perfectly. Doesn’t that smell amazing? And the filling is so creamy and light. You will feel like a fancy baker. But it’s really quite simple. I promise.
Step 1: Prepare the Oven & Pan
First, get your oven ready. Heat it to 350 degrees. Grab your mini muffin pan. Give it a quick spray with cooking spray. This keeps our little tart shells from sticking. Trust me, you don’t want them stuck in there.
Step 2: Make the Dough
Now, let’s make the dough. Put your flour and powdered sugar in the food processor. Pulse it a few times. Then add your butter pieces slowly. Pulse until it looks like wet sand. Then it will start to clump together. That’s when you know it’s perfect.
Step 3: Shape the Tart Shells
Scoop dough into tablespoon-sized balls. Flatten each ball into a little disc. Press it firmly into a muffin cup. Push the dough up the sides. (A hard-learned tip: If your dough gets too warm, pop it in the fridge for 10 minutes. Cold butter makes a flaky crust!).
Step 4: Bake the Shells
Time to bake! Bake your shells for 15 minutes. Halfway through, peek at them. Use the back of a spoon to press the centers down. This makes a nice little cup for our filling. Let them cool for 5 minutes in the pan. Then move them to a rack. Why do we let them cool completely before filling? Share below!
Step 5: Make the Filling & Assemble
Make the dreamy filling. In a bowl, mix the cream, mascarpone, sugar, and vanilla. Beat it until it’s thick and holds a peak. It will look like fluffy clouds. Spoon or pipe it into your cool shells. Refrigerate them until you’re ready. Top with beautiful fruit right before you serve!
Cook Time: 15 minutes
Total Time: 45 minutes
Yield: About 24 mini tarts
Category: Dessert, Snack
Three Sweet Twists to Try
You can dress these tarts up for any season. It’s so much fun. Here are my favorite ideas. They always impress guests.
- Lemon Sunshine: Add a teaspoon of lemon zest to the filling. Top with blueberries. It’s so fresh and bright.
- Chocolate Dream: Brush the baked shells with melted chocolate first. Let it set. Then add the filling and strawberries. A little secret I love.
- Autumn Spice: Mix a pinch of cinnamon into the dough. Fill as normal. Top with thin apple slices and a drizzle of caramel.
Which one would you try first? Comment below!
Serving Your Little Masterpieces
Presentation is part of the joy. Arrange them on a pretty plate. Use different colored fruits for a rainbow effect. A mint leaf beside each one looks so fancy. Serve them on a tiered stand for a real tea party feel.
For drinks, I have two favorites. A cup of hot herbal tea, like chamomile, is lovely. For a special grown-up treat, a little glass of sweet Moscato wine pairs perfectly. The bubbles cut through the creamy filling. Which would you choose tonight?
Keeping Your Tarts Tasty Later
These little tarts are best eaten the day you make them. But life happens! You can store them in the fridge. Just cover them tightly with plastic wrap. They will keep for one day.
I don’t recommend freezing the filled tarts. The shells can get soggy. But you can freeze the baked, empty shells for a month. Thaw them at room temperature before filling. This is a great batch-cook trick.
I once made a double batch of shells. I stored them for a surprise visit from my grandkids. It made dessert so easy! Batch cooking matters. It turns a treat into a quick, happy moment. Have you ever tried storing it this way? Share below!
Simple Fixes for Common Tart Troubles
Is your dough too crumbly? It needs more butter. Add one more tablespoon, piece by piece. The dough should stick together when you pinch it. This matters for a shell that holds its shape.
Did your tart shells puff up in the oven? Press them down halfway through baking. Use the back of a spoon. I remember when I forgot this step once. My shells looked like little balloons!
Is your filling too runny? Make sure your cream and bowl are very cold. Beat it until it forms stiff peaks. This matters for a creamy, dreamy filling that doesn’t drip. Which of these problems have you run into before?
Your Quick Tart Questions, Answered
Q: Can I make this gluten-free? A: Yes! Use your favorite gluten-free flour blend. The texture will be a bit more crumbly.
Q: Can I make parts ahead? A: Absolutely. Bake shells and make filling a day early. Keep them separate in the fridge.
Q: What if I don’t have mascarpone? A: Use full-fat cream cheese instead. Let it soften first for easy mixing.
Q: Can I make bigger tarts? A: Sure! Use a regular muffin pan. Just bake the shells a few minutes longer.
Q: Any fun topping ideas? A: Try a drizzle of honey or a sprinkle of lemon zest. A fun fact: berries are my favorite because they are like little jewels. Which tip will you try first?
From My Kitchen to Yours
I hope you love making these sweet bites. Cooking is about sharing joy. It is about creating small, delicious memories. I would love to see your kitchen creations.
Show me your beautiful fruit tarts. Let me know how your family liked them. Have you tried this recipe? Tag us on Pinterest! Your pictures always make my day.
Happy cooking!
—Lena Morales.
Mini Fruit Tarts: Mini Fruit Tarts Recipe Easy Homemade Dessert
Description
Experience the delightful contrast of textures and flavors with these Mini Fruit Tarts, featuring a buttery shortbread crust and creamy vanilla mascarpone filling.
Ingredients
1/2 cup heavy whipping cream
1/2 cup mascarpone
2 tbsp powdered sugar
1 tsp vanilla extract
Instructions
- Heat oven to 350 degrees. Spray a mini muffin pan with non-stick cooking spray.
- In a food processor pulse together the flour and powdered sugar, add butter gradually and pulse until the dough begins to hold together.
- Scoop into 1 Tbsp size balls, flatten into a disc, and then press firmly into the muffin tins (dough will come up the sides). Repeat with the remaining dough.
- Bake tart shells for 15 minutes. (Half way through press centers down with back end of measuring spoon). Cool in pan for 5 minutes and then move to a rack.
- Make the filling by beating the cream, mascarpone, sugar, and vanilla until you have stiff peaks.
- Spoon or pipe filling into the cooled shells. Refrigerate until ready to serve and top with fruit right before.
Notes
- For best results, ensure all ingredients for the crust and filling are cold. Top with fresh berries, kiwi, or mango for a colorful presentation.


Leave a Reply