The Salad That Waits for You
Some foods are best right away. This salad is not one of them. It needs a long, quiet night in the fridge. The flavors get to know each other. They become friends.
I learned this from my Tia Rosa. She always made it the day before a picnic. “Lena,” she’d say, “good things take time.” She was right. That wait makes every bite better. It’s a lesson in patience. Patience makes food taste wonderful.
My Favorite Mix-Up
I once used leftover turkey instead of ham. I was so nervous. But you know what? It was delicious. That’s the magic of this salad. You can use what you have.
Got chicken? Great. Love tuna? Perfect. Don’t like olives? Leave them out. This recipe is like a friendly suggestion. It’s not a strict rule. Your kitchen, your rules. What’s your favorite protein to toss in a salad? I’d love to hear your ideas.
The Secret in the Dressing
That creamy dressing is the heart of it. The two mustards are the secret. Dijon is tangy. Dry mustard is a little spicy. Together, they sing.
Mix it all in a bowl. Doesn’t that smell amazing? A little sweet, a little sharp. Fun fact: The vinegar helps keep the dressing smooth. It stops it from separating overnight. This dressing matters because it coats everything evenly. It ties all the different layers into one happy family.
Building Your Layers
Start with the crunchy lettuce at the bottom. It’s like a green nest. Then add your cool pasta. Now the fun part. Sprinkle on those bright peas and peppers.
I love the pop of color. Then your meat, the olives, and that wonderful dressing. Last, a snow of Parmesan on top. Do you prefer your salads very colorful, or more simple? I always add extra peas for their sweet little pop.
Why This All Works
This salad is a full meal in a bowl. You have your pasta for energy. You have your meat for strength. The veggies keep things fresh and light. That’s why it matters. It feeds your whole body.
It also feeds a crowd. I still laugh at that one family reunion. We had three different versions! Everyone made it their own. That’s the best part of cooking. Sharing food and stories. What’s the best dish you’ve ever taken to a party? Tell me about it.
Ingredients:
| Ingredient | Amount | Notes |
|---|---|---|
| Mini penne (or favorite pasta) | 4 cups | |
| Mayonnaise | 3/4 cup | |
| Sour cream | 3/4 cup | |
| Sugar | 1 1/2 teaspoons | |
| Champagne vinegar | 1 1/2 teaspoons | |
| Dijon mustard | 1 1/2 teaspoons | |
| Dry mustard | 1 teaspoon | |
| Worcestershire sauce | 1/2 teaspoon | |
| Celery salt | 1 teaspoon | |
| Romaine lettuce, chopped | 4 cups | |
| Green bell pepper, chopped | 1/4 cup | |
| Green peas, frozen | 1/2 cup | |
| Celery, chopped | 1/4 cup | |
| Red onion, sliced | 1/4 cup | Optional |
| Ham, chicken, tuna, or salmon, cooked & chopped | 2 cups | |
| Black olives, sliced | 1/2 cup | |
| Grated Parmesan Cheese | 1/2 cup |
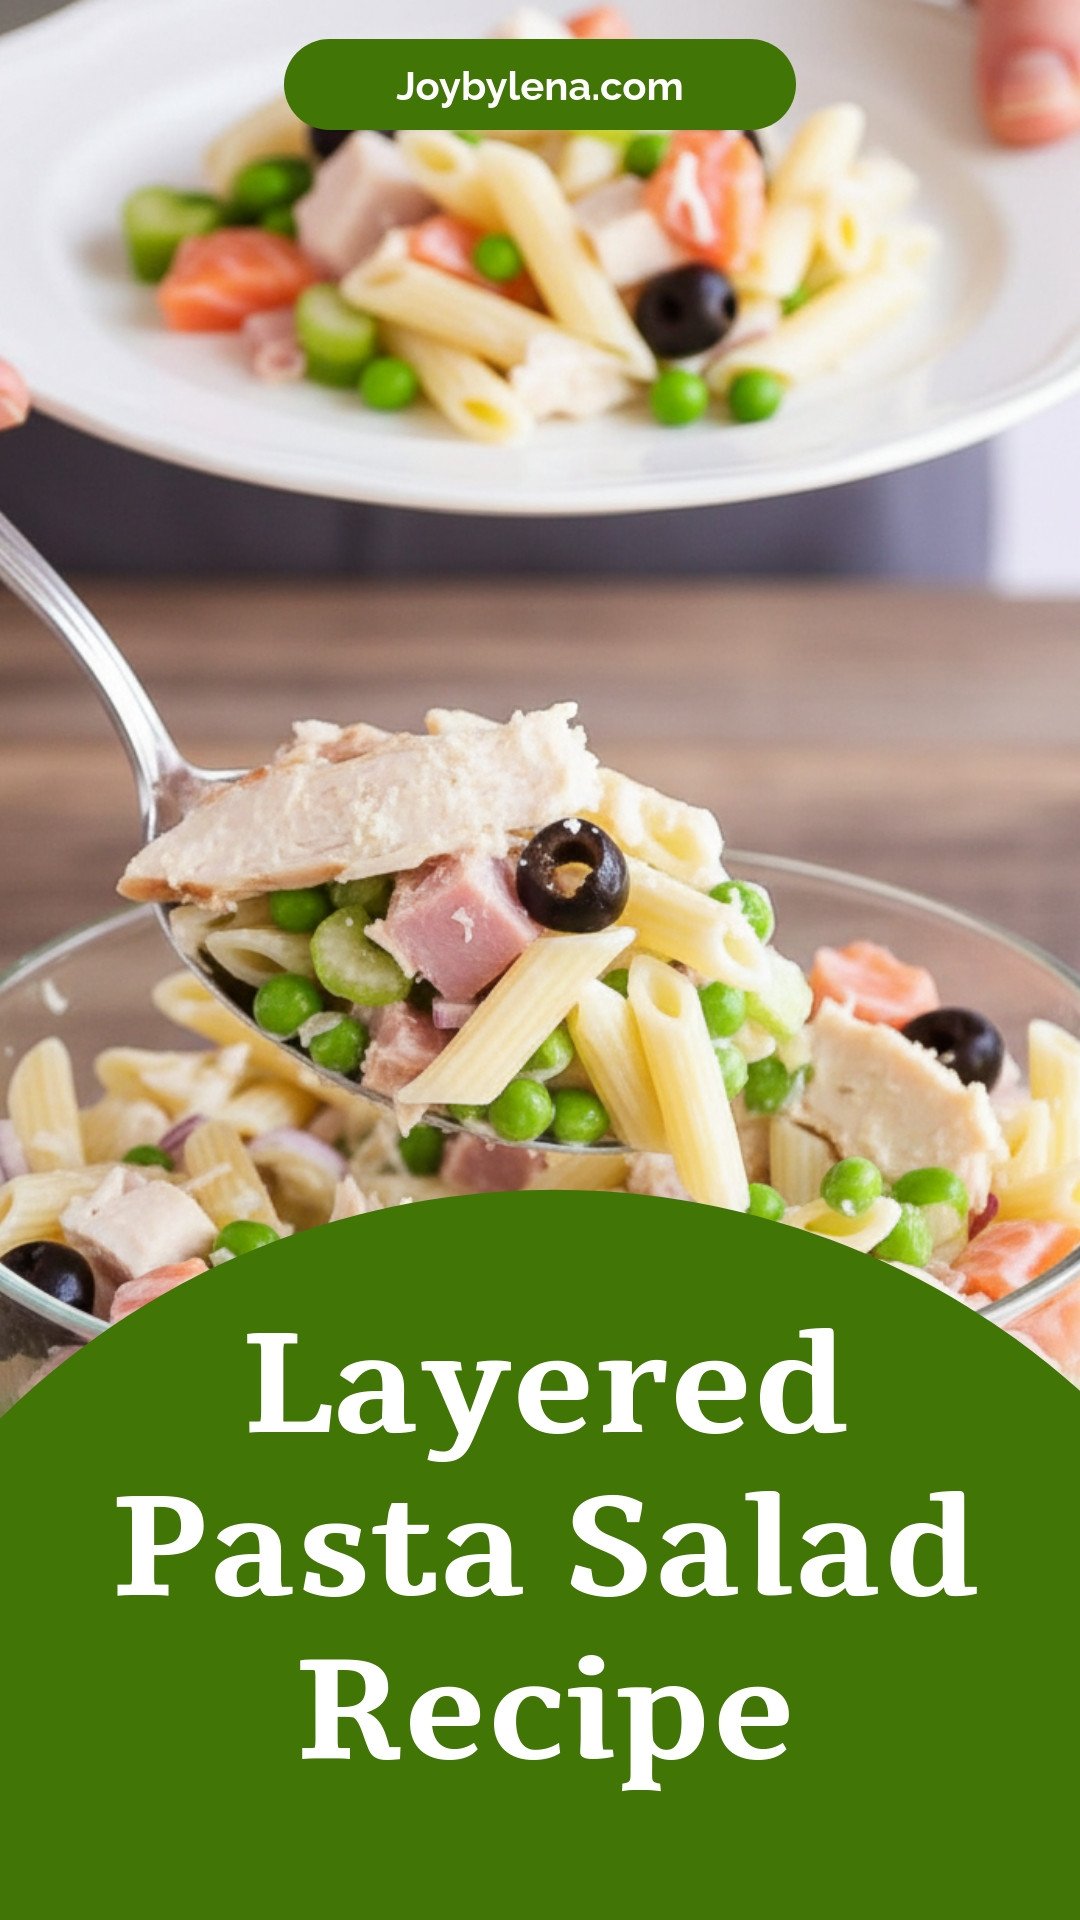
My Famous Layered Pasta Salad
Hello, my dear! Come sit. Let’s make my famous layered salad. It’s perfect for a family picnic. I’ve been making it for years. My grandkids always ask for it. It gets better as it sits overnight. All those lovely flavors become friends in the fridge. Doesn’t that sound wonderful?
We call it a “layered” salad for a reason. You build it like a tasty tower. The magic happens while it sleeps. You toss it just before eating. Every bite is a little surprise. I still laugh at how my husband tries to peek under the lid. He just can’t wait!
Step 1: Cook the Pasta
First, cook your mini penne pasta. Follow the directions on the box. Drain it and let it cool completely. A hot pasta will wilt our lettuce. I spread mine on a big plate. I let the fan blow on it. (My hard-learned tip: Toss the cooled pasta with a tiny drizzle of oil. This keeps it from sticking together!)
Step 2: Make the Dressing
Now, let’s make the creamy dressing. Grab a medium bowl. Add the mayo and sour cream. Then, all those little flavor boosters go in. The sugar, both mustards, vinegar, Worcestershire, and celery salt. Whisk it until it’s smooth and happy. Doesn’t that smell amazing? It’s tangy and rich.
Step 3: Build the Base
Time to build our tower! Use a big, clear bowl if you have one. Start with the chopped romaine lettuce. Pat it down gently. Then, add your cooled pasta in an even layer. This is our sturdy base. What’s your favorite pasta shape for a salad? Share below!
Step 4: Add Veggies & Protein
Here is the fun part. Layer on your chopped veggies. I use green pepper, celery, and peas. The peas can go in frozen! They thaw in the fridge. Add the red onion if you like a little bite. Then, your protein goes on next. I often use leftover baked ham.
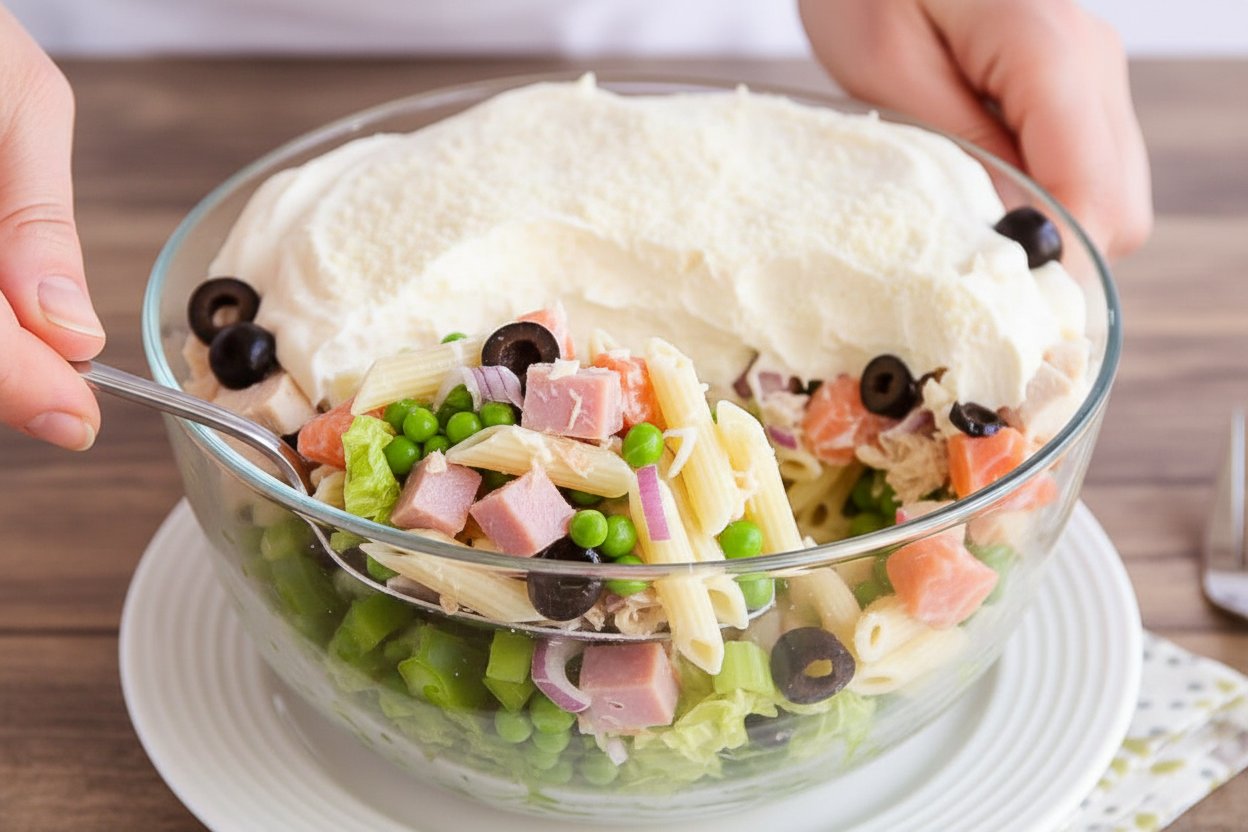
Step 5: Top & Chill
Almost done! Scatter the sliced black olives over everything. Now, carefully spread that creamy dressing over the top. Seal it like a lid. Last, sprinkle the Parmesan cheese over the dressing. Cover the bowl tightly. Let it rest in the fridge overnight. The waiting is the hardest part!
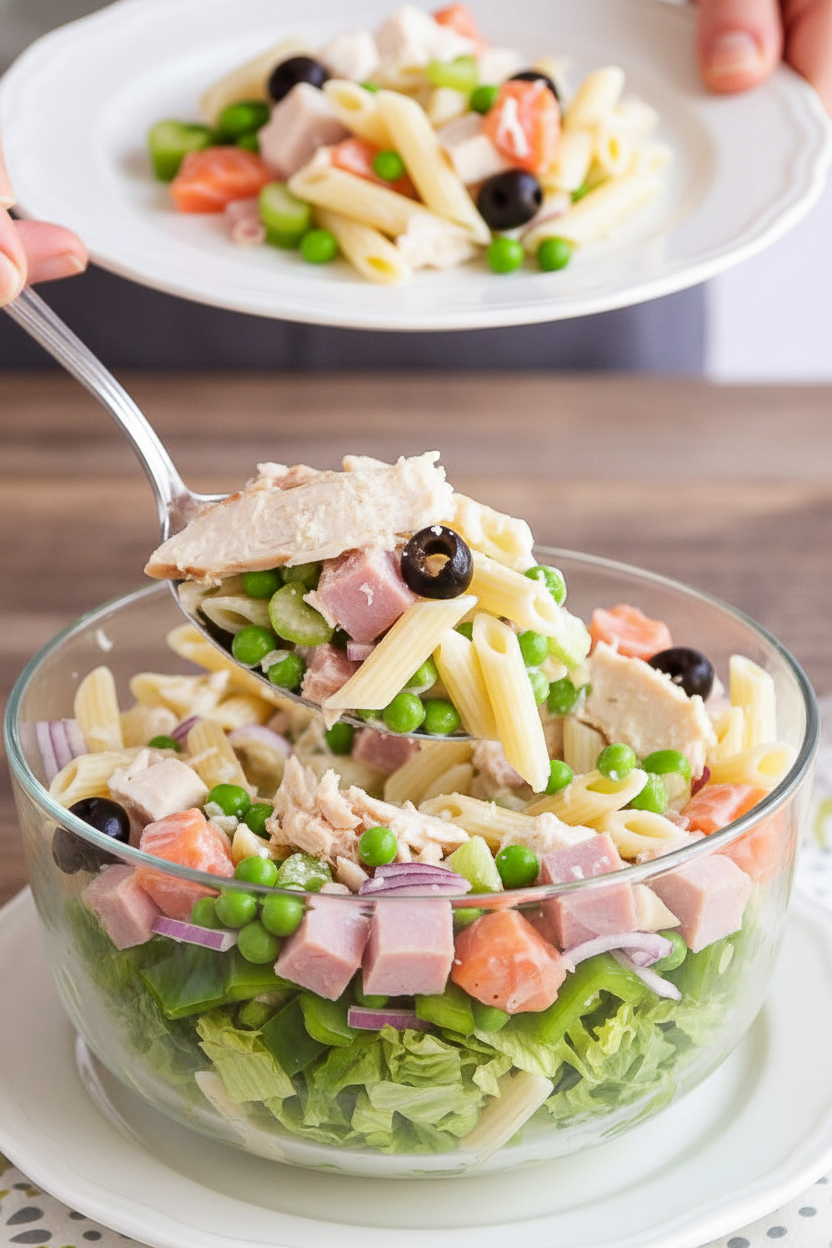
Step 6: Toss & Serve
The big moment! Take your salad from the fridge. Grab two big spoons. Toss everything together until it’s beautifully mixed. All the layers become one delicious dish. Serve it cold. See how the flavors mingled? It was worth the wait.
| Cook Time | 20 minutes |
| Total Time | 12 hours 20 minutes (includes chilling) |
| Yield | 6 servings |
| Category | Lunch, Side Dish |
Three Fun Twists to Try
This salad is like a blank canvas. You can paint it with different flavors. Here are my favorite ideas. They make it feel like a whole new meal.
- The Garden Party: Skip the meat. Add chickpeas and chopped sun-dried tomatoes. It’s hearty and vegetarian.
- The Zesty Fiesta: Use cooked taco-seasoned chicken. Swap the dressing for ranch mixed with a little salsa. Olé!
- The Summer Shore: Use flaked tuna or salmon. Add chopped dill and a squeeze of lemon to the dressing. So fresh!
Which one would you try first? Comment below!
Serving It Up Just Right
This salad is a meal all by itself. But I love to make a spread. It feels so special. For a simple lunch, I serve it with crusty bread. For dinner, add some sweet watermelon slices. A few cherry tomatoes on the side look so cheerful.
What to drink? On a hot day, I love iced tea with lemon. It’s so refreshing. For a grown-up gathering, a crisp white wine pairs beautifully. It cuts through the creaminess. Which would you choose tonight?
Keeping Your Pasta Salad Happy
This salad loves a good night’s sleep in the fridge. Cover it tightly. It will keep for three days. The flavors get friendlier overnight.
Do not freeze this salad. The creamy dressing will separate. The veggies will get sad and soggy. I learned this the hard way once. My frozen salad became a watery soup!
You can batch-cook the pasta and chop the veggies ahead. Store them separately in containers. Mix them with the dressing the day you eat it. This saves so much time for busy families.
Storing food properly matters. It keeps your family safe. It also makes sure your hard work tastes delicious later. Have you ever tried storing it this way? Share below!
Simple Fixes for Common Salad Troubles
Is your salad too dry? Just mix a little milk into the leftover dressing. Add a spoonful and toss. This makes it creamy again.
Worried about raw onion breath? Soak your sliced onions in cold water for ten minutes. This tames their sharp bite. I remember when my grandson finally ate onions this way!
Is the salad bland? Taste your dressing before you pour it. It might need a pinch more salt. This step builds your cooking confidence. You learn to trust your own taste buds.
Getting the flavor right matters. It turns simple ingredients into a special meal. Which of these problems have you run into before?
Your Pasta Salad Questions, Answered
Q: Can I make this gluten-free? A: Yes! Use your favorite gluten-free pasta. Cook it just until tender.
Q: How far ahead can I make it? A: Assemble it up to 24 hours before serving. The wait makes it better.
Q: I don’t have peas. What can I use? A: Try chopped cucumber or shredded carrots. Use what you love.
Q: Can I make a smaller portion? A: Absolutely. Just cut all the ingredients in half. It works perfectly.
Q: Is the red onion really optional? A: Of course! My granddaughter skips it. Your kitchen, your rules. Which tip will you try first?
From My Kitchen to Yours
I hope you love making this layered salad. It is perfect for sunny days and family picnics. Fun fact: The word “pasta” comes from an Italian word for “paste.”
I would love to see your creation. Share a photo of your beautiful layers. Have you tried this recipe? Tag us on Pinterest! Thank you for cooking with me today.
Happy cooking!
—Lena Morales.
Layered Pasta Salad
Description
A make-ahead pasta salad with layers of crisp vegetables, savory meat, and a creamy, tangy dressing, all topped with Parmesan cheese.
Ingredients
Instructions
- Cook your choice of pasta according to package directions. Drain and let cool completely.
- In a medium bowl, mix mayonnaise, sour cream, sugar, champagne vinegar, Dijon mustard, dry mustard, Worcestershire sauce, and celery salt to make the dressing.
- In a large bowl, start layering the ingredients: first the chopped romaine lettuce, then the cooled pasta.
- Continue layering with green bell pepper, frozen peas, chopped celery, red onion (if using), your choice of meat (ham, chicken, tuna, or salmon), and black olives.
- Pour the dressing evenly over the top layer. Sprinkle the grated Parmesan cheese over the dressing.
- Cover the bowl and refrigerate overnight or for a minimum of 12 hours. Toss all ingredients together right before serving.
Notes
- For best results, do not toss the salad until ready to serve to maintain the distinct layers and textures. The frozen peas will thaw perfectly in the refrigerator.


Leave a Reply