The Butter That Started It All
Let’s talk about the heart of this dish. It’s that lemon-herb butter. You mix soft butter with garlic and parsley. Add a good squeeze of lemon. Doesn’t that smell amazing? It’s like a little garden in a bowl.
You stuff this butter inside the chicken. Why does this matter? Because when it cooks, it melts into a secret sauce. Every bite is juicy and full of flavor. It’s the surprise that makes everyone smile. What’s your favorite herb to cook with? I always lean on parsley.
A Little Pocket of Love
Now, we make a pocket in the chicken. Use a small, sharp knife. Be gentle, like you’re tucking in a blanket. Slide the knife in, but don’t go all the way through. I still laugh at that. My first try, I made a hole! The butter leaked out. It was a tasty mess.
You spoon that cool butter inside. Then pinch the opening shut. This step is important. It keeps all that good flavor locked in. Pat the chicken dry first. It helps the breading stick. Have you ever had a kitchen mishap that turned out okay?
The Crispy, Golden Jacket
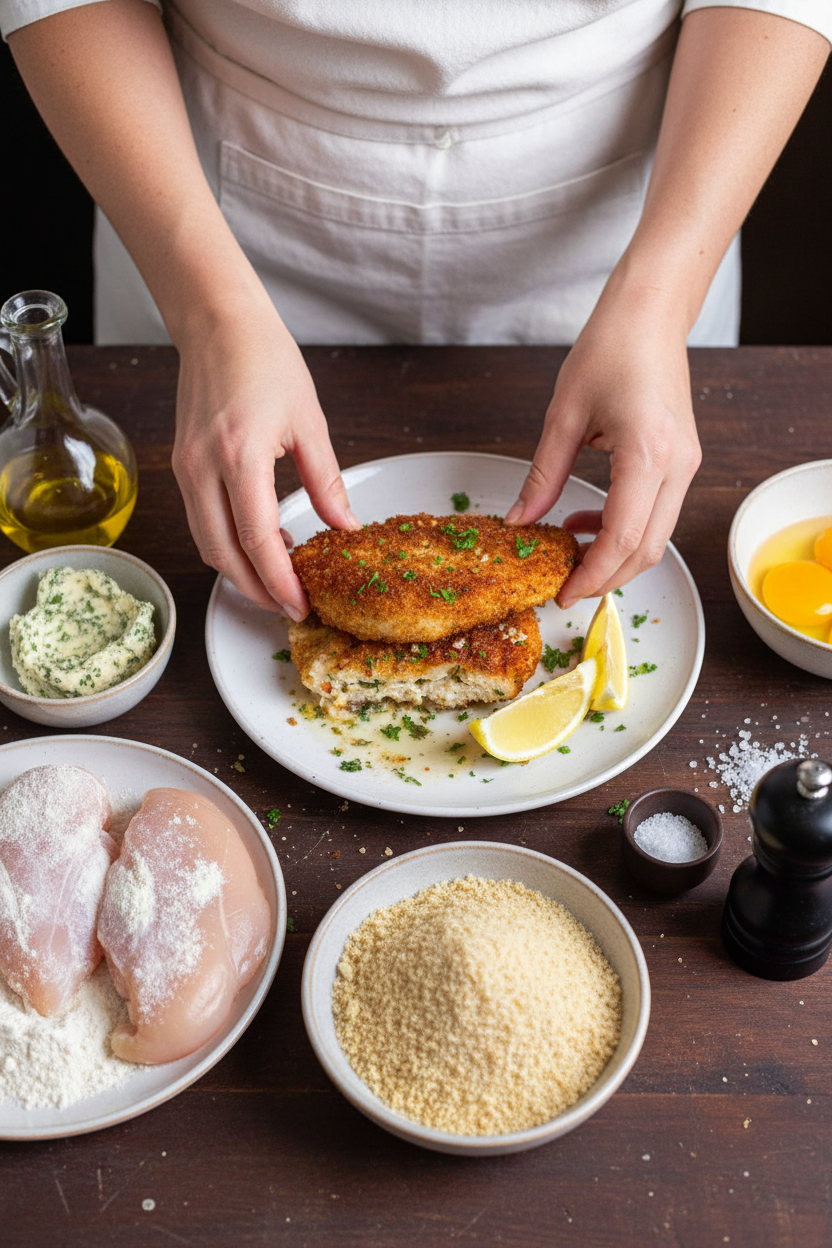
Time for the crispy part. Set up three plates. Flour, beaten eggs, then panko crumbs. Panko are Japanese breadcrumbs. Fun fact: they stay extra crispy because they’re made from crustless bread. Dredge the chicken in each one. It’s like giving the chicken a winter coat.
Why does this matter? This coating protects the chicken. It lets the inside steam and cook gently. The outside gets golden and crunchy. It’s the perfect texture. Do you prefer panko or regular breadcrumbs for frying?
The Sizzle in the Pan
Heat your oil in a big pan. You don’t need a deep fryer. Just enough oil to come up the side of the chicken. Listen for the sizzle when you add it. That’s the sound of dinner coming together. Fry until it’s a beautiful golden brown on each side.
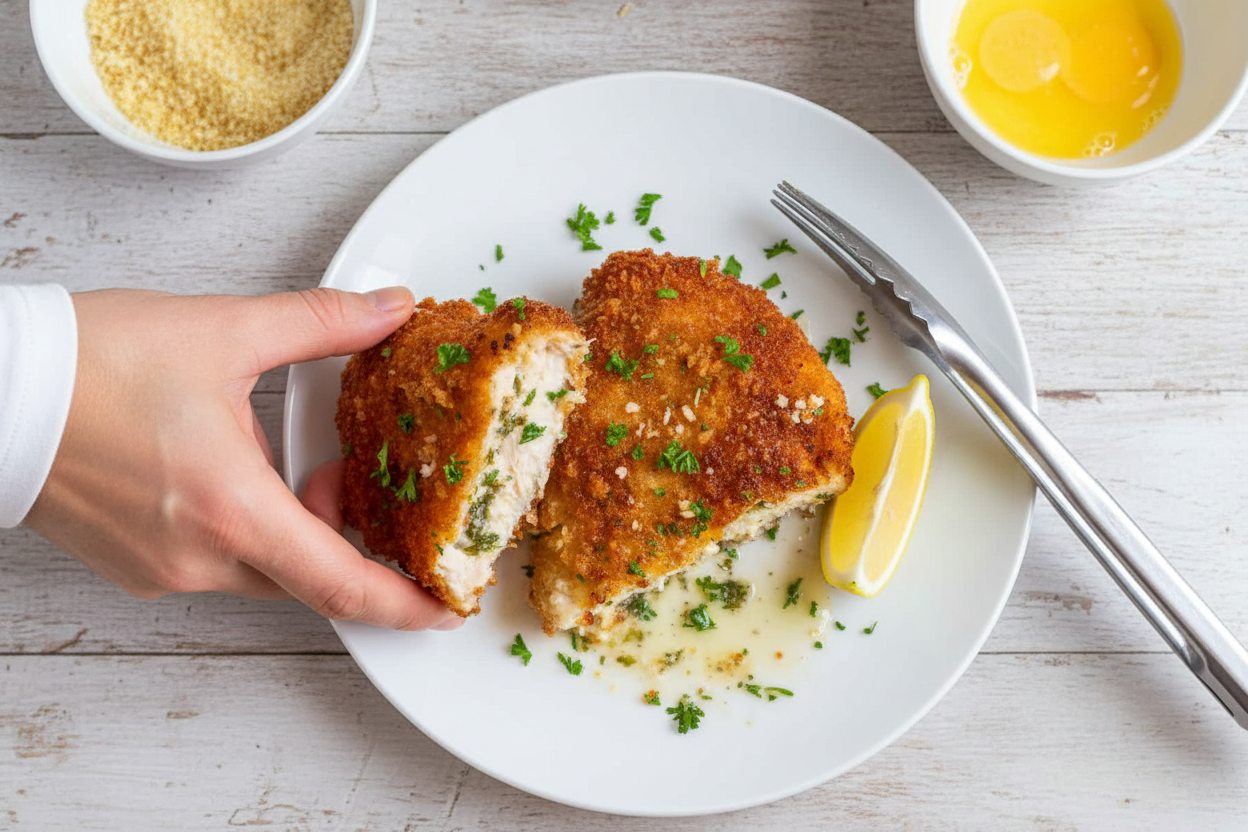
Please use a thermometer. Chicken is done at 165 degrees inside. This keeps everyone safe and healthy. The best part? When you cut into it. Be careful! That hot, herby butter will rush out. It’s the reward for your work.
Gather Round the Table
Serve your Chicken Kiev hot. Always add another squeeze of fresh lemon. The bright lemon cuts through the rich butter. Sprinkle on some fresh parsley. It looks pretty and tastes fresh. I love to serve this with simple mashed potatoes.
The potatoes soak up that glorious butter sauce. It’s a meal that feels special. It shows you care. Cooking for others is a way to share love. What side dish do you think would be perfect with this?
Ingredients:
| Ingredient | Amount | Notes |
|---|---|---|
| Unsalted butter | 6 Tbsp | room temperature |
| Garlic clove | 1 large | minced |
| Lemon juice | 1 Tbsp | plus more lemon wedges to serve |
| Fresh parsley | 2 Tbsp | chopped, plus more to garnish |
| Salt | 1/2 tsp | for the butter |
| Black pepper | 1/2 tsp | freshly ground, for the butter |
| Chicken breasts | 3 large | 12 oz each |
| Eggs | 2 | beaten |
| All-purpose flour | 1/2 cup | |
| Panko bread crumbs | 2 cups | |
| Salt and Pepper | 1/2 tsp | or to taste, for the chicken |
| Light olive oil or Canola oil | as needed | to sauté |
My Chicken Kiev Story (And How To Make It!)
Hello, my dear. Come sit. Let me tell you about Chicken Kiev. My Tío Miguel first made it for a family party. We all jumped when he cut into it. Hot, herby butter shot out! We still laugh at that. It’s a happy, delicious surprise. Making it feels like a little kitchen magic. You can do it, I promise. Let’s start with the best part—the butter.
Step 1: First, we make the secret inside. Get your butter nice and soft. Mash it with the garlic, parsley, lemon, salt, and pepper. Doesn’t that smell amazing? Keep mixing until it’s all one happy, green-speckled blob. This is the flavor heart of the whole dish. (A hard-learned tip: really let your butter soften first. Cold butter is too grumpy to mix well!).
Step 2: Now, prepare the chicken. Cut each breast in half the long way. Then, carefully cut a pocket inside. Imagine you’re making a little cave for the butter. Stuff a big spoonful into each pocket. Pinch the opening shut. This keeps our butter surprise safe inside. Season the outside with salt and pepper. What’s the fun surprise inside a Chicken Kiev? Share below!
Step 3: Time for the crispy coat. Set up three plates: flour, beaten eggs, and panko crumbs. This is your assembly line. Dredge each chicken in flour, then egg, then crumbs. The panko makes it extra crunchy. I love that sound. Let them rest on a plate. Doing this step neatly keeps your fingers less messy!
Step 4: Carefully fry them. Heat about 1/4 inch of oil in a big pan. You’ll know it’s ready when a breadcrumb sizzles. Gently add the chicken. Don’t crowd the pan. Fry until each side is a perfect golden brown, like a summer tan. They’re done when a thermometer says 165°F. That hot, herby butter is bubbling inside, waiting for you.
Cook Time: 20 minutes
Total Time: 50 minutes
Yield: 6 servings
Category: Dinner
Three Fun Twists on the Classic
Once you know the basics, you can play! Here are three ideas I love. Spicy Sunshine: Add a pinch of red pepper flakes and some orange zest to the butter. Herb Garden: Use fresh dill and chives instead of parsley. It tastes like spring. The Crispy Cordon Bleu: Tuck in a slice of ham and Swiss cheese with the butter. So good! Which one would you try first? Comment below!
What to Serve With Your Kiev
This dish is rich, so simple sides are best. Buttered egg noodles catch all that glorious, melted butter. A crisp green salad cuts through the richness. For something cozy, try mashed potatoes. They are the best friends with the herby butter sauce. To drink, a chilled glass of white wine is lovely. For the kids, sparkling lemonade feels fancy. Which would you choose tonight?
Keeping Your Chicken Kiev Tasty Later
Let’s talk about storing this lovely dish. First, let it cool completely. Then, wrap each piece tightly. You can use plastic wrap or foil. Store them in the fridge for up to three days.
For the freezer, I use a two-step method. Wrap each piece tightly in plastic. Then, place them in a freezer bag. They will keep well for about two months. This is perfect for busy nights.
To reheat, use your oven. It keeps the crust crispy. Bake at 375°F until hot inside. My first time, I used the microwave. The breading got soggy. I learned my lesson that day!
Batch cooking saves so much time. Make the butter-filled chicken ahead. Freeze them before frying. Fry them straight from frozen, just add a few extra minutes. This matters because good food should make life easier, not harder. Have you ever tried storing it this way? Share below!
Fixing Common Chicken Kiev Troubles
Sometimes the butter leaks out while cooking. This usually means the pocket wasn’t sealed well. Pinch that opening tightly. I remember when my butter all ran into the pan. My family still ate it, but I was disappointed.
The breading might fall off. This happens if the flour or egg step is skipped. Always follow the order: flour, egg, then crumbs. Each layer helps the next one stick. This matters for a perfect, golden crust.
The chicken could brown too fast. Your oil is likely too hot. Just turn down the heat. Let it cook a bit slower. Getting the temperature right builds your cooking confidence. You learn to trust your instincts. Which of these problems have you run into before?
Your Chicken Kiev Questions, Answered
Q: Can I make this gluten-free? A: Yes! Use gluten-free flour and breadcrumbs. The method stays the same.
Q: How far ahead can I prepare it? A: You can bread the chicken a day ahead. Keep it covered in the fridge until frying.
Q: What if I don’t have fresh parsley? A: Dried herbs work in the butter. Use one teaspoon instead of two tablespoons.
Q: Can I double the recipe? A: Absolutely. Just use a bigger pan or cook in more batches.
Q: Any optional tips? A: Try adding a little dill to the butter. *Fun fact: In some families, that tiny herb is the secret.* Which tip will you try first?
From My Kitchen to Yours
I hope you enjoy making this special meal. It is a real treat for the table. Cooking is about sharing love and stories. I would love to see your creation.
Please share a photo of your golden Chicken Kiev. Show me how it turned out for you. Have you tried this recipe? Tag us on Pinterest! Thank you for cooking with me today.
Happy cooking!
—Lena Morales.
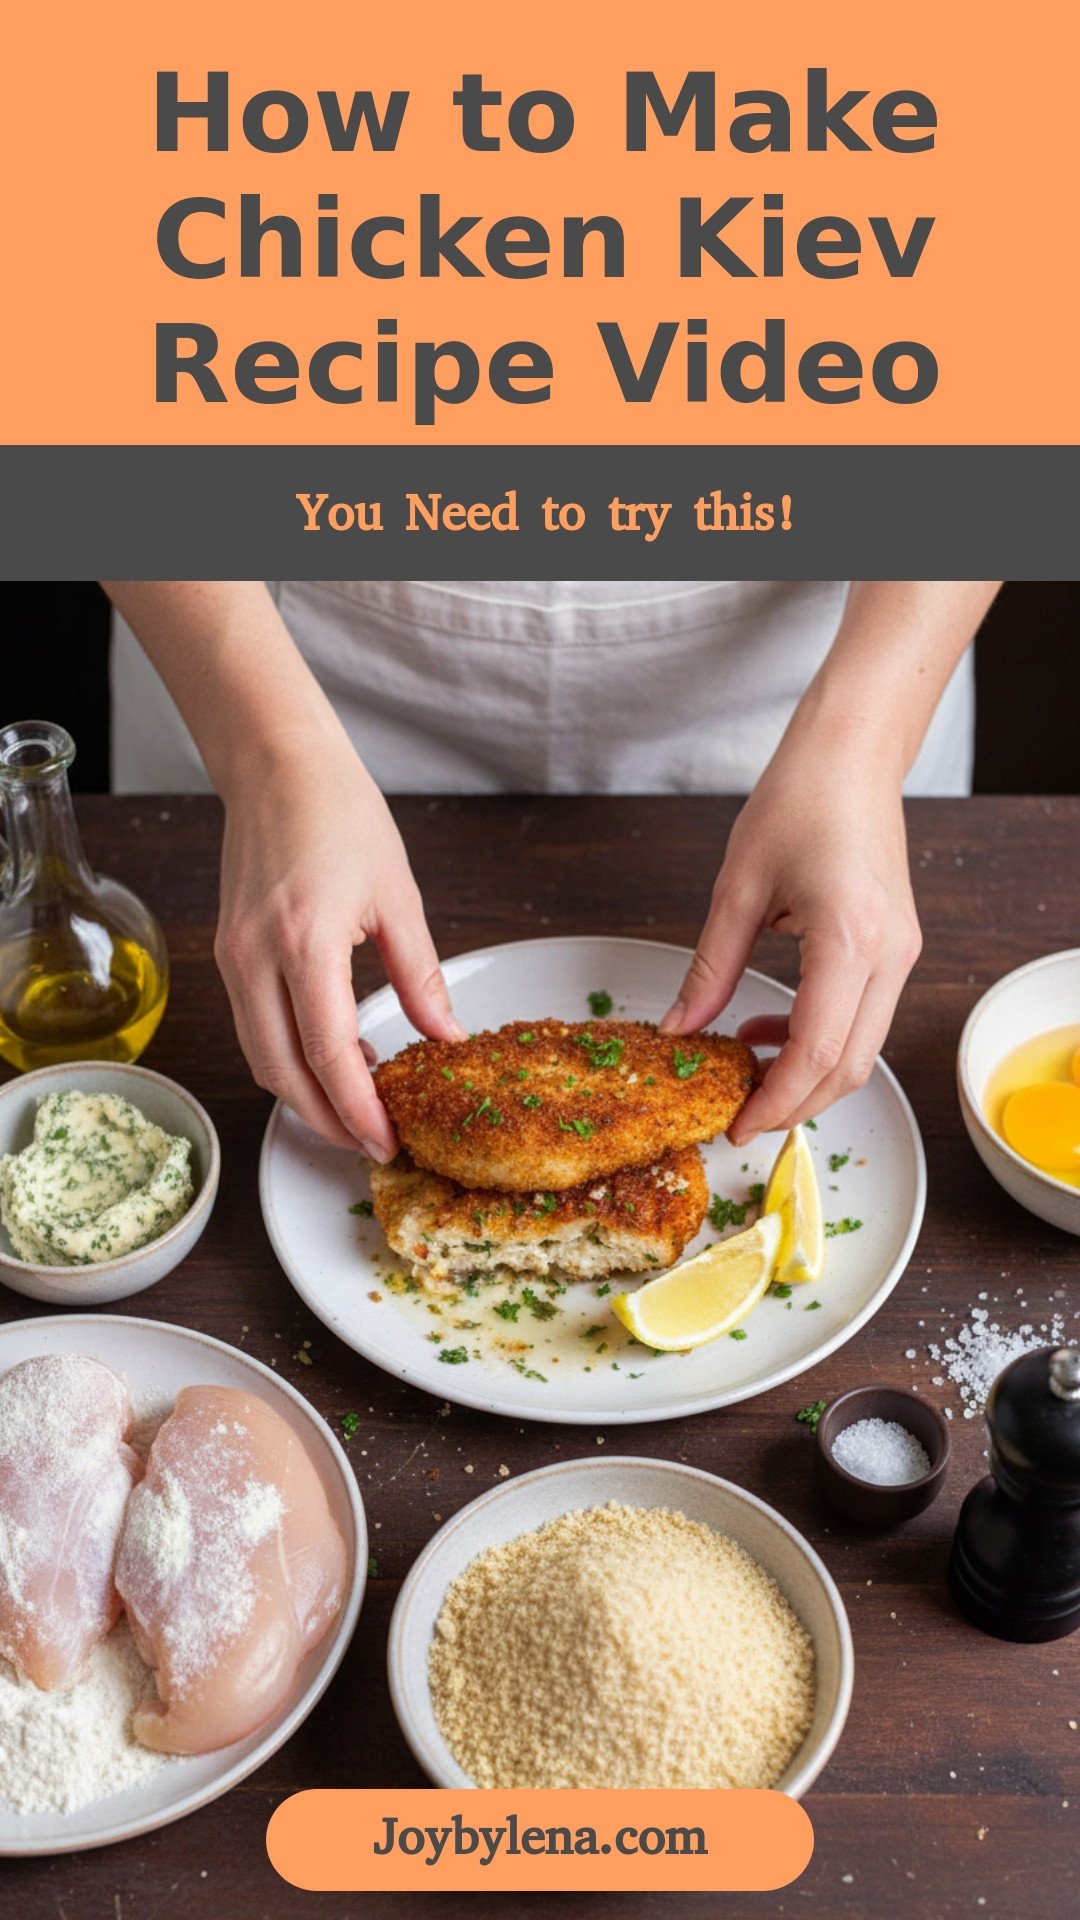
Chicken Kiev (with Video): How to Make Chicken Kiev Recipe Video
Description
A classic, impressive dish featuring tender chicken breasts stuffed with a vibrant lemon-herb garlic butter, breaded, and fried to golden perfection.
Ingredients
**For the Lemon-Herb Garlic Butter:**
**For the Chicken Kiev:**
Instructions
- Make the Flavored Butter – In a medium bowl, mash together all Kiev butter ingredients with a fork, just until lemon juice is incorporated into the butter. It takes a couple of minutes but it does come together.
- Prepare Chicken – Using a sharp slim knife, cut chicken breasts in half lengthwise, keeping both halves equal in size and thickness. Carefully cut a pocket into the side of each chicken breast as deep and wide as you can go without cutting through the chicken breast (about a 2″wide x3″ long pocket). Stuff each chicken breast with 1 Tbsp of Kiev butter then close the pocket and push over the top of the chicken breast to disperse the butter. Pinch the opening to seal. Season both sides of the chicken breast with salt and pepper.
- Make your breading stations – Set up 3 plates for breading: In the first plate, pour 1/2 cup flour. In the second large bowl, beat together 2 eggs. In the third large bowl, pour 2 cups panko crumbs. Dredge chicken in flour, dusting off excess then dip in eggs making sure to get a good egg coating all around and letting any excess egg drip off. Finally, dip into the bread crumbs. Transfer to a platter while forming the remaining chicken Kievs.
- Fry Chicken Kiev – Add 1/4″ of oil to a large deep skillet and place over medium heat. Once the oil is hot (350˚F or if you add a bread crumb, it should sizzle), add chicken in a single layer and fry until golden brown (4 min per side- if it browns too quickly, reduce the heat). It’s done when it reaches 165˚F on an instant-read thermometer. Repeat cooking the second batch.
- To Serve – Season hot fried chicken with a sprinkle of salt, garnish with fresh parsley, and squeeze lemon wedges over the top, then serve. Be careful of the first spurt of hot butter when you cut the chicken.
Notes
- Nutrition Per Serving: Calories: 384kcal | Carbohydrates: 23g | Protein: 18g | Fat: 24g | Saturated Fat: 9g | Polyunsaturated Fat: 2g | Monounsaturated Fat: 11g | Trans Fat: 0.5g | Cholesterol: 121mg | Sodium: 623mg | Potassium: 297mg | Fiber: 1g | Sugar: 1g | Vitamin A: 559IU | Vitamin C: 4mg | Calcium: 57mg | Iron: 2mg


Leave a Reply