The Magic of Warm Water
Let’s start with the warm water. It should feel like a nice bath. Not too hot, not too cold. This wakes up the yeast. Think of yeast as tiny sleepy bugs. Warm water tells them it’s time to get to work.
I once used water that was too hot. It made the yeast very sad. The dough never rose. I still laugh at that. Now I always test it on my wrist first. Why does this matter? Happy yeast makes fluffy, light buns. It’s the first secret to success.
Getting Your Hands in the Dough
Mixing the dough is my favorite part. You add most of the flour. The dough will be sticky at first. That’s okay. Keep kneading. In five minutes, it changes. It becomes smooth and soft like a baby’s cheek.
Feel the dough with your clean fingers. It should be a little sticky. But it shouldn’t stick to you. If it does, add just a spoon more flour. Fun fact: Kneading makes long stretchy strands in the dough. That’s what holds the air and makes it puff up! Do you prefer using your hands or a mixer for dough?
A Lesson in Patience
Now we let the dough rest. Cover it and walk away. I put mine in the oven with just the light on. It’s cozy there. You must wait for it to double in size. This takes about an hour.
This waiting time is important. Why does this matter? Rushing here makes tough buns. The yeast needs time to make little air pockets. That’s where the softness comes from. I use this time to clean up. Or just to sit with a cup of tea.
Shaping Your Buns
Divide the dough into eight pieces. Cup your hand around one. Roll it gently on the counter. You are making a smooth ball. There will be a little dimple on the bottom. Keep rolling until it disappears.
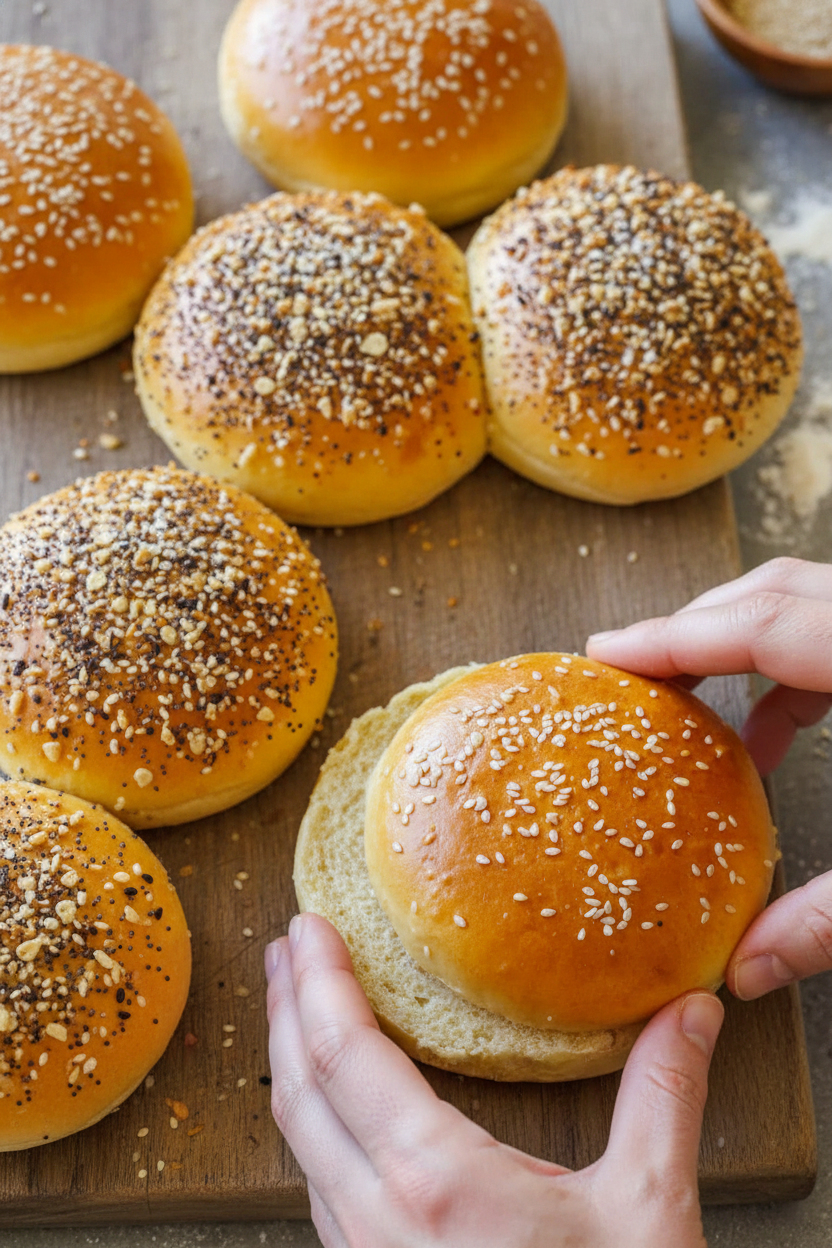
Then, flatten each ball on your baking sheet. Pat it down to about three inches wide. They look like little fluffy clouds. Let them puff up again for another hour. This second rise gives them their final shape. What’s your favorite thing to put on top, sesame seeds or everything seasoning?
The Golden Finish
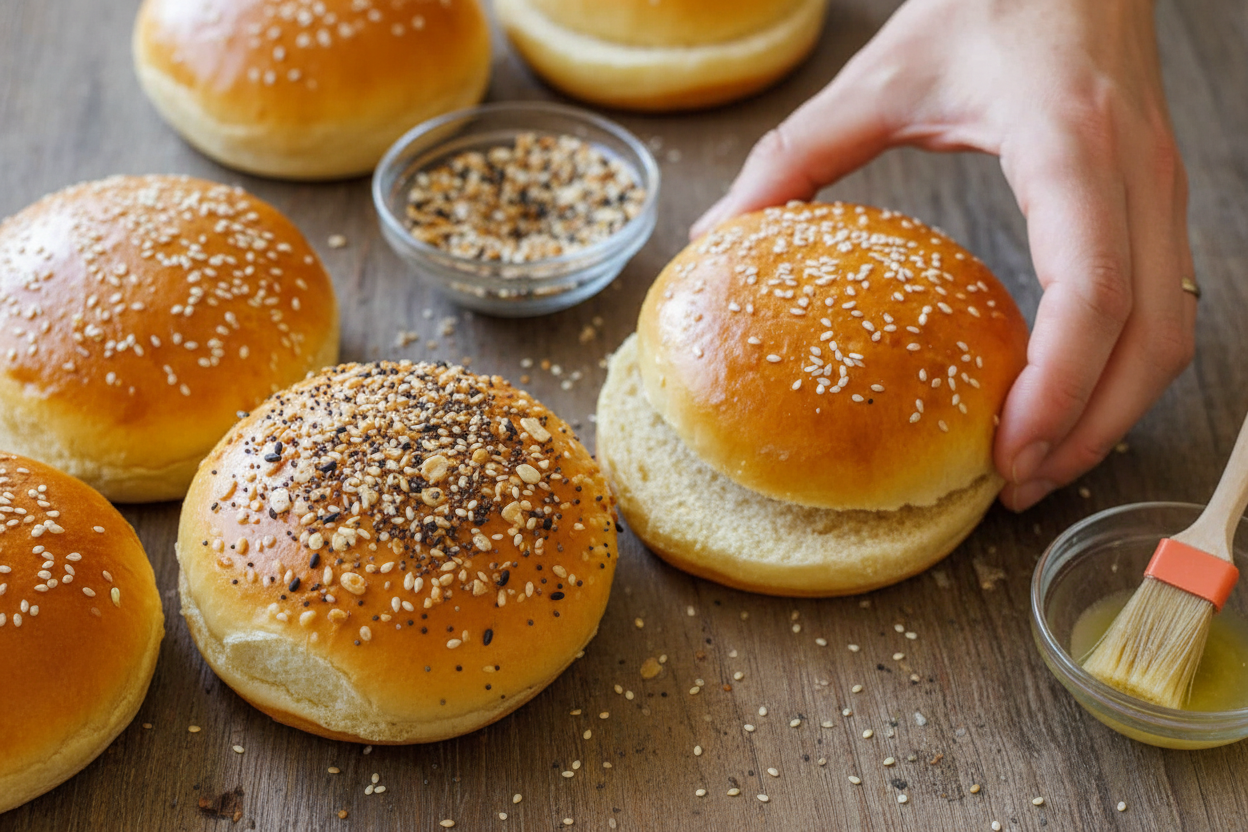
Time for the egg wash. Beat an egg with water. Brush it all over each bun. Doesn’t that smell amazing? This wash makes them shiny and golden. Then sprinkle on your seeds.
Bake them until they are a deep, beautiful gold. That color tells you they are done. Let them cool completely before you cut them. A serrated knife works best. I love the sound of that gentle sawing. It means a burger feast is coming soon. Tell me, what will you put inside your homemade bun first?
Ingredients:
| Ingredient | Amount | Notes |
|---|---|---|
| Warm water | 3/4 cup | about 110°F |
| Egg | 1 | room temperature |
| Granulated sugar | 3 Tbsp | |
| Fine sea salt | 1 1/2 tsp | |
| Instant yeast (rapid rise) | 1 Tbsp | |
| Unsalted butter | 3 Tbsp | softened |
| Unbleached all-purpose flour | 3 1/4 cups (400g) | plus more as needed |
| Egg (for wash) | 1 | |
| Water (for wash) | 1 Tbsp | |
| Sesame seeds | 1/2 Tbsp | or Everything Bagel Seasoning |
My Secret for Perfect Burger Buns
Hello, my dear! Come sit. Let’s talk about buns. Store-bought ones are fine in a pinch. But homemade? Oh, they are a hug for your burger. They smell like a bakery and feel so soft. I learned this recipe from my Abuela. She said good food starts with good foundations. I still laugh at that. She was talking about bread, not a house!
Making them is like a little science project you can eat. You just need patience. The yeast is a tiny, living thing. It needs a warm, cozy bath to wake up. That’s your warm water. Not too hot, now! If it’s too hot, you’ll hurt the yeast. (My hard-learned tip: test the water on your wrist. It should feel warm, not hot, like a baby’s bottle.) Doesn’t that smell amazing when it starts to bubble?
- Step 1: Grab your big mixing bowl. Pour in the warm water. Crack in the egg. Add the sugar and salt. Last, sprinkle in the yeast. Give it all a good whisk for a whole minute. This wakes up the yeast nicely. See how it gets a little foamy? That’s a good sign. It means your buns will be fluffy.
- Step 2: Now, add the soft butter. Dump in almost all the flour. Save just a spoonful or two. Mix it with a spoon or a dough hook. It will look shaggy and messy. That’s perfect. Now, use your hands. Knead the dough for five minutes. You want it smooth and soft. It will be a little sticky, but not stuck to your fingers.
- Step 3: Put the dough back in the bowl. Cover it with a little oiled plastic wrap. Find a warm spot for it. I use my oven with just the light on. Let it rest for about an hour. It needs to grow to double its size! This is called proofing. What do you think the yeast is eating to make it grow? Share below!
- Step 4: Time to shape! Gently push the air out of the dough. Scrape it onto your counter. Cut it into eight equal pieces. Cup your hand over a piece. Roll it in little circles on the counter. Make a nice, smooth ball. Do this for all eight pieces. It’s like playing with edible clay.
- Step 5: Place the balls on a baking sheet. Give them lots of space to grow again. Gently press each one down into a fat disc. Cover them loosely. Let them get puffy for another hour. Near the end, heat your oven to 400°F.
- Step 6: Make your egg wash. Beat one egg with a tablespoon of water. Brush this gently over every bun. This gives them that beautiful, shiny, golden top. Sprinkle on sesame seeds if you like. Bake them for about 15 minutes. You’ll know they’re done by that gorgeous color.
- Step 7: Take them out and let them cool completely. I know, it’s hard to wait! But it’s important. Then, slice them with a serrated knife. See how soft and perfect they are inside? Now you have a foundation for something wonderful.
Cook Time: About 30 minutes active, 2+ hours rising
Total Time: About 3 hours
Yield: 8 buns
Category: Bread, Basics
Let’s Get Creative With Your Buns!
Once you master the basic bun, the fun begins. You can twist this recipe so many ways. It’s like dressing up a favorite doll. Just add your twist before the first rise. Here are three ideas I love.
- Herb Garden Buns: Add two tablespoons of fresh, chopped herbs. Try rosemary or dill. It makes your burger taste like a summer garden.
- Cheesy Pull-Apart Buns: Mix in a half cup of shredded cheddar cheese. Bake them close together in a pan. They’ll stick together and tear apart so gooey.
- Sweet Cinnamon Buns: Swap the salt for a teaspoon of cinnamon. Use them for a breakfast sandwich. Imagine them with bacon and egg!
Which one would you try first? Comment below!
The Perfect Plate & What to Sip
Of course, these buns are for burgers. But think bigger! Slice one for a fancy breakfast sandwich. Use them for pulled pork or even a giant chicken salad sandwich. For sides, keep it simple. A big pile of crispy oven fries or a tangy coleslaw. Maybe some pickles straight from the jar.
Now, for a drink. A cold glass of lemonade or fizzy ginger beer is perfect. For the grown-ups, a cold lager or a pale ale pairs beautifully. It cuts through the rich burger flavor. So, what’s on your menu? Which would you choose tonight?
Keeping Your Buns Fresh and Ready
Fresh buns are best the day you bake them. But they freeze beautifully! Let them cool completely first. Then wrap each bun tightly in plastic wrap. Pop them all into a big freezer bag.
They will keep for about three months. To reheat, just thaw at room temperature. Then warm them in a 350-degree oven for five minutes. I once forgot to wrap them tightly. They got a little dry, so wrap them well!
Batch cooking these buns saves so much time. You can have homemade buns anytime. This matters because good food should be easy. A ready bun means a quick, happy meal.
Have you ever tried storing buns this way? Share below!
Bun Troubles and Simple Fixes
First, your dough might not rise. Check that your water is warm, not hot. Hot water can hurt the yeast. I remember when my dough just sat there. My water was too hot!
Second, the dough can feel too sticky. Add just one more tablespoon of flour. Knead it in and check again. Getting the texture right builds your cooking confidence.
Third, the buns might bake up hard. Do not over-bake them. Take them out when they are golden brown. This matters for a soft, delicious bun every time.
Which of these problems have you run into before?
Your Bun Questions, Answered
Q: Can I make these gluten-free? A: I have not tried it. Use a good 1-to-1 gluten-free flour blend. The texture might be a little different.
Q: Can I make the dough ahead? A: Yes! After the first rise, put the dough in the fridge. Let it rise slowly overnight. Shape and bake the next day.
Q: What can I use instead of an egg wash? A: You can use just milk or cream. It will give a softer, lighter color.
Q: Can I make smaller slider buns? A: Absolutely! Just divide the dough into twelve pieces. Bake them for a few minutes less.
Q: Any fun topping ideas? A: Try coarse salt, poppy seeds, or dried garlic. *Fun fact: The tiny holes in sesame seed buns are called “dockers.”*
Which tip will you try first?
From My Kitchen to Yours
I hope you love making these buns. There is nothing like the smell of fresh bread. It makes your whole kitchen feel like home.
I would love to see your beautiful creations. Share a picture of your burger night. Show me your golden, perfect buns.
Have you tried this recipe? Tag us on Pinterest! I always look for your photos. Thank you for baking with me today.
Happy cooking!
—Lena Morales.

Homemade Hamburger Buns Recipe Video Tutorial
Description
Learn how to make soft, fluffy, and perfectly golden homemade hamburger buns with this easy video tutorial. Perfect for your next barbecue.
Ingredients
1 egg
1 Tbsp water
1/2 Tbsp sesame seeds (or Everything Bagel Seasoning)
Instructions
- In a large mixing bowl or the bowl of your stand mixer, combine warm water, egg, sugar, salt, and yeast. Whisk for 1 minute to hydrate the yeast.
- Add softened butter then add most of your flour (leave out about 1-2 Tbsp of flour). Use a firm spatula or dough hook attachment to mix the dough just until it comes together. Knead the dough for 5-6 minutes or until it is smooth, soft, and elastic. The dough should feel sticky to the touch but should not stick to clean/dry fingertips. If it’s too sticky to knead, add more flour or until you reach the desired consistency.
- Cover the dough with oiled plastic wrap and let it rest in a warm place (I like to put it in my oven with the light on so it’s not hotter than 100 ̊F) for 1 to 1 1/2 hours or at room temperature for about 2 hours. The dough must double in volume.
- Scrape the dough out onto a clean work surface and use a food scraper or knife to cut it into 8 equal pieces, about 100 grams each piece. Cup your hand around a piece of dough and gently roll each piece of dough into a ball over your clean work surface or over the palm of your hand. Roll the dough balls until the surface is smooth and the dimple underneath shrinks.
- Set dough balls onto a silicone or parchment-lined baking sheet, keeping them evenly spaced. Flatten each dough ball into a 3” to 3 1/2” wide diameter, patting it down evenly. Cover the baking sheet loosely with plastic wrap and let it rest at room temperature until visibly puffed (1 to 1 1/2 hours). Towards the end of the rising time, preheat the oven to 400 ̊F.
- Make the egg wash by beating together egg and water with a fork then brush it generously over the tops and sides of the buns. Sprinkle on sesame seeds or everything bagel seasoning if desired and bake at 400 ̊F for 15 to 16 minutes, or until the tops are deeply golden. Transfer to a rack to cool completely then cover and store until ready to use. Before serving, slice the buns in half lengthwise with a serrated knife.
Notes
- Nutrition Per Serving: Calories: 257, Total Fat: 6g, Saturated Fat: 3g, Trans Fat: 0.2g, Polyunsaturated Fat: 1g, Monounsaturated Fat: 2g, Cholesterol: 52mg, Sodium: 455mg, Potassium: 76mg, Total Carbohydrates: 44g, Dietary Fiber: 2g, Sugars: 5g, Protein: 7g, Vitamin A: 192IU, Vitamin C: 0.001mg, Calcium: 16mg, Iron: 3mg


Leave a Reply