The Secret in the Dough
My secret is cream cheese. I add it to my sugar cookie dough. It makes the cookies so soft and rich. They taste like a little hug.
My grandson once ate three before they were even frosted. He had a big cream cheese smile. I still laugh at that. The dough is a dream to work with. Just don’t play with it too much.
Why Soft Butter Matters
Let your butter and cream cheese get soft. Leave them on the counter for an hour. This is a very important step. It lets you mix everything smooth and fluffy.
If they are cold, your dough will be lumpy. We don’t want lumpy cookies. Creaming them with the sugar traps tiny air bubbles. Those bubbles make your cookies light. Fun fact: That’s the “science” of a perfect cookie!
Shaping Your Pumpkins
Rolling the dough is my favorite part. Use plenty of flour on your rolling pin. For soft cookies, roll it a little thick. About the height of two pennies stacked up.
Thin dough makes a crunchy cookie. Both are good! Cut out your pumpkin shapes. Then slide them onto the baking sheet. Your kitchen will smell amazing. What’s your favorite cookie shape? Mine will always be a pumpkin.
The Joy of Messy Decorating
Now for the fun part. Make your frosting a bright orange. If it’s too thick, add a drop of milk. Don’t worry about making it perfect. A little messy is more fun.
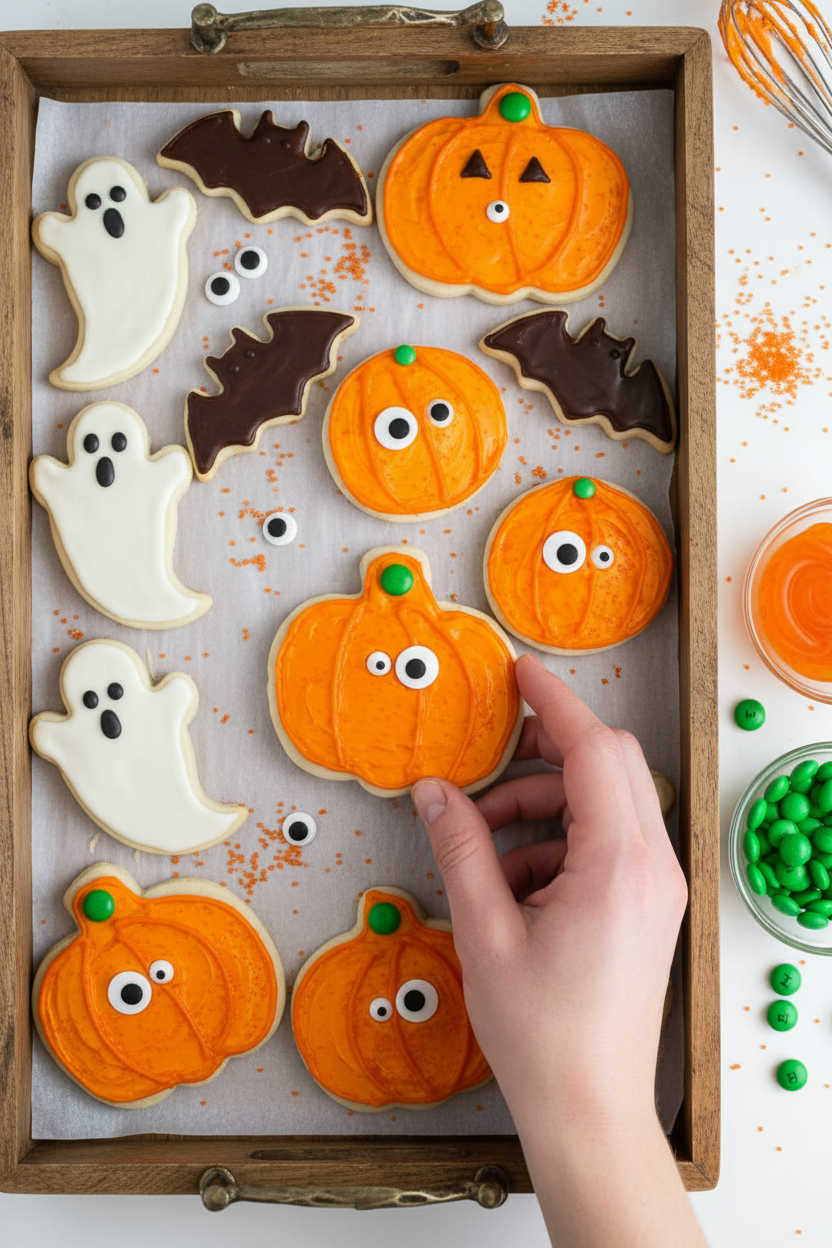
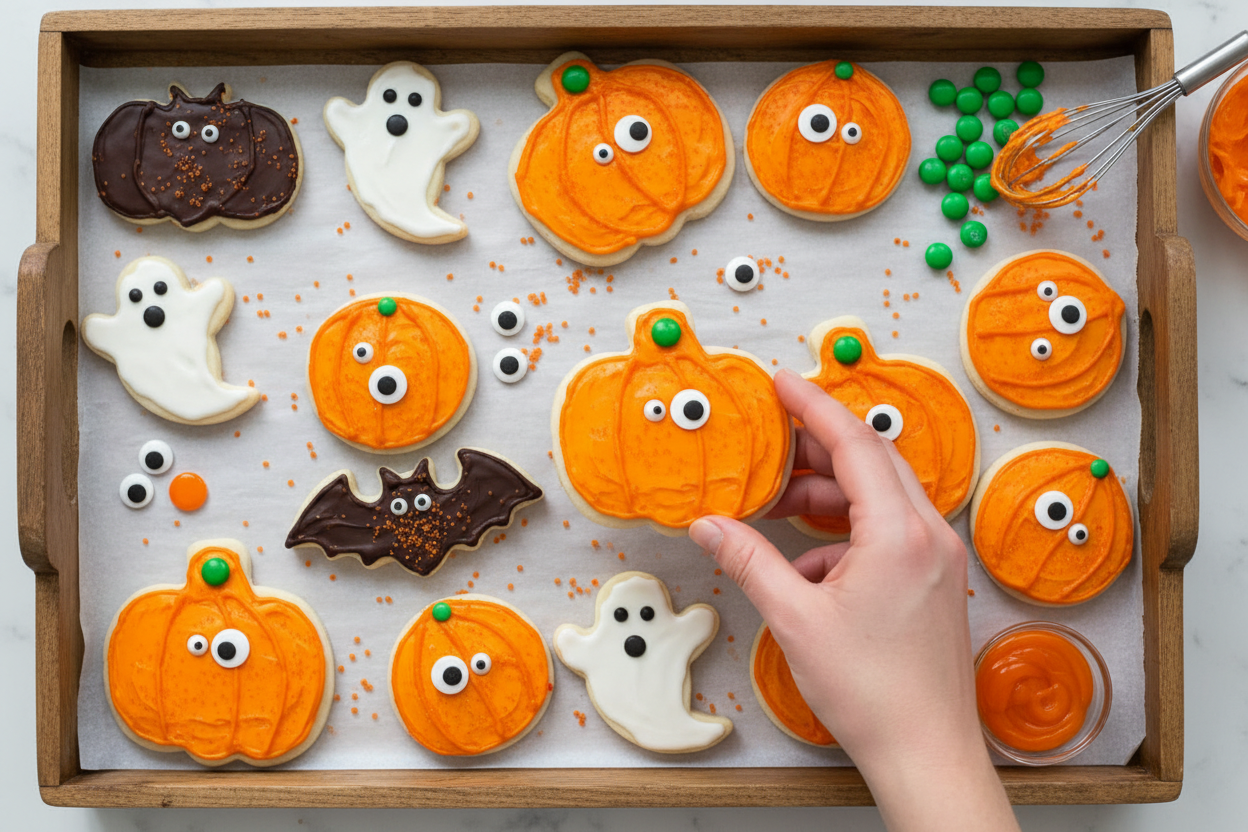
I let the kids add the candy eyes. Every cookie gets its own silly face. Some look surprised. Some look sleepy. It makes each one special. Do you like candy eyes or do you draw faces with frosting?
More Than Just a Treat
These cookies are not just about eating. They are about making memories. Mixing the dough together. Laughing at the funny faces. That time together matters most.
Sharing food you made with love is a gift. It says, “I thought of you.” That is the real magic in baking. Who will you share your batch with this year? I hope you make a wonderful mess and even better memories.
Ingredients:
| Ingredient | Amount | Notes |
|---|---|---|
| Butter | 3/4 cup | softened, for cookie dough |
| Cream cheese | 8 oz | softened |
| Sugar | 1 cup | |
| Powdered sugar | 1/2 cup | for cookie dough |
| Egg | 1 | |
| Almond extract | 1 teaspoon | for cookie dough |
| All-purpose flour | 2 3/4 cups | |
| Baking powder | 1/2 teaspoon | |
| Salt | 1/2 teaspoon | |
| Butter | 1/3 cup | softened, for frosting |
| Powdered sugar | 4 1/2 cups | for frosting |
| Milk | 1/4 cup | for frosting |
| Vanilla extract | 1/2 teaspoon | for frosting |
| Almond extract | 1/2 teaspoon | for frosting |
| Orange food coloring | as needed | for frosting |
| Orange decorating gel | as needed | for topping |
| Green M&Ms | as needed | for topping |
| Candy eyes | as needed | for topping |
| Orange sugar sprinkles | as needed | for topping |
My Spooky, Soft Halloween Sugar Cookies
Hello, my dear! Come sit. Let’s make my famous Halloween cookies. They are wonderfully soft and creamy. That’s the secret of the cream cheese. I learned that from my Tía Rosa. She always said good dough needs a little tang. Doesn’t that smell amazing? The almond extract makes the whole kitchen smell like a bakery. We’ll turn them into little pumpkin faces. My grandkids giggle the whole time we decorate. I still laugh at that.
Here is how we make the magic happen. Follow these simple steps.
- Step 1: First, heat your oven to 375 degrees. Now, let’s make the dough. Put the soft butter and cream cheese in a big bowl. Add the white sugar and powdered sugar. Crack in one egg. Don’t forget that teaspoon of almond extract. Mix it all until it’s fluffy and light. It should look like a sweet cloud.
- Step 2: Grab another bowl for the dry things. Measure your flour carefully. Add the baking powder and salt. Give it a little stir with a fork. This mixes everything evenly. Now, slowly add these dry ingredients to your fluffy cloud. Mix until a soft dough forms. (A hard-learned tip: try not to handle the dough too much with warm hands. It makes the cookies tough).
- Step 3: Sprinkle some flour on your counter. Roll the dough out. For soft cookies, roll it a little thick. Use your pumpkin cookie cutter. Press down and lift carefully. Place them on a greased pan. They don’t spread too much. You can put them fairly close. Ready for the oven? They bake fast, only 8 to 10 minutes. Let them cool completely. What’s your favorite cookie shape? Share below!
- Step 4: Time for the fun part! Making the frosting is easy. Mix the soft butter with lots of powdered sugar. Add the milk, vanilla, and almond extract. Whip it until smooth. Now, add orange food coloring. Make it a bright pumpkin orange. Frost each cooled cookie with a knife or spoon.
- Step 5: Let’s give them personality. Use the orange gel to draw lines on your pumpkins. Sprinkle on some orange sugar for sparkle. Press a green M&M on top for a stem. Finally, add two candy eyes. Look at that silly face! Each one will be a little different. That’s what makes them special.
Cook Time: 10 minutes per batch
Total Time: 1 hour 30 minutes
Yield: About 24 cookies
Category: Dessert, Holiday
Three Fun Twists on Our Pumpkin Cookies
You can change these up so easily. It’s fun to play in the kitchen. Here are three ideas I love. My grandson Miguel always asks for the chocolate ones.
- Chocolate Ghosts: Use a ghost-shaped cutter. Leave the frosting white. Use mini chocolate chips for eyes. So cute and spooky!
- Autumn Spice: Add a teaspoon of cinnamon to the dough. It smells like fall leaves. Frost them with brown sugar frosting.
- Spooky Black Cats: Use a cat cutter. Make the frosting black with food coloring. Use yellow sprinkles for eyes. Simple and perfect.
Which one would you try first? Comment below!
Serving Them Up With Style
These cookies are a party on a plate. Pile them high on a cake stand. Use a black napkin underneath. It makes the orange pop! You could also make a cookie “graveyard.” Stand some up in chocolate pudding “dirt.” It’s messy and fun for kids.
What to drink? For a cozy night, I love hot apple cider. The cinnamon goes so well. For the grown-ups, a glass of creamy bourbon milk punch is lovely. It’s smooth and sweet. A perfect match for our soft cookies. Which would you choose tonight?
Keeping Your Spooky Cookies Fresh
Let’s talk about keeping these cookies yummy. First, let them cool completely. A warm cookie in a container will get soggy. I learned that the hard way with my first batch years ago. I was too excited to share them!
Store frosted cookies in a single layer. Use wax paper between layers if you must stack them. They will keep for 4 days at room temperature. You can also freeze the unfrosted cookies for up to 3 months. This is perfect for batch cooking.
Why does this matter? Good storage saves your hard work. It means you can bake ahead for a party. You won’t be stressed on the big day. Have you ever tried storing cookies this way? Share below!
Cookie Troubles? Let’s Fix Them!
Sometimes cookies don’t turn out right. That’s okay. Here are common fixes. First, dough too sticky? Chill it for one hour. This makes rolling much easier. I remember my dough sticking to everything once. What a mess!
Second, cookies spreading too much? Your butter was probably too soft. Make sure it is just softened, not melted. Third, frosting too runny? Add a little more powdered sugar, one spoon at a time. Getting the texture right builds your cooking confidence.
Why does this matter? Small fixes lead to big wins. Your cookies will look and taste better. You will feel like a kitchen pro. Which of these problems have you run into before?
Your Quick Cookie Questions, Answered
Q: Can I make these gluten-free? A: Yes! Use your favorite gluten-free flour blend. The texture might be slightly different.
Q: Can I make the dough ahead? A: Absolutely. Wrap it tightly and refrigerate for up to 2 days.
Q: I don’t have almond extract. A: Use all vanilla extract instead. It will still taste wonderful.
Q: Can I double the recipe? A: You can! Just mix in a very large bowl. *Fun fact: Doubling recipes is how I learned to bake for big family gatherings.*
Q: Any other decorations? A: Black sprinkles make great spiders. Purple frosting is perfect for ghosts. Which tip will you try first?
From My Kitchen to Yours
I hope you have fun making these. Baking should be joyful, not perfect. I love seeing your creations. It makes my day. Please share your spooky cookie photos with me.
You can tag my blog’s Pinterest page. Let’s build a gallery of Halloween treats together. I can’t wait to see your smiling pumpkins. Have you tried this recipe? Tag us on Pinterest!
Happy cooking!
—Lena Morales.

Halloween Sugar Cookies: Halloween Sugar Cookie Recipes and Ideas
Description
These soft and festive Halloween sugar cookies are shaped like pumpkins and decorated with orange frosting, candy eyes, and green M&Ms for a fun and delicious treat.
Ingredients
Cookie
Frosting
Topping
Instructions
- Cookie Preheat oven to 375°F. Cream butter, cream cheese, sugars, egg, and almond extract in a large bowl (or Kitchen-Aid) until fluffy. In a separate medium bowl, combine flour, baking powder, and salt. Add dry ingredients to creamed mixture. Stir until soft dough forms.
- Roll out dough and cut with a cookie cutter. For crunchy cookies, roll dough thin. For soft cookies, roll dough to about ⅜ inch thick. (Note: Try not to handle the dough too much). Bake for 8-10 minutes on a greased pan. Let cool completely.
- Frost and decorate Make frosting by mixing all frosting ingredients with a hand mixer. If too thick, add a tad more milk. Frost the cooled cookies with orange frosting.
- Use the decorating gel to add texture to the pumpkins. Sprinkle with orange sugar sprinkles, then add a green M&M for the stem and place on the candy eyes.
Notes
- Nutrition per serving (1 cookie): Calories: 293kcal, Carbohydrates: 45g, Protein: 2g, Fat: 12g, Saturated Fat: 7g, Cholesterol: 39mg, Sodium: 157mg, Potassium: 46mg, Fiber: 1g, Sugar: 33g, Vitamin A: 397IU, Calcium: 22mg, Iron: 1mg.


Leave a Reply