
A Sweet Start
Let me tell you about these peanut butter squares. They are my go-to treat for a happy day. The smell fills the whole house with warmth. I think that is the best part of baking.
You just mix the butter and sugars together first. It makes a sweet, gritty paste. Then you stir in the peanut butter. Doesn’t that smell amazing already? This simple start matters because it builds the flavor. Every ingredient has its moment to shine.
A Little Kitchen Story
I first made these for my grandson, Leo. He was having a tough week at school. I wanted to make him something special. His whole face lit up when he tried one.
I still laugh at that. He had peanut butter on his nose. Food is more than just eating. It is a way to show someone you care. That is a lesson I hold close to my heart.
The Magic of Mixing
Now, you add the eggs and flour. Stir it all until it feels like a thick cookie dough. It is okay if your arm gets a little tired. That is how you know it is working!
The best part is adding the peanuts and chips. I always save a handful for the top. It makes the squares look so pretty. *Fun fact: The salt on the peanuts makes the sweet peanut butter taste even sweeter.* What is your favorite part to add when you bake?
Patience is a Virtue
Here is the hardest step. You have to let the pan cool completely. I know it is tempting to cut a piece right away. But trust me on this.
If you wait, you get a perfect, fudgy square. If you do not, it will be a gooey mess. Waiting for good things makes them even better. This is true for baking and for life. Do you find it hard to wait for treats to cool?
Your Turn to Share
I have shared my story with you. Now I would love to hear yours. These squares are perfect for sharing with friends and family.
Who would you make these for? Maybe a parent, a friend, or just for yourself? Tell me, what is your favorite food memory from when you were young? Sharing stories is like sharing a recipe. It keeps the good things going.

Ingredients:
| Ingredient | Amount | Notes |
|---|---|---|
| Unsalted butter, melted | 1 cup | |
| Peanut butter | 1/2 cup | |
| Sugar | 1 cup | |
| Light brown sugar | 1 cup | Firmly packed |
| Eggs | 2 | Well beaten |
| Self-rising flour | 2 cups | |
| Vanilla extract | 2 teaspoons | |
| Salted peanuts | 1 cup | |
| Peanut butter chips | 1 cup |
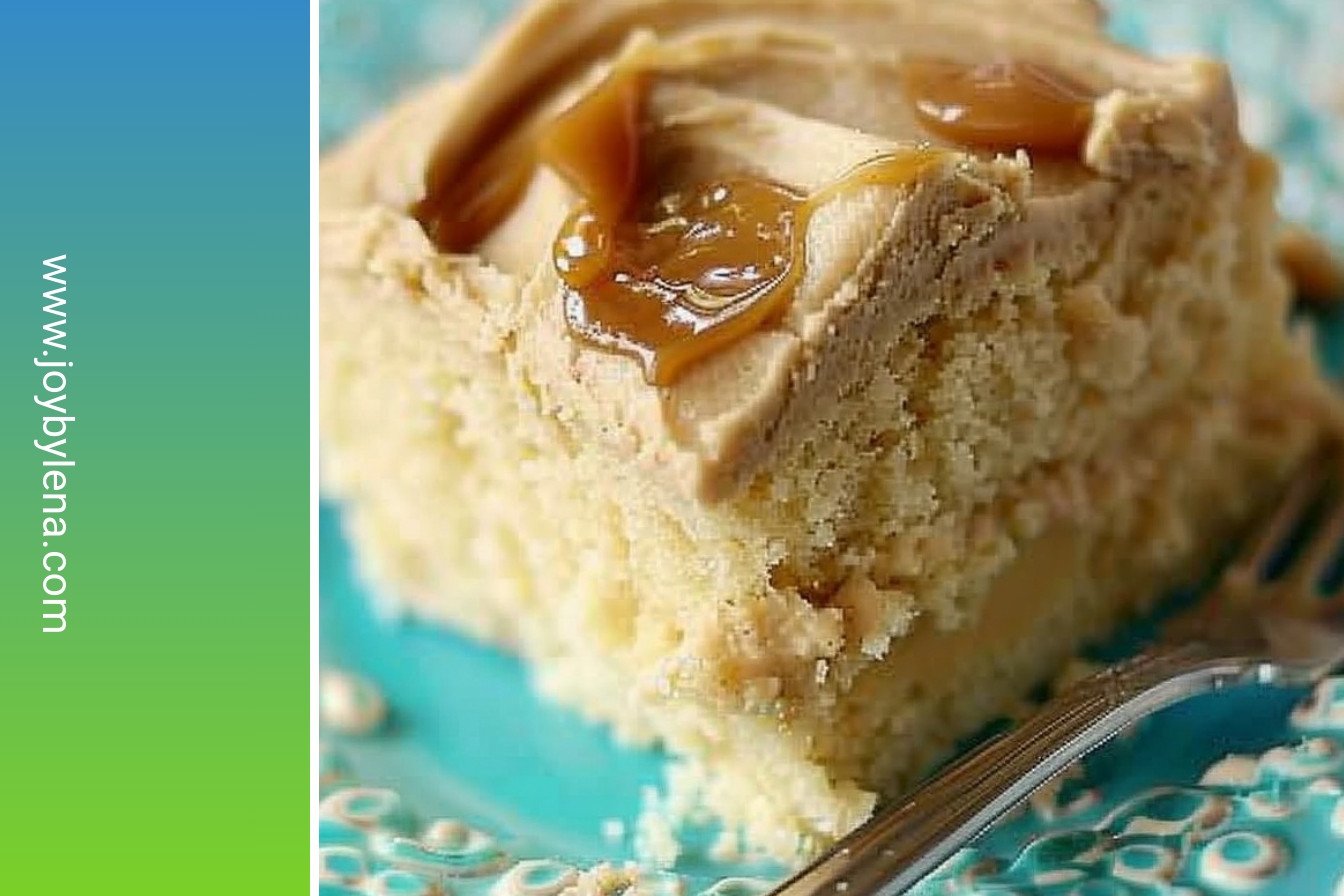
My Gooey Peanut Butter Dream Squares
Oh, these squares are my weakness. Just thinking about them makes me smile. My grandson calls them “candy bar cookies.” He’s not wrong. They are rich, fudgy, and full of peanut butter joy. I love how the kitchen smells when they are baking. It feels like a big, warm hug.
Let’s make some magic together. It’s so simple, I promise. You just need one big bowl and a spoon. No fancy mixers required here. Are you ready? Let’s get our hands busy.
Step 1: First, get your oven warming up to 300°F. Spray your baking dish so nothing sticks. Now, take that melted butter and put it in your big bowl. Add the peanut butter and both sugars. Stir it all until it looks like a smooth, happy paste.
Step 2: Crack in your two eggs. Give them a good whisk first. Stir everything until it’s nice and smooth again. Now, add your flour and mix it in. Don’t over-stir, just until you see no more white bits. That’s the secret to a tender square.
Step 3: Time for the best part! Pour in the vanilla. It smells amazing, doesn’t it? Now, toss in most of the peanuts and peanut butter chips. (Save a little handful for the top!). Stir them all through the thick dough. I still laugh at how my dog watches this step.
Step 4: Spread the dough into your pan. Use your spoon to make it even. Now, sprinkle those saved peanuts and chips on top. They make the squares look so pretty. (A hard-learned tip: The middle should still look a little jiggly when you take them out). That’s what makes them so gooey!
Step 5: Let them cool completely in the pan. I know, the waiting is the hardest part. But if you cut them warm, they will fall apart. Trust me on this. Do you like your desserts warm or cold? Share below!
Cook Time: 40 minutes
Total Time: 50 minutes
Yield: 12 servings
Category: Dessert, Cookies
Let’s Mix It Up!
Once you know the basics, you can get creative. Here are a few fun twists I love to try. They make an old recipe feel brand new.
Chocolate Swirl: Drop spoonfuls of chocolate syrup on the dough. Swirl it with a knife before baking.
Pretzel Crunch: Swap the salted peanuts for crushed pretzel pieces. You get a sweet and salty surprise.
Jammy Thumbprint: Press little dents in the dough before baking. Fill them with your favorite jam or jelly.
Which one would you try first? Comment below!
The Perfect Little Plate
These squares are a treat all on their own. But sometimes, I like to make a special plate. It feels like a party then.
For serving, try a tiny sprinkle of sea salt on top. It makes the peanut flavor pop. A small scoop of vanilla ice cream on the side is heavenly. Or just warm one up for ten seconds. It turns into a melty dream.
For a drink, a tall glass of cold milk is the classic choice. It cuts through the richness perfectly. For the grown-ups, a cup of strong black coffee is wonderful too. Which would you choose tonight?

Keeping Your Fudgy Peanut Butter Squares Fresh
These squares are best kept in an airtight container. They will stay fresh on your counter for about three days. You can also freeze them for a sweet treat later. Just wrap each square tightly in plastic wrap.
Then place them all in a freezer bag. They will keep for up to three months. I once sent a whole batch to my grandson at college. He said they tasted perfect after thawing on his desk.
This matters because a little planning gives you joy anytime. You can double the recipe and freeze half. That way, you always have a homemade dessert ready. Have you ever tried storing it this way? Share below!
Easy Fixes for Common Baking Hiccups
Is your middle too gooey? Your oven might be too hot. Next time, try lowering the temperature by 25 degrees. I remember when my first batch came out soupy in the center. I learned my oven runs a little hot.
Are the edges too hard? You might have over-baked them. The pan should look set around the edges but jiggly inside. Are your squares crumbly? Let them cool completely before you cut them.
Getting this right builds your confidence in the kitchen. It also makes the flavor and texture just perfect. Which of these problems have you run into before?
Your Peanut Butter Square Questions, Answered
Q: Can I make this gluten-free? A: Yes! Just use your favorite gluten-free self-rising flour blend. It works wonderfully.
Q: Can I make it ahead? A: Absolutely. Bake them a day before you need them. The flavor gets even better.
Q: What can I use instead of peanut butter chips? A: Chocolate chips are a delicious swap. My grandkids love that version.
Q: Can I make a smaller batch? A: Sure. Just halve all the ingredients. Use an 8×8 inch pan to bake it.
Q: Are the salted peanuts important? A: They add a nice little crunch. But you can use unsalted if you prefer. Which tip will you try first?
Share Your Kitchen Creations
I hope you love making these fudgy squares. Baking is a way to share love with family and friends. My kitchen is my happy place, and I love hearing about yours.
I would be so thrilled to see your results. Fun fact: This recipe was my daughter’s favorite after-school snack. Please show me your beautiful creations. Have you tried this recipe? Tag us on Pinterest!
Happy cooking! —Lena Morales.

Fudgy Peanut Butter Squares: Irresistibly rich and gooey.:
Description
The ultimate no-bake dessert! These fudgy peanut butter squares are irresistibly rich, gooey, and so easy to make. A guaranteed crowd-pleaser for any occasion.
Ingredients
Instructions
- Preheat the oven to 300°F and lightly spray a 9×13-inch baking dish with nonstick cooking spray. In a large bowl, combine the melted butter, peanut butter, sugar, and brown sugar. Stir until well combined. Add the eggs and stir until smooth.
- Add the flour and stir until combined. Add the vanilla. Add the peanuts and peanut butter chips, reserving a few of each to sprinkle on the top. Stir to combine.
- Spread the cookie dough mixture evenly into the prepared pan. Sprinkle with the reserved peanuts and peanut butter chips. Bake for about 40 minutes or until the edges are set but the middle is still a bit jiggly. Cool completely before slicing.
Notes
- For best results, cool completely before slicing to ensure clean cuts.


Leave a Reply