A Sweet Start
Hello, my friend. Come sit. Let’s make something fun. Today, we are making caramel apples. They are sticky, sweet, and so good. I love making them when the air gets a little cooler.
My grandson calls them “candy apples on a stick.” He is right. They are a special treat. Making them together is the best part. What is your favorite fall treat to make with family?
The Apple of My Eye
First, we need good apples. Use any kind you like. I prefer crisp ones. They give a nice crunch under all that caramel.
Here is a little secret. Wash them in hot water first. Store apples often have a waxy coat. The hot water helps the caramel stick. Dry them very, very well. I still laugh at that. A wet apple makes the caramel slide right off.
Melting the Memories
Now, the caramel. We use the little wrapped squares. Unwrapping them is a job for little fingers. My granddaughter loves to help. She sneaks a few, of course.
Melt them slow with cream and a tiny salt pinch. The salt makes the sweet taste even better. Doesn’t that smell amazing? Stir until it is smooth like sauce. Fun fact: The first caramel apples were sold in the 1950s. A candy maker had too many caramel leftovers after Halloween!
The Dip and Roll
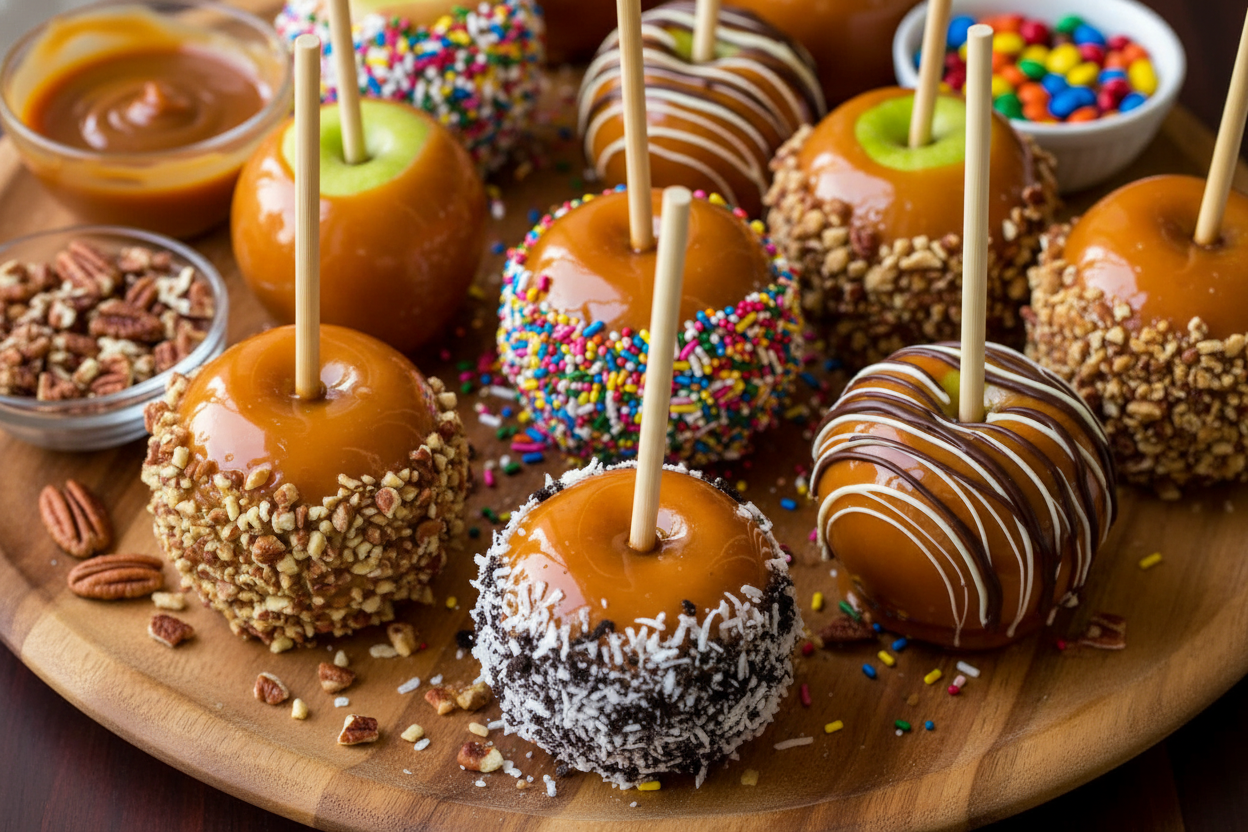
Time for the fun part. Push a stick into each apple top. Now, dip it into the warm caramel. Turn it slowly. Let the extra drip back into the bowl.
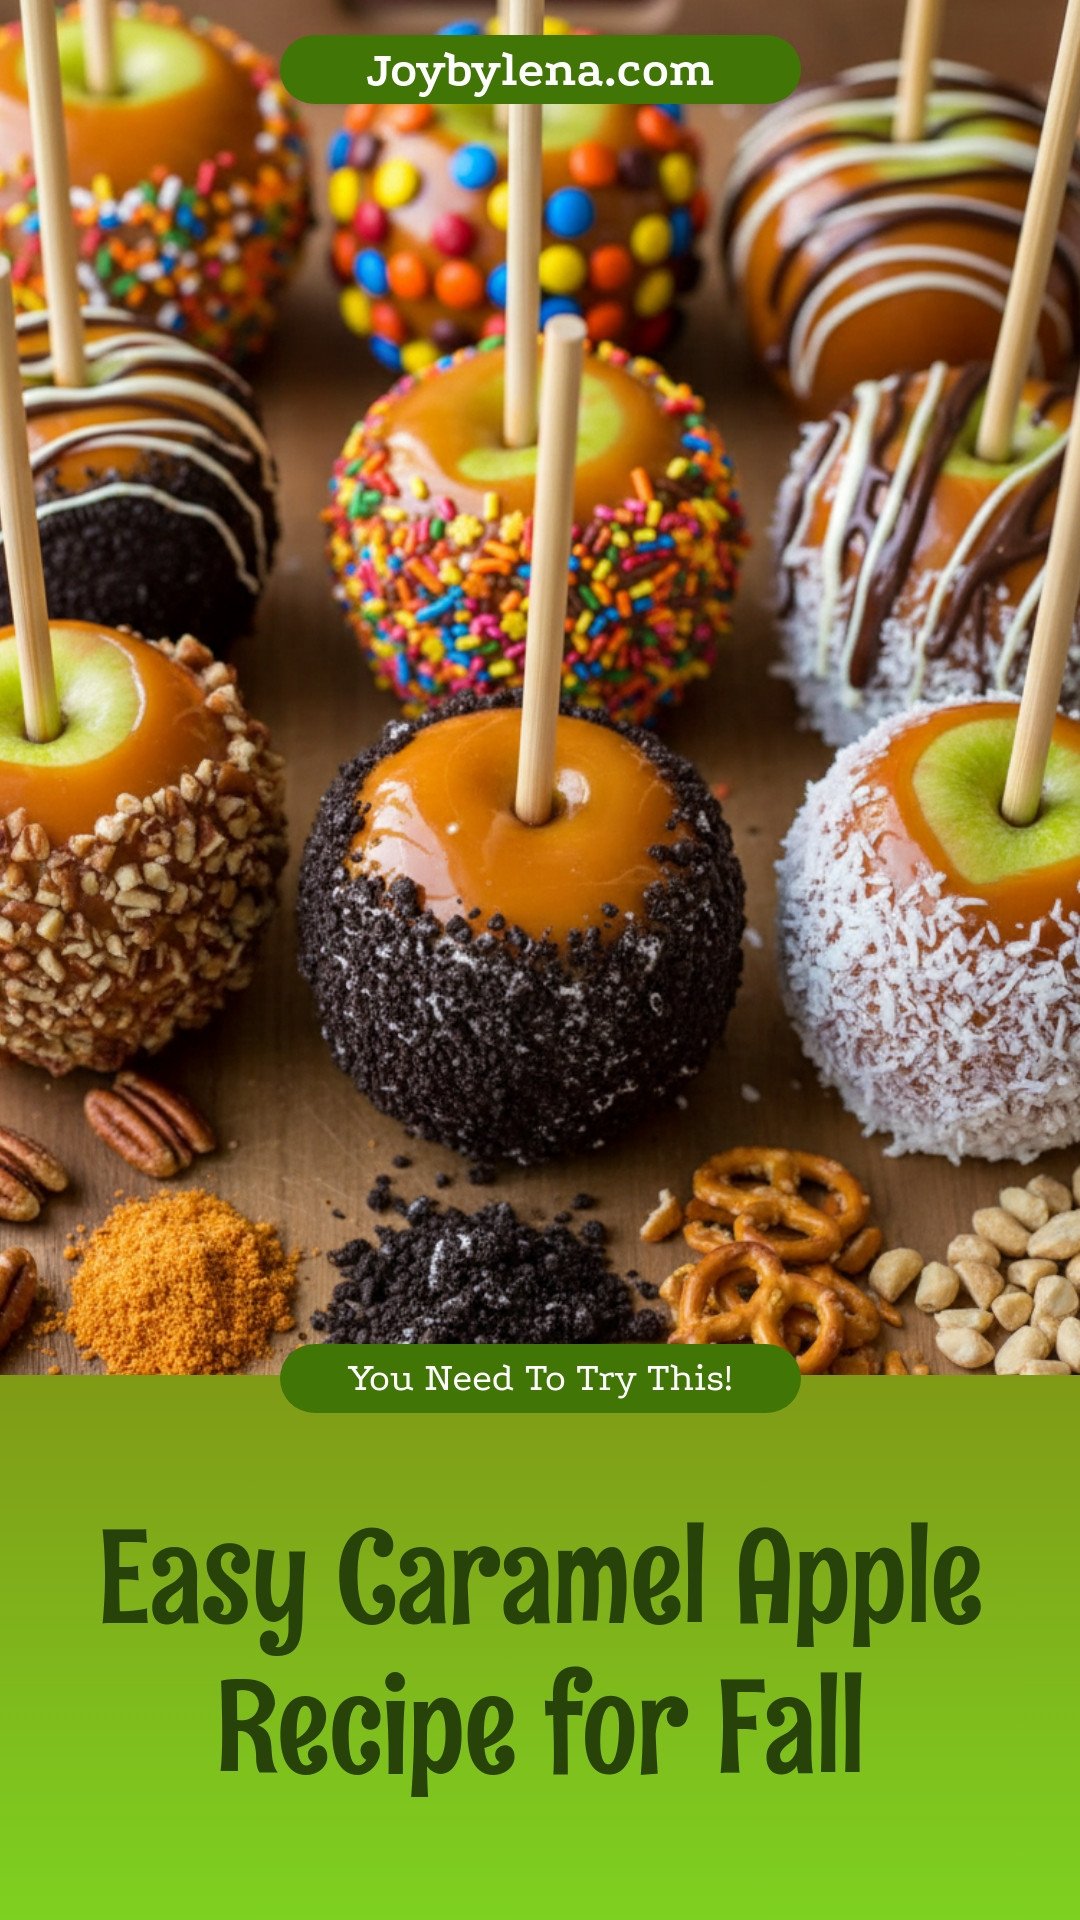
Why does this matter? Doing it slow makes a nice, even coat. If you go too fast, you get lumps. Then, roll your apple in toppings right away. Sprinkles, nuts, or crushed cookies all work. Which topping would you try first?
A Little Patience
After dipping, the apples need to rest. Put them in the fridge. Wait about 15 minutes. This lets the caramel get firm.
This waiting time is important. Why does this matter? It teaches us that good things take a little time. Use this time to clean up. Or, just tell a story. Then, you can drizzle on some melted chocolate if you like. Share a picture of your finished apples with me. I would love to see your creations.
Ingredients:
| Ingredient | Amount | Notes |
|---|---|---|
| Apples | 10 | or use 8-10 apples depending on size |
| Skewers for apples | 10 | |
| Caramels, unwrapped | 22 oz | from two 11 oz bags |
| Heavy whipping cream | 4 Tbsp | |
| Salt | 1 pinch | |
| Chopped pecans | As desired | Optional topping |
| Sprinkles | As desired | Optional topping |
| Mini M&M’s | As desired | Optional topping |
| Shredded coconut | As desired | Optional topping |
| Crushed Oreo cookies | As desired | Optional topping |
| Melted chocolate | For drizzling | Optional topping |
| Crushed pretzels | As desired | Optional topping |
| Chopped peanuts | As desired | Optional topping |
My Easy Caramel Apple Recipe for Fall
Hello, my dear! Come sit. The air is getting crisp, isn’t it? That means it’s caramel apple time. I’ve been making these since my kids were small. We’d pick apples at the orchard every October. My grandson still laughs at that one time I got caramel in my hair. Let’s make some sweet, sticky magic together. You’ll see how simple it is.
Step 1: Prepare the Apples
First, we must prepare our apples. If you bought them from a store, give them a quick dip in hot water. Rub them dry with a towel. This removes the waxy coating so the caramel will stick. Push a skewer firmly into the top of each apple, where the stem was. A little tip? Chill them in the fridge while you work. A cold apple helps the caramel set faster.
Step 2: Get Everything Ready
Now, let’s get everything ready. Line a baking sheet with parchment paper. Doesn’t that make cleanup a dream? Then, prepare your toppings. Chop some nuts, pour sprinkles into a bowl, crush those pretzels! Having everything laid out is the secret. (My hard-learned tip: Dry your apples VERY well. Any water makes the caramel slide right off. Trust me, I learned the hard way!)
Step 3: Melt the Caramel
Time to melt the caramel. Unwrap all those little squares. Place them in a bowl with the cream and a tiny pinch of salt. Heat them in the microwave, stirring every 30 seconds. You want it smooth and silky. Be patient. Stir until it’s like a warm, gooey river. Doesn’t that smell amazing already?
Step 4: Dip the Apples
Here’s the fun part! Hold an apple by its stick. Dip it sideways into the caramel. Swirl it around to coat almost to the top. I like leaving a peek of red apple skin. Let the extra caramel drip off. Then, gently scrape the bottom on the bowl’s edge. This stops a big, sticky puddle from forming on your plate later.
Step 5: Add Toppings & Set
Immediately roll your sticky apple in your favorite toppings. Or leave it plain for classic goodness. Place it on your prepared sheet. If the caramel gets too thick, just warm it up a little. Pop all the apples in the fridge for at least 15 minutes. This lets the caramel set perfectly. What’s your must-have topping? Share below!
Cook Time: 20 minutes
Total Time: 45 minutes
Yield: 10 apples
Category: Dessert, Snack
Three Fun Twists to Try
Once you master the classic, try playing with flavors! It’s like choosing your own adventure. My grandkids love to invent new versions. Here are three of our favorites to spark your imagination.
Salty-Sweet Pretzel Crunch
Roll your apple in crushed pretzels right after dipping. Then, drizzle with a little extra caramel. The salty crunch is so good.
Chocolate-Peanut Butter Dream
Stir two big spoonfuls of peanut butter into the melted caramel. After the apple sets, drizzle it with melted chocolate.
Autumn Spice
Add a sprinkle of cinnamon and a dash of nutmeg to your caramel while it melts. It will smell like a cozy fall day.
Which one would you try first? Comment below!
Serving Them Up with Style
These apples are a celebration all by themselves. But every treat is better with friends. For a party, stand them in a cup filled with sugar or popcorn kernels. It makes a cute display. You could also slice them into wedges for sharing. Just be ready for sticky fingers and big smiles.
What to drink? A cold glass of fresh apple cider is the perfect match. It’s sweet and tangy. For the grown-ups, a small glass of spiced rum or bourbon alongside their cider is wonderfully warm. Which would you choose tonight?

Keeping Your Caramel Apples Happy
Let’s talk about storing these sweet treats. First, always keep them in the fridge. The caramel will stay nice and firm. You can store them for up to three days this way.
I do not recommend freezing them. I tried it once years ago. The apples got mushy when they thawed. It was a sad, sticky lesson.
For a party, you can batch-cook the caramel ahead. Just melt it the day before. Then dip your apples fresh the day of your gathering. This saves you so much time and stress.
Storing them right matters. It keeps your hard work delicious. It also means you can make joy ahead of time. Have you ever tried storing it this way? Share below!
Fixing Common Caramel Apple Troubles
Sometimes, caramel can be tricky. Here are easy fixes. First, if the caramel slides off, your apples were wet. Dry them completely with a towel before dipping.
Second, if the caramel is too thick, warm it a little. Add a tiny splash of cream. I remember when my first batch turned into a glob. A little warmth fixed it right up.
Third, if toppings won’t stick, act fast. Roll your apple right after dipping. The caramel sets quickly. This matters because a good seal means crunchier toppings. Fixing small problems builds your kitchen confidence. Which of these problems have you run into before?
Your Caramel Apple Questions, Answered
Q: Is this recipe gluten-free? A: Yes, the caramel apples are. Just check your topping labels, like pretzels.
Q: Can I make them ahead? A: You can! Make them up to three days before. Keep them chilled in the fridge.
Q: What if I don’t have heavy cream? A: You can use whole milk. The caramel will be a bit softer. Fun fact: A pinch of salt makes the sweet caramel taste even sweeter!
Q: Can I make a smaller batch? A: Of course. Just use half the ingredients. One bag of caramels will coat four or five apples.
Q: Any optional tips? A: Try a mix of sweet and salty toppings. It creates a wonderful flavor dance. Which tip will you try first?
From My Kitchen to Yours
I hope you have fun making these. The best part is sharing them. Seeing a friend’s smile is the real reward.
I would love to see your creations. Did you use sprinkles or peanuts? Share your kitchen story with me. Have you tried this recipe? Tag us on Pinterest! You can find me at @LenasCozyKitchen.
Thank you for cooking with me today. Happy cooking!
—Lena Morales.
Easy Caramel Apples: Easy Caramel Apple Recipe for Fall
Description
A classic fall treat made easy! These homemade caramel apples are sweet, crunchy, and perfect for customizing with your favorite toppings.
Ingredients
Chopped pecans
Sprinkles
Mini M&M’s
Shredded coconut
Crushed Oreo cookies
Melted chocolate for drizzling
Crushed pretzels
Chopped peanuts
Instructions
- If using store-bought apples, you should remove the wax coating first. Dip apples in hot water for a few seconds then rub them with a towel to remove wax. Dry the Apples really well. Remove stems and Insert Sticks into the top of the apples. Tip: refrigerating apples will help the caramel set faster while you prep toppings and melt caramel.
- Line a baking sheet with parchment paper or a silicone liner. Prepare toppings so they are ready to use.
- Heat caramel, cream and a pinch of salt over a double boiler or microwave for a few minutes stirring every 30 seconds until caramel is melted and smooth.
- Roll apples in caramel, dipping apples sideways to coat almost to the top. We like to leave a little bit of Apple showing on top so you can see what kind of Apple you’re picking. Allow excess to drip back into the bowl. Scrape off the bottom of the Apple against the side of the bowl so you don’t get too much caramel pooling at the bottom.
- If you see a lot of air bubbles in your caramel start to form or if it gets too thick, then rewarm it slightly. If caramel so too runny, let it cool slightly before using.
- Immediately after dipping in caramel, roll apples into your toppings or leave them plain if desired. Refrigerate at least 15 minutes or until caramel is set before drizzling with melted chocolate and enjoying.
Notes
- Nutrition Per Serving: Calories: 310kcal | Carbohydrates: 65g | Protein: 3g | Fat: 7g | Saturated Fat: 3g | Polyunsaturated Fat: 2g | Monounsaturated Fat: 1g | Cholesterol: 12mg | Sodium: 129mg | Potassium: 308mg | Fiber: 4g | Sugar: 52g | Vitamin A: 208IU | Vitamin C: 9mg | Calcium: 85mg | Iron: 1mg


Leave a Reply