My Grandson’s Favorite Dinner
My grandson Leo calls these “Grandma’s Magic Bites.” He is ten. I still laugh at that. One day he asked why mine taste better than the ones from a bag. I told him my secret is love. And a little Parmesan cheese.
Making them together is the real magic. We get our hands messy with flour and egg. He giggles when the breadcrumbs stick to his fingers. This matters because cooking together makes memories. It’s not just about the food on the plate.
Why We Bake, Not Fry
I used to fry nuggets in a big pan. It made the house smell like oil for days. Now we bake them. They still get so crispy and golden. Doesn’t that smell amazing? It’s a cleaner, simpler way.
Using a wire rack is my trick. It lets hot air move all around each piece. This way, they cook evenly. They don’t get soggy on the bottom. This matters because good food should feel good, too. It’s a kinder choice for our bodies.
The Coating Station
Set up three bowls in a row. It’s like an assembly line. Flour first, then egg, then the crunchy mix. The order is important. It makes a little jacket for the chicken.
Fun fact: The Italian seasoning isn’t just for Italian food! It’s a mix of herbs like oregano and basil. It adds a garden of flavor. Do you have a favorite spice you like to add to breadcrumbs? Tell me about it.
A Little Flip for Perfection
Don’t forget to flip them halfway. I set a timer so I don’t get distracted. That last minute under the broiler is key. It gives them that beautiful, toasty color. Watch them closely, though!
They go from golden to dark very fast. I learned that the hard way once. We had very “well-done” nuggets that night. What’s your biggest kitchen “oops” moment? I bet we’ve all had one.
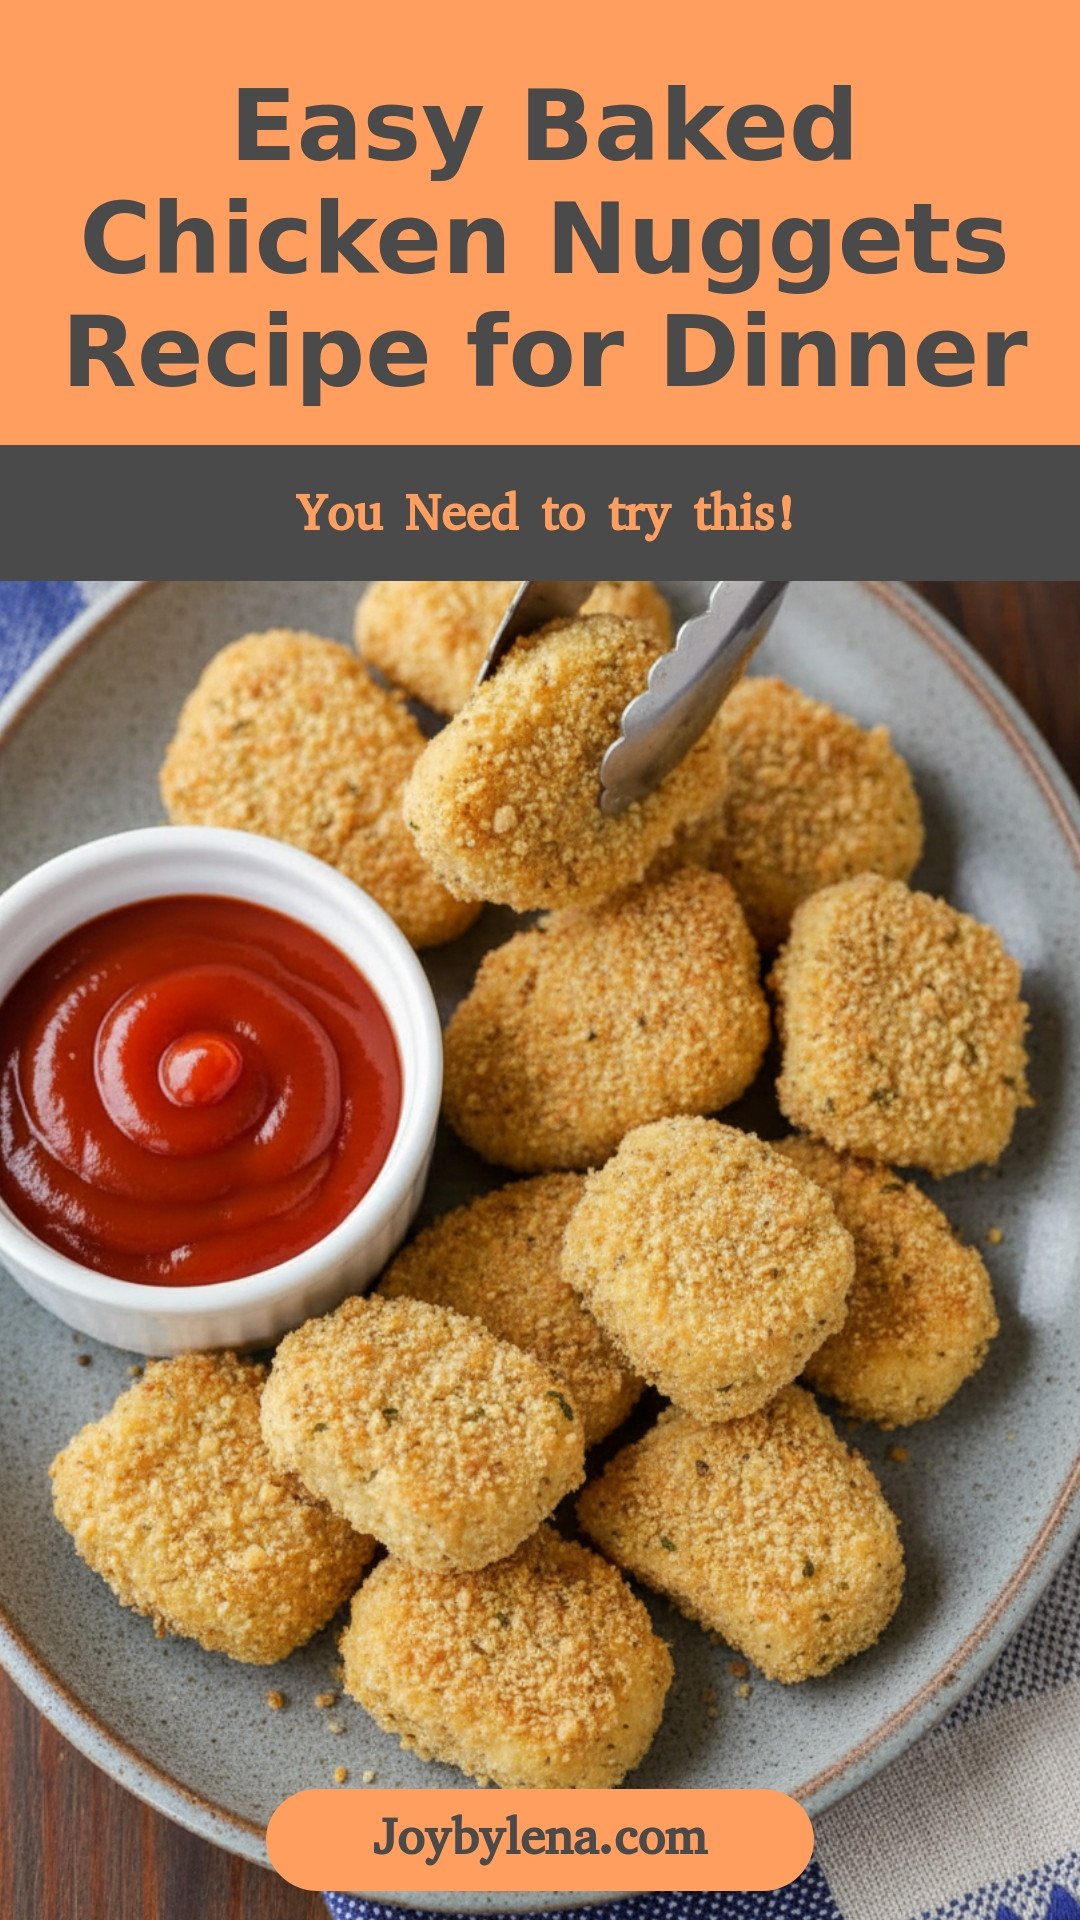
Dipping and Sharing
Let them rest for a minute when they come out. This keeps the coating crisp. Then, the fun begins. Leo likes his with ketchup. I love mine with a little honey mustard.
These are perfect for a simple dinner. They are also great for parties. You can make a big batch ahead of time. What’s your favorite dipping sauce for nuggets? I’m always looking for new ideas to try with Leo.
Ingredients:
| Ingredient | Amount | Notes |
|---|---|---|
| chicken breast, boneless, skinless | 2 | |
| bread crumbs, Plain | 1 cup | |
| parmesan cheese, grated | ½ cup | |
| garlic salt (with parsley flakes) | 1 teaspoon | |
| Italian seasoning | 1 tablespoon | |
| all-purpose flour | 1 cup | |
| eggs | 2 | |
| water | 2 tablespoons |
Easy Baked Chicken Nuggets: My Grandson’s Favorite Dinner
Hello, my dear! Come sit at the counter. Let’s make something fun. These baked chicken nuggets are my grandson Mateo’s absolute favorite. He calls them “Abuela’s magic bites.” I love that. They are crispy outside, tender inside. And baking them makes me feel good. Doesn’t that smell amazing already?
We will make our own little assembly line. It feels like a craft project. I still laugh at the first time I made these. I got the order mixed up! Trust me, our way works perfectly. Just follow these simple steps with me.
Step 1: Prepare the Chicken and Oven
First, warm your oven to 400°F. Then, take your chicken breasts. Cut them into little bite-size pieces. Think about the size of a big grape. This makes them perfect for dipping. Place them on a clean plate. Now we get our bowls ready.
Step 2: Set Up Your Breading Station
Grab three shallow bowls. In the first, put your flour. In the second, crack the two eggs. Add the water and beat it all together. In the third, mix bread crumbs, Parmesan, garlic salt, and Italian seasoning. This mix is the secret flavor!
Step 3: Bread the Chicken Pieces
Time for the fun messy part! Dip each chicken piece. First coat it in flour. Shake off the extra. Then dunk it in the egg wash. Let it drip a bit. Finally, roll it in the crumb mix. Press gently so it sticks. (A hard-learned tip: use one hand for dry steps, one for wet. It keeps your fingers less clumpy!)
Step 4: Arrange for Baking
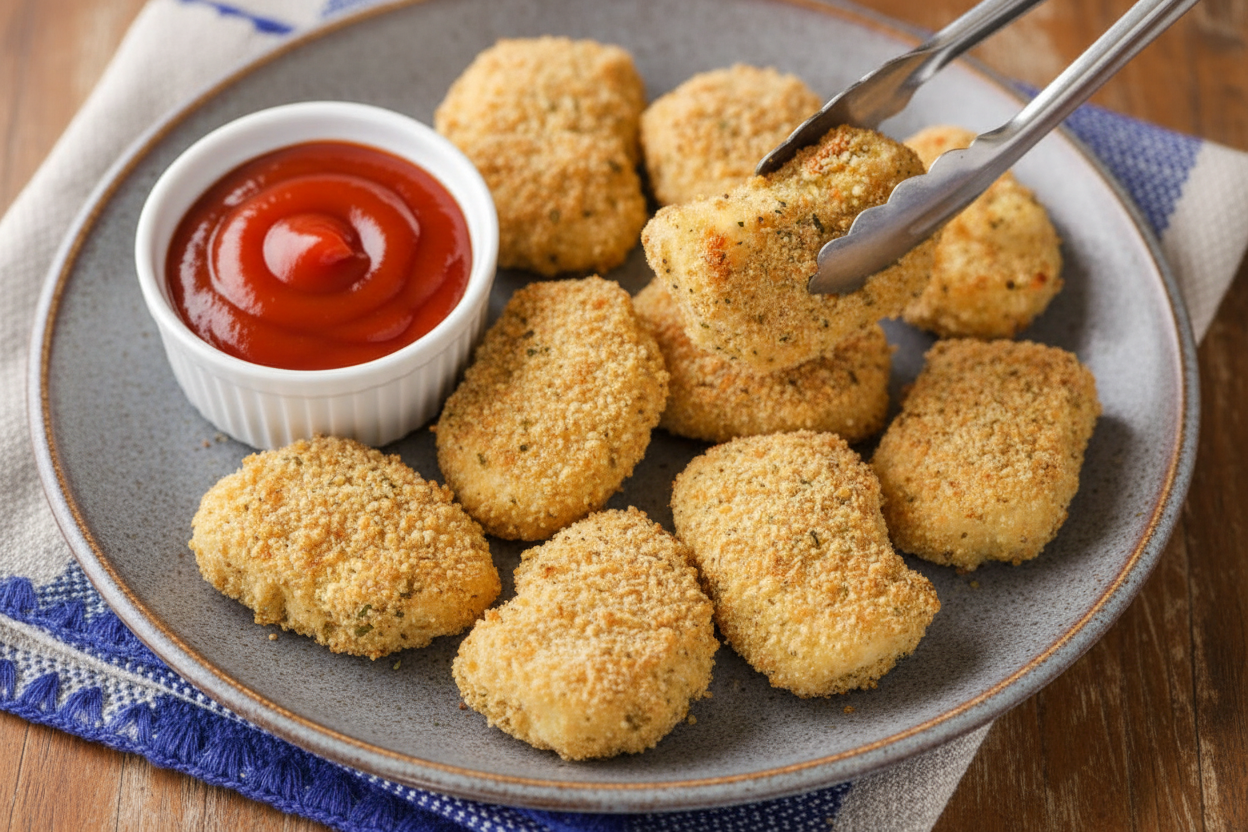
Place each piece on a wire rack over a baking sheet. I line the sheet with foil for easy cleaning. Give them a light spray with olive oil. This helps them get golden and crisp. Ready for the heat!
Step 5: Bake, Flip, and Broil
Bake for 10 minutes. Take them out and flip each nugget. Give them another spray. Bake for 8 more minutes. Last, broil for just 1-2 minutes per side. Watch them closely! They brown so fast. Do you broil with the oven door open or closed? Share below! Serve them warm. They are pure happiness on a plate.
Cook Time: 20 minutes
Total Time: 35 minutes
Yield: About 4 servings
Category: Dinner, Kid-Friendly
Three Fun Twists to Try Next Time
Once you master the basic recipe, you can play! Here are three ideas I love. They make dinner feel new again. My neighbor Sam loves the spicy version.
Pizza Nuggets:
Add dried oregano to the crumbs. Mix a little marinara sauce into the egg wash. So good!
Crunchy Pretzel Nuggets:
Use crushed pretzels instead of breadcrumbs. Skip the Italian seasoning. The salty crunch is wonderful.
Sweet & Smoky Nuggets:
Add a teaspoon of paprika and a pinch of brown sugar to the crumb mix. It gives a cozy, warm flavor.
Which one would you try first? Comment below! I love reading your ideas.
How to Serve Your Golden Nuggets
Presentation is part of the joy. For a simple dinner, I serve these with steamed green beans and apple slices. The colors look so cheerful together. For dipping, honey mustard is Mateo’s pick. I love a cool ranch dressing.
You could also make a nugget salad. Toss greens with a light vinaigrette. Pile warm nuggets on top. It’s a perfect mix of crunchy and fresh. For drinks, a sparkling lemonade is lovely. For the grown-ups, a cold lager beer pairs nicely with the savory crumbs.
Which would you choose tonight? A classic dinner plate or a big salad bowl? I can never decide.

Keeping Your Nuggets Happy and Tasty
Let’s talk about keeping your nuggets for later. First, let them cool completely. Then, pop them in the fridge for up to three days. They reheat best in the oven or toaster oven. This keeps them crispy.
You can also freeze them for a busy night. Lay the baked nuggets on a tray and freeze them solid. Then, bag them up. They’ll keep for two months. Bake from frozen until hot.
I once put warm nuggets in a container. The next day, they were soggy. I learned my lesson about cooling. Batch cooking like this saves your future self. It means a good meal is always ready. Have you ever tried storing it this way? Share below!
Simple Fixes for Nugget Troubles
Is your coating falling off? Pat the chicken pieces dry first. A damp chicken won’t hold crumbs well. This simple step makes all the difference.
Are they not crispy enough? Use that wire rack. It lets hot air circle all around. I remember when I just used a pan. The bottoms got soft.
Are they cooking unevenly? Cut the pieces the same size. A 1.5-inch piece is just right. This matters for confidence. You know dinner will be perfect. Which of these problems have you run into before?
Fun fact: The wire rack trick works for cookies too! Getting these small things right builds kitchen joy. It turns worry into a happy, tasty meal.
Your Nugget Questions, Answered
Q: Can I make these gluten-free?
A: Yes! Use gluten-free bread crumbs and flour. It works just the same.
Q: Can I make them ahead?
A: You can coat them and refrigerate for a few hours. Then, just bake when ready.
Q: What if I don’t have Italian seasoning?
A: Use dried oregano and basil. A pinch of each will do nicely.
Q: Can I double the recipe?
A: Absolutely. Just use two baking sheets. Switch their oven positions halfway through.
Q: Any extra tip for kids?
A: Let them help with the dipping station. It’s fun and messy. Which tip will you try first?
From My Kitchen to Yours
I hope your kitchen is filled with good smells. I hope you feel proud of your meal. Cooking is about sharing love, one bite at a time.
I would love to see your creations. Have you tried this recipe? Tag us on Pinterest! You can find me at @LenasCozyKitchen. Share your photos and stories with me.
Thank you for cooking with me today. Happy cooking!
—Lena Morales.
Easy Baked Chicken Nuggets Recipe for Dinner
Description
Crispy, flavorful baked chicken nuggets made with simple ingredients for a healthier dinner everyone will love.
Ingredients
Instructions
- Preheat oven to 400°F.
- Cut chicken into bite-size pieces (about 1.5 inch).
- Mix together bread crumbs, grated Parmesan cheese, salt, and spices in a shallow bowl. Add flour to a second bowl. In a third bowl beat together the eggs and water.
- Dip chicken into flour, then egg mixture, and finally the crumb mixture. Place onto a wire rack on top of a foil-lined baking sheet. Spray with olive oil.
- Bake for 10 minutes, flip spray with oil and bake 8 more minutes. Broil on HIGH for 1-2 minutes. Flip pieces and broil an additional 1-2 minutes on the other side. Serve warm.


Leave a Reply