My First Apple Crisp
I made my first apple crisp when I was twelve. My abuela was watching. I was so nervous. I mixed everything with my tiny hands.
I forgot the lemon juice. The apples turned a little brown. I thought I ruined it. Abuela just smiled. She said, “It will taste like love.” She was right. It was delicious.
Why We Use Our Hands
This recipe asks you to use your hands. You mix the topping with your fingers. This matters. A fork or spoon makes dough too even.
Your fingers make perfect little crumbs. Those crumbs bake into crispy, buttery bits. They are the best part. Doesn’t that sound good? I still use my hands every time.
The Secret is in the Apples
Use firm, crisp apples. Granny Smith or Honeycrisp are great. They hold their shape. Soft apples get mushy in the oven.
That lemon juice is important too. It keeps the apples bright. It also adds a tiny zing. This matters because we eat with our eyes first. We want it to look as good as it tastes.
What’s your favorite apple for baking? Tell me in the comments.
Fun Fact About Oats
Fun fact: The rolled oats in the topping are called “old-fashioned.” They give the crisp its name! They add a chewy, nutty texture. Quick oats would just disappear.
I love that sound when the crisp comes out. The apples are bubbling. The topping is golden. The whole kitchen smells like cinnamon and butter. Doesn’t that smell amazing?
Making it Your Own
This recipe is like a good friend. You can change it a little. Try adding a handful of chopped pecans to the topping. Or a pinch of nutmeg with the cinnamon.
My grandson adds a few raspberries with the apples. It turns the filling a lovely pink. What would you add? A different spice? A different nut? I would love to hear your ideas.
The Best Part is Sharing
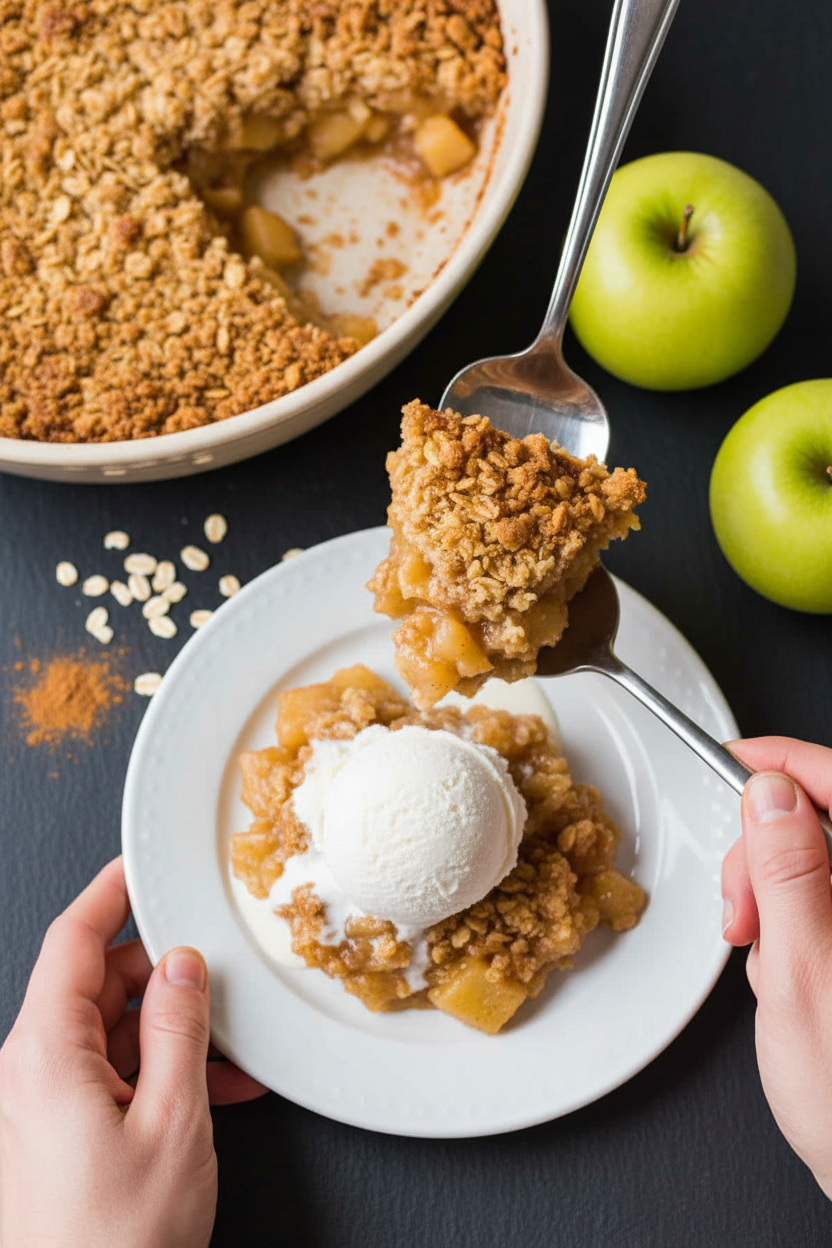
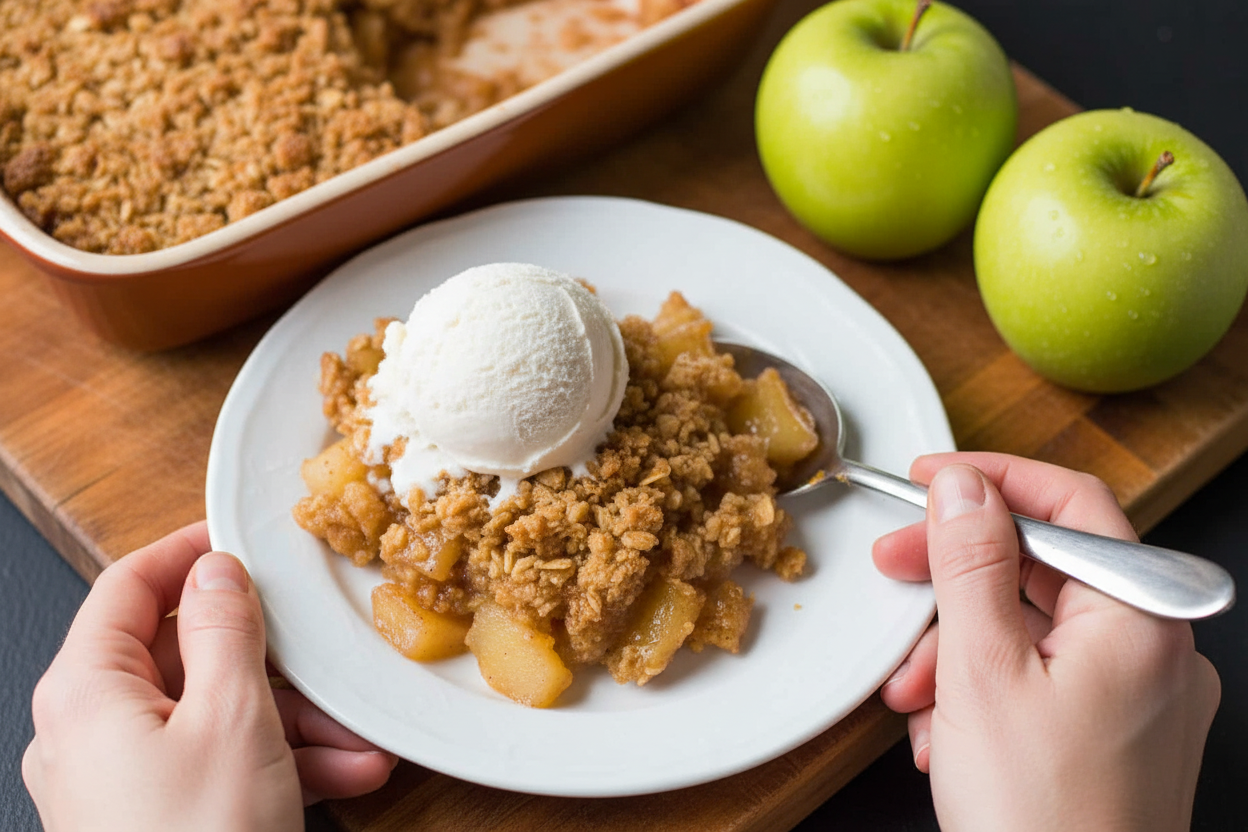
Apple crisp is best warm. Serve it with a scoop of cold vanilla ice cream. The ice cream melts into the crispy topping. It is pure happiness.
This dish is made for sharing. It feeds a crowd. It brings people to the table. That is its real magic. Do you have a food that brings your family together?
Ingredients:
| Ingredient | Amount | Notes |
|---|---|---|
| Firm-crisp apples | 4 lbs (11-12 medium) | For the filling |
| Lemon juice | 2 Tbsp | For the filling |
| Granulated sugar | 3/4 cup | For the filling, or to taste |
| All-purpose flour | 3 Tbsp | For the filling |
| Cinnamon | 1 1/2 tsp | For the filling |
| Flour | 1 3/4 cups | For the crumb topping |
| Packed brown sugar | 1/2 cup | For the crumb topping |
| Granulated sugar | 1/4 cup | For the crumb topping |
| Cinnamon | 1/2 tsp | For the crumb topping |
| Salt | 1/4 tsp | For the crumb topping |
| Unsalted butter | 1 cup (16 Tbsp / 2 sticks) | For the crumb topping, room temperature |
| Rolled oats (old-fashioned) | 1 cup | For the crumb topping |
My Cozy Apple Crisp Adventure
Hello, my dear! Come sit. Let’s make my favorite apple crisp. It’s like a warm hug from the oven. I learned this from my own grandma, you know. We’d pick apples every fall. My brother always ate more than he put in the basket. I still laugh at that.
This recipe is simple and full of love. You just need two bowls and your hands. Doesn’t that smell amazing? The cinnamon and apples together are pure magic. It’s the perfect treat for a chilly afternoon. Let’s get started, step-by-step.
Step 1: First, butter your baking dish well. Use your fingers to spread it everywhere. This keeps our apples from sticking. Then, peel and slice all your apples. Toss them with the lemon juice right away. (My hard-learned tip: The lemon keeps them from turning brown. It’s a little kitchen trick!)
Step 2: Now, mix the sugar, flour, and cinnamon for the filling. Sprinkle it over your apples. Toss them until every slice is coated. It will look like the apples have a sparkly jacket. Pour them into your buttered dish. Spread them out nice and even.
Step 3: Time for the fun part! The crumb topping. Dump the flour, oats, sugars, and salt into a big bowl. Stir it with your hands. Feel the different textures. Now add the soft butter. Squish it all together until it looks like crumbs. Quick quiz: What keeps our apple slices looking fresh and not brown? Share below!
Step 4: Sprinkle your crumbly topping over the apples. Cover them completely like a cozy blanket. Now, into the oven it goes. Bake it until it’s golden and bubbly. Your whole house will smell like heaven. Let it cool just a little before serving. Trust me, it’s worth the wait.
Cook Time: 45-50 minutes
Total Time: 1 hour 15 minutes
Yield: 8 servings
Category: Dessert, Baking
Three Fun Twists to Try
Once you master the classic, you can play! Here are my favorite twists. They make it feel like a whole new dessert. My grandkids love voting on which one we make.
Berry Apple Mix: Swap two apples for a cup of fresh berries. Raspberries are my secret. They add a lovely, tart surprise.
Ginger Snap Topping: Add a teaspoon of ground ginger to the crumb mix. It gives it a warm, spicy kick. Perfect for the holidays.
Salty Sweet Crunch: Stir a handful of chopped pecans into the topping. Add just a tiny pinch more salt. It’s so good! Which one would you try first? Comment below!
Serving It Up With Style
This crisp is wonderful all on its own. But a little extra love makes it special. I love serving it in my old ceramic bowls. They make everything taste better, I think.
For sides, a scoop of vanilla ice cream is classic. It melts into the warm apples. A dollop of fresh whipped cream is lovely too. For a drink, a cold glass of milk is perfect for kids. Grown-ups might like a small glass of sweet dessert wine. Which would you choose tonight?
Keeping Your Apple Crisp Cozy
Fresh apple crisp is a beautiful thing. But leftovers are a gift for tomorrow. Let it cool completely first. Then cover it tightly. It will be happy in the fridge for about four days.
You can freeze it, too. I wrap pieces tightly for my grandson. He heats one for a sweet school-day surprise. Fun fact: A frozen single serving reheats perfectly in a toaster oven.
To reheat, use your oven. Warm it at 350°F until bubbly again. This keeps the topping crisp. The microwave makes it soggy. I learned that the hard way with my first crisp!
Batch cooking saves busy days. Make a double batch of topping. Keep it in a bag in the freezer. Then you are halfway to dessert on any night. This matters because good food should be easy, not stressful. Have you ever tried storing it this way? Share below!
Simple Fixes for Common Crisp Troubles
Is your topping pale? Spread it thin. A thick layer will not get golden. I remember my first crisp. The topping was white and doughy. Now I spread it loosely.
Are the apples too crunchy? Slice them thinly. Thick chunks will not soften enough. Use a firm apple like Granny Smith. They hold their shape but still get tender.
Is the bottom too watery? Use the flour listed. It thickens the apple juices. Do not skip it. This matters for a perfect, saucy filling, not a soup.
Fixing small problems builds your cooking confidence. You learn what each ingredient does. Then you can make any recipe your own. Which of these problems have you run into before?
Your Apple Crisp Questions, Answered
Q: Can I make this gluten-free? A: Yes! Use your favorite gluten-free flour blend. It works just the same.
Q: Can I make it ahead? A: Absolutely. Assemble it and refrigerate overnight. Bake it the next day.
Q: What can I use instead of oats? A: Use chopped nuts or more flour. The texture will change, but it’s still good.
Q: Can I make a smaller batch? A: Of course. Just cut all the ingredients in half. Use a smaller baking dish.
Q: Any optional tips? A: A pinch of nutmeg in the filling is lovely. A scoop of vanilla ice cream is a must. Which tip will you try first?
From My Kitchen to Yours
I hope this recipe finds its way to your table. I love imagining families sharing it. The smell of baking apples is pure happiness.
If you make it, I would love to see. Your photos make my day. You can share them with our community. Have you tried this recipe? Tag us on Pinterest!
Thank you for letting me share my kitchen with you. Keep baking, keep sharing, and keep making sweet memories.
Happy cooking!
—Lena Morales.
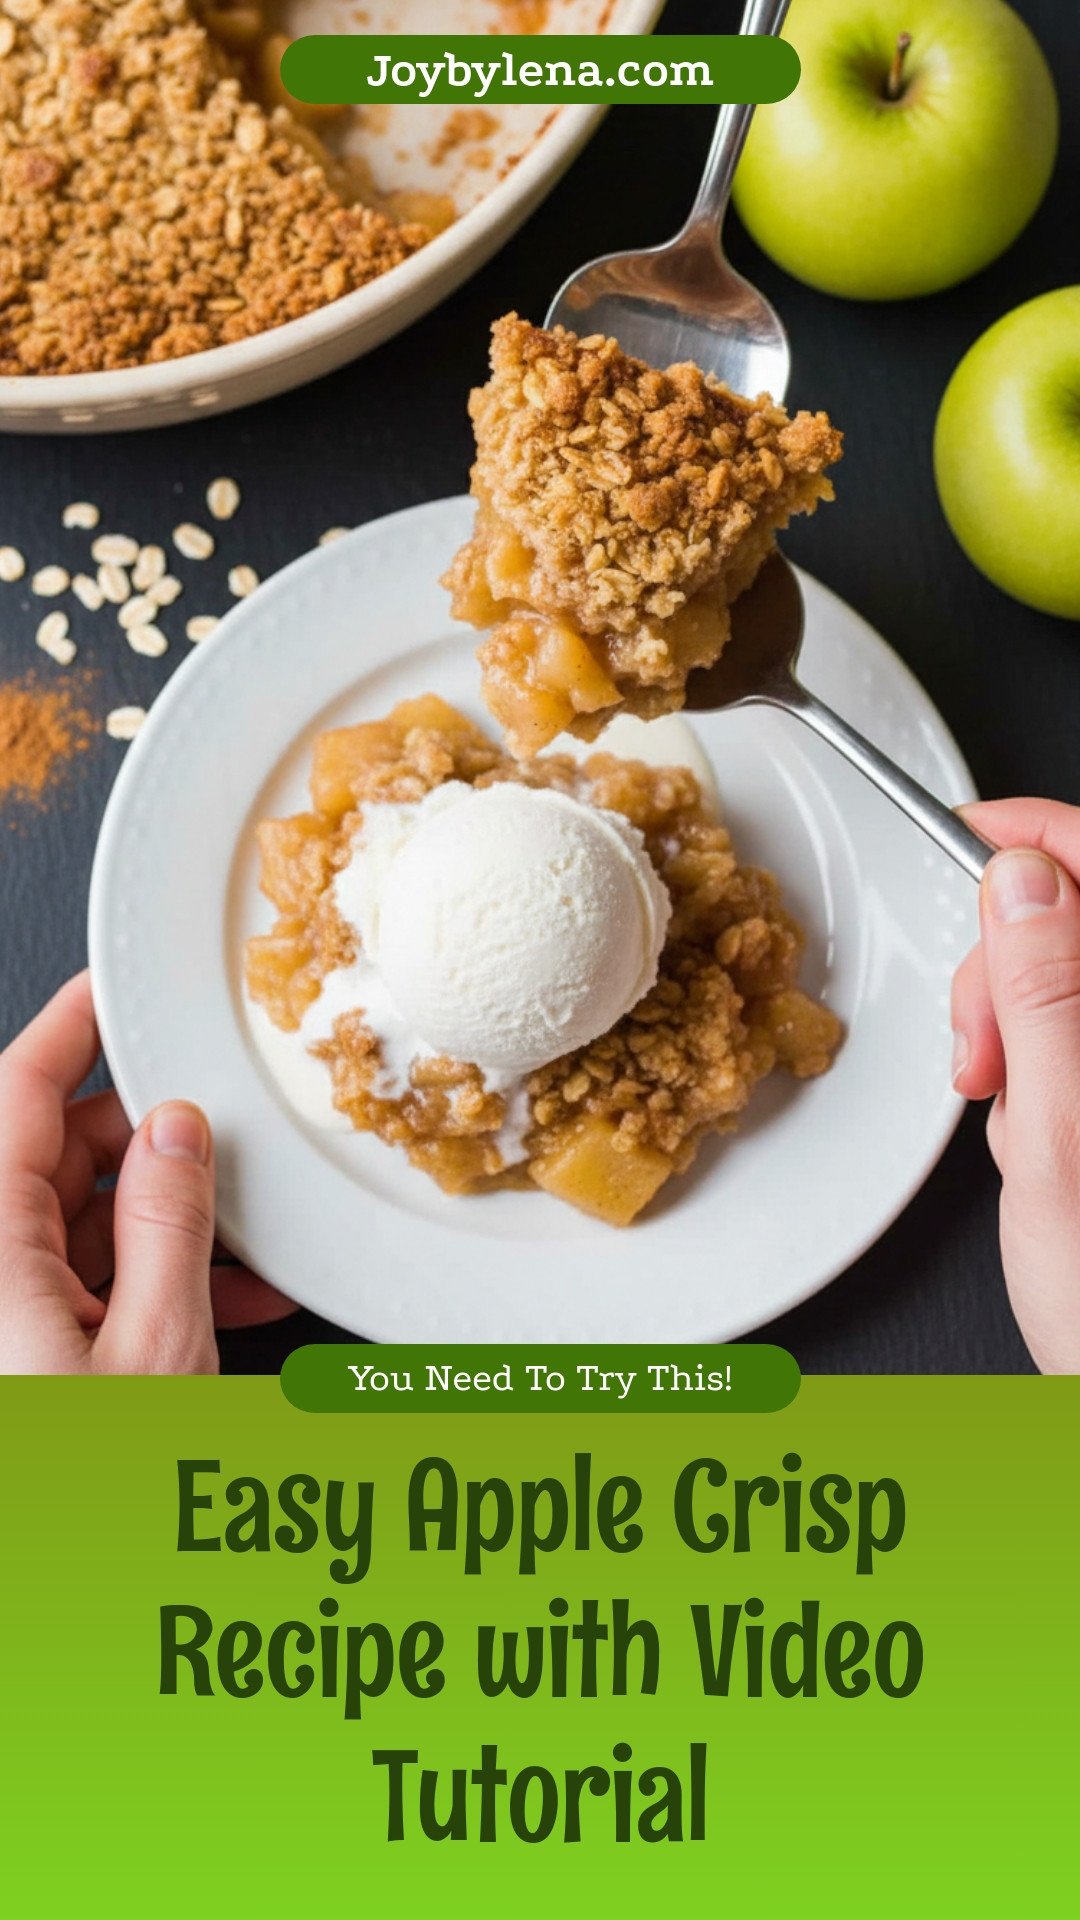
Easy Apple Crisp Recipe with Video Tutorial
Description
A classic and comforting dessert featuring a sweet, spiced apple filling topped with a buttery, crisp oat crumble. Perfect served warm with a scoop of vanilla ice cream.
Ingredients
For the Apple Crisp Filling:
For the Crumb Topping:
Instructions
- Generously Butter a 9×13 casserole dish with 1/2 Tbsp butter. Preheat the oven to 375F.
- Peel core and thinly slice apples to 1/4’ thickness. You should have 12 cups of sliced apples. Squeeze 2 Tbsp lemon juice over the apples and toss to coat.
- In a separate bowl, stir together 3/4 cup sugar, 3 Tbsp flour, and 1 1/2 tsp cinnamon then sprinkle mixture over apples and toss to combine. Transfer apples to the buttered casserole dish.
- Make the topping – in a large bowl, use your hands to stir together flour, oats, brown and granulated sugars, cinnamon, and salt. Add the diced butter and work it into the mixture with your hands until pea-sized crumbs form throughout. Spread topping over apples.
- Bake at 375˚F for 45-50 minutes or until the topping is golden and crisp and the apples are bubbling at the edges. The center should register above 175˚F.
Notes
- Nutrition Per Serving: Calories: 496kcal | Carbohydrates: 80g | Protein: 4g | Fat: 19g | Saturated Fat: 12g | Polyunsaturated Fat: 1g | Monounsaturated Fat: 5g | Trans Fat: 1g | Cholesterol: 49mg | Sodium: 67mg | Potassium: 275mg | Fiber: 6g | Sugar: 50g | Vitamin A: 667IU | Vitamin C: 10mg | Calcium: 38mg | Iron: 2mg


Leave a Reply