My Grandson’s Favorite Lunch
My grandson Leo calls these “food on a stick.” He loves them. I started making them for his school lunches. He said they made him feel like a knight with a tiny food-spear. I still laugh at that.
It matters because food should be fun. When you have fun making it, you enjoy eating it more. What was your favorite school lunch? I would love to hear about it.
How to Build Your Kabob
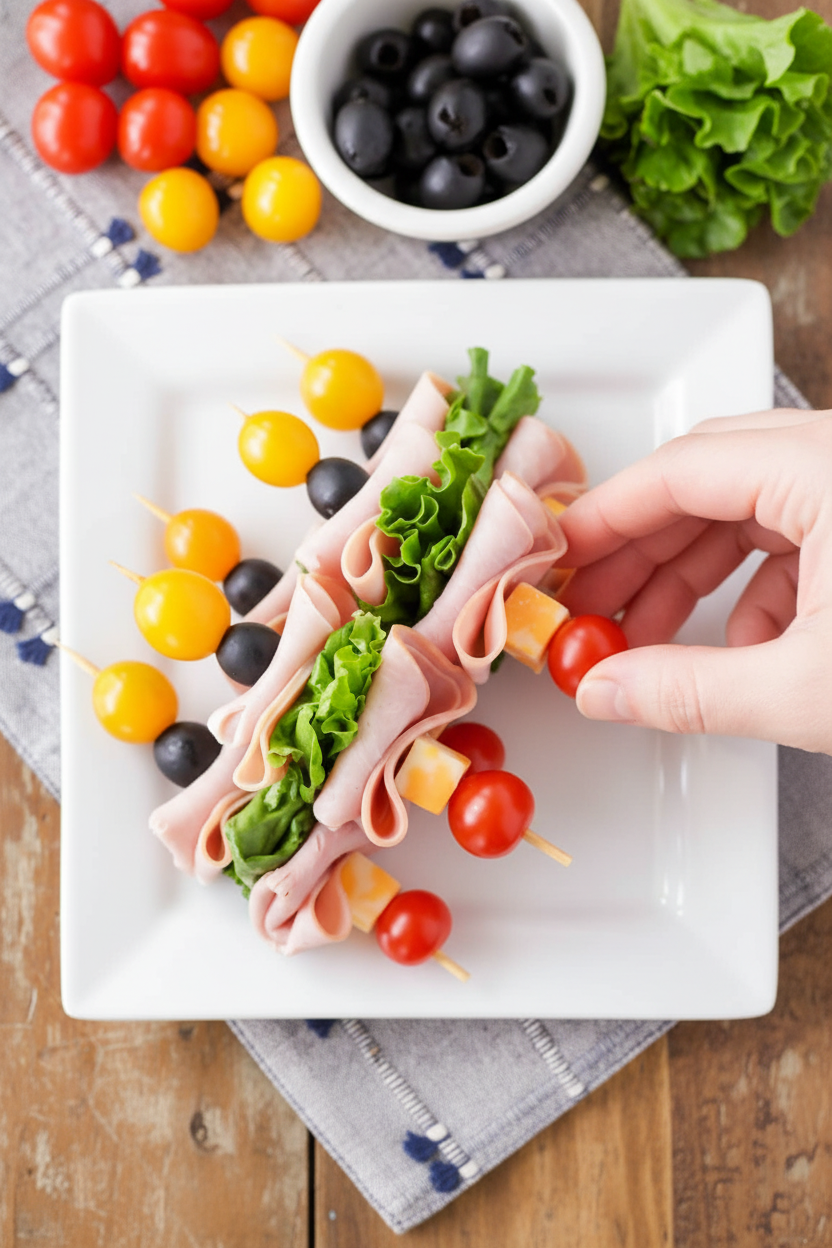
First, get all your bowls out. See everything in front of you. It makes the job easy. Now, take your skewer. Think of it like building a tower.
Start and end with a sturdy piece. A tomato or cheese cube is perfect. It keeps everything from sliding off. Layer the meat, lettuce, and olives in between. You are the boss of your kabob!
A Little Story About Olives
I did not like olives as a girl. My aunt put one on each of my fingers. She called them “finger hats.” I ate them all, laughing. Now I love them.
This is a good lesson. Sometimes playing with your food helps. It helps you try new things. Fun fact: Olives are actually a fruit, not a vegetable! Does that surprise you?
Why This Simple Meal Works
You get a little bit of everything in one bite. Crunchy lettuce, salty meat, juicy tomato. Doesn’t that sound good? It keeps your mouth happy.
It also matters for your body. The protein and cheese give you energy. The veggies are like little vitamins. Which ingredient do you think gives you the most power?
Make It Your Own
This is just my way. You can change it. Try pickles or cucumber slices. Use different cheese. The fridge is your playground.
Make a few and pop them in the fridge. They get cold and crisp. Perfect for later. What two ingredients would you love to put on a skewer together? Tell me your idea.
Ingredients:
| Ingredient | Amount | Notes |
|---|---|---|
| Lunch meat | 12 slices | |
| Lettuce | As needed | For wrapping or serving |
| Black olives | 12 | |
| Cherry tomatoes | 12 | |
| Cheese cubes | 12 | |
| Skewers | 6 | For assembling kabobs |
My No-Cook Kabobs: A Lunchbox Surprise
Hello, my dear! Come sit. Let’s make something fun for lunch. These kabobs are like edible rainbows on a stick. I first made them for my grandson’s school picnic. He said they were the best “sword” he ever ate. I still laugh at that.
You just need a few simple things. Doesn’t that smell amazing? The salty cheese and the fresh lettuce. It’s a party for your nose. Let’s get our bowls ready. This is the best part, putting it all together.
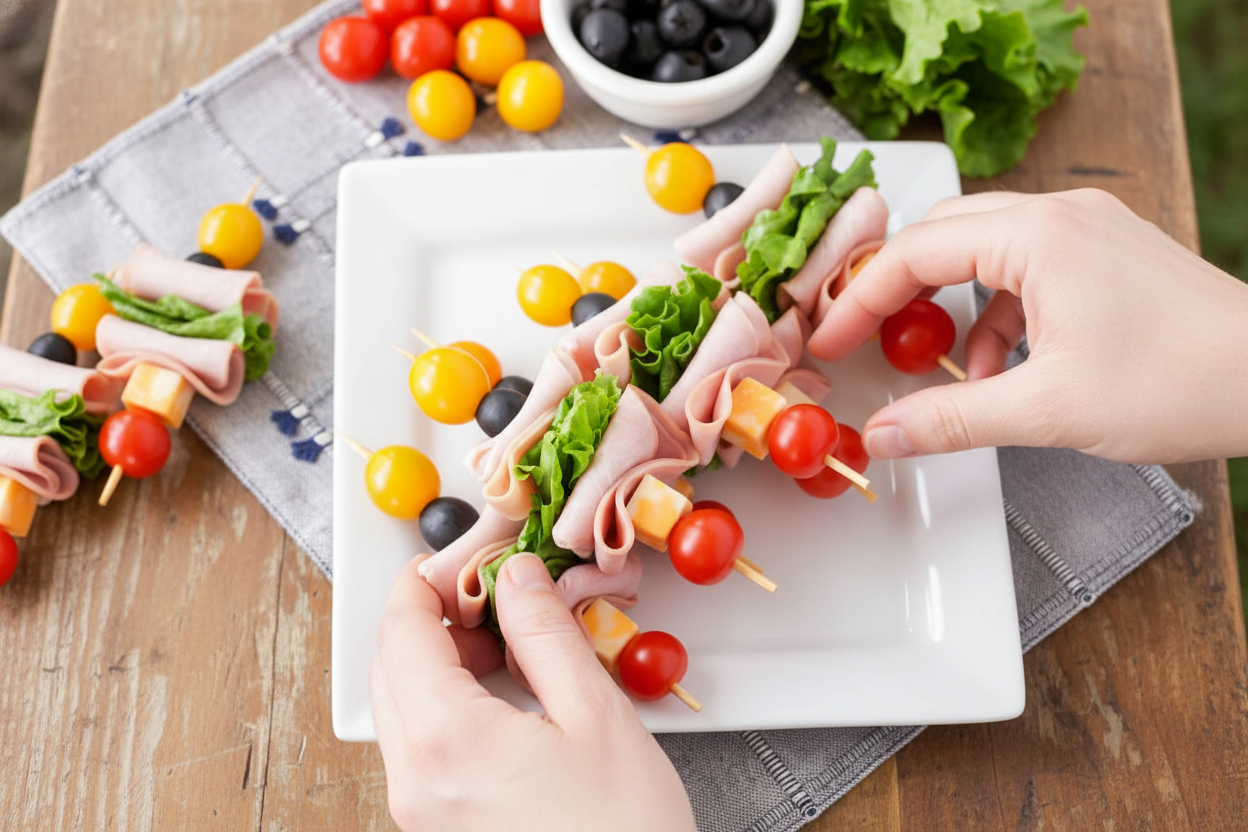
Step 1: Get all your ingredients out. Put them in little bowls on the counter. It looks so pretty, like a artist’s palette. This makes the next part so easy. You won’t be running around looking for the olives.
Step 2: Now, start threading! Slide things onto your skewer in any order you like. I love a tomato, then cheese, then meat. Try to put a sturdier item on the very bottom and top. (A hard-learned tip: a cherry tomato or cheese cube at the ends keeps everything from sliding off!)
Step 3: Make all six skewers. Each one can be a little different. My granddaughter makes patterns with hers. Do you like your olives next to the lettuce? What’s your favorite food combo? Share below! When they’re done, they look so cheerful.
Step 4: Last step is the easiest. Just pop them in the fridge until you’re ready. The cool air makes the flavors get friendly. They taste even better after a little wait. Then, pack them up and go!
Cook Time: 0 minutes
Total Time: 15 minutes
Yield: 6 kabobs
Category: Lunch, Snack
Three Fun Twists to Try
You can change these kabobs with the seasons. It’s so fun to play with your food. Here are three of my favorite ideas. They always make lunch feel new.
Summer Garden: Use cucumber slices and little mozzarella balls. Add a fresh basil leaf. It tastes like sunshine.
Breakfast Kabob: Use small pancakes, strawberry pieces, and sausage chunks. Drizzle with a tiny bit of maple syrup. A sweet way to start the day.
Zesty Fiesta: Use pepperoni, cheddar cheese, and pickled jalapeño slices. It has a little spicy kick. So good! Which one would you try first? Comment below!
Serving Them Up Right
These kabobs are a full meal on a stick. But I love to add a little something extra. It makes the table look so inviting. Here’s what I do on a sunny afternoon.
Lay the kabobs on a big platter of leafy greens. A small bowl of ranch or honey mustard for dipping is perfect. You could also add some salty pretzels on the side. For a drink, I love fizzy lemonade. It’s so refreshing. For the grown-ups, a crisp glass of white wine is nice. Which would you choose tonight?
Keeping Your Kabobs Fresh and Tasty
Let’s talk about keeping these kabobs happy. They are best eaten the same day. Pop them in the fridge until you are ready.
I do not recommend freezing them. The lettuce gets sad and soggy. The tomatoes can turn mushy when they thaw.
You can batch-cook the parts, though. Slice all your meat and cheese at once. Store them in separate containers for quick assembly later.
I once made a big batch for a picnic. I assembled them the night before. They were still crisp and perfect for lunch!
This little bit of planning matters. It makes a busy day feel easier. You get a good meal without the last-minute rush. Have you ever tried storing it this way? Share below!
Fixing Little Kabob Troubles
Sometimes, ingredients slide off the skewer. The trick is to use sturdy items on the ends. A cheese cube or tomato at the bottom helps.
Your lettuce might wilt if you assemble too early. Wait until just before serving to add it. I remember when my lettuce got too soft at a party.
The skewers can be pointy for little hands. Be very careful when handling them. You can also use shorter, blunter sticks if you like.
Fixing these small issues builds your cooking confidence. It also makes the food look and taste its best. A pretty kabob just tastes more fun! Which of these problems have you run into before?
Your Kabob Questions, Answered
Q: Can I make this gluten-free? A: Yes! Just check your lunch meat labels. Many brands are safe.
Q: Can I make them ahead? A: Prep the parts, but wait to assemble. Keep everything chilled separately.
Q: What are good ingredient swaps? A: Use pickles instead of olives. Try cucumber slices for extra crunch.
Q: How do I make more or less? A: Just use two pieces of each item per skewer. Easy math!
Q: Any optional tips? A: A tiny drizzle of Italian dressing adds zip. Fun fact: The word “kabob” comes from a word meaning “to fry.” Which tip will you try first?
Share Your Kitchen Creations!
I hope you love making these colorful kabobs. They always remind me of summer lunches with my grandkids. Food is best when shared.
I would love to see your version. Did you use different cheeses? Maybe you added a fun new veggie. Have you tried this recipe? Tag us on Pinterest!
Thank you for cooking with me today. Come back anytime for more simple, happy recipes from my kitchen to yours.
Happy cooking!
—Lena Morales.
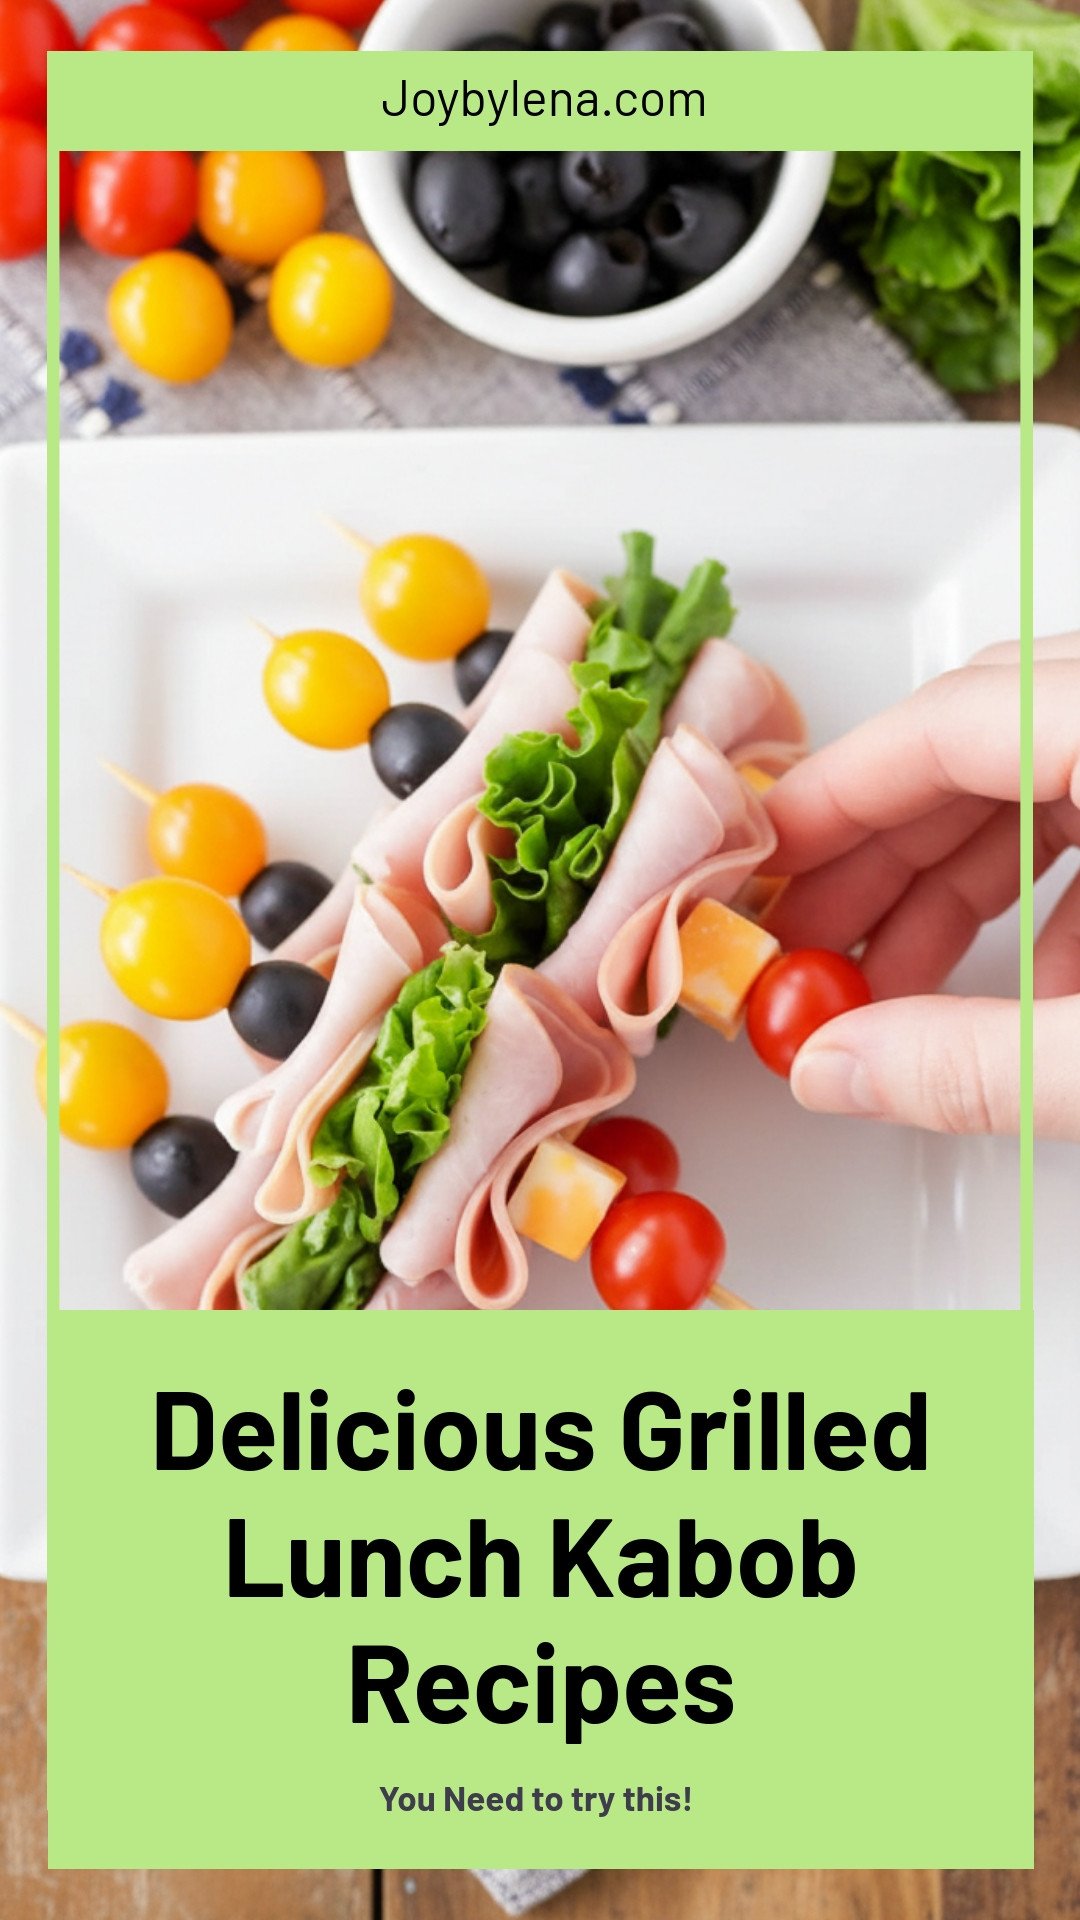
Delicious Grilled Lunch Kabob Recipes
Description
A fun and easy no-cook lunch idea. Layer lunch meat, cheese, and veggies on skewers for a portable, protein-packed meal.
Ingredients
Instructions
- Get all ingredients out in bowls.
- Layer ingredients on skewers as desired making sure to add ones that will help keep everything on for the top and bottom (the cherry tomatoes and cheese cubes worked perfect!)
- Refrigerate until ready to serve.


Leave a Reply