A Secret in the Batter
My grandson saw me putting mayonnaise in this cake. His eyes got so wide. I still laugh at that.
But trust your grandma. It makes the cake so moist and rich. You cannot taste it at all. It just adds a wonderful tenderness. This little trick matters because it keeps your cake from being dry. Nobody wants a dry cake.
Building a Chocolate Dream
This dessert is like building a house. You start with a strong chocolate cake base. Then you add fluffy mousse. Doesn’t that sound amazing?
You do this three times. Cake, mousse, cake, mousse. It is a little project. The final touch is the shiny ganache on top. Fun fact: The corn syrup in the ganache gives it that beautiful, glossy shine. What is your favorite part of baking? Is it mixing, or is it the decorating?
The Magic of Mousse
The mousse filling is my favorite part. It feels so fancy. But it is really just whipped cream and melted chocolate.
The gelatin helps it stay fluffy between the cake layers. You have to fold the cream in gently. This matters because you want to keep all the air in it. That air is what makes it light as a cloud.
A Cake for Celebrations
I first made this for my sister’s birthday. She said it was the best cake she ever had. That made me so happy.
This is not an everyday cake. It is for special days. It shows someone you really care. Sharing food made with love is a beautiful thing. What was the best birthday cake you ever ate?
Your Turn in the Kitchen
Do not be scared by the layers. Just take your time. Read the recipe all the way through first.
Let the cakes cool completely. I know it is hard to wait. But a warm cake will melt your mousse. If you try this, will you make it for a special day or just for fun? I would love to hear about it.
Ingredients:
| Ingredient | Amount | Notes |
|---|---|---|
| all-purpose flour | 2 cups | For the cake |
| cocoa powder | 1/2 cup | For the cake, plus more for dusting |
| baking soda | 1 1/4 teaspoons | For the cake |
| baking powder | 1/4 teaspoon | For the cake |
| salt | Pinch | For the cake |
| Duke’s Mayonnaise | 1 cup | For the cake |
| granulated sugar | 1 cup | For the cake |
| eggs | 3 large | For the cake |
| water | 1 1/4 cups | For the cake |
| vanilla extract | 1 teaspoon | For the cake |
| bittersweet chocolate | 8 ounces | For the Ganache Frosting, chopped |
| heavy cream | 3/4 cup | For the Ganache Frosting |
| corn syrup | 1 1/2 tablespoons | For the Ganache Frosting |
| unflavored gelatin | 1 1/2 teaspoons | For the Chocolate Mousse Filling |
| cold water | 1 tablespoon | For the Chocolate Mousse Filling |
| boiling water | 1 tablespoon | For the Chocolate Mousse Filling |
| bittersweet chocolate | 6 ounces | For the Chocolate Mousse Filling, chopped |
| heavy cream | 1 1/2 cups | For the Chocolate Mousse Filling, divided |
| granulated sugar | 2 tablespoons | For the Chocolate Mousse Filling |
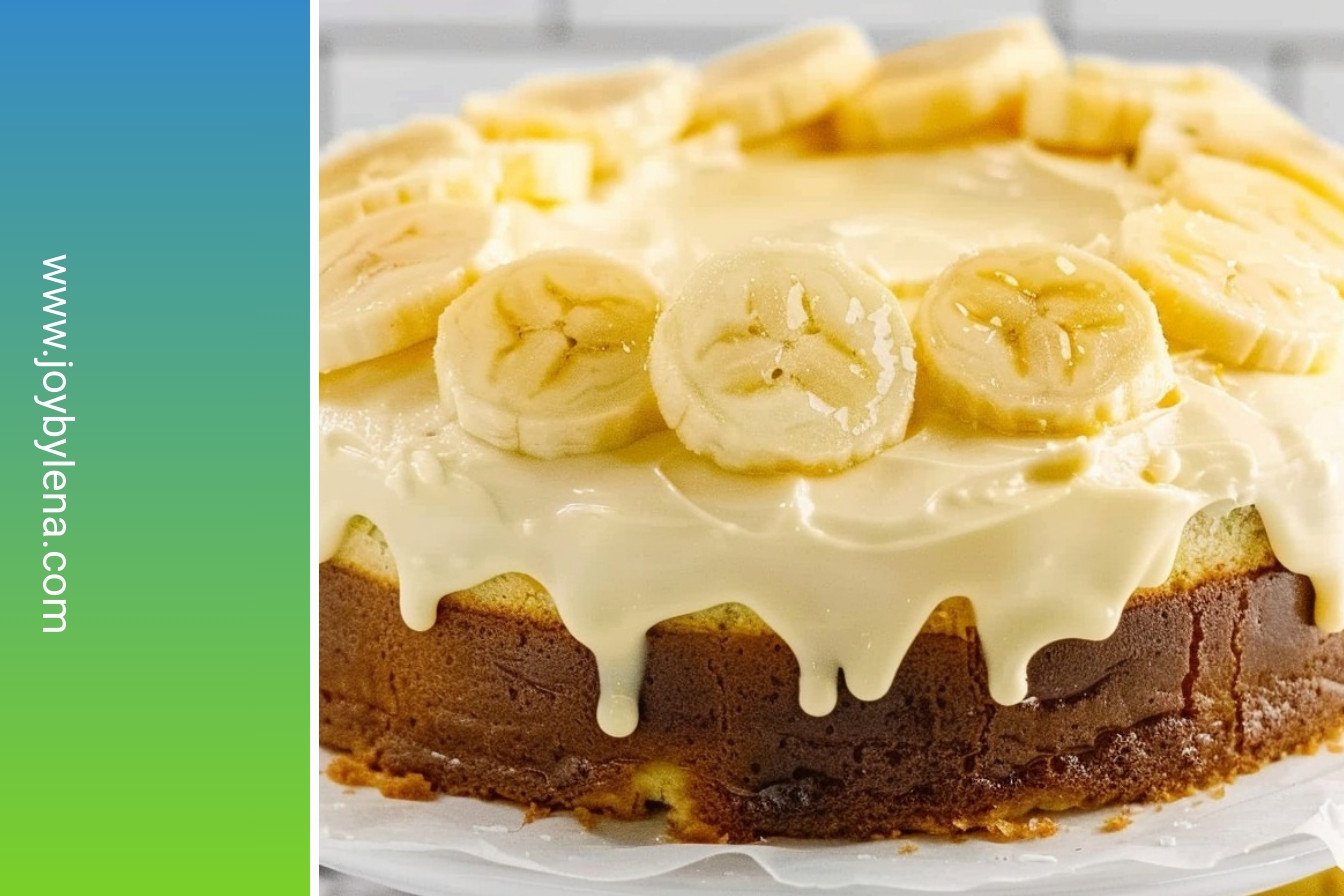
My Best Chocolate Layer Cake
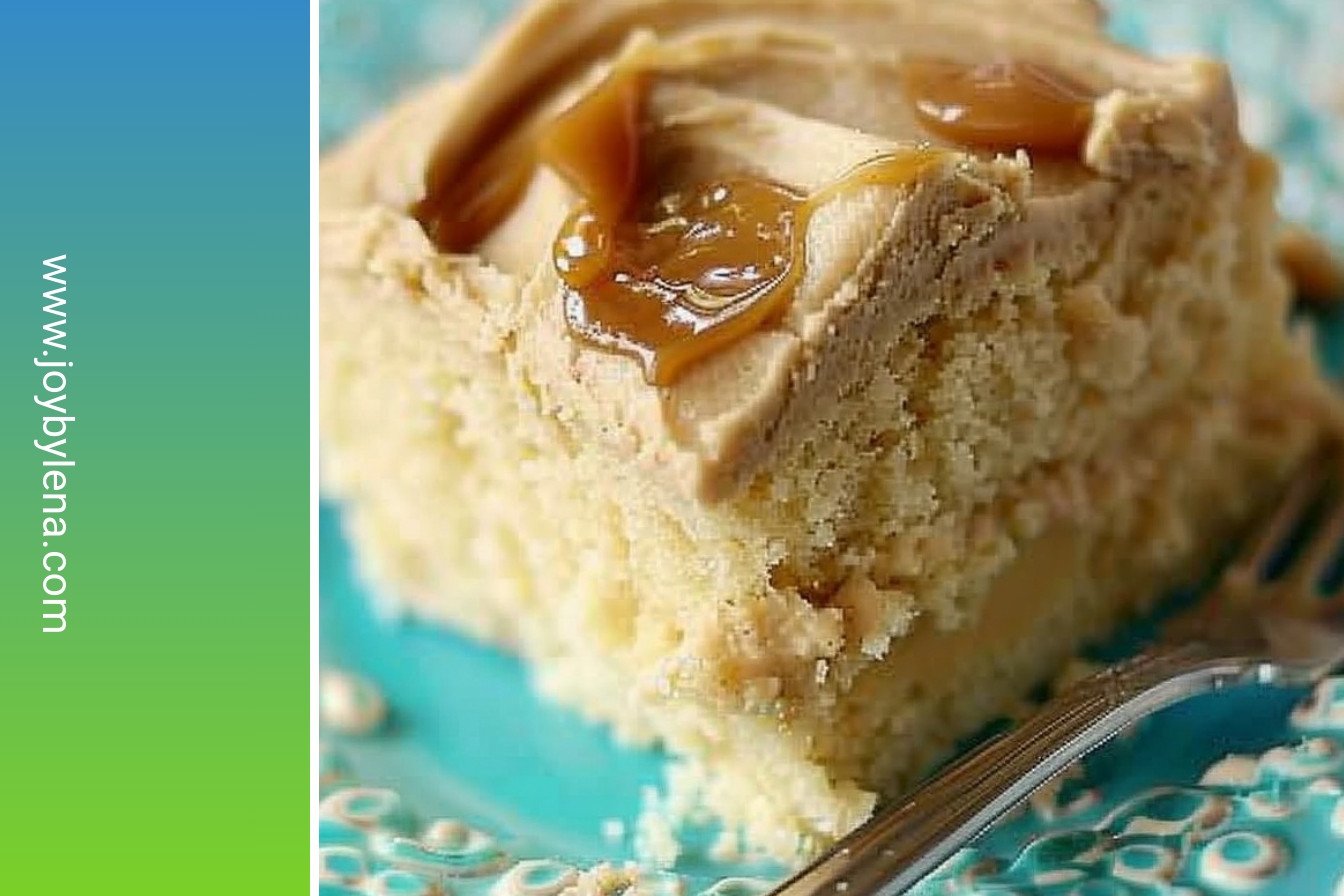
Hello, my dear! Come sit with me. I want to share my favorite chocolate cake recipe. This one is a real showstopper. It reminds me of the cakes my Tía Rosa used to make. Every bite is like a sweet, chocolatey hug.
We will build this cake layer by wonderful layer. It has soft chocolate cake, fluffy mousse, and shiny ganache. Doesn’t that sound amazing? It is a little project, but so much fun. I still laugh at the first time I made it. I had chocolate on my nose!
Let’s start with the cake. The secret ingredient is mayonnaise! It sounds strange, I know. But it makes the cake so moist and rich. Trust your kitchen grandma on this one. You just mix everything together until it’s smooth.
Step 1
First, get your oven ready at 350°F. Grease your two cake pans well. I always dust them with cocoa powder instead of flour. It keeps the outside of the cake a beautiful, dark chocolate color. No white spots!
Step 2
Now, mix your dry ingredients in a bowl. That’s the flour, cocoa, baking soda, and powder. A little pinch of salt makes the chocolate taste even better. Give it a good stir with a whisk. This makes sure everything is friendly.
Step 3
In another bowl, beat the mayonnaise and sugar. It will become creamy and pale. Then add your eggs, one at a time. Now, add the flour mix and water a little at a time. (A hard-learned tip: always start and end with the flour mixture. It helps the batter stay happy and not curdle).
Step 4
Pour the thin batter into your pans. It will be runny, and that’s okay! Bake for about 22 minutes. Your kitchen will smell like a dream. To check if it’s done, poke it with a toothpick. If it comes out clean, it’s perfect. Let the cakes cool completely.
Step 5
While the cakes cool, make the fillings. The mousse is light and airy. The ganache is rich and shiny. This is the fun part! You get to see the magic of chocolate and cream. Do you like your frosting shiny or fluffy? Share below!
Step 6
Now for the best part, building the cake! Carefully split your cooled cakes in half. You will have four layers. Place one layer on a plate. Spread a third of the mousse on top. Keep stacking and spreading. Top it with the last cake layer.
Steps 7 & 8
Finally, the ganache! Pour your smooth, glossy chocolate over the top. Let it drip down the sides. You can spread it with a knife for a rustic look. Or whip it for a fluffy, cloud-like frosting. It’s your masterpiece!
Cook Time: 24 minutes
Total Time: 1 hour 30 minutes
Yield: 10 servings
Category: Dessert, Cake
Three Fun Twists to Try
This cake is wonderful as it is. But you can also play with it! Here are some of my favorite ideas. They are simple and add a little surprise.
Orange Zest
Add the zest of one orange to the cake batter. The chocolate and orange together is a classic. It tastes so bright and cheerful.
Minty Fresh
Add a few drops of peppermint extract to the mousse filling. It turns the whole cake into a chocolate mint dream. It’s very refreshing.
Berry Surprise
Add a layer of raspberry jam between the cake and mousse. The sweet and tart berries cut through the rich chocolate. It’s just lovely.
Which one would you try first? Comment below!
Serving Your Masterpiece
This cake is a celebration all by itself. But a few little touches make it extra special. I love to add a few fresh raspberries on the side. A little sprinkle of sea salt on top is also wonderful. It makes the chocolate flavor pop!
What to drink with such a treat? A glass of cold milk is always the best friend to chocolate cake. For the grown-ups, a small glass of ruby port wine is perfect. It’s sweet and rich, just like the cake.
Which would you choose tonight?
Keeping Your Chocolate Dessert Perfect
This cake is a special treat. You will want to keep it fresh. Cover it well and store it in the fridge for up to four days.
You can also freeze the layers for later. I wrap each cooled cake layer tightly in plastic. Then I put them in a freezer bag.
I once made this for my grandson’s birthday a week early. Freezing the layers saved me so much time. It felt like a little kitchen magic.
This matters because life gets busy. A little planning means you always have a wonderful dessert ready. It makes sharing joy with family so much easier.
Have you ever tried storing it this way? Share below!
Easy Fixes for Common Cake Troubles
Is your cake sticking to the pan? Always grease the pan well. Then dust it with cocoa powder instead of flour.
Is your ganache frosting too runny? Just let it sit a bit longer. It will thicken up as it cools. I remember when my first ganache was a puddle.
Is your mousse filling not fluffy? Make sure your cream is very cold before whipping. This helps it hold its shape beautifully.
Fixing small problems builds your cooking confidence. It also makes your food taste even better. You learn by doing, my dear.
Which of these problems have you run into before?
Your Quick Chocolate Questions Answered
Q: Can I make this gluten-free?
A: Yes! Use your favorite gluten-free flour blend. It works just fine.
Q: Can I make parts ahead?
A: The cake layers freeze beautifully. Make them up to a month early.
Q: What can I use instead of mayonnaise?
A: You can use sour cream. It gives the same moist, tender crumb.
Q: Can I make a smaller cake?
A: Absolutely. Just cut all the ingredients in half. Use two six-inch pans.
Q: Any simple decorating tips?
A: A sprinkle of powdered sugar looks lovely. So do a few fresh berries.
Fun fact: The word “ganache” means “fool” in French. A chef’s apprentice once made a mistake and created it!
Which tip will you try first?
Thank You for Baking With Me
I hope you love making this chocolate dessert. It holds so many sweet memories for my family. Sharing recipes is how we share love.
I would be so happy to see your creation. Your kitchen adventures make me smile. Please share your beautiful cakes with everyone.
Have you tried this recipe? Tag us on Pinterest!
Happy cooking!
—Lena Morales.

Decadent Chocolate Layered Dessert: Rich, velvety chocolate perfection:
Description
Indulge in pure bliss with this decadent chocolate layered dessert. Rich, velvety, and the ultimate no-bake treat for true chocolate lovers.
Ingredients
=== For the cake: ===
=== For the Ganache Frosting: ===
=== For the Chocolate Mousse Filling: ===
Instructions
- Preheat the oven to 350°F. Grease two (8-inch) round cake pans (I use vegetable shortening) and dust with cocoa powder.
- Stir together the flour, cocoa powder, baking soda, baking powder, and salt in a medium bowl.
- Beat the mayonnaise and sugar with an electric mixer until creamy. Add the eggs, one at a time, until combined. Add the flour mixture alternately with the water, beginning and ending with the flour mixture. Beat at medium-low speed for 1 minute. (Batter will be thin.) Stir in the vanilla.
- Pour the batter evenly into the prepared pans. Bake the cakes at 350°F for 21 to 24 minutes, until a toothpick inserted in the center comes out clean. Remove to wire racks. Let cool in the pans for 5 minutes. Run a knife around the edges and turn out onto wire racks to cool completely. Once cooled, split each layer in half.
- Make the Ganache Frosting and the Chocolate Mousse Filling.
- Place one cake layer on a cake plate or stand. Top with one-third of the Chocolate Mousse Filling; repeat the process twice. Place the remaining layer on top. Spread the Ganache Frosting on the top and sides of the cake before slicing.
- Place the chocolate in a medium bowl. Heat the cream and corn syrup in a small saucepan until the cream is hot. Pour over the chocolate. Let stand for 1 minute, then stir until smooth.
- For a shiny look, let stand until spreadable (20 to 30 minutes), stirring occasionally. For fluffy chocolate frosting, beat the mixture with an electric mixer until fluffy.
- Sprinkle the gelatin over the cold water in a small bowl. Let stand until the gelatin softens. Stir in the boiling water to dissolve the gelatin.
- Place the chocolate in a medium bowl. Heat 1/2 cup of the cream and the sugar in a small saucepan over medium heat until the sugar dissolves and the cream is steaming. Pour over the chopped chocolate; add the gelatin and stir until smooth.
- Beat the remaining 1 cup cream with an electric mixer until stiff peaks form. Fold a small amount of the whipped cream into the chocolate; gently fold in the remaining whipped cream until combined. Use immediately. (The mixture will firm up as it stands.)

Leave a Reply