My First Charcuterie Mistake
I made my first board for a family party. I put everything out so neatly. Then my nephew, Miguel, went straight for the brie. He used his whole hand! I still laugh at that. It taught me a big lesson.
Food is for sharing, not just for looking pretty. A board should feel welcoming. That’s why I cut a few wedges in the soft cheeses now. It tells guests, “Go ahead, it’s okay to dig in.” This matters because good food brings people together.
How to Build Your Board
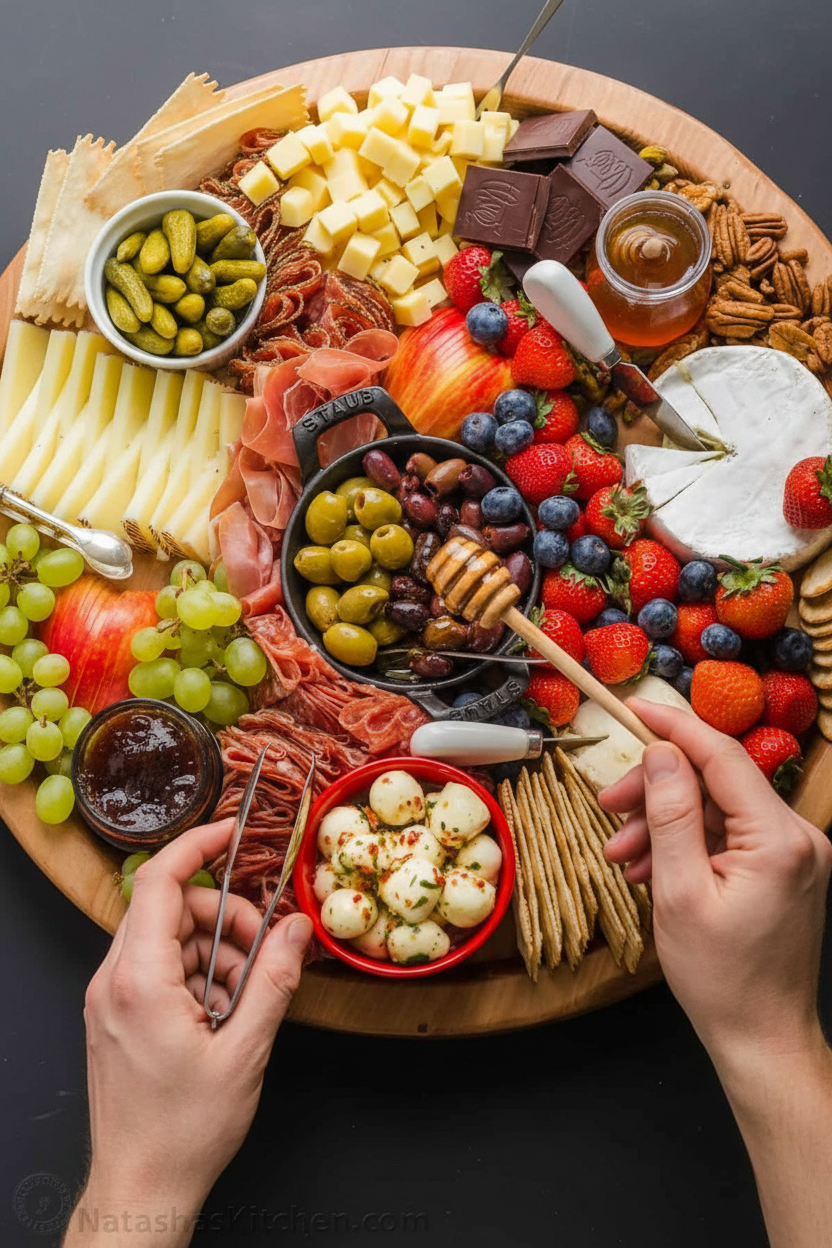
Start with your cheeses and little dishes. Put the bowls of olives and pickles down first. They take up more room. Then add your meats. Try folding the prosciutto into little ribbons. It looks so fancy but is easy.
Now, play matchmaker. Put the honey next to the brie. Place apple slices near the cheddar. Fill empty spots with nuts and chocolate. Fun fact: Ancient Romans served nuts and fruit with cheese too. Some ideas are timeless!
Why The Little Things Matter
You might wonder why we add pickles or nuts. They are the flavor helpers. A salty olive makes the creamy cheese taste even richer. A crunchy walnut is a nice surprise next to soft salami.
Every bite can be a little adventure. You get to decide what to try next. That’s the real joy of a charcuterie board. It’s about choice and discovery. What’s your favorite salty-and-sweet combo? I love fig spread with manchego.
Make It Your Own
You don’t need every single item on the list. Use what you love and what looks good. No figs? Use strawberries. Don’t like blue cheese? Leave it out. Your board should make you smile.
I always add marinated mozzarella balls. They are like little flavor treasures. Doesn’t that smell amazing when you open the jar? This matters because cooking should be fun, not stressful. What is one item you would always have on your dream board?
Gathering Your People
The best part comes after the board is made. You call everyone to the table. You watch them talk and point and try new pairings. The board becomes the heart of the party.
It’s not really about the food. It’s about the stories shared around it. That is the secret ingredient you won’t find on any list. So tell me, who would you love to share a board with this weekend?
Ingredients:
| Ingredient | Amount | Notes |
|---|---|---|
| Brie cheese | 8 oz | |
| Manchego cheese | 6 oz | cut into thin slices |
| Triple cream cheese (Bourgogne) | 8 oz | |
| Fresh mozzarella balls | 12 oz | marinated |
| Vermont white cheddar | 8 oz | diced |
| Salami | 8 oz | |
| Prosciutto | 2 oz | |
| Dried coppa, or chorizo | 2 oz | |
| Stuffed olives, or pitted green olives | 1/3 cup | |
| Kalamata olives | 1/3 cup | pitted |
| Baby dill pickles (or Gerkins) | 1 cup | |
| Grapes | 2 cups | cut into sections |
| Strawberries or figs | 2 cups | |
| Blueberries | 1 cup | |
| Apple or pear | 1 | |
| Honey | 1/4 cup | |
| Fruit spread | 1/4 cup | we love fig and strawberry |
| Pecans, walnuts, or pistachios | 1 cup | or a variety of nuts |
| Dark chocolate bar | 3 oz | broken into bite-sized pieces |
| Water crackers | 4 oz | |
| Artisan crackers | 4 oz | |
| Baguette | 1 | sliced into toasts (brushed with olive oil and baked at 400˚F for 6-8 minutes) |
How to Build Your Perfect Party Board
Hello, my dear! Come sit. Let’s talk about party boards. We call them charcuterie now. Fancy word for a happy plate of snacks. I love making these. It’s like edible art. You get to be creative. Best part? No cooking required. Just assembly. Let me guide you through it.
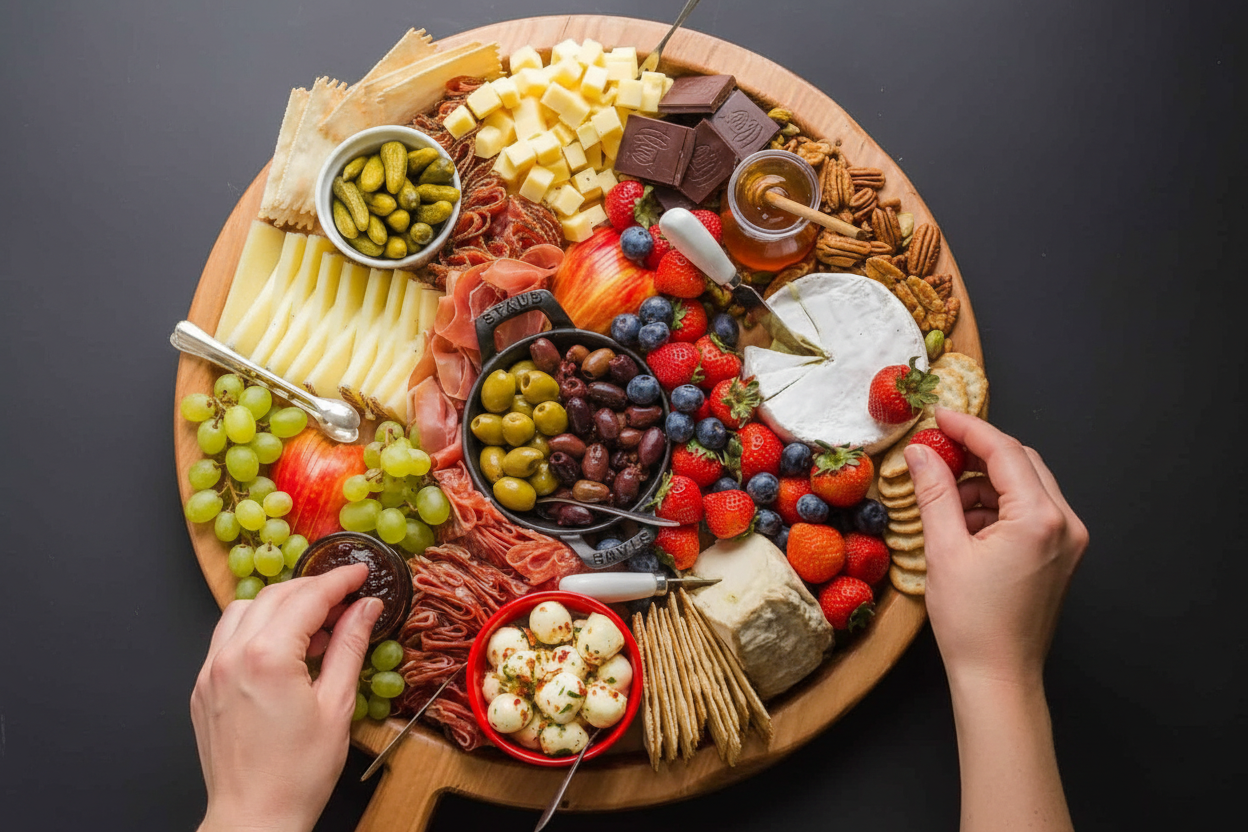
- Step 1: Start with your cheeses. Place them on your board first. Put soft cheeses, like brie, in one spot. Put hard cheeses, like cheddar, in another. Cut a few wedges from the brie wheel. This tells guests it’s okay to start eating. I learned that from my friend Maria. Her brie sat untouched all night once! (Hard-learned tip: Take your cheeses out of the fridge an hour early. They taste so much better when not cold.)
- Step 2: Next, add your meats. Fold the salami into little cones or rolls. Drape the prosciutto in loose piles. It looks pretty this way. My grandson calls them “meat flowers.” I still laugh at that. This step is fun. You can’t really mess it up. Just keep different meats in their own little areas.
- Step 3: Now for the pickles and olives. Put them in small bowls or ramekins. This keeps their juices from running everywhere. Place the bowls on the board. See how the space is filling up? Good! Olives are a must for me. They add a nice salty bite. Do you prefer green olives or black kalamatas? Share below!
- Step 4: Time for sweet and crunchy things. Put little jars of honey and jam near the brie. Doesn’t that combination sound amazing? Scatter nuts in empty spots. Add your chocolate pieces too. Dark chocolate with cheese is a wonderful surprise. Finally, fill all the gaps with beautiful fruit. Grapes, berries, apple slices. It becomes a rainbow.
- Step 5: Last step! Add your crackers and toasts. You can pile them in empty spaces. Or put them in a basket next to the board. The homemade toasts are my favorite. They smell so good baking. Now, take a step back and look. You made a masterpiece! It’s ready to share.
Cook Time: 20 minutes
Total Time: 20 minutes
Yield: 8-10 servings
Category: Appetizer, Snack
Three Fun Twists to Try
The basic board is wonderful. But sometimes you want a theme. It makes planning easier. Here are three of my favorite twists. They always impress my guests.
- The Garden Party: Skip the meats completely. Add more cheeses, like a soft goat cheese. Load up on veggies too. Think cherry tomatoes, radishes, and snap peas.
- The Sweet & Spicy: Add spicy pepper jelly instead of fig spread. Use spicy salami or chorizo. The sweet fruit cools your mouth down. It’s a fun dance of flavors.
- The Fall Harvest: Use sliced pears instead of apples. Add dried cranberries and figs. A pumpkin butter spread would be perfect here. It tastes like autumn on a plate.
Which one would you try first? Comment below!
Serving It With Style
Your board is the star. But a few extra touches make it a full meal. I like to add a simple green salad on the side. It feels fresh. You could also put out small plates and napkins. It keeps things tidy.
What to drink? For the grown-ups, a light red wine is lovely. It sips nicely with cheese. For everyone, I love sparkling apple cider. It feels festive in a glass. Pour it into pretty cups. It makes any day feel special.
Which would you choose tonight?
Keeping Your Board Beautiful for Later
Let’s talk about saving your lovely board. First, take everything off the wood. Wrap cheeses and meats tightly in fresh plastic wrap. They will keep for three days in the fridge.
Place pickled items and spreads back in their jars. Berries and sliced fruit go in a sealed container. I once left grapes on the board overnight. They made the wood all sticky!
You can batch-prep parts of this. Toast your baguette slices ahead of time. Store them in a bread bag at room temperature. Wash and cut your fruit the morning of your party.
This matters because good food is precious. A little planning saves time and money. It lets you enjoy your own party! Have you ever tried storing it this way? Share below!
Simple Fixes for Common Snags
Is your cheese too hard to slice? Let it sit out for twenty minutes. Room temperature cheese cuts like a dream. It also tastes much better.
Crackers getting soggy? Keep them in a bowl next to the board. I remember when my crackers soaked up juice from the olives. It was a sad, soft surprise.
Guests unsure how to start? Cut a few wedges in the soft cheeses. This gives them permission to dig in. It makes everyone feel more welcome.
Fixing small problems builds your confidence. It also makes the flavors shine. Good food should be easy and fun. Which of these problems have you run into before?
Your Quick Questions, Answered
Q: Can I make this gluten-free? A: Yes! Use your favorite gluten-free crackers. Check labels on cured meats too.
Q: What can I make ahead? A: Toast the bread, wash fruit, and slice hard cheeses. Do this the day before.
Q: I don’t have fig spread. A: Any jam works. Apricot or raspberry are lovely with cheese. Fun fact: Honey and cheese is a classic pair loved for centuries.
Q: How do I make a smaller board? A: Pick just two cheeses, one meat, two fruits, and one cracker.
Q: Is the chocolate necessary? A: No, but try it! A bite of dark chocolate with cheddar is magic. Which tip will you try first?
From My Kitchen to Yours
I hope you have fun building your board. The best part is sharing it with people you love. Every board tells a little story.
I would love to see your creation. Your board will be beautiful because you made it. Have you tried this recipe? Tag us on Pinterest!
Thank you for spending time in my kitchen today. I am so glad you are here.
Happy cooking!
—Lena Morales.
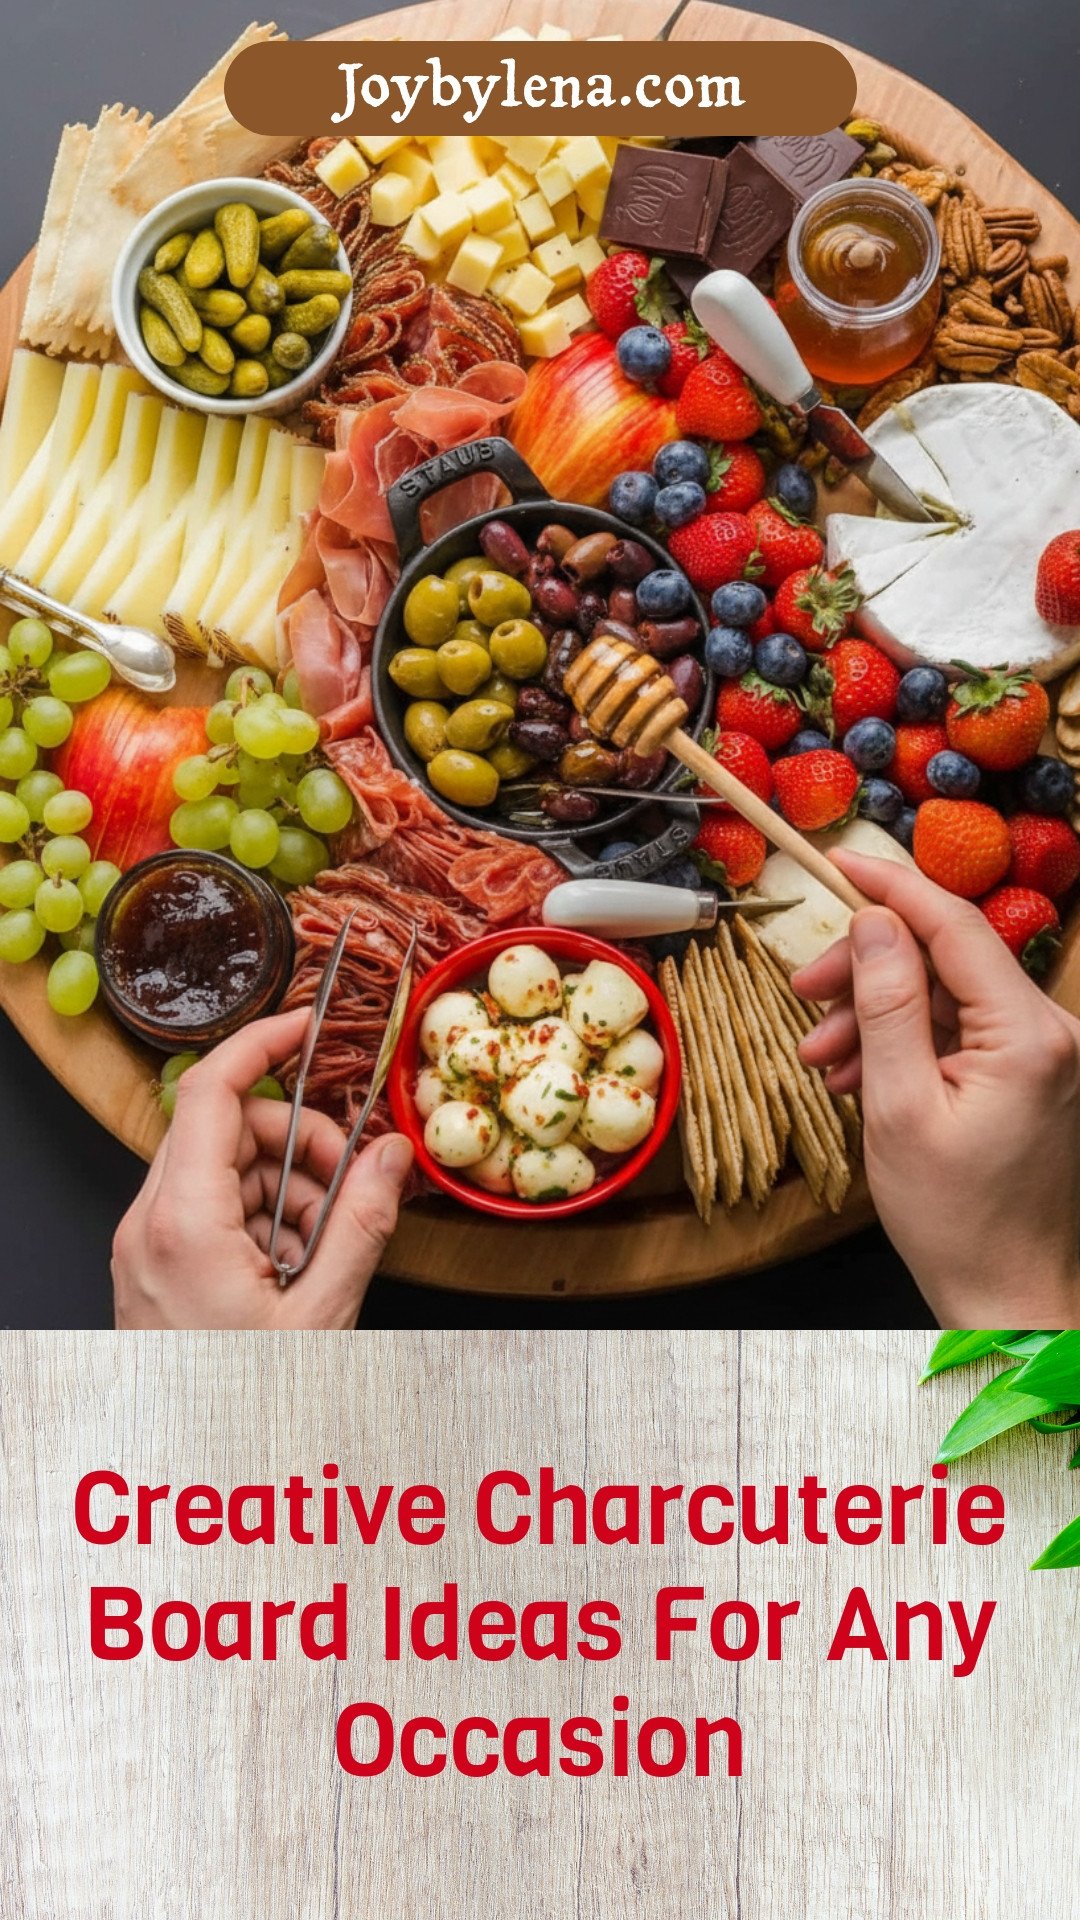
Charcuterie Board Ideas: Creative Charcuterie Board Ideas For Any Occasion
Description
Create a stunning and delicious spread for any gathering with this guide to building the perfect charcuterie board.
Ingredients
**Cheeses:**
**Meats:**
**Pickled Items:**
**Fruit:**
**Spreads and Condiments:**
**Accompaniments:**
**Crackers or Toasts:**
Instructions
- **Cheeses**. Arrange them around the serving board. Pre-slice hard cheeses so they serve easier and cut a few wedges out of the brie to encourage guests to dig in.
- **Meats**. Fold them in a variety of patterns. Watch the video to see how to fold meat for a charcuterie board.
- **Pickled Items.** Anything that requires a dish such as pickles and olives goes down next so you can gauge your space.
- **Condiments and Spreads**. Place condiments next to cheeses they pair well with (i.e. honey next to brie). Keep condiments in separate jars and ramekins to keep the board clean.
- **Fresh Fruit**. Pre-cut grapes and pre-slice apples, rinse, and pat dry berries. Arrange fruit next to cheeses they pair well with.
- **Nuts and Extras**. Place pecans or walnuts and pistachios next to brie or soft cheeses. Also add chocolate which is delicious with cheese.
- **Arrange crackers** and toasts in remaining spaces or place them on a separate shallow bowl for serving.
Notes
- Nutrition information is not provided in the text.


Leave a Reply