My First Time Making These
I first made these for my grandson’s soccer team. I was so nervous. Would the boys like them? Well, they vanished in five minutes. I still laugh at that.
That day taught me something. Good food brings people together. It is a simple joy. That matters more than a perfect recipe. Do you have a favorite food memory from a game or party?
Why These Ingredients Work
Let’s talk about the team in your bowl. The sausage brings the flavor. The cream cheese makes everything rich and smooth. The cheddar adds a sharp, happy bite.
The baking mix is the quiet helper. It holds everyone together. This matters because each part has a job. Together, they create magic. Fun fact: the cream cheese keeps the balls super moist, so they never get dry!
Getting Your Hands Dirty
Preheat your oven to 350. Now, get a big bowl. Put everything in it. Use your hands to mix it. Yes, your hands! It is the best tool.
Feel the cool cream cheese and the sausage. Mix until it is all one color. Doesn’t that smell amazing? Rolling the balls is fun. Make them about the size of a walnut. What is your favorite part of cooking with your hands?
The Waiting Game
Line your pan with foil. It makes cleanup easy. Place your little balls on it. Give them space to breathe. Then into the oven they go.
Now you wait. For 22 to 24 minutes. Your kitchen will smell wonderful. This waiting time matters. It teaches us patience. Good things come to those who wait. Do you peek at your oven, or do you wait patiently?
Serving With Love
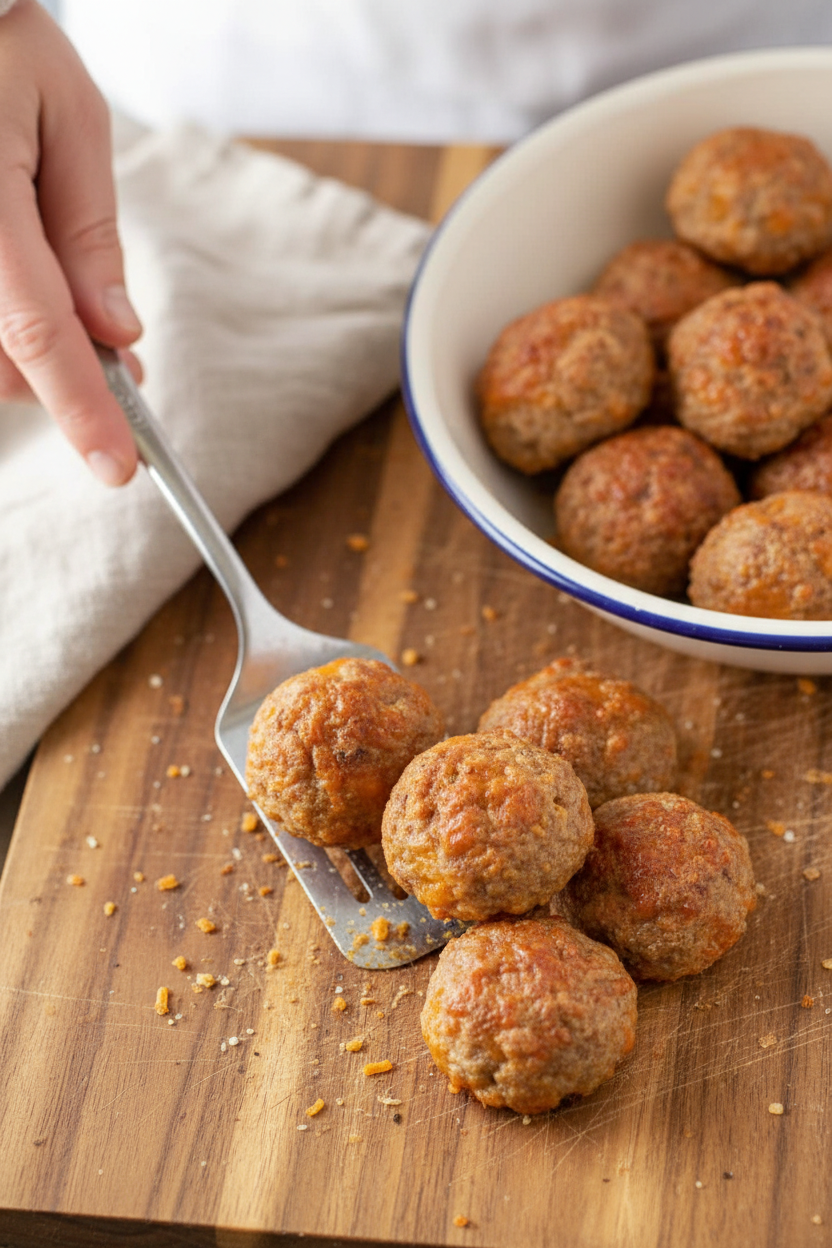
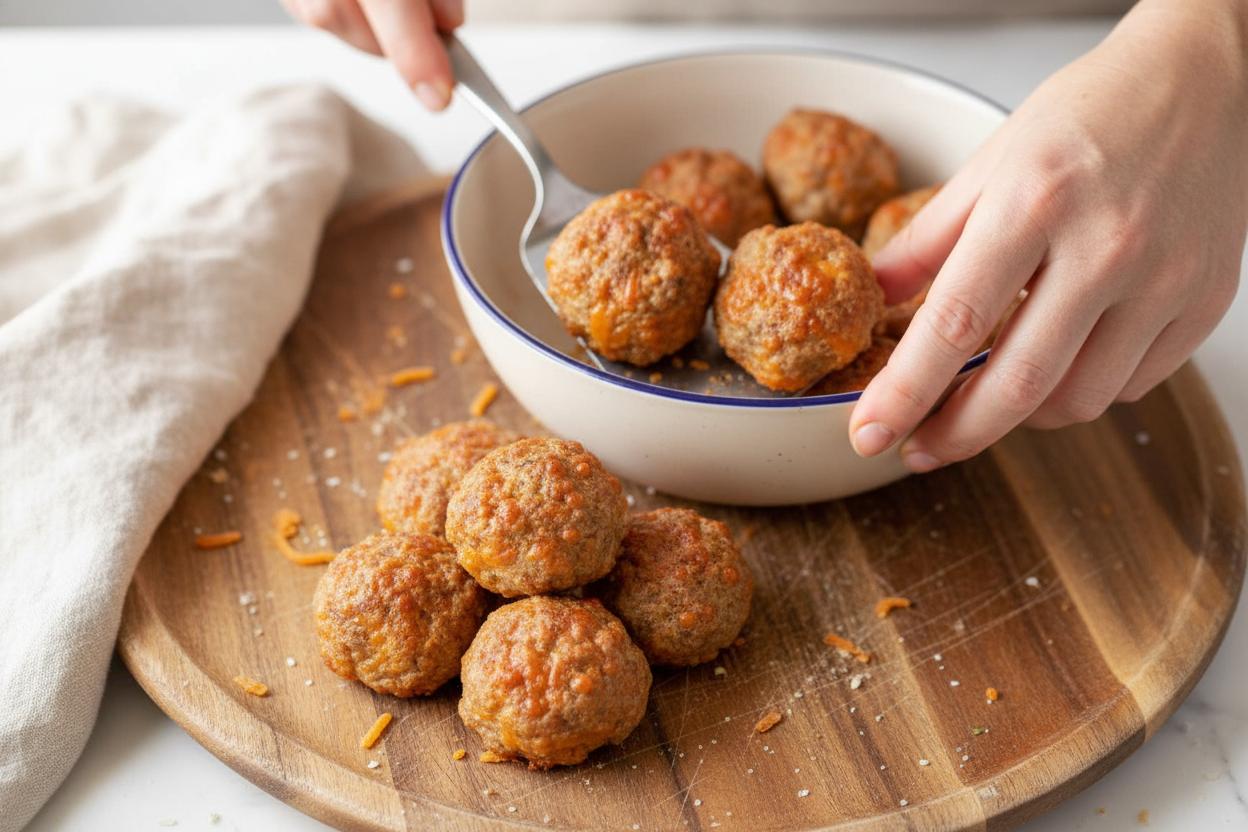
Take them out when they are golden. Let them cool just a minute. Then try one. Be careful, they are hot! The outside is a little crisp. The inside is soft and cheesy.
Serve them warm. They are perfect for a crowd. Or for a quiet afternoon snack. Food made with care always tastes better. That is a life lesson right there. I hope you make them for someone you love.
Ingredients:
| Ingredient | Amount | Notes |
|---|---|---|
| Pork sausage | 1 lb | |
| Baking mix (e.g., Bisquick) | 1 1/4 cups | |
| Cream cheese | 1 (8 oz) package | |
| Shredded Sharp Cheddar cheese | 1 (8 oz) package |
My Favorite Little Sausage Balls
Hello, my dear! Come sit. Let’s make my favorite little party bites. These sausage balls are pure joy. I’ve made them for fifty years. They disappear like magic every time. My grandson calls them “cheesy meat clouds.” I still laugh at that. They are so simple to mix up. Your hands are the best tool for this job. Doesn’t that smell amazing already? Let’s begin.
Step 1: First, turn your oven on to 350 degrees. This lets it get nice and hot. While it warms, get out a big bowl. You’ll add everything right into it. No fancy equipment needed here. Just a bowl and your own two hands.
Step 2: Now, put all your ingredients in the bowl. That’s the sausage, baking mix, cream cheese, and cheddar. The cream cheese should be soft. (A hard-learned tip: If it’s cold, it will be lumpy. Let it sit out for an hour first!). Use your fingers to squish it all together. Mix until you see no more dry spots.
Step 3: Next, we make the balls. A small cookie scoop is perfect for this. If you don’t have one, a spoon works fine. Roll each scoop in your palms. Make them about the size of a walnut. Place them on a baking sheet with a little foil. This makes cleanup so easy later.
Step 4: Time to bake! Pop that tray into your hot oven. They need about 22 to 24 minutes. You’ll know they’re done when they’re golden brown. The smell in your kitchen will be incredible. What’s your favorite kitchen smell? Share below! Let them cool for just a minute before eating. The cheese inside is very hot!
Cook Time: 22–24 minutes
Total Time: 35 minutes
Yield: About 36 balls
Category: Appetizer, Snack
Three Fun Twists to Try
Once you know the basic recipe, you can play! Here are my favorite little changes. They make the recipe feel brand new. I love seeing what my family prefers.
The Spicy Kick: Use hot pork sausage. Add a pinch of cayenne pepper to the mix. It gives them a nice little warmth.
The Herb Garden: Mix in a tablespoon of fresh chopped herbs. Chives or parsley are lovely. It tastes like a sunny day.
The Everything Bagel: Roll the shaped balls in “everything” bagel seasoning. It adds a delicious, crunchy crust. So good!
Which one would you try first? Comment below!
Serving Them With Style
These little balls are wonderful all on their own. But sometimes, I like to dress them up. For a snack, just pile them high on a pretty plate. For a meal, try them with a simple green salad. A bowl of creamy tomato soup is perfect for dipping. It’s my favorite cozy lunch.
What to drink? For the grown-ups, a cold lager beer is a classic match. It cuts through the richness. For everyone, a fizzy apple cider is just right. It’s sweet and tangy. Which would you choose tonight?
Keeping Your Sausage Balls Happy
These little bites are perfect for making ahead. Let them cool completely after baking. Then, pop them in a container in the fridge. They will be good for three to four days.
You can also freeze them for later. I once made a triple batch for my grandson’s team party. I froze two trays for the busy week ahead. Place the balls on a baking sheet first. Freeze them solid for one hour.
Then, move them to a freezer bag. They will keep for two months. This matters because a ready-to-go snack saves your day. Reheat them in a 350-degree oven until warm. Have you ever tried storing it this way? Share below!
Little Fixes for Big Flavor
Sometimes the dough feels too sticky. Your hands will get messy. Just add a little more baking mix. I remember when my first batch stuck to everything. A bit more mix fixed it right up.
If your balls are dry, the sausage might be too lean. Using a regular pork sausage adds needed fat. This matters because fat carries flavor and keeps them tender. Another issue is them not browning. Make sure your oven is fully preheated.
A hot start gives them a nice, golden coat. This simple step builds cooking confidence. Which of these problems have you run into before?
Your Quick Questions, Answered
Q: Can I make these gluten-free? A: Yes! Use a gluten-free baking mix. The recipe works just the same.
Q: Can I make the dough ahead? A: You can mix it, cover, and refrigerate overnight. Roll and bake the next day.
Q: What cheese can I swap? A: Try pepper jack for a little kick. Colby cheese is a milder choice too.
Q: Can I double the recipe? A: Absolutely. Just use two baking sheets. Switch their positions halfway through baking.
Q: Any optional add-ins? A: A pinch of garlic powder is lovely. Fun fact: My neighbor adds a dash of hot sauce to hers! Which tip will you try first?
From My Kitchen to Yours
I hope you love making these sausage balls. They always make my kitchen smell like home. I would love to see your creations. Sharing food connects us all.
Have you tried this recipe? Tag us on Pinterest! You can find me at Lena’s Cozy Kitchen. I enjoy seeing your family favorites and happy faces. Thank you for cooking with me today.
Happy cooking! —Lena Morales.

Cream Cheese Sausage Balls
Description
Savory, cheesy, and incredibly easy to make, these Cream Cheese Sausage Balls are the perfect appetizer or snack.
Ingredients
Instructions
- Preheat the oven to 350 degrees F (175 degrees C).
- Mix together sausage, baking mix, cream cheese, and Cheddar cheese in a large bowl until well combined.
- Scoop out with small cookie scoop and roll into 1-inch balls and place on a lightly greased foil lined baking sheet.
- Bake in the preheated oven until browned and no longer pink in the centers, 22 to 24 minutes.
Notes
- Nutrition per ball: Calories: 89kcal | Carbohydrates: 3g | Protein: 4g | Fat: 7g | Saturated Fat: 3g | Polyunsaturated Fat: 1g | Monounsaturated Fat: 3g | Trans Fat: 1g | Cholesterol: 17mg | Sodium: 192mg | Potassium: 51mg | Fiber: 1g | Sugar: 1g | Vitamin A: 107IU | Vitamin C: 1mg | Calcium: 41mg | Iron: 1mg


Leave a Reply