A Cake That Means “Pick Me Up”
Tiramisu is a fancy word for a happy feeling. It means “pick me up” in Italian. I think that’s perfect. One bite lifts your spirits right up. It’s coffee, cream, and cake all in one.
My first taste was at my friend Rosa’s house. She was from Sicily. I was so shy, but the dessert made me smile. She saw and winked. Food is a language everyone understands. That matters. It connects us without needing words.
The Heart of the Matter
This dessert is about balance. You have strong coffee. Then you have sweet, gentle cream. They need each other. Too much of one and the magic is gone.
Here is the key. Dip those ladyfingers fast! Just a quick in-and-out on each side. I still laugh at the time I soaked one too long. It fell apart in my fingers. A soggy cake makes a sad tiramisu. You want them moist, not mushy.
Whipping Up Memories
Making the cream is my favorite part. You cook the yolks and sugar until they’re warm and safe. Doesn’t that smell amazing? Like sweet sunshine. Then you fold in the whipped cream.
Folding is gentle. You are not stirring. Think of it as giving the cream a hug. Fun fact: The mascarpone cheese is why the cream is so rich. It’s not really cheese, but a creamy dairy product! This gentle care matters. It gives us a cloud-light cream that melts on your tongue.
The Waiting Game
Now comes the hard part. You must wait. Cover it and let it sleep in the fridge overnight. All the flavors get to know each other. They become one perfect dessert.
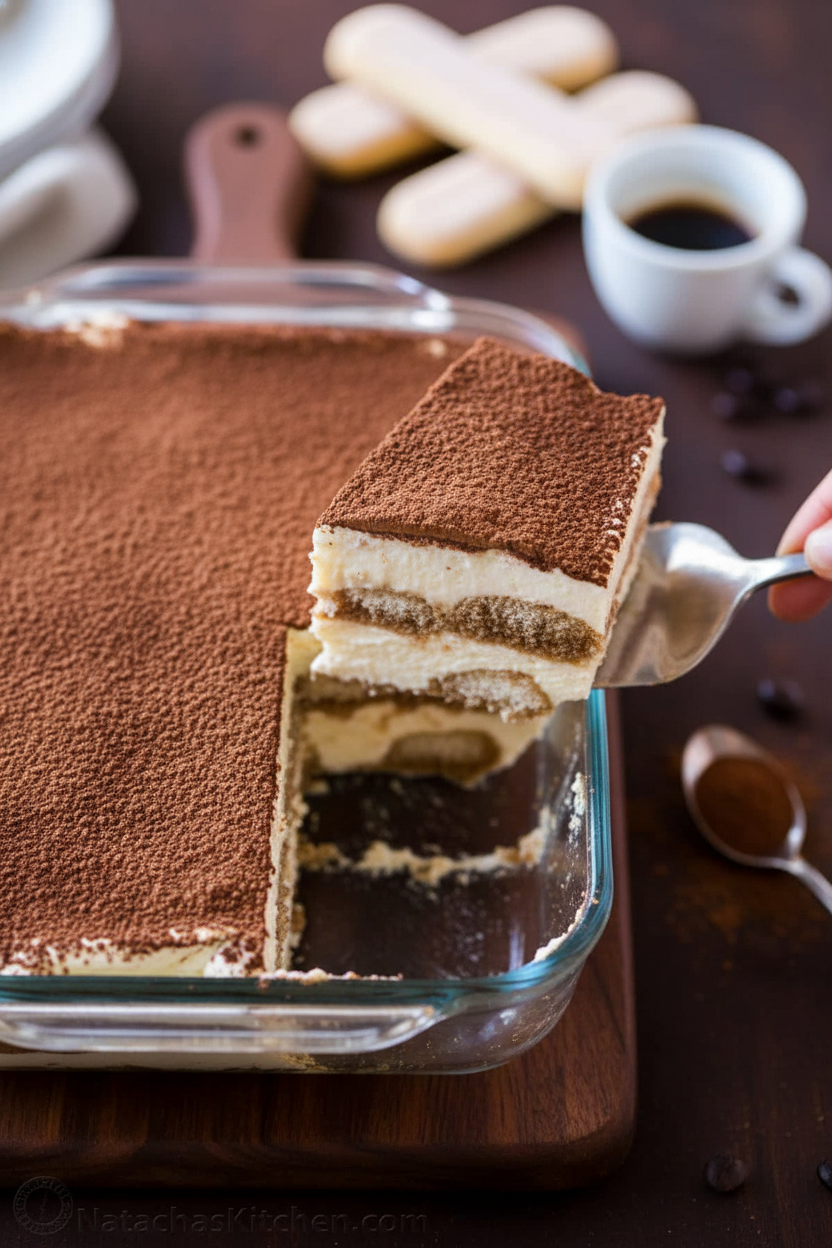
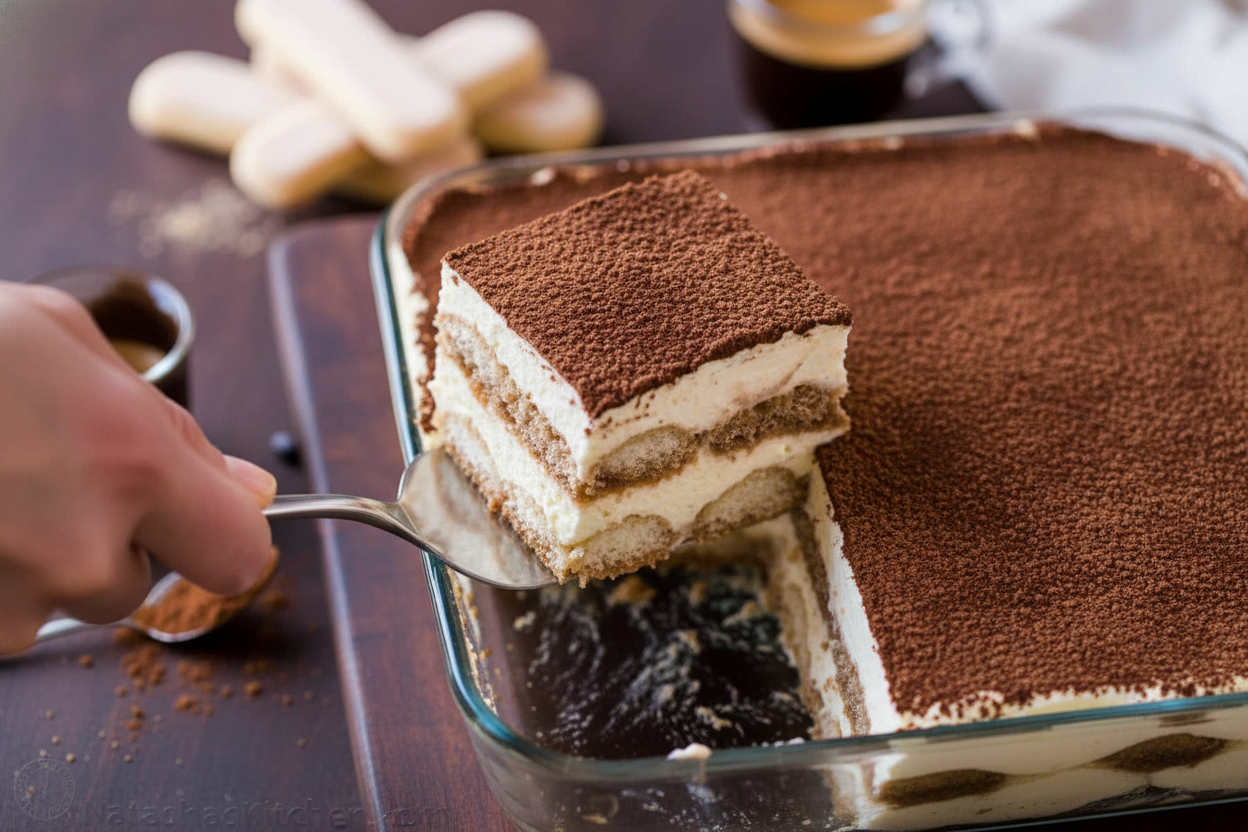
Right before serving, dust the top with cocoa powder. It looks like a fresh blanket of snow. I always give it one last big tap to spread it evenly. Do you like a little or a lot of cocoa on top?
Your Turn in the Kitchen
This is a wonderful dessert to share. It looks fancy but is just careful layers. Have you ever made tiramisu before? Or maybe you’ve had a special version.
Some families use different liqueurs. Some use no alcohol at all. That’s okay. What matters is making it with love. What is your favorite dessert to make for people you care about? Tell me about it. I love hearing your stories.
Ingredients:
| Ingredient | Amount | Notes |
|---|---|---|
| Espresso (or strong coffee) | 1 1/2 cups | Room temperature |
| Golden rum | 6 Tbsp | Divided use |
| Ladyfingers | 40 | |
| Egg yolks (large) | 6 | |
| Granulated sugar | 3/4 cup | |
| Mascarpone | 16 oz | Cold |
| Heavy whipping cream | 2 cups | Cold |
| Unsweetened cocoa powder | 2-3 Tbsp | For dusting the top |
My Favorite Tiramisu Story & How-To
Let me tell you about my first tiramisu. My Nonna made it for my birthday. I was your age. The cocoa dusted top looked like magic. I thought it was the fanciest thing ever. Now I make it for my own grandkids. It’s easier than it looks. I promise. Just follow these steps with me.
Step 1: Start with the coffee bath. Mix your cool espresso and half the rum in a bowl. Now, dip those ladyfingers. Do it one at a time. Just a quick dip on each side. You want them moist, not soggy. Lay them in your dish. (My hard-learned tip: If they soak too long, they’ll fall apart! Be quick like a bunny.)
Step 2: Time for the creamy heart. Whisk the egg yolks and sugar. You’ll do this over a pot of steaming water. Whisk for about 10 minutes. It gets pale and lovely. Doesn’t that smell amazing? Let it cool a bit. In another bowl, beat the mascarpone and the rest of the rum. Then mix in your warm yolk mixture.
Step 3: Let’s make it fluffy. Whip that cold heavy cream until it forms stiff peaks. Now, gently fold it into your mascarpone mix. Use a big spoon and be kind. Folding keeps it airy. What does “fold” mean? Share below! I still laugh at my first try. I stirred it hard and got soup!
Step 4: Let’s build our masterpiece. Spread half the cream over your first ladyfinger layer. Dip the rest of the cookies. Place them on top. Cover with the last of the cream. Now, the hardest part. Cover it and walk away. It needs to sleep in the fridge overnight. This patience makes it perfect.
Step 5: The final touch. Right before serving, dust the top with cocoa powder. I use a little sieve. It looks like a gentle snowfall. Then slice and enjoy. The wait is always worth it.
Cook Time: 30 minutes
Total Time: 8 hours 30 minutes (includes chilling)
Yield: 12 servings
Category: Dessert
Three Fun Twists on the Classic
Once you know the basics, you can play. Here are my favorite little changes. They make it new again.
Berry Bright: Add a layer of fresh raspberries or sliced strawberries. Place them on the first cream layer. It’s so pretty and fruity.
Chocolate Dream: Swap the cocoa powder for grated dark chocolate. You can also add mini chocolate chips to the cream. My grandson loves this one.
No-Coffee Version: Use warm milk with a spoon of vanilla instead of espresso. It’s perfect for kids or late nights. Still deliciously creamy.
Which one would you try first? Comment below!
Serving It Up Just Right
This dessert is a star all by itself. But I like to make it special. Serve it on pretty little plates. A mint leaf on the side adds a fresh green pop. For a party, make it in a big glass bowl. Everyone can see all the beautiful layers.
What to drink with it? A small glass of sweet dessert wine is lovely for the grown-ups. For everyone, a cold glass of sparkling apple cider is perfect. The bubbles cut through the cream. Which would you choose tonight?
Keeping Your Tiramisu Happy
Tiramisu loves the cold. Keep it covered in the fridge. It stays perfect for three days. You can freeze it for one month. Thaw it overnight in the refrigerator.
I do not recommend reheating it. The magic is in the chilled, creamy layers. I once left a slice out too long. It became a sad, soggy mess. Now I am very careful.
You can make a double batch. Use two dishes. Share one with a neighbor. This matters because good food is for sharing. It builds community and joy. Have you ever tried storing it this way? Share below!
Tiramisu Troubles? Easy Fixes!
First, soggy ladyfingers. Just dip them quickly. One second per side is enough. I remember my first tiramisu. It was like a coffee soup. A quick dip fixes everything.
Second, a runny cream. Make sure your bowl and cream are very cold. Whip until stiff peaks form. This matters for a light, fluffy texture. It makes the dessert feel special.
Third, a grainy filling. Do not overmix the mascarpone. Fold gently. This matters for a smooth, luxurious feel. It builds your cooking confidence. Which of these problems have you run into before?
Your Tiramisu Questions, Answered
Q: Can I make it gluten-free? A: Yes! Use gluten-free ladyfingers. They work just the same.
Q: How far ahead can I make it? A: It is best made a day ahead. The flavors get better overnight.
Q: What if I do not have rum? A: Use extra strong coffee. A little vanilla extract is nice too.
Q: Can I make a smaller portion? A: Absolutely. Just cut all the ingredients in half. Use a smaller dish.
Q: Any special tip? A: Use a fine sieve for the cocoa. It gives a beautiful, smooth dusting. Fun fact: The name “tiramisu” means “pick me up” in Italian! Which tip will you try first?
From My Kitchen to Yours
I hope you make wonderful memories with this recipe. Cooking is about love and stories. I would love to see your creation.
Share a picture of your beautiful tiramisu. Let me know how your family liked it. Have you tried this recipe? Tag us on Pinterest! I am cheering for you.
Happy cooking!
—Lena Morales.

Classic Italian Tiramisu (with Video): Classic Italian Tiramisu Recipe with Video Tutorial
Description
Experience the classic layers of coffee-soaked ladyfingers and rich, creamy mascarpone in this authentic Italian Tiramisu.
Ingredients
Instructions
- Soak the Ladyfingers: In a bowl, stir together 1 1/2 cups espresso and 3 Tbsp rum. Quickly dip half of the ladyfingers, one at a time, and then arrange them in a single layer in the bottom of a 9×13 casserole dish. Dip once on each side so they are moist, but do not soak ladyfingers or the cake will collapse.
- Mix the Tiramisu Mascarpone Cream: In a separate rimmed medium glass bowl, whisk together yolks and sugar. Place over steam (on a saucepan with simmering water) and whisk 10 minutes on low heat until the mixture is lighter in color, slightly thickened, and not grainy when you rub between your fingers. Remove from heat and whisk for a few minutes off the heat to help it cool down. Then set it aside to cool while doing step 3.
- In a separate bowl, beat together 16 oz mascarpone and 3 Tbsp rum. Use an electric hand mixer to beat in the warm yolk mixture until well incorporated.
- Whip – In a separate chilled bowl, beat cold heavy whipping cream until stiff peaks form. Use a spatula to gently fold half of the whipped cream into mascarpone cream, then blend in the remaining whipped cream, just until incorporated. Do not overfold, or it will become grainy.
- Layer the Tiramisu: Spread half of the cream over the first layer of ladyfingers. Dip and arrange the remaining ladyfingers on top, and then spread the remaining cream on top. Cover with foil and refrigerate 8 hours or overnight. Dust with cocoa powder before serving. It is ok to dust with cocoa ahead of time – the color will just darken from the moisture.
Notes
- Nutrition Per Serving: Calories: 538, Total Fat: 38g, Saturated Fat: 22g, Cholesterol: 271mg, Sodium: 95mg, Potassium: 98mg, Total Carbohydrates: 37g, Dietary Fiber: 1g, Sugars: 13g, Protein: 9g, Vitamin A: 1446IU, Vitamin C: 1mg, Calcium: 109mg, Iron: 2mg


Leave a Reply