My First Kitchen Mess
I first made these bars when I was young. I wanted to surprise my abuela. I used a whole bag of chocolate chips. The dough was so stiff!
I could barely stir it. My arms got so tired. Abuela found me, flour on my nose. She just laughed and helped me pat the dough into the pan. That memory is sweeter than the bars. I still laugh at that.
Why This Recipe Works
This recipe is simple for a reason. You only need one bowl. That means less washing up. I love that.
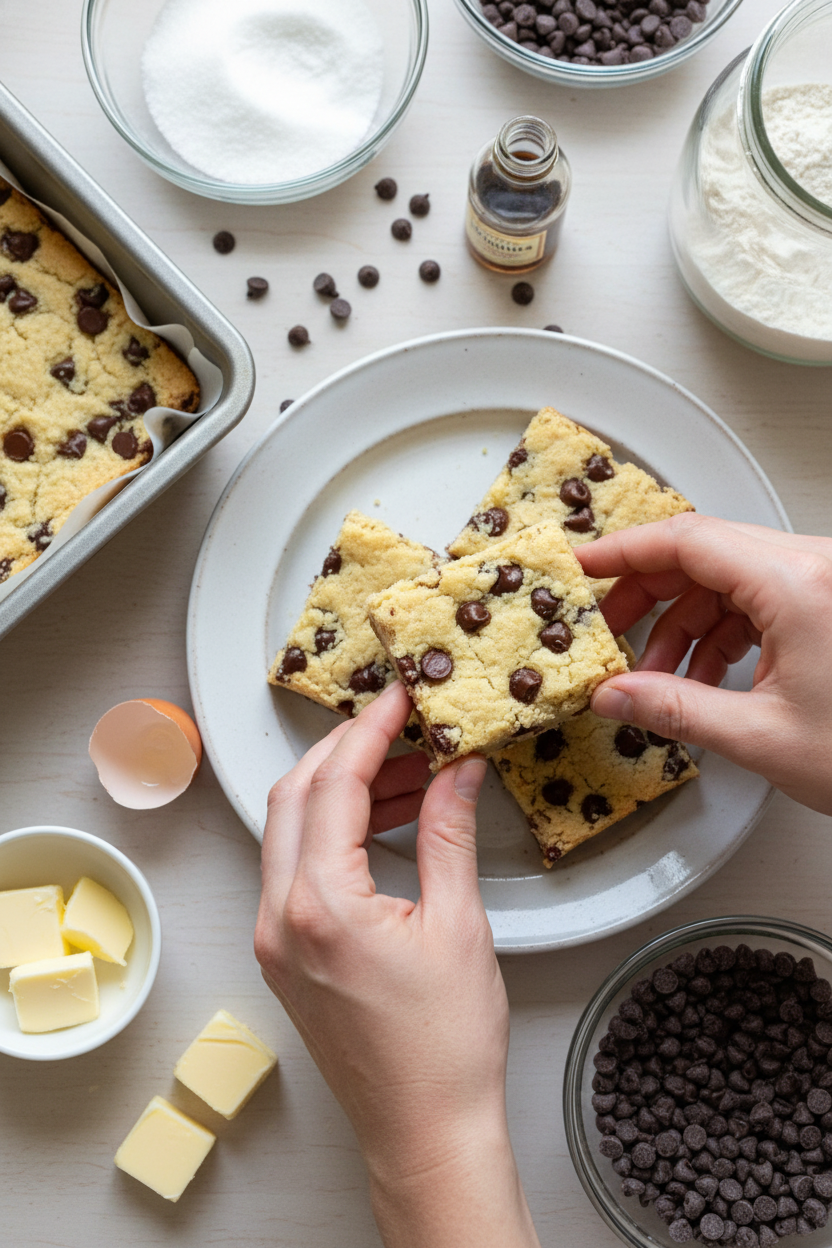
Room-temperature butter is the secret. It creams with the sugar so easily. This makes the bars soft, not tough. Getting your hands wet to pat the dough is my favorite trick. It doesn’t stick to you. Try it and see!
The Heart of the Kitchen
Food is about more than eating. It is about sharing. These bars are perfect for that. You can cut them big or small.
Bringing a plate to a neighbor matters. It says, “I was thinking of you.” That is a powerful thing. Fun fact: The first chocolate chip cookie was an accident! A baker ran out of baker’s chocolate and used chips instead. Her happy mistake changed baking forever.
Let’s Bake Together
First, preheat your oven to 350. Cream the butter and sugar. Doesn’t that smell amazing already? It should look fluffy and light.
Add the flour, egg, and vanilla. Mix it all up. Now, stir in those chocolate chips by hand. Feel the dough come together. Spoon it into your greased pan. Use wet hands to press it flat. Bake for 25-30 minutes. The edges will be just golden.
Your Turn to Share
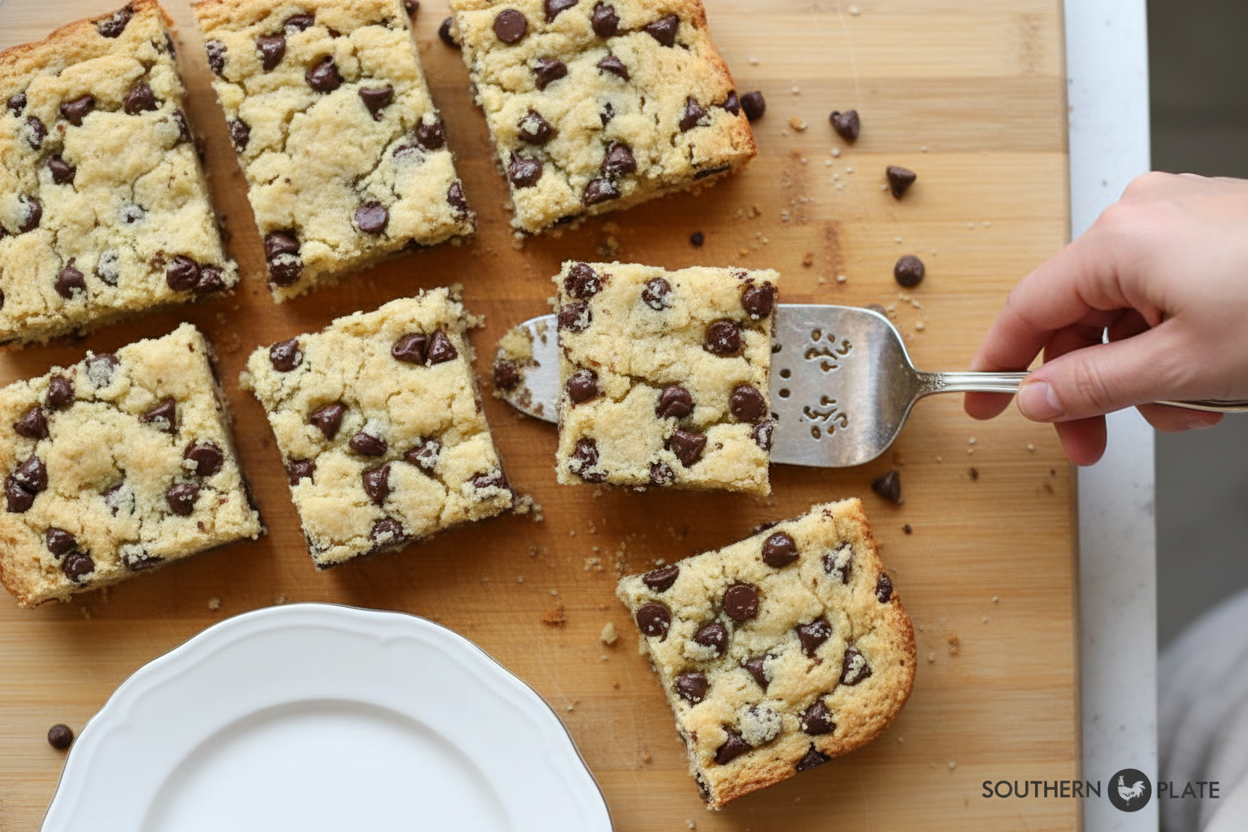
Let the bars cool completely before you cut. This is the hard part! Waiting makes them set up nicely. Then, enjoy your first bite.
What did you think? Do you like your bars gooey or more set? Tell me in the comments. Did you share them with anyone? I love hearing your stories. What’s your favorite thing to bake when you want to make someone smile?
Ingredients:
| Ingredient | Amount | Notes |
|---|---|---|
| sugar | 1 cup | |
| butter | 1 cup | at room temperature |
| egg | 1 large | |
| vanilla | 1 tablespoon | |
| all purpose flour | 2 cups | |
| chocolate chips | 1 cup |
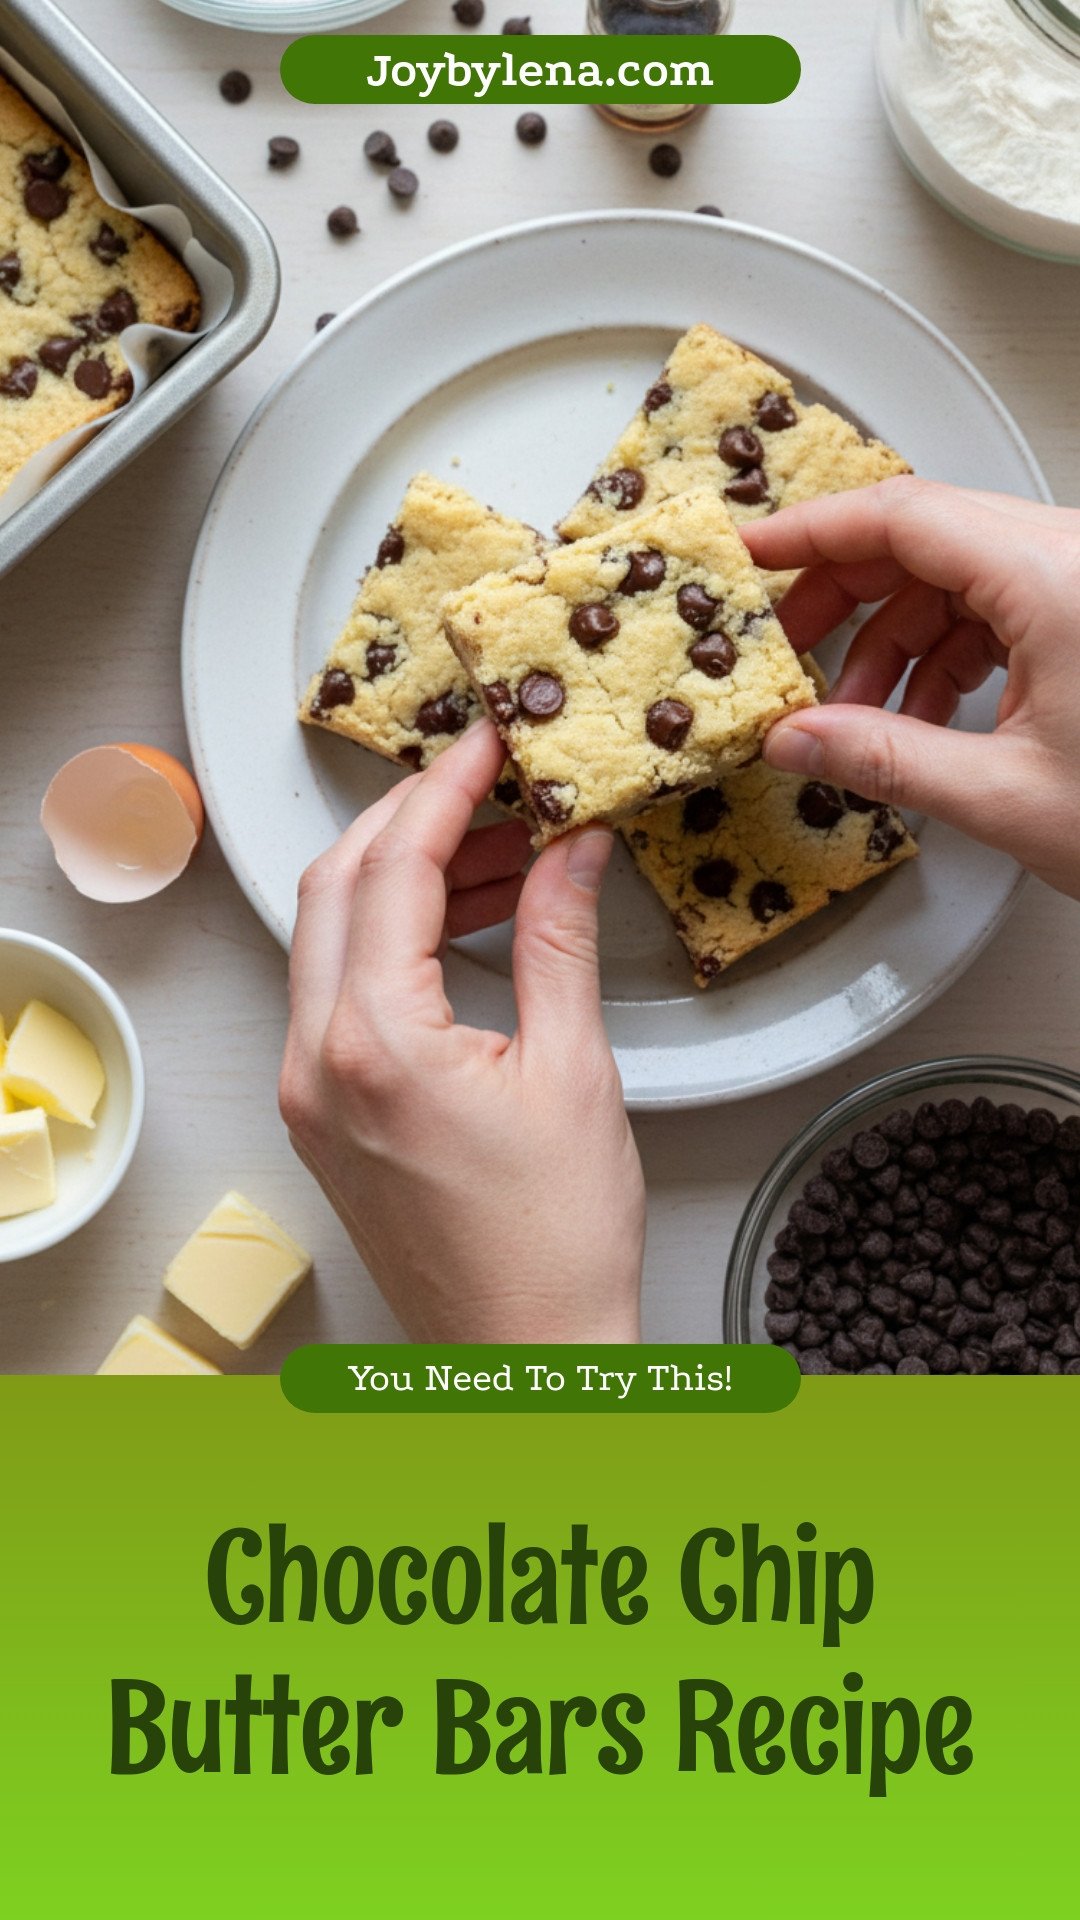
My Favorite Chocolate Chip Butter Bars
Hello, my dear! Come sit at the counter. Let’s bake something sweet. These bars are my go-to treat. They remind me of my own grandma’s kitchen. The smell is pure happiness. It fills the whole house with warmth. We’ll make them together, step by step. Don’t worry, it’s easy. I still laugh at that time I used cold butter. What a mess! So let’s get our butter nice and soft first. Doesn’t that smell amazing already? Just imagining it.
Step 1: First, warm your oven to 350 degrees. Get out your big mixing bowl. Put the soft butter and sugar right in. Now, use your mixer to beat them. Keep going until it looks fluffy and light. This is the secret to a good bar! My grandson calls this “making cloud cream.” I think that’s just perfect.
Step 2: Next, crack in that egg. Pour in the vanilla. Dump in all the flour. Time to mix again! Scrape the sides of the bowl with a spoon. You want everything to become one soft dough. (A hard-learned tip: scrape the sides often. It avoids flour pockets!).
Step 3: Now for the best part. Pour in your chocolate chips. Use a big spoon to stir them in by hand. I like to sneak a few chips for myself. Can you guess my favorite kind of chocolate? Milk or dark? Share below!
Step 4: Spray your baking dish lightly. Spoon your dough into the pan. Here’s a trick: wet your fingers with a little water. Now pat the dough flat. It won’t stick to you! Make it nice and even in the pan.
Step 5: Slide the pan into your warm oven. Bake for about 25 to 30 minutes. Watch for light golden edges. They might look a little soft inside. That’s okay! They firm up as they cool. Let them sit until they are just warm. Then cut them into squares.
Cook Time: 25–30 minutes
Total Time: 40 minutes
Yield: 9–12 bars
Category: Dessert, Snack
Three Fun Twists to Try
Once you master the basic bar, you can play! Here are my favorite simple twists. They make it feel like a whole new treat. Try one next time you bake.
Sea Salt Sprinkle: After patting the dough, sprinkle a tiny bit of flaky sea salt on top. It makes the chocolate taste even richer.
Peanut Butter Swirl: Drop spoonfuls of peanut butter on the dough. Use a knife to swirl it around before baking. So good!
Festive Mix-Ins: Swap half the chocolate chips for something else. Try colorful M&Ms or chopped pecans. Perfect for a party.
Which one would you try first? Comment below!
Serving Them Up With Style
These bars are wonderful all on their own. But sometimes, I like to dress them up a little. It makes a simple snack feel special. Here are a few ideas from my table.
For serving, try a small scoop of vanilla ice cream on a warm bar. Or place one on a pretty plate with fresh berries on the side. A dusting of powdered sugar looks lovely, too.
What to drink? A cold glass of milk is the classic choice. It’s perfect for kids. For the grown-ups, a little cup of coffee with cream pairs beautifully. The bitter coffee and sweet chocolate are old friends.
Which would you choose tonight?
Keeping Your Butter Bars Fresh
Let’s talk about keeping these bars yummy. First, cool them completely. Then, cover the dish tightly. They stay fresh on the counter for three days.
For longer storage, use your fridge or freezer. Wrap individual squares in plastic wrap. Pop them into a freezer bag. They freeze beautifully for two months.
I once froze a whole batch for my grandson’s visit. He loved having a sweet treat ready. Batch cooking means you’re always prepared for surprise guests.
To reheat, just warm a square in the microwave for ten seconds. It makes the chocolate gooey again. This little step brings back that fresh-baked magic.
Have you ever tried storing it this way? Share below! Good storage saves your treats. It also saves your time and effort in the kitchen.
Simple Fixes for Common Baking Hiccups
Even grandmas have baking troubles sometimes. Here are easy fixes. First, if your dough is too sticky, wet your hands. This helps you press it into the pan neatly.
Second, watch for over-baking. I remember when I got distracted by the phone. My bars came out too crisp. Set a timer and check at 25 minutes.
Third, your butter must be soft. If it’s too cold, your dough will be crumbly. Let it sit out for an hour before you start. This matters for a perfect, tender texture.
Fun fact: Room-temperature butter creams better because it can trap more air. Getting these steps right builds your confidence. You will feel like a real baker.
Which of these problems have you run into before? Fixing small issues makes your food taste better. It also makes cooking more fun.
Your Butter Bar Questions, Answered
Q: Can I make these gluten-free? A: Yes! Use a one-to-one gluten-free flour blend. The results are just as good.
Q: Can I make the dough ahead? A: Absolutely. Press it into the pan, cover it, and refrigerate overnight. Bake it the next day.
Q: What can I use instead of chocolate chips? A: Try chopped nuts or dried cranberries. Use what you love.
Q: Can I double the recipe? A: For sure. Double everything and use a 9×13 inch pan. Bake for a few minutes longer.
Q: Any optional tips? A: Sprinkle a little sea salt on top before baking. It makes the chocolate flavor pop. Which tip will you try first?
From My Kitchen to Yours
I hope you love making these butter bars. Baking is about sharing joy and making memories. I still make them with my own grandkids.
I would love to see your creations. Show me your finished bars or your happy helpers. Your kitchen stories make my day brighter.
Have you tried this recipe? Tag us on Pinterest! You can find me at @LenasCozyKitchen. Thank you for baking with me today.
Happy cooking!
—Lena Morales.
Chocolate Chip Butter Bars: Chocolate Chip Butter Bars Recipe
Description
These rich and buttery Chocolate Chip Butter Bars are an easy, one-bowl dessert with a soft, cookie-like texture and melty chocolate chips.
Ingredients
Instructions
- Preheat oven to 350.
- In large mixing bowl, place butter and sugar. Cream together with an electric mixer until well combined and fluffy.
- Add in flour, egg, and vanilla. Beat again until fully incorporated and a dough is formed, scraping down sides as needed.
- Add in chocolate chips and stir by hand until mixed in.
- Spray 9×9 or 8×8 inch baking dish with cooking spray.
- Spoon dough into dish. Using wet hands pat out into dish until it is even.
- Bake for 25-30 minutes, or until just lightly browned on the edges, being careful not to over bake. Allow to cool before cutting.


Leave a Reply