The Heart of the Cookie
Let’s talk about butter. It is the soul of this cookie. You must let it get soft. Leave it on the counter for an hour. It should feel like a gentle hug, not a cold rock. This makes all the difference. I learned this from my Tia Rosa. She would tap the butter and smile. “It’s ready, Lena,” she’d say. I still laugh at that.
Why does this matter? Soft butter mixes with sugar perfectly. It traps little air pockets. Those pockets make your cookies light. They almost melt in your mouth. Hard butter just won’t do the same job. It’s a small step with a big reward.
A Little Kitchen Magic
Creaming butter and sugar is my favorite part. You beat them until they are pale and fluffy. Doesn’t that smell amazing? It smells like sweet promises. Then you add the egg and vanilla. This binds everything together with love. Really, it does.
Here is a fun fact for you: *The vanilla you smell mostly comes from the alcohol in the extract. It evaporates in the oven, leaving pure flavor behind.* Isn’t that neat? Now, what is your favorite smell in the kitchen? Is it vanilla, or maybe cinnamon? Tell me, I’d love to know.
The Gentle Touch
Now, we add the dry ingredients. Be gentle here. You mixed air into the butter. We don’t want to push it all out. Just mix until you no longer see white flour. The dough will be soft. It might make you think, “Is this right?” Yes, it is.
Rolling the dough is next. Use just enough flour so it doesn’t stick. Roll to about a third of an inch thick. That’s the perfect thickness. It bakes evenly. Too thin, and they burn. Too thick, and they stay doughy inside. This matters because texture is everything in a cookie.
Shapes and Stories
Time for cookie cutters! I have a whole tin of them. My favorite is a little star. It’s worn down from so much use. When I was small, I would sneak the dough scraps. My mama would pretend not to see. She knew I just wanted a taste.
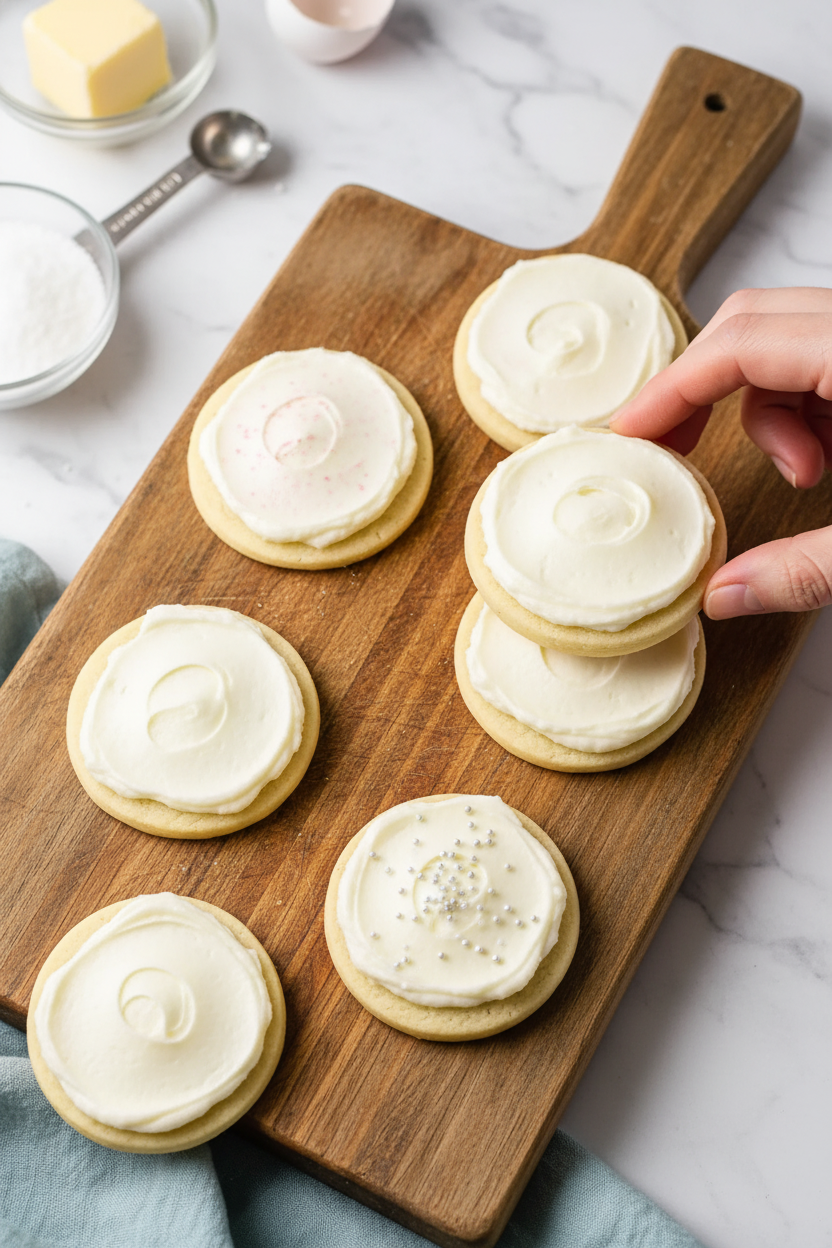
Bake them just until set. They should not turn brown. Let them cool completely. This takes patience. But it’s important. If you frost a warm cookie, it will turn into a sweet, messy puddle. What shapes will you make? Will you try animals, or classic circles?
The Sweet Finish
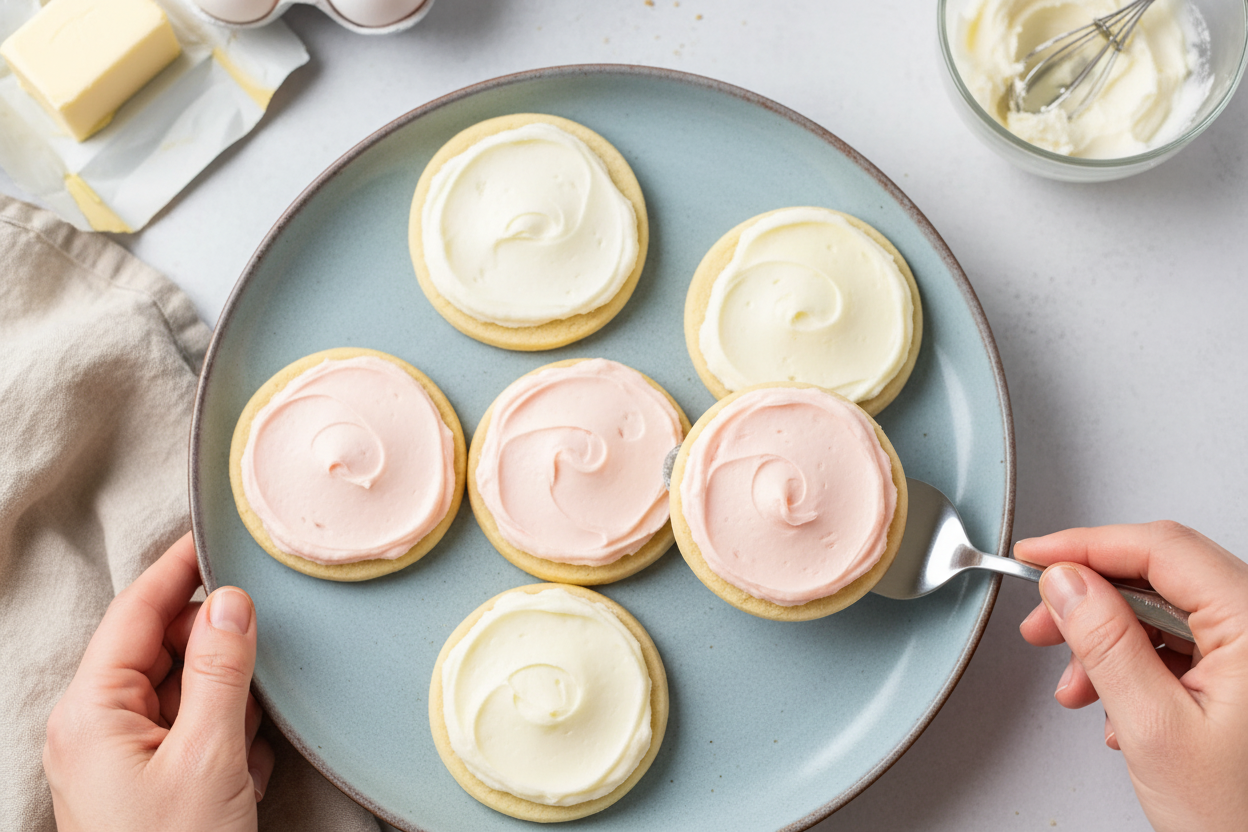
The frosting is pure joy. Start with less milk. You can always add more. Beat it until it’s smooth and spreadable. A little goes a long way. Food coloring is a fun choice. A drop of red or blue makes it a party.
Frosting these cookies is a quiet moment. You can make swirls or simple stripes. There is no wrong way. This is where you make them yours. So, when you make these, who will you share them with? A neighbor, a teacher, your family? Sharing is the best part of baking.
Ingredients:
| Ingredient | Amount | Notes |
|---|---|---|
| Butter, softened | 1 cup | For the cookie dough |
| Sugar | 3/4 cup | |
| Egg | 1 | |
| Vanilla extract | 1/2 teaspoon | |
| All-purpose flour | 2 1/2 cups | |
| Baking powder | 1 teaspoon | |
| Salt | 1/4 teaspoon | |
| Butter, softened | 1/2 cup | For the frosting |
| Powdered sugar | 4 cups | |
| Vanilla extract | 1 teaspoon | |
| Milk | 3-4 tablespoons | As needed for consistency |
| Food coloring | (optional) | Optional for decorating |
My Favorite Butter Cookie Cut-Outs
Hello, my dear! Come sit at the table. Let’s make my butter cookies. They are soft and sweet. I’ve made them for years. My grandkids love cutting out the shapes. The kitchen will smell like happy memories. Doesn’t that sound nice?
First, we get everything ready. This is called “mise en place.” It just means no running for the vanilla later! Use real butter, softened. Leave it on the counter for an hour. It should feel like a cool pillow. (My hard-learned tip: If you rush and melt the butter, your dough will be sad and greasy.)
Step 1: Preheat your oven to 375°. Now, let’s cream the butter and sugar. Use your mixer. Beat them until they are fluffy and pale. It should look like clouds. This takes a few minutes. I still laugh at how my grandson licked the beater.
Step 2: Crack in the egg. Add the vanilla too. Mix it all until it’s smooth. That vanilla smell is the best part. It reminds me of my own abuela’s kitchen. Now, in another bowl, whisk the flour, baking powder, and salt.
Step 3: Slowly add the flour mix to the butter bowl. Mix on low speed. Stop when you see no more white flour. The dough will be soft. Quick quiz: Why do we add baking powder? Share below! It makes our cookies puff up just a little.
Step 4: Sprinkle flour on your counter. Roll the dough about 1/3 inch thick. Not too thin! Press your cookie cutters down. Lift the shapes carefully. Place them on a lined baking sheet. Leave a little space between them.
Step 5: Bake for 6 to 8 minutes. Watch them closely. They are done when set, but not brown. Let them cool completely on a rack. This is the hardest part—waiting! Now, let’s make the frosting.
Step 6: Beat the soft butter for the frosting. Slowly add the powdered sugar. It will look snowy! Add vanilla and milk. Use just enough milk to make it spreadable. Add food coloring if you like. Pink clouds taste the best, I think.
Cook Time: 6–8 minutes per batch
Total Time: About 1 hour 30 minutes
Yield: About 3 dozen cookies
Category: Dessert, Cookies
Three Fun Twists to Try
Once you know the basic recipe, you can play! Here are my favorite twists. They make the cookies special for any day.
Lemon Sunshine: Add the zest of one lemon to the dough. Use lemon juice in the frosting instead of milk. So bright and cheerful!
Cinnamon Sugar Sparkle: Skip the frosting. Before baking, brush cookies with milk. Sprinkle them with cinnamon and sugar. They sparkle like morning frost.
Almond Joy: Use almond extract instead of vanilla. Sprinkle a sliced almond on top before baking. It gives a lovely, nutty crunch.
Which one would you try first? Comment below!
Serving Them Up With Style
These cookies are stars all on their own. But I love making a little event. Stack them on a pretty plate. Tie them with ribbon for a gift. Everyone loves a cookie present.
For a party, serve with cold milk. That’s the classic choice. For grown-ups, a sweet dessert wine pairs nicely. Or a cup of hot peppermint tea. The mint is so refreshing with the sweet butter.
Which would you choose tonight? A glass of cold milk or a fancy little cup of tea? I think I’ll have the tea. It gives me an excuse to sit and rest my feet.
Keeping Your Butter Cookies Fresh and Happy
Let’s talk about keeping your cookies tasty. First, cool them completely. A warm cookie in a container will get soggy. Store them in a tin or airtight container at room temperature. They will stay perfect for about a week.
You can freeze the baked cookies, too. Just layer them between parchment paper in a freezer bag. They thaw quickly on the counter. I once sent a frozen batch to my grandson for his birthday. He said they tasted just-baked!
You can also freeze the dough. Roll it out and cut your shapes first. Then, freeze the shapes on a tray before bagging them. This lets you bake just a few fresh cookies anytime. Batch cooking like this saves time for busy days.
It matters because homemade treats should bring joy, not stress. Having cookies ready means you’re always prepared for surprise guests. Have you ever tried storing it this way? Share below!
Simple Fixes for Common Cookie Troubles
Sometimes cookies don’t turn out as planned. That’s okay! Here are easy fixes. First, if your dough is too sticky, add a little more flour. Just a tablespoon at a time until it feels right.
If your cookies spread too much, your butter was likely too soft. I remember when my kitchen was too warm. My snowman cookies turned into puddles! Chilling the dough for 30 minutes fixes this.
Finally, if they are too hard, you may have over-baked them. Ovens can run hot. Take them out when the edges are just set. They will firm up as they cool.
Getting this right builds your cooking confidence. It also makes sure every bite is soft and delicious. Which of these problems have you run into before?
Your Butter Cookie Questions, Answered
Q: Can I make these gluten-free?
A: Yes! Use a good gluten-free flour blend. The results are wonderful.
Q: Can I make the dough ahead?
A: Absolutely. Wrap it tightly and refrigerate for up to 3 days.
Q: What if I don’t have vanilla?
A: Try almond or lemon extract instead. It gives a lovely new flavor.
Q: Can I double the recipe?
A: You sure can. It’s perfect for big holiday baking days.
Q: Any fun decorating tips?
A: Before baking, sprinkle with colored sugar. Fun fact: This is called “sanding” and it’s very old-fashioned! Which tip will you try first?
From My Kitchen to Yours
I hope you love making these cookies. Baking is about sharing love and stories. I would love to see your creations. Did you make stars, hearts, or silly shapes?
Your kitchen adventures make me so happy. Please share your beautiful cookies with everyone. Have you tried this recipe? Tag us on Pinterest! I can’t wait to see them.
Happy cooking!
—Lena Morales.
Butter Cookies: Butter Cookies Recipe Easy Homemade Treats
Description
Enjoy these classic, melt-in-your-mouth butter cookies, perfect for holidays or any occasion.
Ingredients
Frosting Ingredients
Instructions
- Preheat oven to 375°F (190°C).
- With a kitchen aid or hand mixer, cream butter and sugar together until light and fluffy. Add egg and vanilla and beat until smooth.
- In a separate bowl, whisk your flour, baking powder, and salt. Slowly add to your creamed mixture and beat until well combined.
- Roll out onto a floured surface til the dough is about ⅓ inch thick. Use cookie cutters to cut out shapes. Place on lined cookie sheets.
- Bake for 6-8 minutes, until set but not brown. Let cookies cool on wire racks or parchment paper.
- For the frosting: Beat butter, confectioners’ sugar, vanilla, and enough milk to reach a spreading consistency. Spread over cookies as desired.
Notes
- Nutrition (per serving): Calories: 170kcal, Carbohydrates: 24g, Protein: 1g, Fat: 8g, Saturated Fat: 5g, Polyunsaturated Fat: 0.3g, Monounsaturated Fat: 2g, Trans Fat: 0.3g, Cholesterol: 25mg, Sodium: 80mg, Potassium: 27mg, Fiber: 0.2g, Sugar: 17g, Vitamin A: 245IU, Calcium: 11mg, Iron: 0.4mg


Leave a Reply