The First Time I Made These
I still laugh at the first time I tried these bars. I was in a hurry and forgot to buy dates. I used raisins instead. Big mistake. The filling turned into a sticky, sweet mess that ran all over the pan. My kitchen looked like a cranberry crime scene. Doesn’t that sound like something that would happen to you? That is why I love this recipe so much now. It uses sugared dates, which hold together perfectly. Dates are like nature’s candy. They give the cranberries a chewy hug. Have you ever cooked with dates before? I would love to hear your favorite way to use them.Why These Bars Matter
You might wonder why I bother making these from scratch. The first reason is simple. Store-bought granola bars are full of things I cannot pronounce. These bars have real food in them. Cranberries, oats, and a little sugar. That is it. You can feel good about giving these to your family. The second reason is bigger. Making food with your own hands is a way to slow down. When you stir the cranberries and watch them pop, you are not thinking about homework or your to-do list. You are just there, in the warm kitchen. That is a kind of magic. Why do you think cooking makes people feel happy?The Secret to a Perfect Crust
The crust is the most important part of these bars. You want it to be crumbly but not dry. The trick is using melted butter. Cold butter makes little pebbles in the dough. Melted butter coats every oat and every grain of flour. That gives you a crust that holds together like a soft cookie. If you need a dairy-free version, use a good vegan butter. I like Earth Balance. It works the same way. Just melt it and pour it in. Then mix with your hands until it feels like wet sand. That is how you know it is ready. Does that sound easy enough to try?Fun Fact About Cranberries
*Fun fact: Cranberries bounce. Fresh cranberries can bounce like little rubber balls if you drop them. That is why they are sometimes called “bounceberries.” Farmers actually use a bounce test to sort the good ones from the bad ones.* When you cook them, they pop open and release their tart juice. That juice mixes with the sweet dates and orange to make a jammy filling. The smell will fill your whole house. My grandkids always run into the kitchen when they smell it. They know something good is coming.A Little Story About My Grandma
My grandma used to make something like these bars when I was a little girl. She called them “cranberry squares.” She never used a recipe. She just kept adding oats and sugar until it “felt right.” I remember standing on a little stool next to her, watching her work. One time, she let me stir the cranberries. I was so excited that I stirred too hard and splashed hot juice on my arm. It did not hurt much, but she gave me a cookie to make me feel better. That is the thing about baking with someone you love. Even the mistakes turn into sweet memories.The Glaze Makes It Special
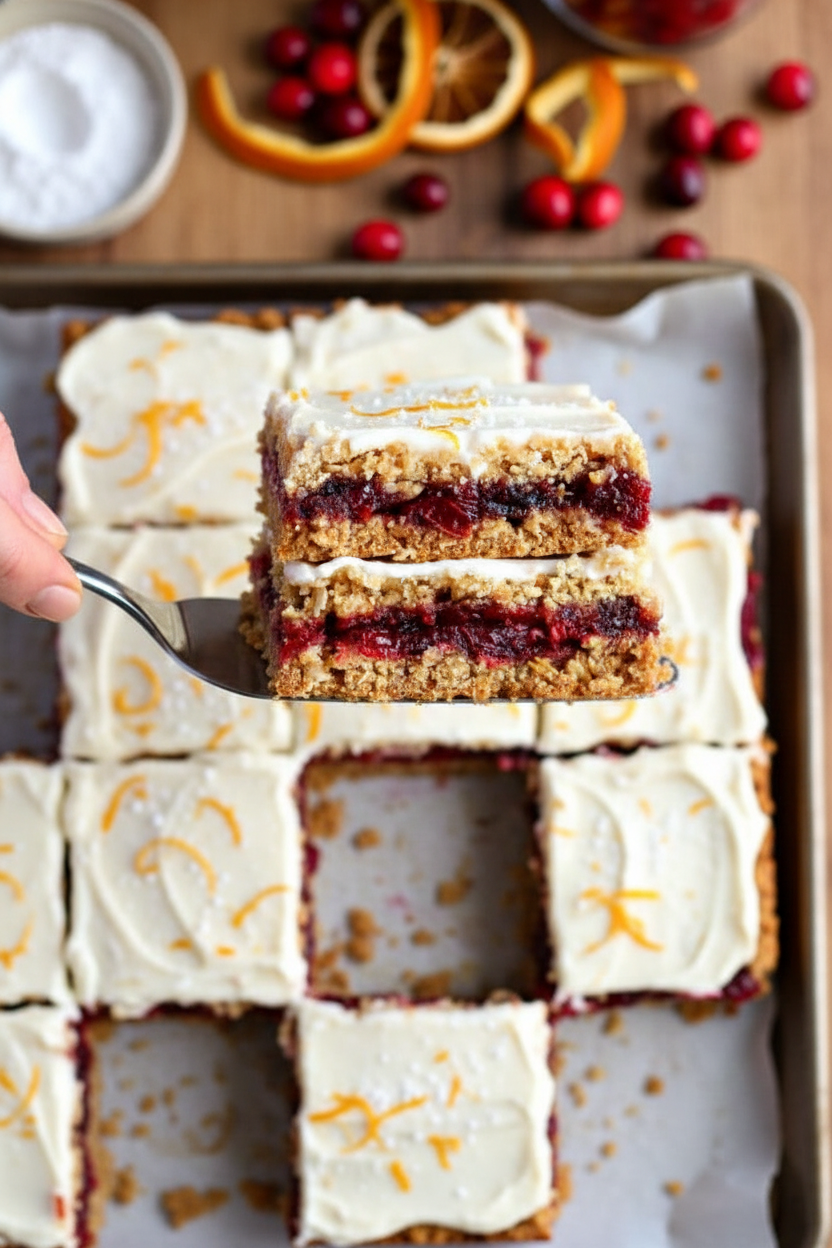
Some people skip the glaze. I think that is a mistake. The glaze is what turns a good bar into a special treat. It is just powdered sugar, a little milk or juice, and vanilla. When you drizzle it over the warm bars, it sets into a shiny, sweet ribbon. I like to use orange juice in the glaze. It matches the orange in the filling. The tangy sweetness is perfect. If you want a thicker glaze, add more sugar. If you want it thinner, add more milk. You are the boss of your own kitchen. What flavor would you use in your glaze?How to Serve and Share
These bars are best the second day. I know that is hard to believe, but it is true. The flavors need time to get to know each other. The cranberry filling soaks into the crust just a little bit. Every bite becomes soft and chewy and sweet all at once. I like to cut them into small squares and put them on a pretty plate. They are perfect for a school bake sale or a coffee date with a friend. You can also wrap them in plastic and keep them in the fridge for a week. They never last that long in my house, though. Do you have a special person you would bake these for? Tell me about them.Ingredients:
| Ingredient | Amount | Notes |
|---|---|---|
| Fresh cranberries | 1 (12 oz) package | |
| Pure vanilla extract | 1 teaspoon | |
| Orange juice or water | 2 tablespoons | |
| Dried orange peel or orange zest | 1/4 teaspoon | Optional |
| Gluten-free quick oats | 2 cups | Bob’s Red Mill recommended |
| All-purpose gluten-free flour | 2 cups | Pillsbury gluten-free recommended |
| Xanthan gum | 1/2 teaspoon | Leave out if flour already contains it |
| Baking soda | 1/2 teaspoon | |
| Butter (or dairy-free alternative) | 1 cup, melted | Earth Balance or Smart Balance for dairy-free |
| Chopped sugared dates | 1 (8 oz) package | |
| Packed brown sugar | 1 1/2 cups | |
| Salt | 1/4 teaspoon | |
| Glaze | ||
| Powdered sugar | 2 cups | |
| Orange juice or milk | 2 tablespoons | Almond milk used in original |
| Pure vanilla extract | 1 teaspoon | |
| Dried orange peel or orange zest | 1/8 teaspoon | Optional |
These Cranberry Bars Made My Kitchen Smell Like a Cozy Hug
I still remember the first time I made these. My granddaughter was coming over after school, and I wanted something sweet but not too heavy. The whole house filled with warm, tangy berry smells. Doesn’t that sound perfect?
These bars are a little different because they use gluten-free oats and flour. But don’t let that scare you. They come out chewy, sweet, and a little tart all at once. Even my picky neighbor asked for the recipe.
The secret is in the cranberry mixture. You let the berries and dates bubble together on the stove until they pop. I always sneak a taste before it goes on the crust. It tastes like a happy little jam.
Now, let’s get our hands a little messy. I promise it’s easy.
Step 1: Preheat your oven to 350°F. Spray a 9×13 glass pan with gluten-free cooking spray. I use glass because it bakes so evenly. Don’t skip the spray—it really helps the crust hold together.
Step 2: Grab a medium saucepan. Toss in the whole bag of cranberries, the chopped dates, and the orange juice. Add the dried orange peel if you have it—it adds a little sunshine. Heat everything to a boil over medium heat.
Step 3: Once it boils, turn the heat down low. Cover the pot and let it simmer for about 15 minutes. Stir it every few minutes until the berries start to pop. (My grandma called this the “dancing berry” sound.) When it’s done, take it off the heat and stir in the vanilla.
Step 4: In a big bowl, mix the gluten-free flour, oats, brown sugar, baking soda, and salt. Make sure they’re all friends in there. Pour in the melted butter and stir until it looks like crumbly sand.
Step 5: Press half of that oat mixture into your greased pan. Use your fingers or the bottom of a glass. Bake it for just 8 minutes. (Hard-learned tip: Don’t overbake it here! This bottom layer should be just barely set, not hard like a cookie.)
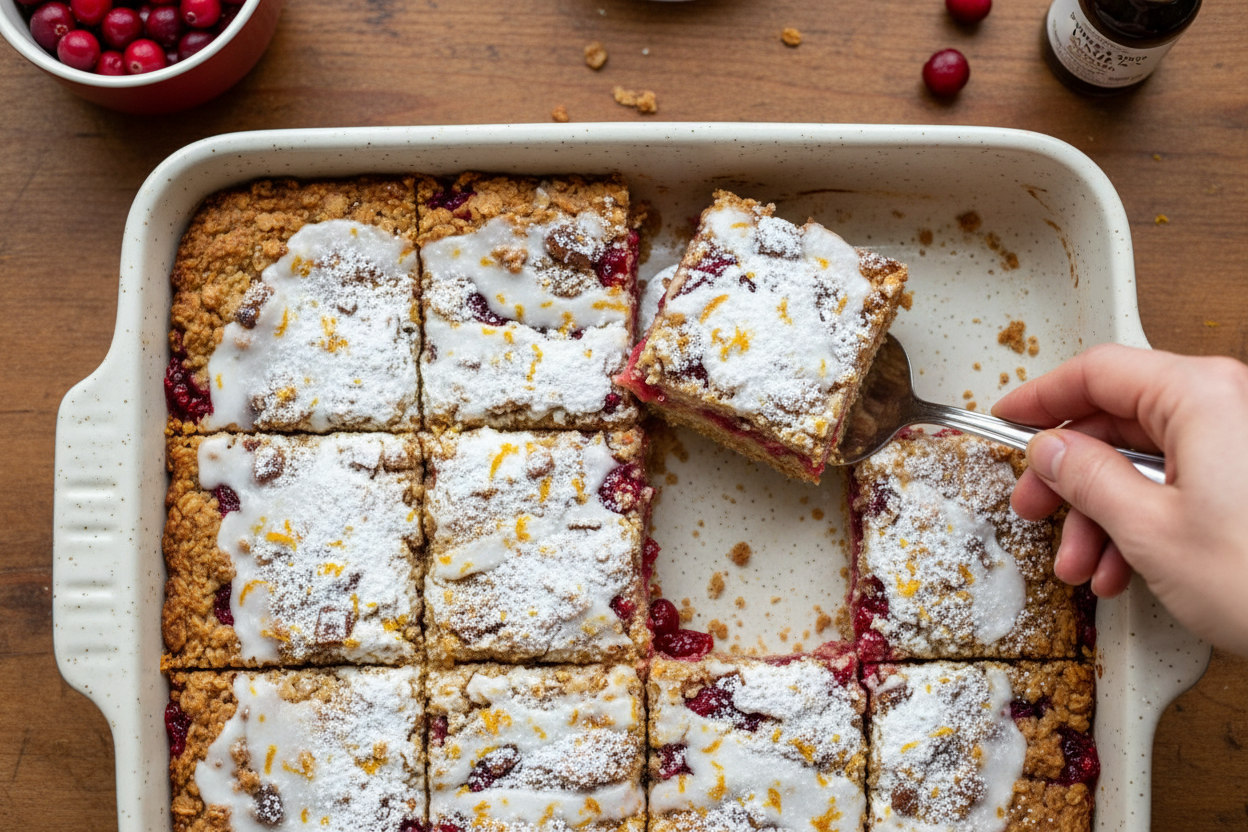
Step 6: Spoon the warm cranberry mixture evenly over the baked crust. Spread it gently with a spatula—it should look like a berry quilt. Sprinkle the rest of the oat mixture on top, and pat it down softly. Bake for 25-30 minutes, until it’s golden brown on top.
Step 7: While it bakes, whisk the glaze in a small bowl. Just mix the powdered sugar, a splash of orange juice, vanilla, and a pinch of dried orange peel. Drizzle it over the warm bars. Let them cool completely before cutting—or they’ll crumble into a happy mess. Here’s a fun quiz question: What makes these bars “pop” with flavor in the filling? Share below!
Cook Time: 30 minutes
Total Time: 1 hour
Yield: 12-15 bars
Category: Dessert, Snack
Three Fun Twists to Try
I love a recipe that lets you play around a little. These bars are perfect for that. Here are three ideas I’ve tested in my own kitchen.
Chocolate Berry Dream: Sprinkle a handful of dark chocolate chips over the cranberry layer before adding the top crust. The chocolate melts into the tart berries. It tastes like a fancy candy bar.
Apple Cinnamon Fall Bars: Swap the cranberries for 2 cups of diced apples. Add a teaspoon of cinnamon to the oat mixture. Your kitchen will smell like autumn leaves and warm hugs.
Lemon Sparkle Bars: Use lemon juice instead of orange juice in both the filling and the glaze. Add a little lemon zest on top for extra zing. These are bright and perfect for spring. Which one would you try first? Comment below!
How to Serve and Sip
These bars are wonderful just as they are. But if you want to make them feel special, here are some ideas.
Serve them warm with a dollop of whipped coconut cream on top. Or cut them into tiny squares and pile them on a pretty plate for a snack board. A sprinkle of fresh mint makes them look fancy, too.
For a cozy drink, try a cold glass of almond milk. It balances the sweet and tart flavors nicely. If you’re having grown-up company, a cup of hot spiced chai tea is wonderful. Which would you choose tonight?
How to Store Your Cranberry Oatmeal Bars So They Stay Delicious
These bars taste even better the next day. I learned this the hard way. The first time I made them, I ate one fresh from the pan and thought they were good. Then I hid the rest in the fridge for breakfast. The next morning, the flavors had melted together like a hug.
To store them, let the bars cool completely first. Then wrap them tight in plastic wrap or foil. You can keep them on the counter for three days. Or pop them in the fridge for a week. For longer storage, freeze the bars in a single layer on a baking sheet. Once frozen, move them to a zip-top bag. They will last three months in the freezer.
To reheat, just warm a bar in the microwave for 15 seconds. Or pop it in a 350-degree oven for 5 minutes. I like to batch-cook a double batch and freeze half. That way, I always have a treat ready for surprise guests. Why does this matter? It saves you time and keeps you from eating the whole pan in one sitting. Have you ever tried storing it this way? Share below!
Three Common Problems and Simple Fixes
First problem: the bottom crust is too soft. This happens if you don’t bake the crust long enough. Bake it for the full 8 minutes before adding the filling. I once skipped this step because I was in a hurry. The bars fell apart when I cut them. Now I set a timer. Why this matters: a good crust gives you a bar you can hold without a fork.
Second problem: the cranberry filling is too runny. The fix is simple. Cook the cranberries until they pop and the liquid thickens. That takes about 15 minutes. If the filling is still watery, let it simmer another 5 minutes. I remember my first batch—I pulled it off too early and the filling soaked the crust. It was a tasty mess, but not pretty.
Third problem: the topping won’t stick. The trick is to press it down gently with your hands. Don’t pat it hard like you are packing snow. Just a light touch. Why this matters: gentle pressing keeps the topping crunchy, not dense. Getting these fixes right makes you feel like a pro in the kitchen. Which of these problems have you run into before?
Five Quick Answers to Your Top Questions
Q: Can I make these bars gluten-free without special flour?
A: Yes, use oat flour or almond flour instead. The texture will be softer, but still tasty.
Q: Can I use fresh cranberries instead of frozen?
A: Yes, just chop them first. Fresh cranberries need a minute or two longer to pop.
Q: Can I swap the dates for raisins?
A: Sure, but the bars will be less chewy. Dates give a caramel-like sweetness.
Q: Can I cut the sugar in half?
A: You can, but the bars will be more tart. The sugar balances the sour cranberries.
Q: Can I double the recipe for a crowd?
A: Yes, use a 12×17 baking sheet and add 5 minutes to the bake time. Which tip will you try first?
A Warm Goodbye from My Kitchen to Yours
Thank you for making these bars with me. I hope they fill your home with a sweet, spicy smell. These bars remind me of fall mornings and cozy afternoons. I want you to feel that warmth too.
*Fun fact: Cranberries bounce when they are ripe. That’s why they are sometimes called “bounceberries.”
Please share your baking adventures with me. Have you tried this recipe? Tag us on Pinterest! I love seeing your photos. It makes me feel like we are baking together.
Happy cooking!
—Lena Morales.
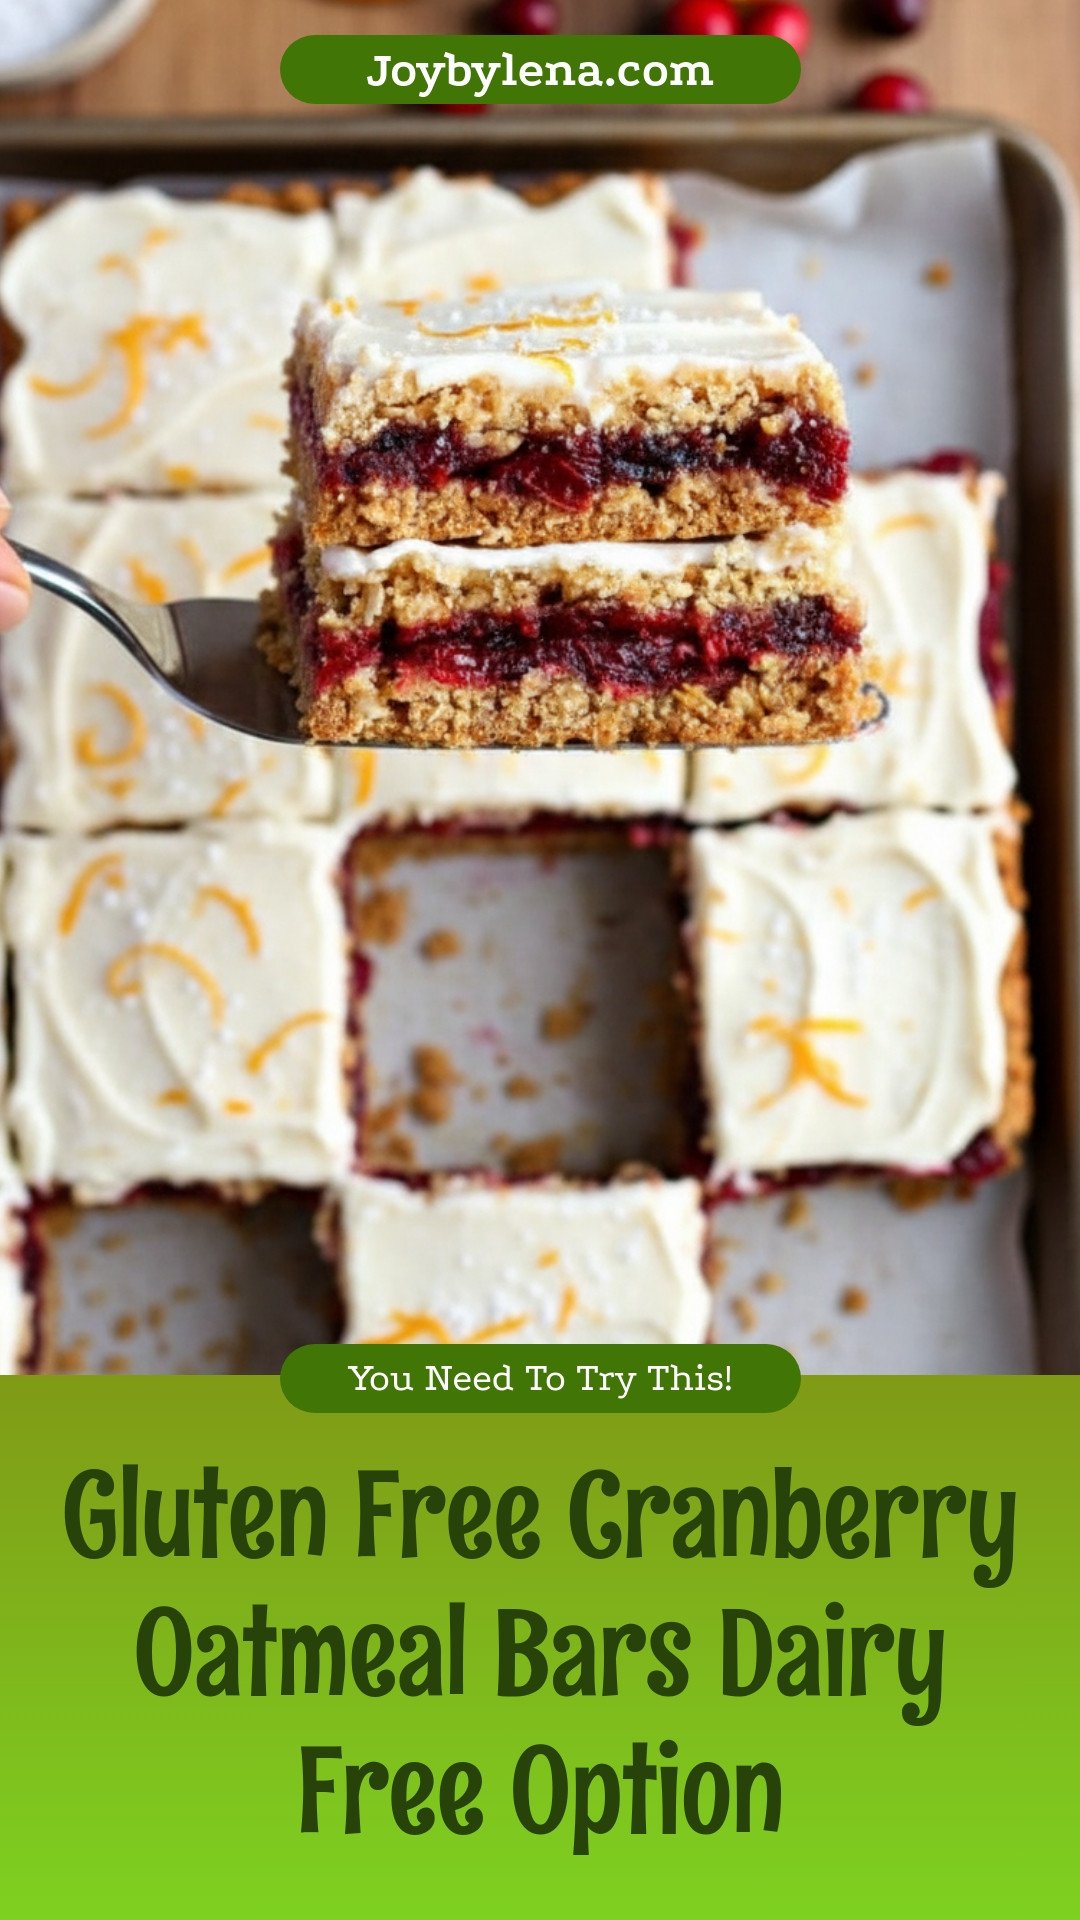
Cranberry Oatmeal Bars {Gluten-Free, Dairy-Free Option}
Description
Gluten free cranberry oatmeal bars with a dairy free option. Sweet, tart, and perfectly crumbly.
Ingredients
Glaze:2 cups powdered sugar
Instructions
- Preheat oven to 350° F. Spray a 9×13 glass pan with gluten-free cooking spray.
- Place the cranberries, dates and orange juice (or water) and dried orange peel (optional) in a saucepan; bring to a boil over medium heat. Reduce heat; simmer, covered, until berries pop, about 15 minutes, stirring occasionally. Remove from heat; stir in the pure vanilla extract.
- Mix all-purpose gluten-free flour, oats, brown sugar, baking soda, and salt until fully combined. Stir in melted butter, until the mixture is nice and crumbly.
- Press half of the oat mixture into a greased baking pan. Bake 8 minutes.
- Spoon cranberry mixture over baked crust bottom. Smooth with the back of a spoon or spatula.
- Sprinkle with remaining oat mixture and pat down gently.
- Bake until golden brown, 25-30 minutes.
- In a small bowl combine the glaze ingredients and stir until it’s nice and smooth.
- Drizzle with the glaze. Cool completely and cut into bars. Enjoy!
Notes
- Cover bars with plastic wrap, foil or store in an air-tight container. These are even better the second day.


Leave a Reply