My First Manicotti Mess
Let me tell you about my first time making manicotti. I was so nervous. I tried to spoon the filling into those slippery tubes. What a mess! Cheese was everywhere. I still laugh at that.
Then my friend Maria showed me a trick. Use a bag to pipe it in, like frosting. It changed everything. Cooking is full of little lessons like that. It matters because it keeps us learning and having fun. What was your first big kitchen mess? I would love to hear your story.
Why We Add the Little Things
Look at the nutmeg in the list. Just a tiny pinch. You might wonder, why? It does not taste like pumpkin pie here. It makes the cheese filling taste richer and warmer. It is a secret whisper of flavor.
The cream in the sauce is another quiet helper. It makes the tomato sauce smooth and cozy. It takes away any sharp bite. These small steps matter. They turn good food into a hug on a plate.
The Noodle Know-How
Here is the key. Do not cook the noodles all the way. Boil them just five minutes. They should still be firm. This is called ‘al dente’. It means ‘to the tooth’ in Italian.
Rinse them with cold water right away. This stops the cooking. The noodles will finish cooking in the oven. This way they hold their shape and do not get mushy. Fun fact: Manicotti means “little sleeves” in Italian. Perfect for stuffing!
Building Your Flavor House
Think of your casserole dish as a house. First, you lay down a rug of red sauce. This keeps the pasta from sticking. It also starts the flavor right from the bottom up.
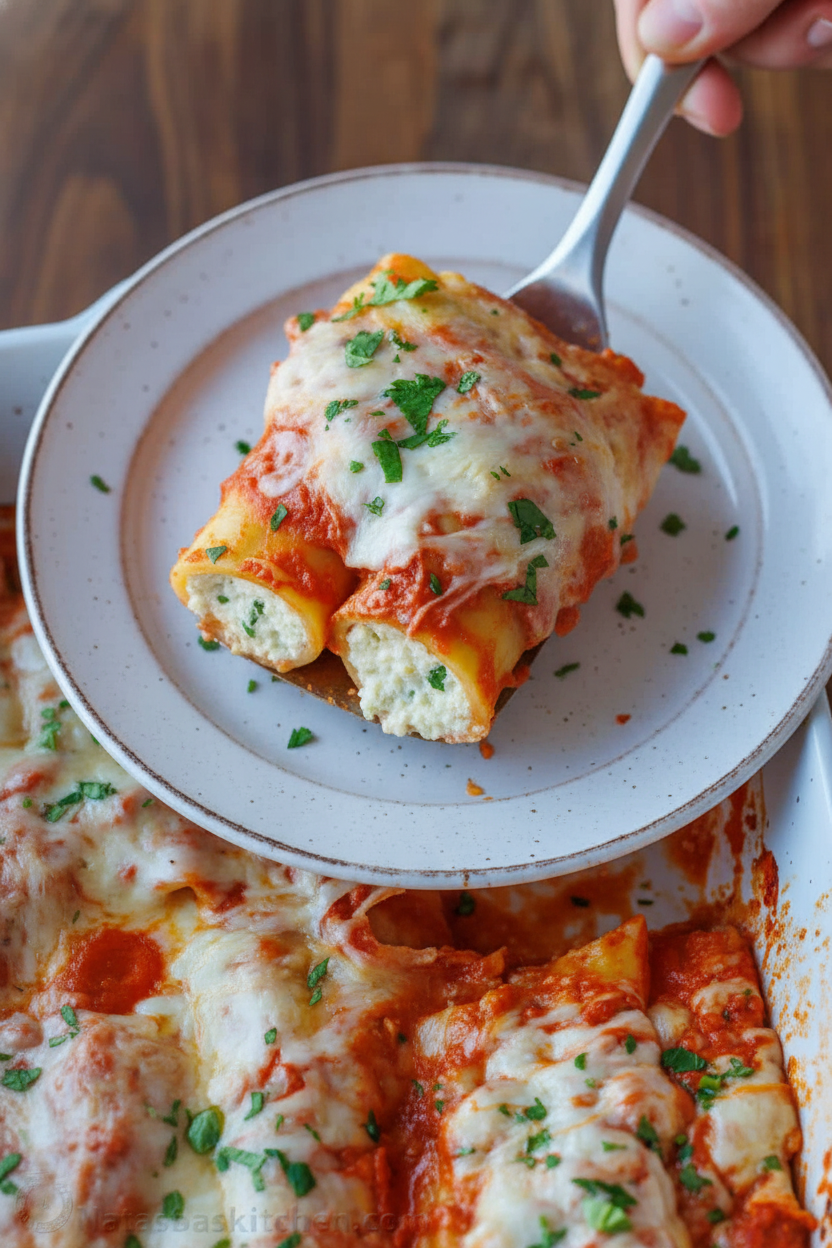
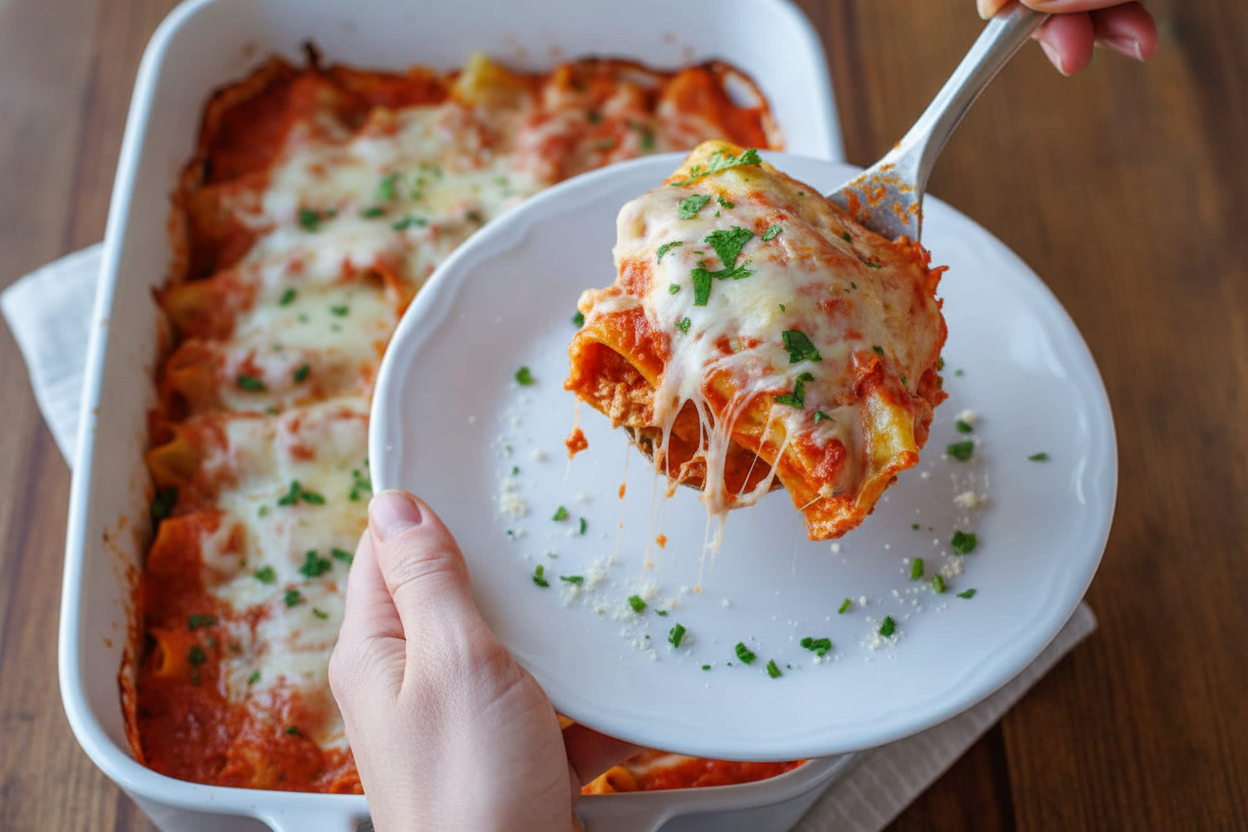
Then you line up your stuffed noodles. Pour the rest of the sauce over them like a warm blanket. Last, add the cheese roof. This gets all bubbly and golden. Doesn’t that smell amazing? Do you like more sauce or more cheese on top?
The Waiting Game
When it comes out of the oven, you must wait. Let it sit for five minutes. I know it is hard. The cheese is calling you!
But this wait is important. It lets everything settle. The filling firms up just a bit. Then you can cut perfect pieces that do not fall apart. It is a lesson in patience. What is the hardest dish for you to wait to eat?
Ingredients:
| Ingredient | Amount | Notes |
|---|---|---|
| Manicotti Pasta | 8 oz (14 count) | |
| Marinara Sauce | 3 cups | homemade or store-bought |
| Heavy cream | 1/4 cup | optional, tones down acidity of marinara |
| Eggs | 2 large | |
| Whole milk ricotta cheese | 24 oz | |
| Shredded mozzarella cheese | 2 cups (8 oz block) | divided |
| Freshly grated parmesan cheese | 1 cup | divided |
| Parsley | 1/4 cup | plus more for garnish |
| Garlic cloves | 2 | grated or pressed |
| Fine sea salt | 3/4 tsp | plus more for pasta cooking water |
| Freshly ground black pepper | 1/4 tsp | |
| Grated nutmeg | 1/4 tsp |
My Cozy Kitchen Manicotti
Hello, my dear! Come sit. Let’s make my favorite manicotti. This recipe feels like a big hug. It is simpler than it looks, I promise. We will fill those pasta tubes with creamy, cheesy goodness. Doesn’t that smell amazing already? I learned this from my friend Rosa years ago. I still laugh at that day. I was so nervous to pipe the filling! But you will do great. Let’s start our cozy cooking.
Step 1: First, get your water boiling. Use a big pot. Add a good handful of salt. It should taste like the ocean! This is the only chance to flavor the pasta itself. Cook the manicotti for just 5 minutes. They need to stay firm. (My hard-learned tip: rinse them with cold water right away. This stops the cooking so they don’t get mushy.)
Step 2: Now, let’s make the sauce cozy. Stir a little cream into your marinara. It makes it so smooth. Pour a cup into your baking dish. Swirl it around to coat the bottom. This keeps everything from sticking. It also makes a lovely base. See how the color gets richer? I love that.
Step 3: Time for the best part: the filling! Crack two eggs into a big bowl. Add all the ricotta. Then comes half of each cheese. Don’t forget the parsley, garlic, and a tiny pinch of nutmeg. Nutmeg is my secret. It makes everything taste warm and special. Mix it all with love. What’s my secret “warm” spice in the filling? Share below!
Step 4: Let’s fill those tubes. Spoon your mixture into a bag. A simple zip-top bag works perfectly. Snip a corner off. Gently squeeze the filling into each pasta shell. It’s like frosting them! Lay them side-by-side in your dish. They look so pretty already, don’t they?
Step 5: Almost done! Pour the rest of the sauce over the top. Sprinkle on the remaining cheese. Cover it with foil and bake. The foil keeps it moist. Then, take the foil off. Let the cheese get bubbly and golden. Your kitchen will smell incredible. Let it rest for 5 minutes before serving. This helps it set.
| Cook Time: | 35 minutes |
| Total Time: | 1 hour |
| Yield: | 6-7 servings |
| Category: | Dinner, Pasta |
Three Fun Twists to Try
This recipe is like a blank canvas. You can paint it with different flavors! Here are three ideas I love. They make the dish feel new again. Try one next time you make it.
- The Garden Twist: Add a handful of chopped spinach to the cheese filling. It’s so fresh and green.
- The Meaty Favorite: Brown some Italian sausage. Mix it right into the marinara sauce for a heartier meal.
- The Pumpkin Surprise: In the fall, swap half the ricotta for canned pumpkin. Add a dash of sage. So cozy!
Which one would you try first? Comment below!
Serving It Up Just Right
This manicotti is a star. But it loves some simple friends on the plate. I always serve it with a crisp green salad. Garlic bread is wonderful for soaking up sauce. For a pretty plate, sprinkle on extra parsley. It adds a pop of color.
What to drink? For the grown-ups, a glass of Chianti is perfect. It’s like a trip to Italy! For everyone, sparkling water with a lemon slice is so refreshing. It cleanses your palate between bites. Which would you choose tonight?
Keeping Your Manicotti Happy for Later
Let’s talk about leftovers. They are a gift to your future self. Cool the dish completely first. Then cover it tightly. It will be good in the fridge for 3-4 days.
You can also freeze it. Wrap the whole pan well in foil. Or portion it into freezer-safe containers. It keeps for 2 months. Thaw it in the fridge overnight before reheating.
Reheating is easy. Use the oven at 350°F. Add a splash of water to keep it moist. Cover with foil until warm. I once reheated it without covering. The cheese got a little tough.
Batch cooking this saves busy nights. Make two pans. Eat one now, freeze one for later. This matters because a good meal should bring comfort, not stress. Have you ever tried storing it this way? Share below!
Simple Fixes for Common Manicotti Moments
Sometimes pasta tubes crack while boiling. Do not worry. The cheese filling will seal them in the oven. Just place them crack-side down in the pan.
The filling can be tricky to pipe. If your bag bursts, just spoon it in. I remember when my first bag exploded. Ricotta flew everywhere! We laughed so hard.
Your sauce might seem too acidic. That is why we add the cream. It makes the flavor smooth and cozy. This matters because every bite should feel like a hug.
Getting these little things right builds your cooking confidence. You learn that small fixes make big flavor. Which of these problems have you run into before?
Your Manicotti Questions, Answered
Q: Can I make this gluten-free? A: Yes! Use gluten-free manicotti tubes. Check your marinara label too.
Q: Can I prepare it ahead? A: Absolutely. Assemble the whole dish. Cover and refrigerate for up to a day. Bake it when you are ready.
Q: What if I don’t have ricotta? A: Cottage cheese is a fine swap. Just give it a quick blend first for smoothness.
Q: Can I make a smaller batch? A: Of course. Just cut all the ingredients in half. Use a smaller baking dish.
Q: Is the nutmeg really needed? A: It is my secret! A tiny pinch makes the cheese filling taste special. *It’s a fun fact from my nonna!* Which tip will you try first?
From My Kitchen to Yours
I hope you love making this dish. It is perfect for sharing with family. The table is where our best stories are told.
I would be so thrilled to see your creation. Your version is what makes this recipe live. Have you tried this recipe? Tag us on Pinterest! You can find me at @LenasCozyKitchen.
Thank you for cooking with me today. I am already thinking of our next kitchen adventure.
Happy cooking!
—Lena Morales.

Easy Manicotti Recipe with Video Tutorial
Description
A classic, comforting Italian baked pasta dish with a rich cheese filling, smothered in marinara and topped with melted mozzarella and parmesan.
Ingredients
Instructions
- Preheat the oven to 400 degrees. Bring a large pot of water to a rolling boil with about 2 Tbsp Salt – add enough salt for it to taste like ocean water. Add pasta and cook until barely tender and extra al dente (about 5 minutes). Stir initially to prevent sticking. Drain and immediately rinse under cold water to stop the cooking, then drain well.
- Stir cream into your marinara sauce. Pour about 1 cup of this sauce into a 9×13 casserole dish and tilt the pan to spread it around the bottom.
- In a large mixing bowl, lightly beat 2 eggs. Add ricotta, half of the mozzarella, half of the parmesan cheese, parsley, garlic, salt, pepper, and nutmeg. Mix until well combined.
- Transfer the cheese mixture to a piping bag with a large round tip, or use a large zip-top bag and cut off a 3/4” corner. Fill all of the manicotti pasta shells and arrange them in a single layer in the prepared casserole dish.
- Pour the remaining marinara sauce over the top. Sprinkle with the remaining mozzarella and parmesan cheese. Cover with foil and bake for 25 minutes. Uncover and bake for another 10 minutes, until the cheese is melted and golden.
- Let the manicotti stand for 5 minutes before serving. Garnish with more parsley and serve.
Notes
- Nutrition Per Serving: Calories: 506 kcal | Carbohydrates: 36 g | Protein: 30 g | Fat: 27 g | Saturated Fat: 16 g | Polyunsaturated Fat: 1 g | Monounsaturated Fat: 7 g | Trans Fat: 0.004 g | Cholesterol: 139 mg | Sodium: 1302 mg | Potassium: 582 mg | Fiber: 3 g | Sugar: 6 g | Vitamin A: 1540 IU | Vitamin C: 11 mg | Calcium: 619 mg | Iron: 2 mg


Leave a Reply