My First Peppermint Mess
I first made these bars for a school party. My son, Miguel, was in third grade. I wanted something special. I added a little too much peppermint extract. Oh my! It was so strong. We all laughed. Our mouths felt very, very cold.
That is why I say “add as desired.” Start with a little. You can always add more. Taste as you go. This matters because cooking is about your own taste. Make it how you like it.
Why The Paper Matters
Let’s talk about that parchment paper. Make sure it hangs over the sides. This is my best trick. It makes life so easy. When the cheesecake is cold, you just lift it out. No sticking. No fighting with the pan.
I learned this after a big mess. Once, I didn’t use paper. The whole thing stuck. I was so sad. Now I always use it. A good trick matters. It saves time and your sweet treat.
The Fun Swirl Part
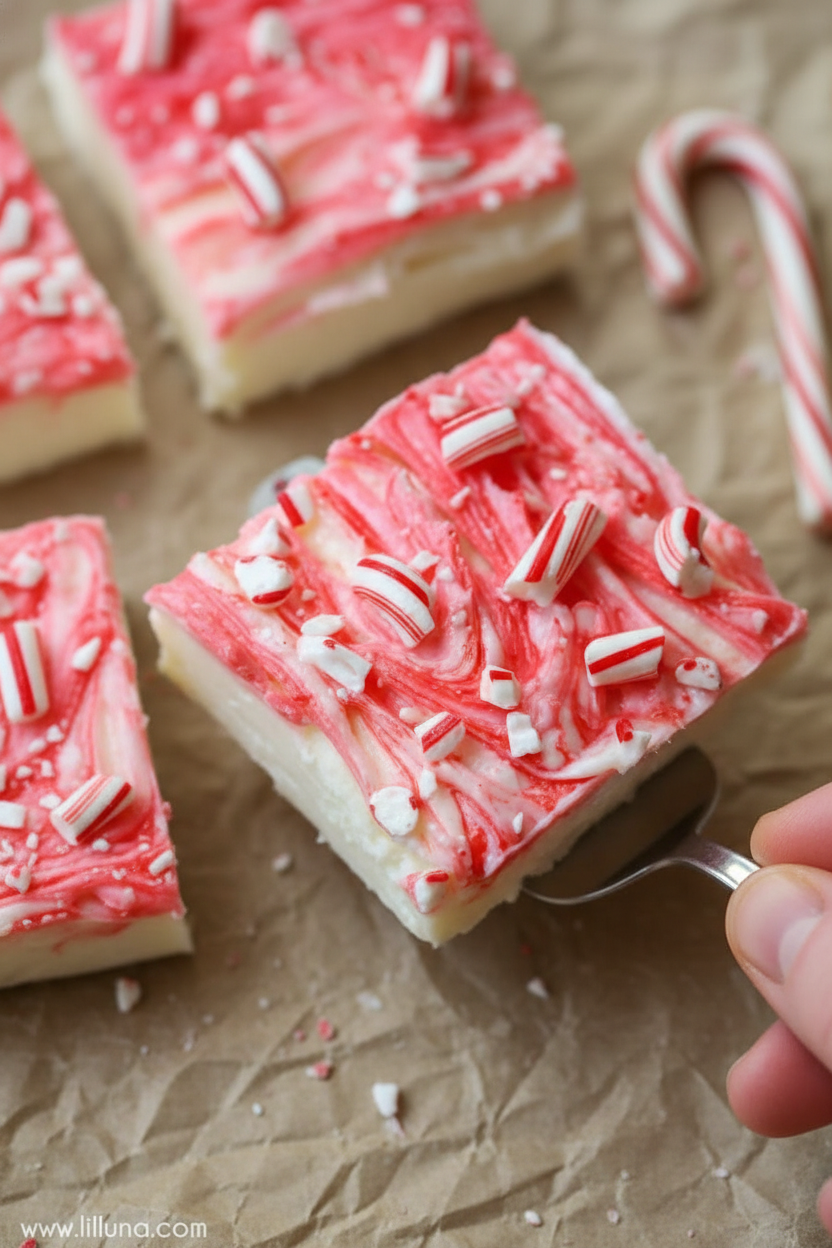
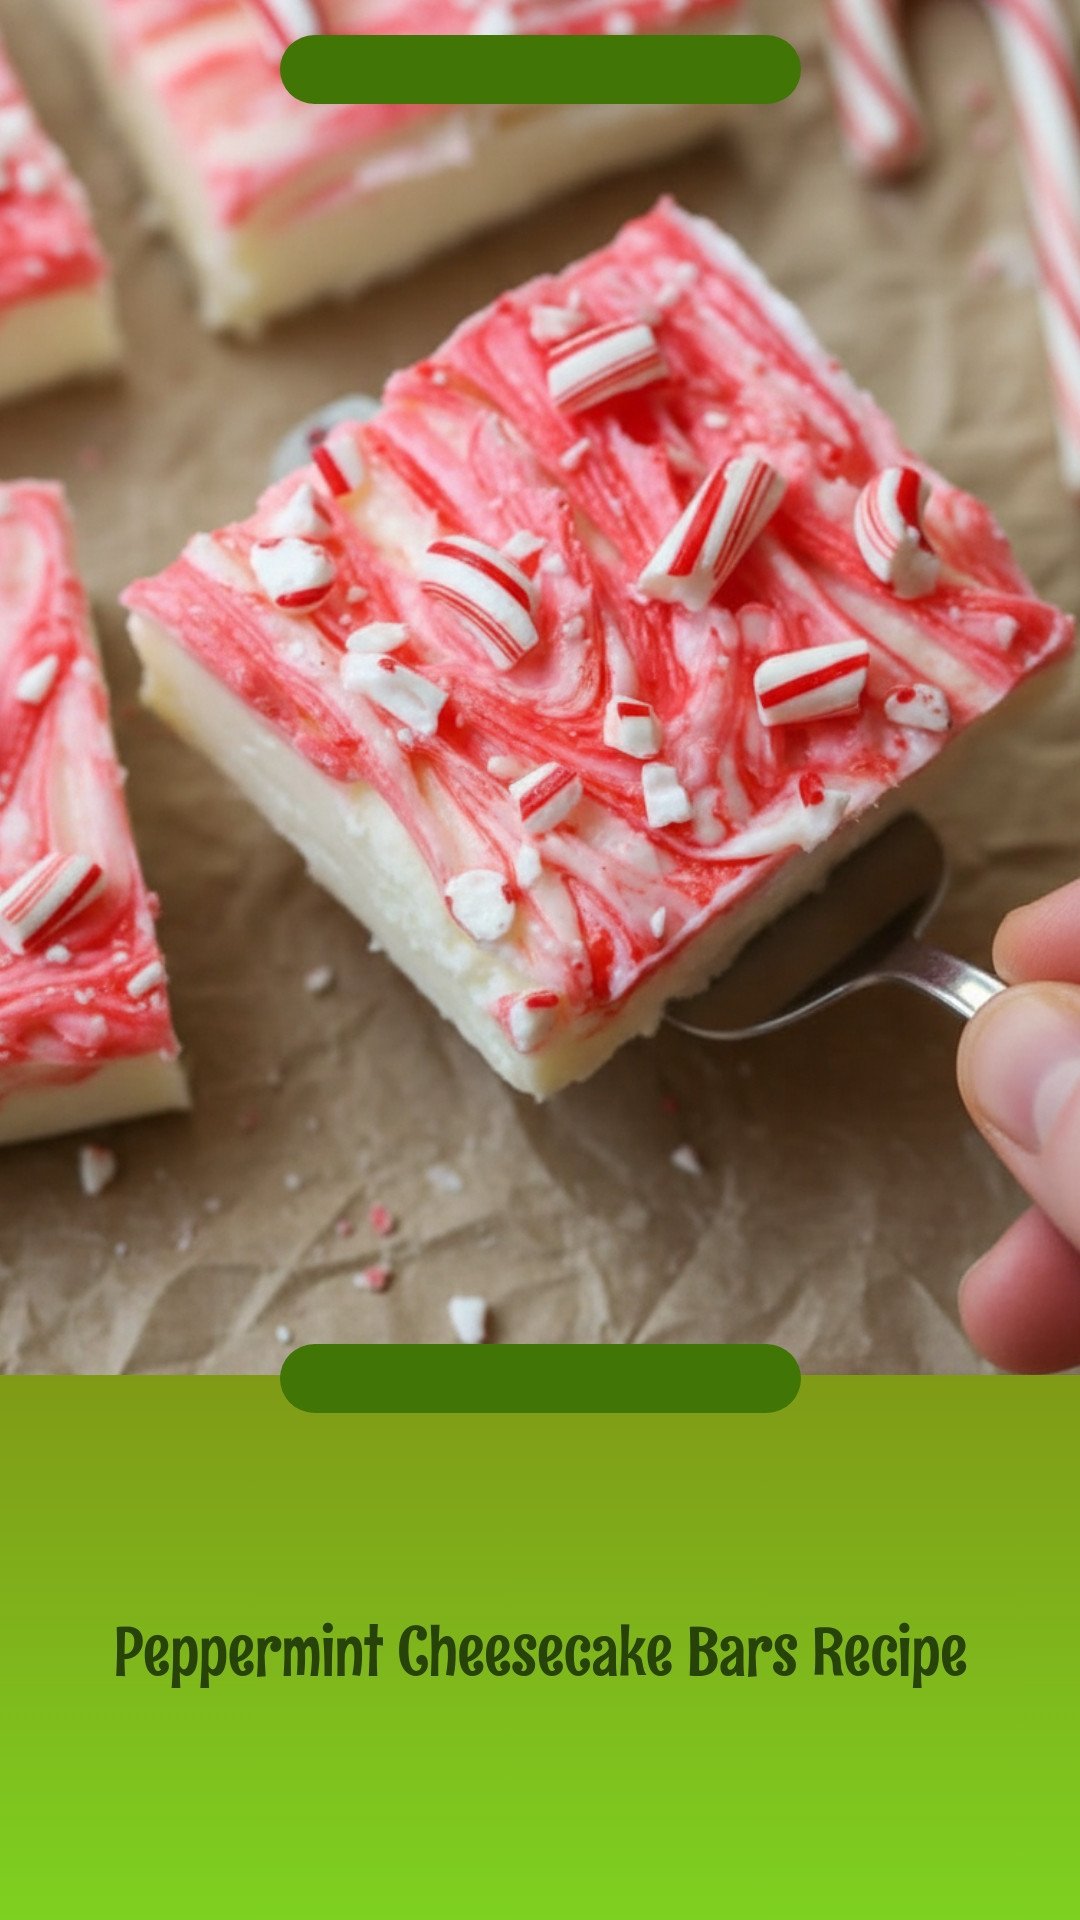
This is the best part for kids. Or for you! Add a few red drops on top. Then take a knife. Swirl it around. Make pretty patterns. It feels like you are painting. Doesn’t that sound fun?
Fun fact: The swirl idea came from my grandma’s marble cake. She used chocolate. We use food coloring. It makes food look happy. Do you like to make your food look pretty? Tell me your favorite way to decorate a dessert.
Chill Time is Magic Time
You must chill the bars. Wait one to two hours. I know, waiting is hard. The smell is amazing. But this step is important. It lets the flavors get cozy together. It also makes the bars firm so you can cut them.
While you wait, you can crush candy canes. That is my favorite topping. It adds a little crunch. And it looks like a party. Do you prefer candy cane bits or clean, smooth tops on your cheesecake?
Sharing is the Sweetest Part
Food tastes better when shared. I still believe that. Cut your cheesecake into bars. Put them on a plate. Share them with family or friends. See them smile. That is the real recipe.
These bars are rich and special. We don’t eat them every day. We save them for happy times. That makes them more special. What holiday or gathering would you make these for? I would love to hear your ideas.
Ingredients:
| Ingredient | Amount | Notes |
|---|---|---|
| Butter | 1 1/2 cups | softened |
| Cream cheese | 20 oz | softened |
| Sugar | 1 1/2 cups | |
| Peppermint extract | 2 1/2 tsp | |
| Candy Canes | optional | |
| Red food coloring | optional |
My Magical Peppermint Cheesecake Bars
Hello, my dear! Come sit. Let’s make something magical. These bars taste like a winter party. They are cool, creamy, and minty fresh. My grandkids call them “Santa’s dessert.” I still laugh at that. The best part? No baking is needed. Just mix and chill. Doesn’t that sound easy? We’ll make the kitchen smell wonderful. Are you ready? Let’s begin our sweet adventure together.
Step 1: Soften & Blend
First, let your butter and cream cheese get cozy on the counter. They need to be soft. This makes blending so much easier. Put them in a big bowl. Add the sugar and peppermint extract. Now, use your hand mixer. Blend everything until it’s smooth and dreamy. Taste a tiny bit. Want more mint? Add a little more extract. (My hard-learned tip: If the ingredients are cold, your mixer will dance right out of the bowl!)
Step 2: Swirl & Design
Grab an 8×8 pan. Line it with parchment paper. Let the paper hang over the sides. This is our magic trick for later. Pour your creamy mixture into the pan. Spread it gently. Now for the fun! Drop a few dots of red food coloring on top. Take a knife and swirl it around. You are making a peppermint masterpiece. Do you make swirls or hearts? Share below!
Step 3: Crush & Chill
If you have candy canes, now is their time. Crush a few in a bag. Just tap them with a spoon. Sprinkle the bits over the top. It looks so pretty and adds a little crunch. Then, the hardest part. Slide the pan into the fridge. You must wait at least 1-2 hours. I know, waiting is tough! But it makes the magic set.
Step 4: Slice & Serve
Time is up! Pull the pan from the fridge. Grab those paper “handles” and lift the whole cheesecake out. Place it on a cutting board. Use a sharp knife to cut into bars. Wipe the knife between cuts for clean edges. Then, serve them on a pretty plate. See? You made something beautiful and delicious. I’m so proud of you.
| Cook Time | 2 hours (chilling) |
| Total Time | 2 hours 15 minutes |
| Yield | 8 generous bars |
| Category | Dessert, No-Bake |
Three Fun Twists to Try
This recipe is like a favorite song. You can sing it different ways! Here are three fun twists for next time. I think they are all delightful.
- Chocolate Cookie Crust: Press crushed chocolate wafer cookies into the pan first. It adds a yummy, crunchy bottom.
- Peppermint Patty Swirl: Melt dark chocolate. Drizzle it over the top before swirling. It tastes like a fancy candy bar.
- Vanilla Berry Swirl: Use vanilla extract instead of peppermint. Swirl with raspberry jam. Perfect for a summer day.
Which one would you try first? Comment below!
Serving Them Up With Style
These bars are stars all on their own. But a little presentation is nice. Place each bar on a small, festive napkin. You could add a tiny sprinkle of powdered sugar. It looks like snow. For a party, serve them with a bowl of fresh berries on the side. The tart berries love the sweet mint.
What to drink? For grown-ups, a small glass of chilled peppermint schnapps is a fun match. It’s very minty! For everyone, a tall glass of cold milk or hot cocoa is perfect. The creamy drink is the best friend for cheesecake. Which would you choose tonight?
Keeping Your Cheesecake Bars Happy
These bars love the cold. Keep them in the fridge for three days. Cover the pan tightly with plastic wrap. This stops other fridge smells from sneaking in.
You can freeze them for a sweet treat later. I wrap each bar in plastic. Then I tuck them all into a freezer bag. My grandkids love finding these on a hot day.
I once forgot to cover a batch. The next day, my cheesecake tasted like onions! Now I always cover it. Batch cooking saves time for busy weeks. It means you always have a little joy ready. Have you ever tried storing it this way? Share below!
Simple Fixes for Common Troubles
First, a grainy filling means your cream cheese was too cold. Let it sit on the counter first. Soft cheese blends smooth and creamy. This matters for that perfect, dreamy texture.
Second, bars that stick are no fun. I remember losing a whole corner once! Always let the paper overflow the pan. It makes a handy handle to lift everything out.
Third, the peppermint flavor might be too weak. Add extract slowly and taste as you go. Getting the flavor right builds your cooking confidence. You learn to trust your own taste. Which of these problems have you run into before?
Your Quick Questions, Answered
Q: Can I make this gluten-free? A: Yes! This recipe has no flour. It is naturally gluten-free.
Q: How far ahead can I make it? A: Make it up to two days ahead. The flavor gets even better.
Q: What can I use instead of candy canes? A: Crushed peppermint candies work great. Chocolate chips are yummy too.
Q: Can I double the recipe? A: For a crowd, just double everything. Use a 9×13 inch pan instead.
Q: Any secret tip? A: A hot knife cuts clean bars. Just run it under hot water first. Fun fact: Peppermint can help soothe your tummy after a big meal! Which tip will you try first?
Share Your Kitchen Creations
I hope you love making these bars. Cooking is about sharing sweet moments. I would love to see your version. Did you add pretty red swirls? Maybe you used different toppings.
Show me what you made in your kitchen. It makes my day to see your photos. Have you tried this recipe? Tag us on Pinterest! You can find me at Lena’s Cozy Kitchen. Thank you for baking with me today.
Happy cooking! —Lena Morales.

Peppermint Cheesecake Bars
Description
Creamy, minty cheesecake bars with festive red swirls and optional candy cane topping.
Ingredients
Instructions
- With a hand mixer, blend all ingredients together until smooth. Add additional peppermint extract as desired.
- Pour mixture into an 8×8 pan lined with wax or parchment paper (make sure paper is overflowing on the sides, for easy removal).
- For red swirls, put 3-5 drops of red food coloring on the top of the cheesecake and swirl using a knife. To decorate, swirl drops of red food coloring with a knife. You may also sprinkle bits of candy cane over the top of the cheesecake.
- Chill in the fridge for at least 1-2 hours.
- Use the hanging paper to remove cheesecake from the pan. Cut into bars and serve.
Notes
- Nutrition (per serving, 8 servings per recipe): Calories: 696kcal | Carbohydrates: 41g | Protein: 5g | Fat: 59g | Saturated Fat: 36g | Polyunsaturated Fat: 2g | Monounsaturated Fat: 15g | Trans Fat: 1g | Cholesterol: 169mg | Sodium: 532mg | Potassium: 111mg | Sugar: 40g | Vitamin A: 2015IU | Calcium: 80mg | Iron: 1mg


Leave a Reply