My First Fudge Fiasco
I tried making fudge when I was young. It was a sticky mess. I still laugh at that.
I learned a big lesson. Good things need patience. You cannot rush them. This recipe is much easier, I promise. It always makes me think of snowy days.
Why We Make Sweet Treats
Sharing food is sharing love. It is that simple. A pan of fudge says, “I am happy you are here.”
That is why this matters. It is not just about sugar. It is about making a memory. Do you have a favorite treat someone makes for you? Tell me about it.
The Magic of Melting
Let us start cooking. Melt the sugar, cream, and butter together. Watch it bubble. Doesn’t that smell amazing?
Pour it over the white chocolate. Mix until it is smooth like silk. This is the fun part. Fun fact: The hot syrup melts the chocolate for you. No double boiler needed!
The Best Part: Mix-Ins!
Now, fold in the crushed Oreos and peppermint bits. The red filling looks so cheerful. It reminds me of holiday sweaters.
Here is another “why this matters.” Crushing the cookies yourself lets out a little stress. It is very satisfying. Do you like big cookie chunks or small bits in your fudge?
The Hardest Step
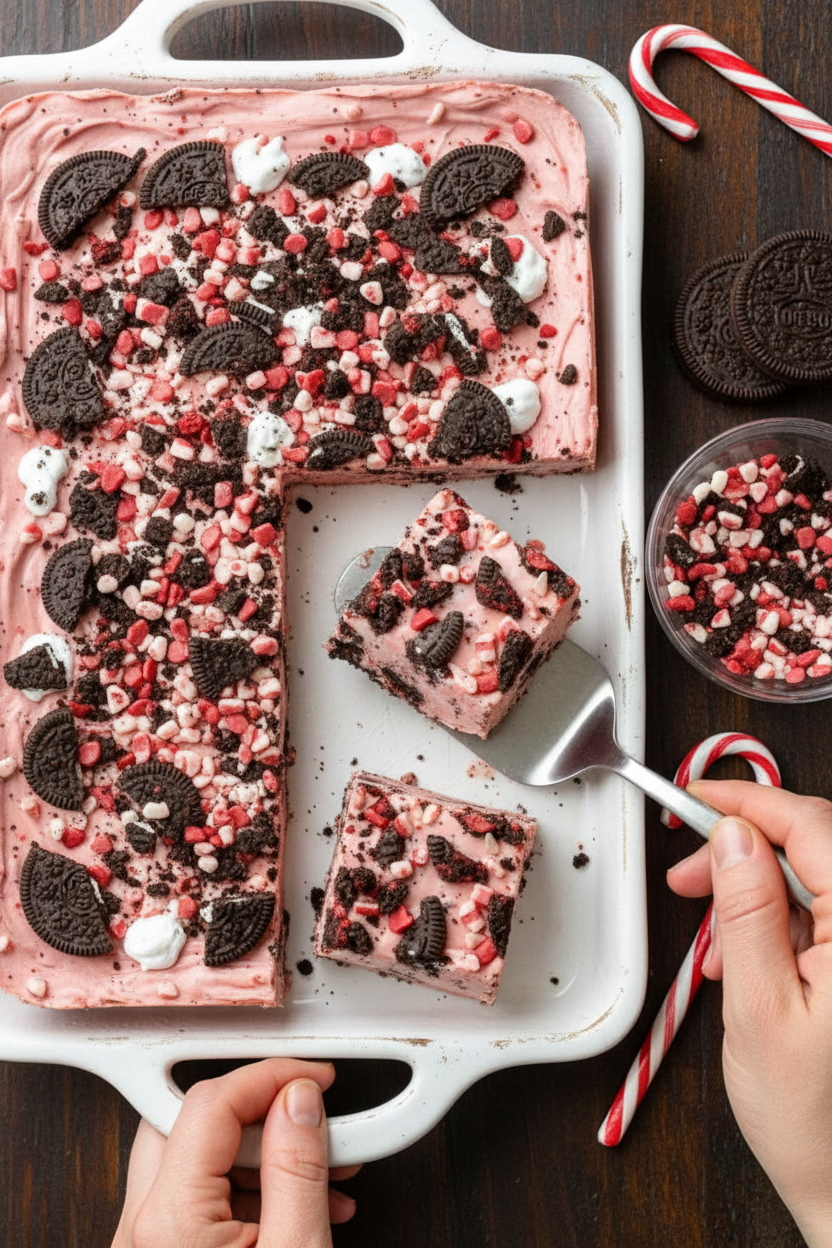
Pour your mix into the pan. Sprinkle the last peppermint bits on top. Now, the waiting begins.
You must put it in the fridge for hours. This is the true test. But it makes the fudge firm and perfect for cutting. What is a food you find hard to wait for?
Ingredients:
| Ingredient | Amount | Notes |
|---|---|---|
| Sugar | 1 cup | |
| Heavy whipping cream | 1/2 cup | |
| Salt | 1/2 teaspoon | |
| Butter | 1/2 cup | |
| White chocolate chips | 1 bag | |
| Marshmallow Fluff | 7 ounces | |
| Andes Peppermint Crunch Bits | 1/2 cup | |
| Oreos (holiday Oreos with red filling) | 10-12 | Crushed |
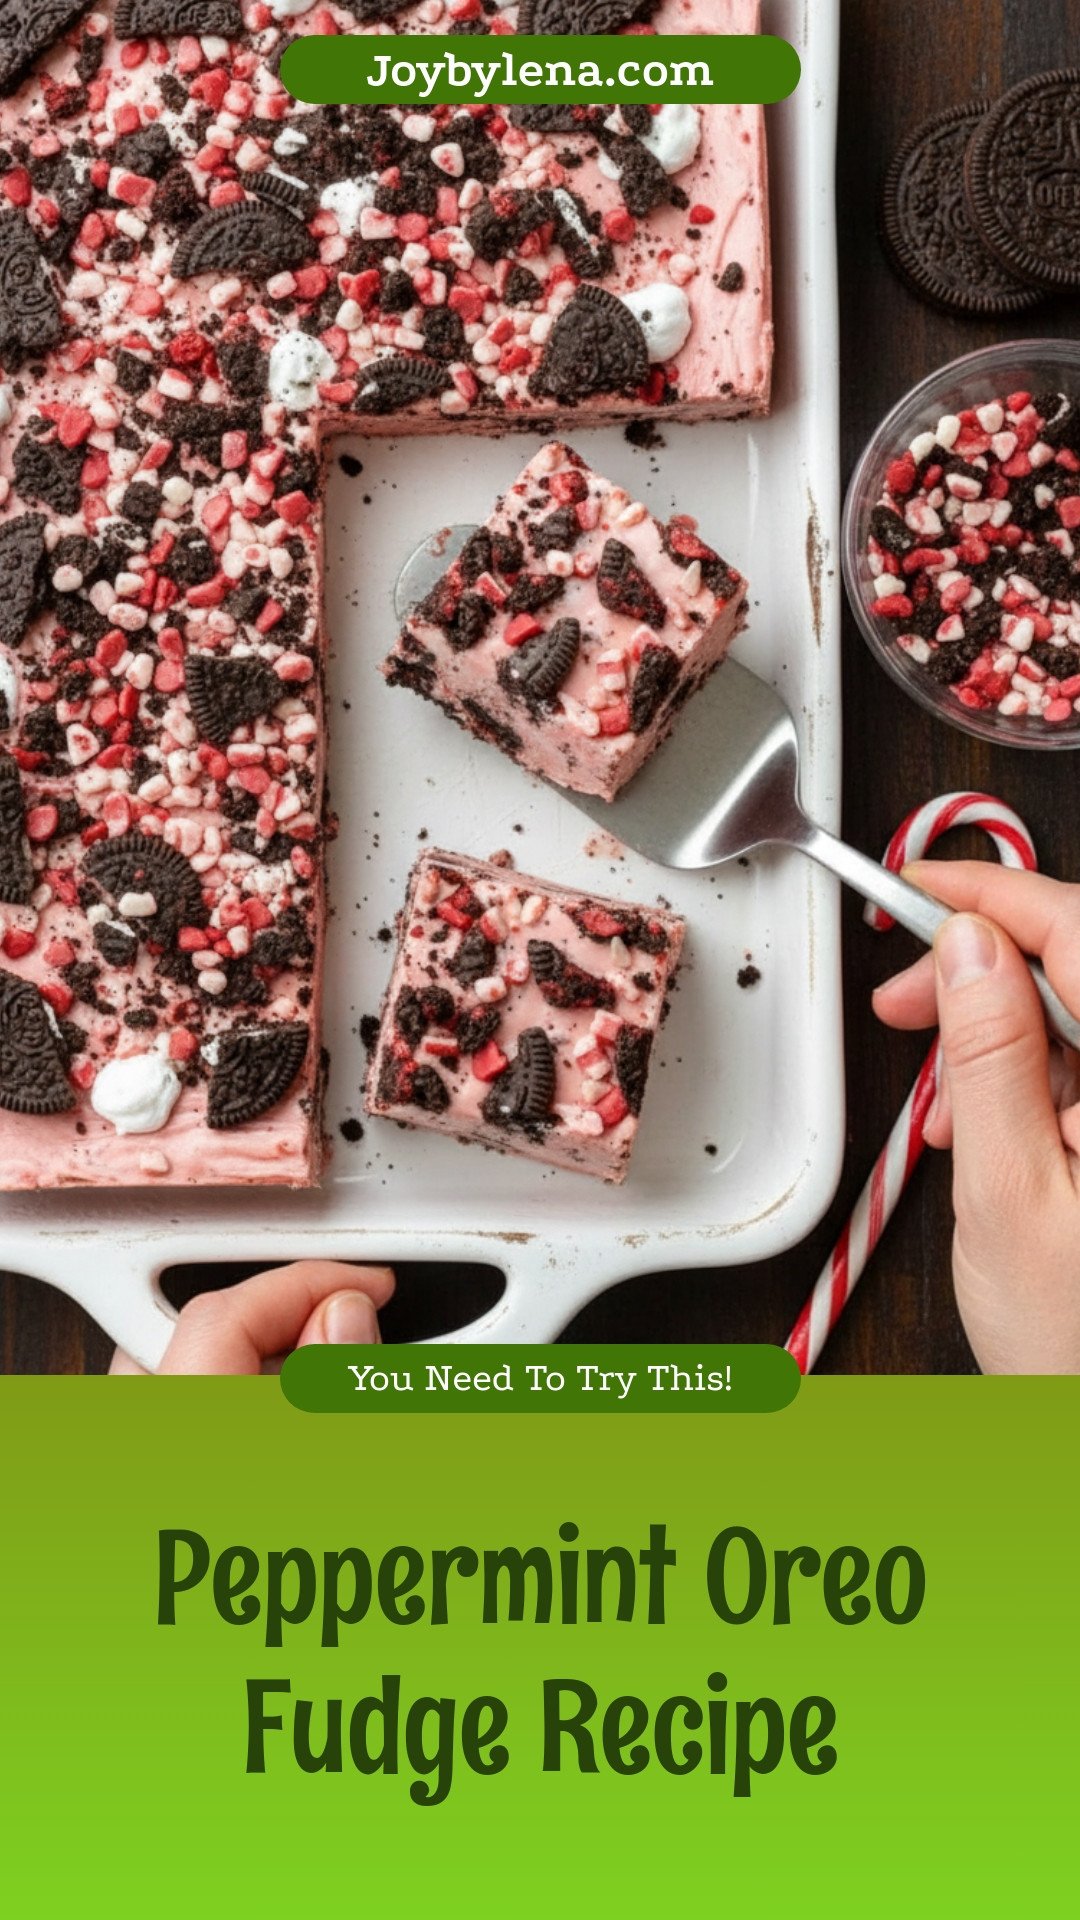
My Peppermint Oreo Fudge Secret
Hello, my dear! Come sit. Let’s make some magic. This fudge is my grandkids’ favorite holiday treat. It reminds me of snowy days and loud, happy kitchens. The peppermint makes everything feel fresh and festive. And those Oreos? A little surprise in every bite. I still laugh at that. One year, my grandson ate the whole pan! We had to hide it. Doesn’t that smell amazing? Let’s begin.
Step 1: First, line your 9×9 pan with parchment paper. This is our trick. It lets us lift the fudge out so easily. Now, put the white chocolate chips and marshmallow fluff in a big bowl. Just set it aside for now. Think of it as their little nap before the party.
Step 2: In a saucepan, combine sugar, cream, salt, and butter. Warm it on medium heat. Stir it gently until it just starts to boil. Let it bubble for five full minutes. (My hard-learned tip: set a timer! This part is important for perfect texture). It will become a lovely, smooth syrup.
Step 3: Carefully pour that hot syrup into your bowl. The heat will melt the chocolate. Now, use your mixer! Beat it until it’s completely smooth and glossy. This takes a couple of minutes. Your arm might get tired. I always think of it as making edible clouds.
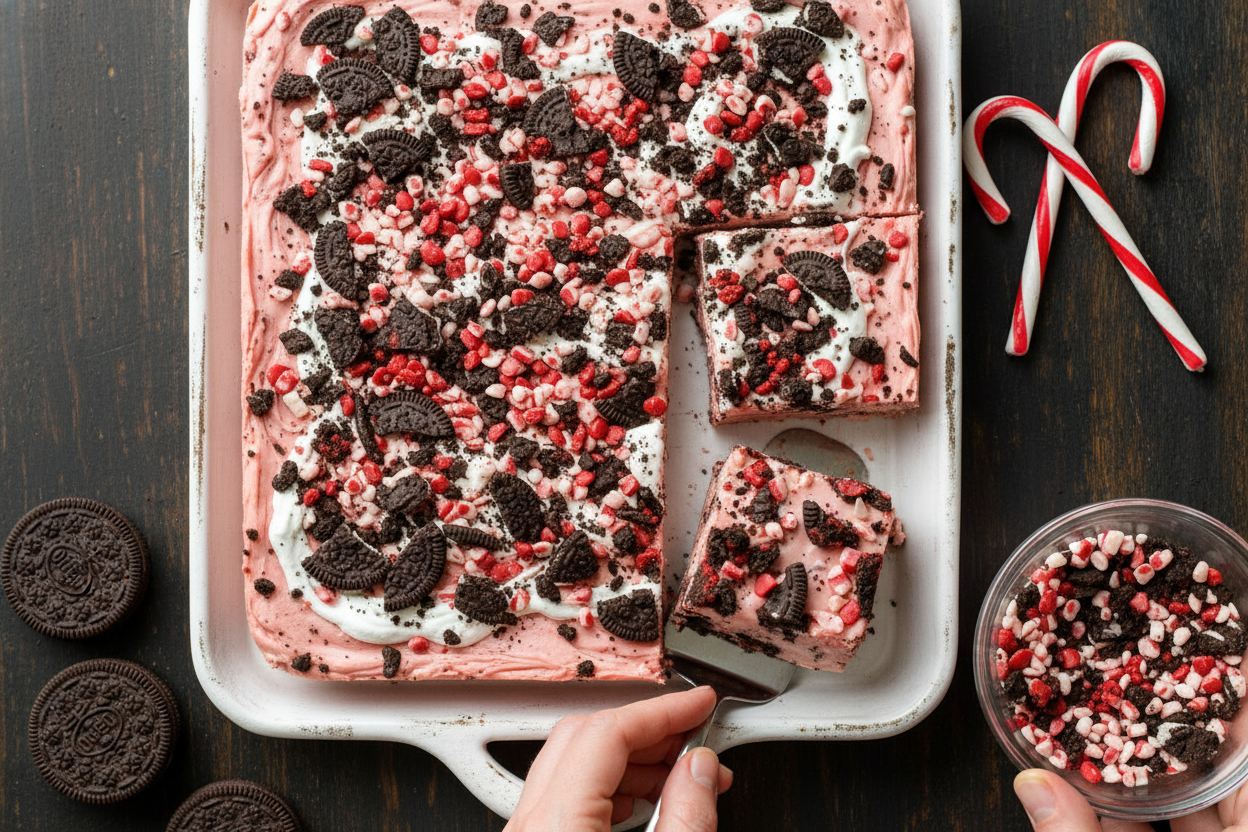
Step 4: Time for the fun part! Gently fold in half the peppermint bits and all the crushed Oreos. You want little chunks of cookie everywhere. Then pour it all into your prepared pan. Use a spoon to spread it out evenly. It’s so pretty already.
Step 5: Sprinkle the rest of the peppermint bits on top. Press them in lightly. Now, the hardest part. The waiting! Pop the pan into the fridge. Let it set for at least three hours. What’s your favorite holiday treat to make? Share below! Then, cut it into small squares. It is very rich and sweet.
Cook Time: 15 minutes
Total Time: 3 hours 15 minutes
Yield: 25 squares
Category: Dessert, Candy
Three Fun Twists to Try
This recipe is like a good friend. You can dress it up for any occasion! Here are my favorite ways to change it. Each one brings a different smile.
Cookie Swap: Use mint chocolate chip cookies instead of Oreos. Crunchy and minty all at once!
Chocolate Lover’s Dream: Swap the white chocolate for dark chocolate chips. So deep and rich.
Birthday Party Fun: Use funfetti Oreos and rainbow sprinkles. It’s a confetti explosion!
Which one would you try first? Comment below! I’d love to hear your ideas too.
Serving It With Style
A little treat deserves a nice plate. I like to put these squares on a vintage platter. Sometimes I add a few fresh mint leaves for color. It looks so fancy! For a party, stack them in a little tower. Everyone will be impressed.
What to drink? A cold glass of milk is always the best friend to fudge. For the grown-ups, a small cup of strong coffee is wonderful. The bitter coffee and sweet fudge are perfect together. Which would you choose tonight? I think I’ll have the milk. It reminds me of being a kid.
Keeping Your Fudge Fresh and Fabulous
This fudge loves the cold. Keep it in the fridge for up to two weeks. Just cover the pan tightly with plastic wrap. For longer storage, the freezer is your friend. Wrap pieces in wax paper and freeze for three months.
I once left a batch on the counter. It became a soft, sticky mess! The fridge keeps it perfect for slicing. You can also make a double batch easily. Just use two pans instead of one.
This matters because good storage saves your treats. It means you always have a sweet bite ready for guests. Have you ever tried storing it this way? Share below!
Fudge Fixes for Common Kitchen Hiccups
Is your fudge too soft? It likely needed more fridge time. Let it set for a full five hours. I remember rushing this once. We ate fudge soup with spoons! It was still tasty, but messy.
Is the mixture grainy? Your sugar may not have dissolved. Stir the pan mixture constantly as it heats. Are the chocolate chips not melting? Make sure your hot syrup is truly boiling. Pour it over the chips right away.
Fixing these issues builds your cooking confidence. It also makes sure your fudge is smooth and delicious. Which of these problems have you run into before?
Your Fudge Questions, Answered
Q: Can I make this gluten-free? A: Yes! Use gluten-free sandwich cookies instead of Oreos.
Q: How far ahead can I make it? A: It’s perfect for making 2-3 days before a party.
Q: What if I don’t have peppermint bits? A: Crushed candy canes work just as well.
Q: Can I double the recipe? A: Absolutely. Use a 9×13 pan for a double batch.
Q: Any optional tips? A: A pinch of extra salt makes the sweet flavors pop. Fun fact: This is called “flavor balancing”! Which tip will you try first?
From My Kitchen to Yours
I hope this fudge brings you joy. It always reminds me of snowy days and laughter. Making sweets is about sharing love with family and friends.
I would love to see your creations. Your kitchen stories make my day. Have you tried this recipe? Tag us on Pinterest! You can find me at @LenasCozyKitchen.
Happy cooking!
—Lena Morales.
Peppermint Oreo Fudge
Description
A rich and creamy white chocolate fudge loaded with peppermint crunch and festive Oreos, perfect for the holidays.
Ingredients
Instructions
- Begin by putting parchment paper in a 9×9 pan. This keeps the fudge from sticking to the pan.
- Put the white chocolate chips and marshmallow fluff in a big bowl. Set aside.
- In a pan melt the sugar, heavy cream, salt and butter on medium heat until it starts to boil. Cook for 5 minutes.
- Pour the hot stuff into the bowl of chocolate chips and mix with the mixer until it’s smooth and soft.
- Mix (fold) in half of the peppermint Crunch Bits and all the crushed Oreos. Pour into your pan.
- Sprinkle the rest of the peppermint crunch bits on the top. Press down a bit. Put in the fridge for 3-5 hours to let it set.
Notes
- For best results, use a candy thermometer to ensure the sugar mixture reaches 235°F (soft-ball stage) before adding to the chocolate.


Leave a Reply