My First Sourdough Disaster
Let me tell you about my first loaf. It was flat as a pancake. I forgot to feed my starter first. It was sleepy and weak. My poor bread had no power to rise. I still laugh at that.
That taught me a big lesson. Your starter is like a tiny pet. You must care for it with good food. This matters because a happy starter makes fluffy bread. A sleepy one makes a doorstop. What was your first kitchen mistake? I love hearing those stories.
Why We Stretch and Fold
You will mix a very sticky dough. Do not add more flour. I promise. The stretch and fold is magic. You wet your hands and pull the dough up. Then you fold it over itself.
This gentle action builds strength. It makes a web inside the dough. That web traps air from the starter. This is why we do it. That air makes the big holes inside your crusty loaf. Fun fact: This web is called gluten. It’s just flour and water holding hands.
The Long, Cold Nap
After shaping, the dough goes in the fridge. It takes a long, cold nap. This wait is the secret to great flavor. The cold slows everything down. The little yeast creatures work slowly.
They create a tangy, rich taste. This matters so much for sourdough. A quick bread tastes bland. A slow bread tastes complex and wonderful. Do you prefer a strong sour taste or a mild one? Tell me in the comments.
The Hot Oven Dance
Preheat your pot until it is screaming hot. Be very careful. Use good oven mitts. You will score the dough quickly. That cut lets the bread expand. It opens up like a flower in the heat.
Doesn’t that smell amazing? The steam from the covered pot makes the crust crispy. Then you take the lid off. The bread turns a deep, golden brown. That color is flavor. What is your favorite smell from the oven? Mine will always be baking bread.
Your Turn to Bake
This recipe has many steps. But each one has a purpose. It is not hard. It just needs your patience. Listen to the dough. It will tell you what it needs.
That is the real lesson. Cooking teaches you to watch and feel. This matters more than perfect loaves. The trying is what fills your heart. So give it a try. Will you use a plain flour or try some rye like I did?
Ingredients:
| Ingredient | Amount | Notes |
|---|---|---|
| Bread flour, or all-purpose flour | 400 g | plus more to dust |
| Rye flour, or whole wheat or bread flour | 55 g | |
| Fine sea salt | 10 g | |
| Filtered water, or dechlorinated water or spring water | 345 g | luke-warm up to 85˚F |
| Active sourdough starter | 100 g | |
| Rice flour | optional | for dusting the bread basket |
My Easy Sourdough, Just Like Abuela Made
Hello, my dear! Come sit. Let’s make some bread. This is my sourdough recipe. It feels like a warm hug from the oven. I learned it from my abuela. Her kitchen always smelled of yeast and honey. We’ll take our time. Good bread cannot be rushed. It’s a quiet, happy kind of work. Are you ready? Let’s begin.
Step 1: Wake Your Starter
First, wake up your starter. This is your bread’s heart. Mix 50 grams each of starter, flour, and warm water. Let it sit until it’s bubbly and happy. It should look like a foamy pancake batter. This can take a few hours. I like to feed mine after breakfast. Then it’s ready by lunch. (Hard-learned tip: Use warm water, not hot! Hot water will hurt the little yeasties.)
Step 2: Mix Your Dough
Now, mix your dough. Whisk the flours and salt in a big bowl. Add the water and your bubbly starter. Stir with a spoon, then use your hands. It will be very sticky and shaggy. That’s perfect! Mix until you have no dry flour spots. I still laugh at my first time. My fingers were glued together! Cover the bowl with a towel. Let it rest for four hours in a warm spot.
Step 3: Stretch and Fold
Next is the stretch and fold. Every hour, wet your hands. Reach under the dough and pull it up. Fold it over itself. Turn the bowl and do this four times. You are building its strength. The dough will get smoother each time. Think of it as tucking in a blanket. Why do we wet our hands? Share below! After four hours, you do this one last time.
Step 4: Shape Your Loaf
Time to shape your loaf. Gently turn the dough onto a floured counter. Shape it to fit your bread basket. Let it rest for twenty minutes. This is called the bench rest. If it spreads, just gently shape it again. Cup your hands and tuck the dough under. This makes a nice tight ball. Now, place it seam-side up in a floured basket. Doesn’t that already look like bread?
Step 5: The Long Wait (Cold Proof)
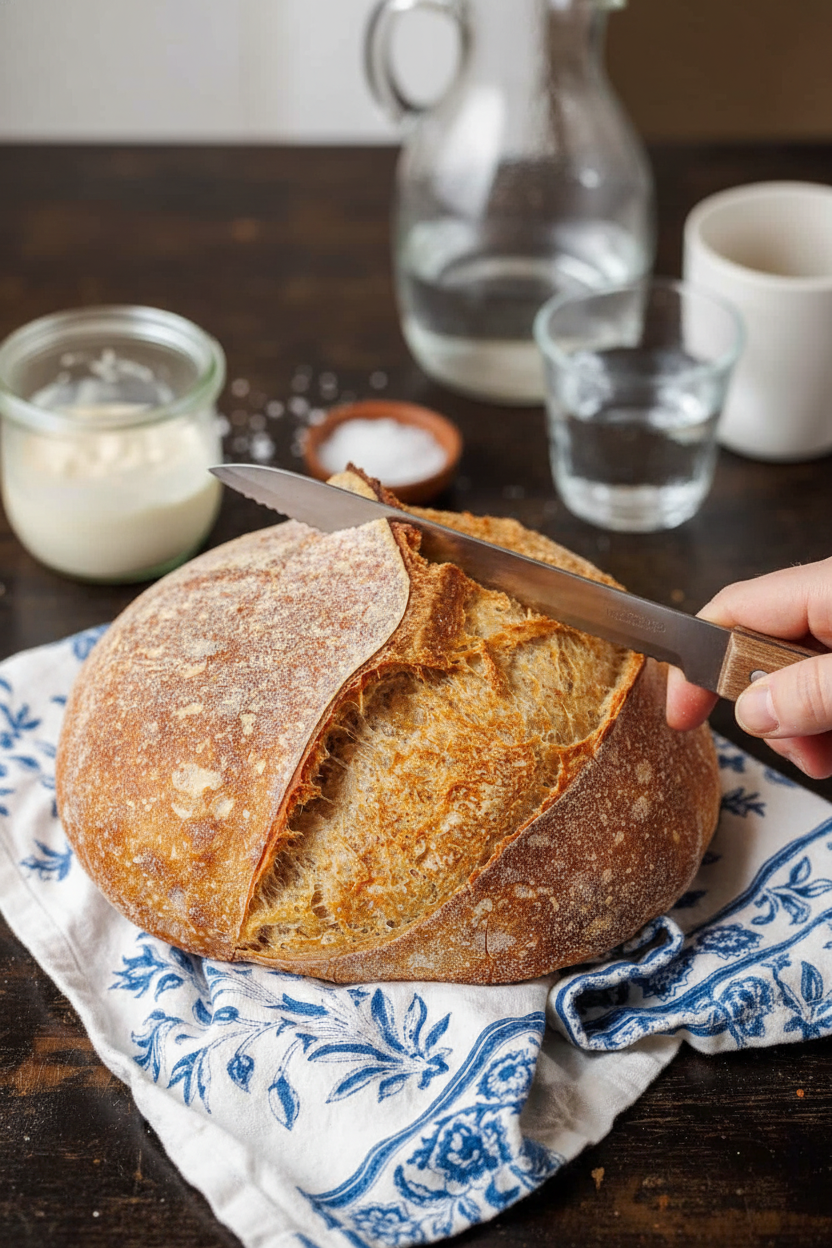
The long wait! Cover the basket and put it in the fridge. Leave it there for at least eight hours. You can even leave it for two days! This slow sleep gives the bread amazing flavor. When you’re ready, heat your oven very hot. Carefully turn your dough onto parchment paper. Use a sharp blade to make one gentle slash on top. This is where your bread will bloom open. It’s my favorite part.
Step 6: Bake!
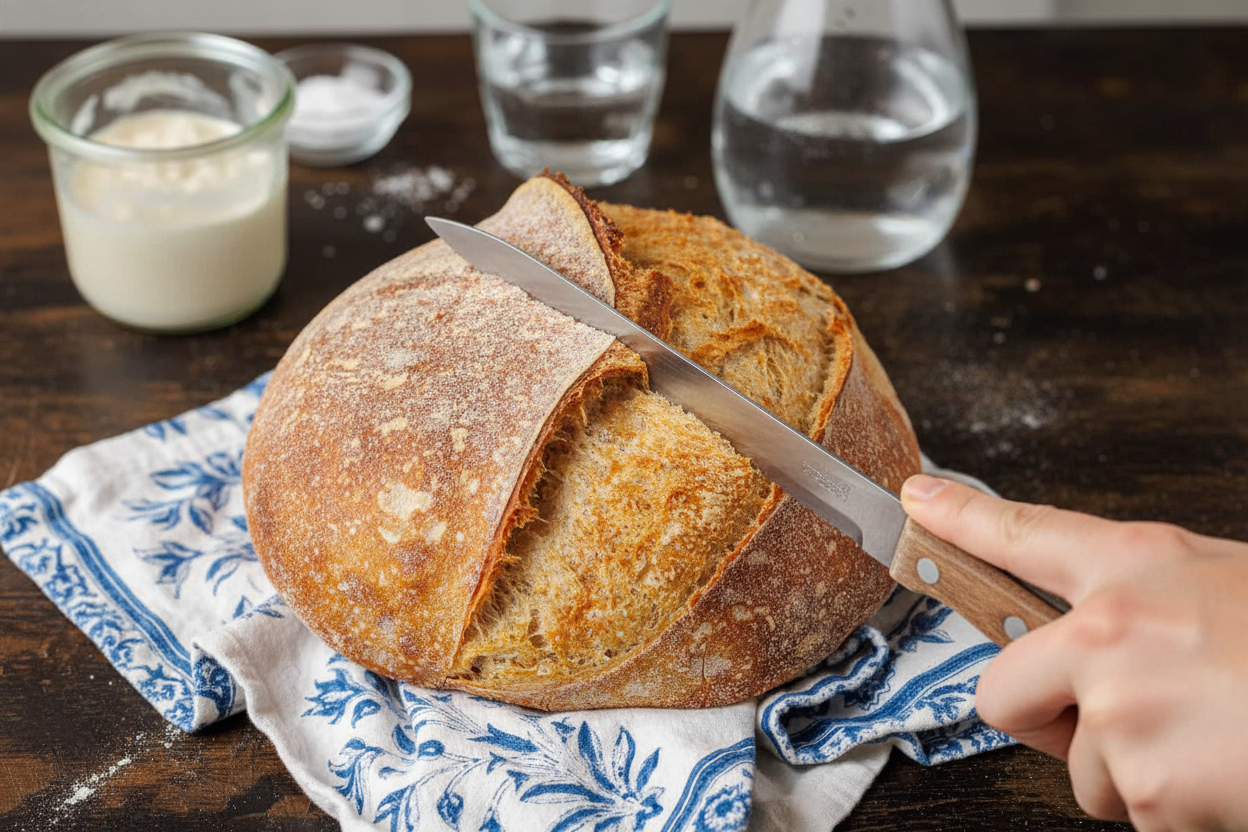
Finally, we bake! Put the dough into your hot pot and cover it. Bake for twenty minutes. Then, take the lid off. Bake for twenty more minutes until it’s golden brown. The smell will fill your whole house. It’s the best smell in the world. Let it cool completely before slicing. I know, the waiting is hard! But the crust will be perfect.
Cook Time: 40-45 minutes
Total Time: 18+ hours (mostly waiting)
Yield: 1 beautiful loaf
Category: Bread, Baking
Three Fun Twists for Your Next Loaf
Once you master the basic loaf, try playing! Here are my favorite simple twists. They make each loaf a little surprise.
- Everything Bagel Loaf: Mix sesame seeds, garlic, and salt into the dough. Sprinkle more on top before baking.
- Sun-Dried Tomato & Herb: Chop a handful of tomatoes and rosemary. Fold them in during your first stretch and fold.
- Honey & Oat: Swap 50g of bread flour for rolled oats. Add a big spoon of honey to the water. It’s subtly sweet.
Which one would you try first? Comment below!
How to Serve Your Homemade Bread
Oh, a warm slice of bread needs little else. But here are some lovely ways to enjoy it. For breakfast, toast it and spread with creamy butter and jam. For lunch, pair it with a big bowl of tomato soup. For dinner, tear off chunks to soak up stew juices. It’s perfect every time.
What to drink? A cold glass of apple cider is wonderful. For the grown-ups, a pale ale or a light red wine pairs nicely. The tangy bread loves a sweet or crisp drink beside it. Which would you choose tonight?
Keeping Your Sourdough Happy After Baking
Fresh sourdough is best eaten within two days. Just keep it on the counter, cut-side down on a board. This keeps the crust crisp. For longer storage, the freezer is your friend.
Let the loaf cool completely first. Then slice it. Wrap the slices tightly in plastic wrap. Pop them into a freezer bag. You can toast slices straight from the freezer. I once forgot a whole loaf in my freezer for a month. It toasted up perfectly for soup!
Batch cooking saves future-you time. Make two loaves instead of one. Enjoy one now, freeze one for later. This matters because a homemade loaf is always ready for you. It turns an ordinary Tuesday into something special.
Have you ever tried storing it this way? Share below!
Simple Fixes for Common Sourdough Troubles
Is your dough too sticky? Wet your hands with water before handling it. This prevents a sticky mess. Your dough will not stick to wet fingers.
Did your bread not rise much? Your starter might be sleepy. Make sure it is bubbly and active before you start. I remember when my first loaf was flat as a pancake. My starter needed a better feeding schedule.
Is the crust too pale or too hard? Baking time and temperature are key. A pale loaf needs more time uncovered. A too-hard crust might mean the oven was too hot. Getting this right matters for that perfect crunch. A good crust protects the soft, airy inside.
Which of these problems have you run into before?
Your Sourdough Questions, Answered
Q: Can I make this gluten-free?
A: This specific recipe uses wheat flour. For gluten-free, you need a special starter and flour blend.
Q: Can I make the dough ahead?
A: Yes! The long fridge rest is your make-ahead secret. It can wait there for up to two days.
Q: What if I don’t have rye flour?
A: Use whole wheat or more bread flour instead. The flavor will be a little different, but still wonderful.
Q: Can I double the recipe?
A: Absolutely. Just use a bigger bowl. You will get two beautiful loaves to share.
Q: Is the rice flour necessary?
A: No, it is optional. It just helps prevent sticking in the bread basket. Regular flour works too. *Fun fact: Rice flour doesn’t develop gluten, so it stays powdery and non-sticky!*
Which tip will you try first?
From My Kitchen to Yours
I hope you feel ready to bake your own loaf. Remember, sourdough is a living thing. Be patient with it and yourself. Your first loaf is a learning adventure.
I would love to see your beautiful bread. Sharing our kitchen stories connects us all. It makes the food taste even better.
Have you tried this recipe? Tag us on Pinterest! Let’s fill the world with the smell of warm, homemade bread.
Happy cooking!
—Lena Morales.

Easy Sourdough Bread Recipe with Video Tutorial
Description
A classic, easy-to-follow sourdough bread recipe with a detailed video tutorial, perfect for bakers of all levels.
Ingredients
Instructions
- Feed your sourdough starter 1 or 2 times before making your sourdough bread, depending on how healthy it is. For a single loaf, (using a kitchen scale to measure) mix 50g of starter with 50g of bread flour and 50g of lukewarm water. Cover with a loose fitting lid and let it rise at room temperature until more than doubled in size, about 4-6 hours.
- Make the Dough: In a large mixing bowl, whisk together bread flour, rye, and salt. Add water and sourdough starter and stir together with a wooden spoon then use your hand to thoroughly mix together, pinch the dough as you mix to make sure it’s very well combined. It will be a very sticky dough. Scrape down the bowl, cover with a clean kitchen towel, and let the dough rest at room temperature for 4 hours in a warm spot (bulk fermentation).
- Bulk Fermentation Stage: After every hour, do a round of “stretch and fold” – with wet hands to prevent sticking, gently lift up on one side of the dough and stretch it upwards (avoid tearing the dough), and then fold it over onto itself. Rotate the bowl a quarter turn and continue to stretch and fold about 3 more times or until the dough resists pulling. Keep the bowl covered with a towel between your stretch and fold rounds. After 4 hours, you’ll stretch and fold the dough for the fourth and final time to tighten it up.
- Shape the Loaf: Turn the dough out onto a lightly floured surface (cut it in half if you’ve doubled the dough for 2 loaves). With floured hands, gently stretch out the dough then shape the dough to match the shape of your banneton (bread basket) and pot.
- Bench Rest: Turn the dough seam-side down, cover it with a towel, and let it ‘bench rest’ for 20 minutes.
- Tighten the Dough: If it loosens up too much during the bench rest and loses shape, gently re-shape it again to tighten the loaf. With floured hands, cup your hands around the sides of the dough and tuck the sides underneath. Pull the dough down the counter towards you in a circular motion to tighten up the shape.
- Cold Fermentation: Transfer the dough seam-side up into your floured banneton. Cover with a tea towel and refrigerate for at least 8 hours or up to 48 hours.
- Preheat the Oven: At least 30 minutes before baking, set the Dutch oven or combo cooker into your oven (set your pizza stone on the bottom rack if using) and preheat the oven to 500 ̊F.
- Score your Bread: Turn the bread out into a parchment lined combo cooker or onto a sheet of parchment paper or bread sling if using a Dutch Oven. Using the bread lame, score the bread starting at the base on one side, (keeping at a 45-degree angle and making a 1/3 to 1/2″ deep crescent shape) cut around the top of the bread, from one side to the other. If using a Dutch Oven use the parchment to transfer your dough into the pot.
- Bake: Using oven mitts, cover with the hot lid and put it into the oven. Immediately reduce heat to 450 ̊F, and bake for 20 minutes covered. Remove the lid and bake another 20-25 minutes uncovered or until it reaches your desired color.
Notes
- (Note: The provided text does not contain a detailed nutrition label or values such as calories, fat, protein, etc. Only the ingredients list is present.)


Leave a Reply