My First Pizza Party
Let me tell you about my grandson’s first pizza party. He was so excited. He wanted to make big pizzas for all his friends.
But big pizzas are messy for little hands. So, we made these mini ones instead. Every kid got to make their own little cup. They loved it. I still laugh at that happy mess.
Why Little Pizzas Matter
This matters because cooking should be fun. It is not just about eating. It is about making memories together.
These mini pizzas let everyone join in. No one is just watching. You get your own little creation. What is your favorite pizza topping? I would love to know.
Let’s Get Making
First, get your dough ready. Unroll it on a floured board. Cut it into twelve little rectangles.
Press each piece into a greased mini muffin cup. Now the fun part! Layer in your cheese and sauce. Doesn’t that smell amazing already?
A Pinch of This and That
After the sauce, add more cheese and your pepperoni. Then, a little sprinkle of parmesan and oregano. This is the magic step.
That oregano makes your kitchen smell like an Italian restaurant. Fun fact: oregano’s name means “mountain joy” in Greek! It brings so much flavor from one tiny pinch.
The Waiting Game
Pop them in the hot oven. Now you wait. This is the hardest part. In about twelve minutes, they will be golden and bubbly.
Let them cool a tiny bit before eating. The cheese is very hot! This matters because good food teaches us patience. Do you think you can wait, or will you sneak a bite?
Your Turn to Share
Food always tastes better with friends. Who would you invite to your mini pizza party? Tell me their name.
You can change the toppings any way you like. Try chopped bell peppers or olives. Making food your own is the best lesson of all. What will you put on yours first?
Ingredients:
| Ingredient | Amount | Notes |
|---|---|---|
| Refrigerated pizza crust | 14 oz | |
| Shredded mozzarella or Italian blend cheese | 1 1/2 cups | |
| Pizza sauce | 1 cup | |
| Pepperoni slices | 12 slices | or any topping you like |
| Grated parmesan cheese | 2 tbsp | |
| Dried oregano | 1/8 tsp |
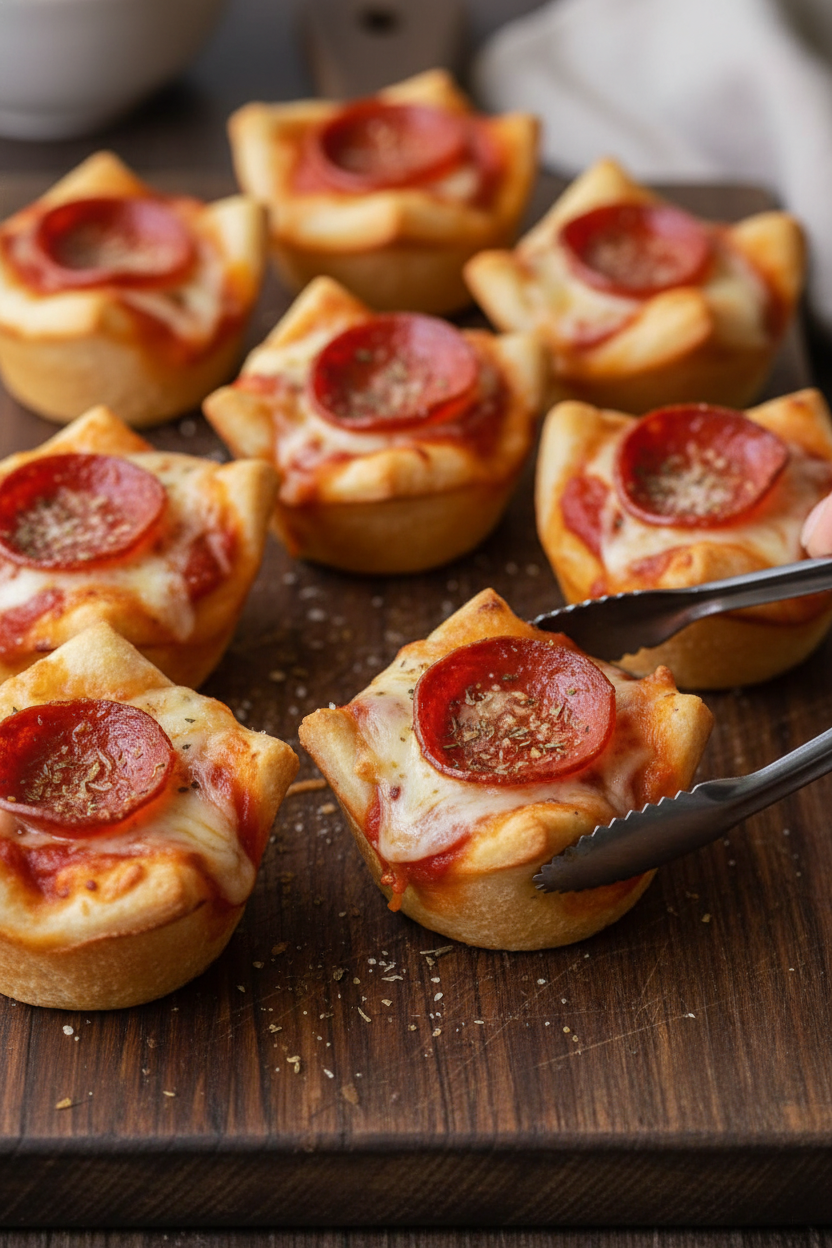
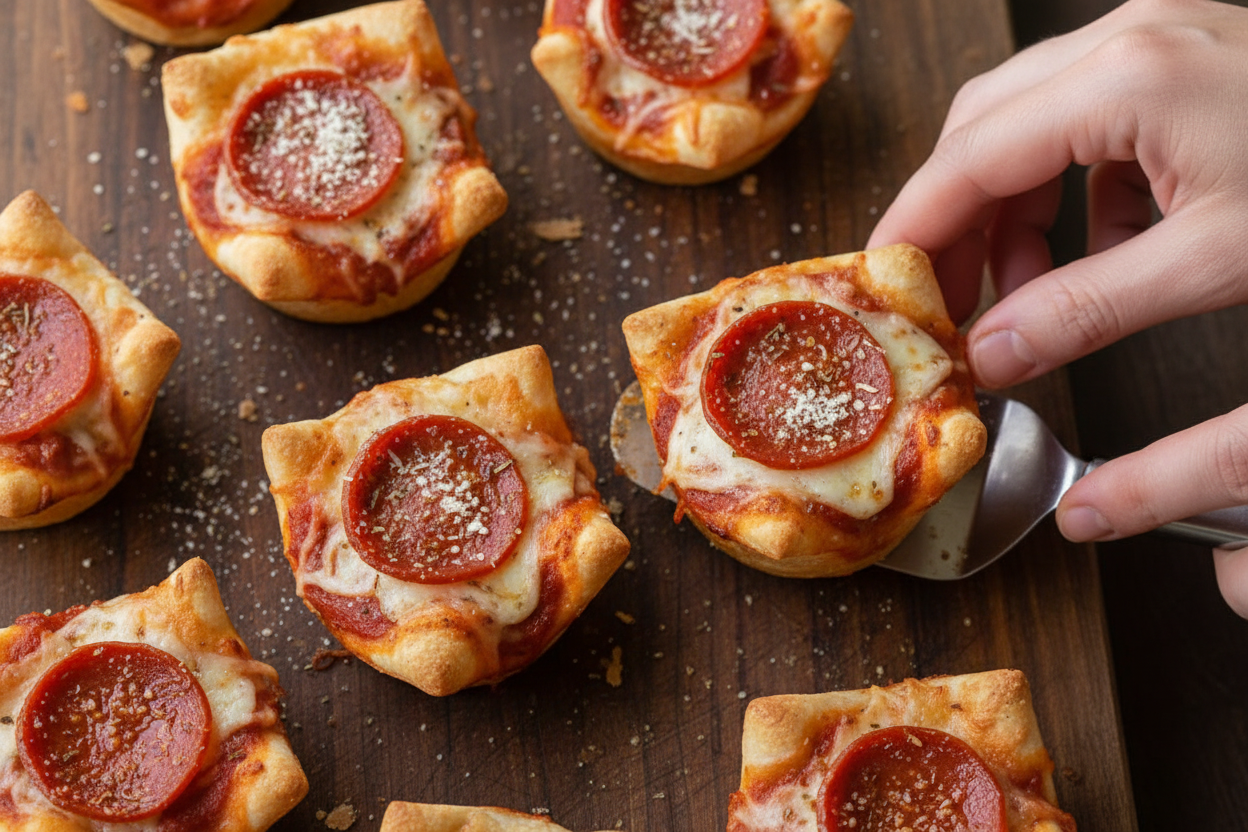
My Mini Deep Dish Pizzas: A Bite of Happiness
Hello, my dear! Come sit. Let’s make something fun today. We are making mini deep dish pizzas. They are like little edible cups of cheesy joy. My grandkids call them “pizza muffins.” I still laugh at that. They are perfect for little hands and big appetites. Doesn’t that smell amazing already? Let’s begin.
Step 1: First, get your oven nice and toasty. Turn it to 400 degrees. Now, take your pizza dough. Unroll it onto your counter. A little flour on the board helps. Cut the dough into twelve rectangles. They don’t have to be perfect. My first ones were all shapes! (Hard-learned tip: A pizza cutter makes this so fast and easy.)
Step 2: Next, grease your mini muffin pan well. Please do not skip this. I once had a pizza cup stick forever. Place one dough piece into each little cup. Press it down gently. It will look like a tiny nest. Now, sprinkle half of your mozzarella inside. This cheese layer at the bottom is a happy surprise.
Step 3: Here comes the saucy part. Add a small spoon of pizza sauce over the cheese. Not too much, or it will bubble over. Then, add the rest of the mozzarella. Top with a pepperoni slice or your favorite topping. What topping would make you smile? Share below! Finish with a pinch of parmesan and oregano.
Step 4: Finally, bake them for about 12 minutes. Watch them turn golden brown. Your kitchen will smell like an Italian restaurant. Let them cool for just a minute before popping them out. The cheese will be wonderfully gooey. Be careful, the filling is hot! I always blow on mine like I did for my kids.
Cook Time: 12 minutes
Total Time: 25 minutes
Yield: 12 mini pizzas
Category: Snack, Appetizer
Three Tasty Twists to Try
You can make these pizzas your own. It is so easy to change them up. Here are three ideas I love. They are all delicious in their own way.
The Garden Party: Skip the pepperoni. Use chopped bell peppers, black olives, and sweet corn. It is fresh and colorful.
Breakfast Pizza: Fill with scrambled egg, crumbled cooked sausage, and cheddar cheese. Perfect for a busy morning.
Hawaiian Sweet Heat: A little ham, a pineapple chunk, and a dash of chili flakes. Sweet, salty, and a tiny kick!
Which one would you try first? Comment below!
Serving Your Little Masterpieces
These minis are a full meal on their own. But I love to make a little spread. It feels like a party. Serve them with a simple green salad. A small bowl of warm marinara sauce for dipping is also wonderful. For drinks, a chilled lemonade is classic and refreshing. For the grown-ups, a light Italian red wine pairs beautifully. Which would you choose tonight? Just remember, the best side is good company. Enjoy every bite.
Keeping Your Mini Pizzas Perfect
Let’s keep your mini pizzas tasty for later. First, let them cool completely. Then, pop them in a sealed container. They will stay good in the fridge for three days.
For the freezer, use a baking sheet. Freeze them in a single layer first. Once frozen, bag them up. They will keep for two months. I once froze a batch for my grandkids’ surprise visit. It was a lifesaver!
To reheat, use your oven or toaster oven. Bake at 350 degrees until warm. This keeps the crust crispy. The microwave makes them soggy. Batch cooking like this saves busy nights. It means a homemade meal is always ready. Have you ever tried storing it this way? Share below!
Little Problems, Easy Fixes
Sometimes the dough sticks to the pan. Just make sure you grease it well. I use my fingers to spread the oil. I remember when my first batch stuck. We ate them with a spoon!
If your filling spills over, you used too much. A heaping teaspoon of sauce is plenty. Too much cheese can also cause leaks. Getting the amount right matters for flavor. Every bite will have the perfect balance.
Soggy bottoms are no fun. Always preheat your oven fully. A hot oven gives a crisp crust. This simple step builds your cooking confidence. You will feel like a real pro. Which of these problems have you run into before?
Your Mini Pizza Questions
Q: Can I make these gluten-free? A: Yes! Use a gluten-free pizza crust from the store.
Q: Can I prepare them ahead? A: Assemble them and refrigerate for a few hours before baking.
Q: What are other topping ideas? A: Try cooked sausage, chopped bell peppers, or black olives.
Q: Can I double the recipe? A: Absolutely. Just use two muffin pans.
Q: Any optional tips? A: Brush the crust edges with garlic butter after baking. *Fun fact: The first pizza was likely just bread with herbs and oil.* Which tip will you try first?
From My Kitchen to Yours
I hope you love these little pizzas. They always make my kitchen smell wonderful. Cooking should be fun and full of joy. I would love to see your creations.
Share a photo of your snack. Tell me what toppings your family picked. It makes me so happy to see you cooking. Have you tried this recipe? Tag us on Pinterest!
Happy cooking!
—Lena Morales.

Mini Deep Dish Pizzas: Mini Deep Dish Pizzas Recipe and Ideas
Description
These adorable Mini Deep Dish Pizzas are the perfect party snack or fun family meal, featuring a crispy crust, gooey cheese, and your favorite toppings.
Ingredients
Instructions
- Preheat oven to 400 degrees F.
- Unroll pizza dough onto a lightly floured cutting board. Cut into 12 (3×2-inch) rectangles.
- Grease a mini muffin pan and place 1 dough piece in each cup.
- Sprinkle half the shredded cheese into the cups; top with pizza sauce, remaining shredded cheese and pepperoni.
- Sprinkle with Parmesan and oregano and bake for 11-12 minutes or until golden brown.
Notes
- Let cool for a few minutes before removing from the pan. Serve warm. Nutrition per serving: Calories: 141kcal | Carbohydrates: 17g | Protein: 6g | Fat: 5g | Saturated Fat: 2g | Cholesterol: 13mg | Sodium: 481mg | Potassium: 83mg | Sugar: 3g | Vitamin A: 190IU | Vitamin C: 1.4mg | Calcium: 83mg | Iron: 1.2mg


Leave a Reply