The Cake That Presses Itself
Some cakes bake in an oven. This one presses itself together. You just stack the wafers with cream. Then you put a heavy board on top. I use my old wooden cutting board. Sometimes I add a pot of beans for weight. You walk away for two hours. The magic happens while you wait.
Why does this matter? The pressing makes the wafers soft. They soak up the sweet cream. It turns from crunchy layers into one perfect cake. It’s a lesson in patience. Good things need a little time to come together. Have you ever tried a no-bake dessert like this?
A Sweet Story From My Kitchen
I first had this cake at my friend Anya’s house. She is from Ukraine. She made it for a quick treat. Her kids were helping. They licked the spoon clean. I still laugh at that. I asked for the recipe right away. It was so simple and so good.
Now I make it for busy weeks. Or when friends stop by. It feels fancy but it’s not. It’s just wafers and that wonderful caramel cream. Fun fact: The cooked sweetened milk is called “dulce de leche.” It means “sweet milk” in Spanish! Do you have a friend who shared a special recipe with you?
The Magic of Just Three Things
Look at the cream. Only three things! Sweet milk, butter, a tiny bit of lemon. You beat them until fluffy. Doesn’t that smell amazing? The lemon is the secret. It cuts the sweetness just right. It makes the cream taste brighter.
Why this matters? Cooking teaches us that simple is often best. You don’t need a long list. Just a few good ingredients. They do all the work for you. Spread it on the wafers. Don’t worry about filling every little hole. A thin layer is perfect.
To Stack Tall or Keep It Small
You can make one tall cake. Or two skinny ones. I like making two. It feels like I get two cakes! They are easier to slice. And they stack nicely under the press. The wafers become friends, holding each other tight.
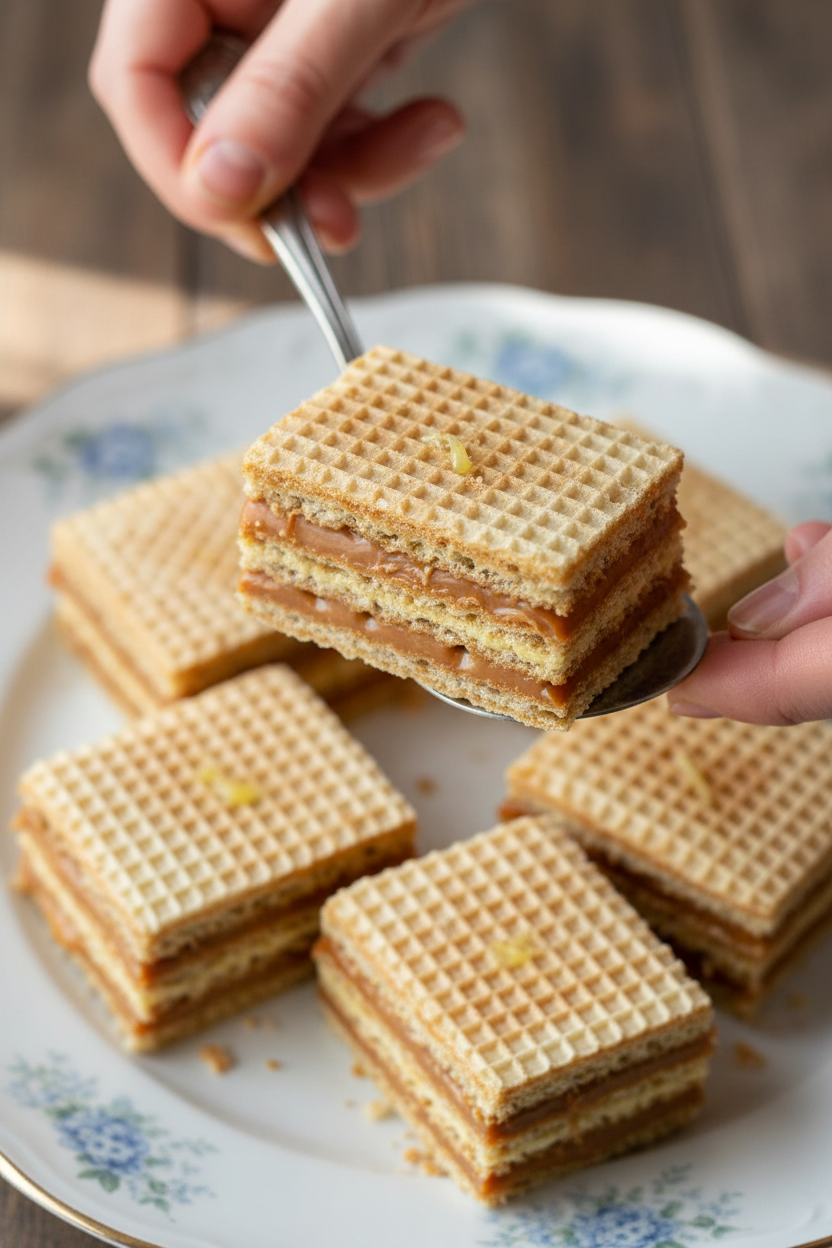
The best part? Slicing it. You cut it into little squares or rectangles. That’s the Ukrainian style. Then you watch it disappear. I always tell my family, “Grab a slice fast!” They really do go quickly. Do you prefer tall layer cakes or thinner slices?
Your Turn in the Kitchen
This is a great first cake to make. No oven, no fuss. If you can spread and stack, you can do it. Let it press. Then share it. Food tastes better when we share it.
What will you put on top of your cake? Some people dust it with cocoa. Others add nuts. I like it plain. It’s perfect just as it is. Tell me, what is your favorite no-bake treat to make?
Ingredients:
| Ingredient | Amount | Notes |
|---|---|---|
| Plain wafers | 1 package (9 layers) | Round or square, 9-inch diameter |
| Cooked sweetened condensed milk (dulce de leche) | 1 can (14 oz) | |
| Unsalted butter | 1/2 stick, softened | |
| Lemon juice | 1 tsp |
My Ukrainian Waffle Cake: A No-Bake Family Treasure
Hello, my dear! Come sit. Let me tell you about this wonderful cake. It comes from my friend Olga’s kitchen. She showed me this recipe years ago. It uses simple wafers you find in any store. The magic happens with the sweet, creamy filling. Doesn’t that sound easy? I still laugh at that first time I made it. My grandson thought I baked for hours! The secret is letting it press together. It becomes soft and perfect.
You just need a few things. Grab your wafers, that cooked sweetened milk in a can, some soft butter, and a tiny bit of lemon juice. The lemon is my little trick. It makes the sweetness just right. Now, let’s make some magic together. Remember, this is about sharing stories and sweet treats.
Step 1: Make the Cream
Put the cooked milk, soft butter, and lemon juice in a bowl. Use a mixer if you have one. Beat it all until it’s fluffy and smooth. This takes about three minutes. Watch it turn a lovely caramel color. Doesn’t that smell amazing? (A hard-learned tip: make sure your butter is very soft. It blends much better that way!).
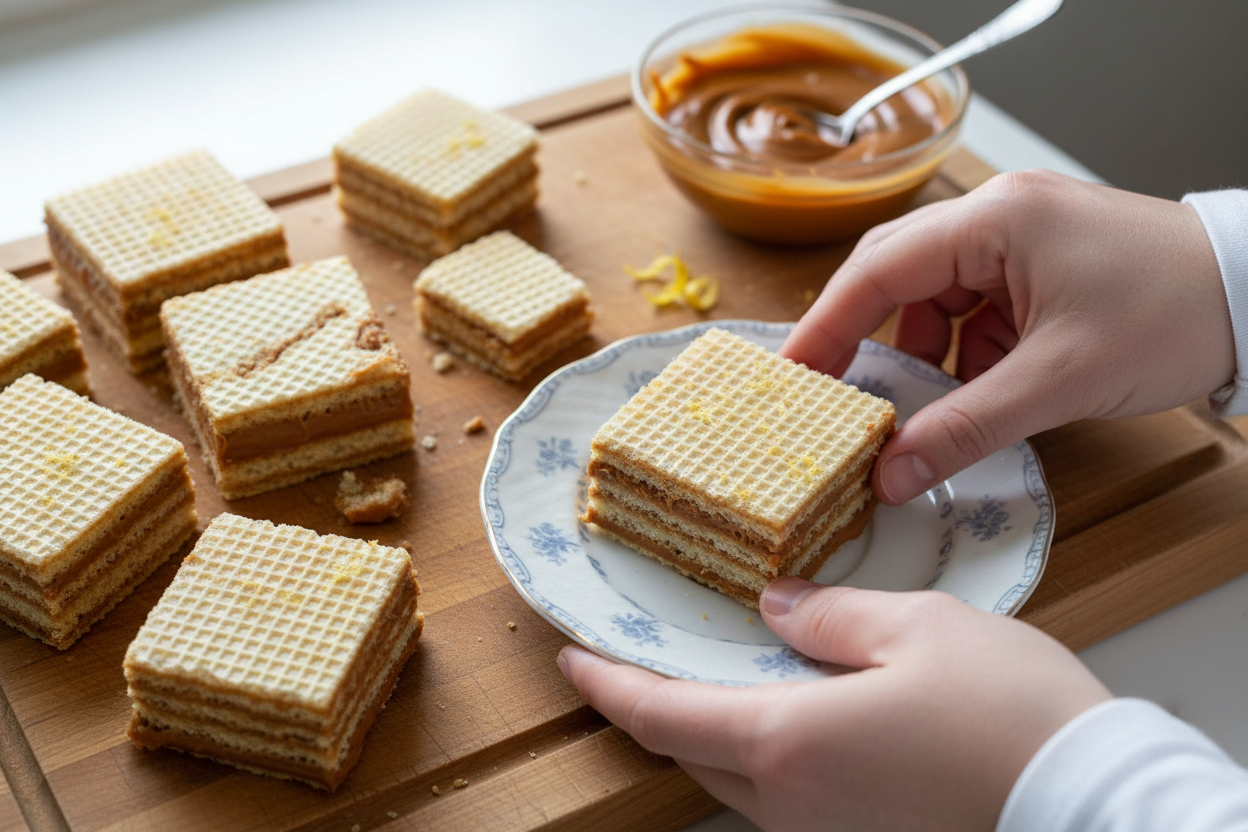
Step 2: Build the Cake
Time to build our cake! Take a wafer and spread a thin layer of cream. Cover it right to the edges. You don’t need a lot. Just enough to make the next wafer stick. You can make one tall cake or two skinny ones. I like two. They are easier to slice. Do you think a tall cake or a skinny cake looks more fun? Share below!
Step 3: Let it Set
Patience is our final ingredient. Place your cake on a plate. Put a heavy cutting board right on top. You can even add a bowl of water for weight. Now walk away for two hours. Let the wafers get soft and dreamy. Then, slice it into little squares. Grab one fast! They disappear like magic at my house.
Cook Time: 0 minutes
Total Time: 2 hours 20 minutes
Yield: 10 servings
Category: Dessert
Three Sweet Twists to Try
This cake is like a blank canvas. You can play with it! Here are some ideas from my kitchen. They are all simple and delicious. Try one next time you feel creative.
- Berry Bliss: Add a layer of mashed raspberries between every few cream layers. It’s tart and sweet.
- Chocolate Chip: Mix mini chocolate chips right into the creamy filling. A little crunch in every bite.
- Nutty Delight: Sprinkle very finely chopped toasted hazelnuts on each cream layer. It tastes so fancy.
Which one would you try first? Comment below!
Serving Your Sweet Masterpiece
This cake is wonderful all on its own. But sometimes, I like to dress it up. For a special tea time, dust the top with powdered sugar. It looks like a light snow. A few fresh berries on the side make it pretty. You could even add a dollop of whipped cream. So simple, but it feels like a party.
What to drink with it? A cold glass of milk is always perfect. It cuts the sweetness just right. For the grown-ups, a small glass of sweet sherry wine is a lovely match. It’s a cozy after-dinner treat. Which would you choose tonight?
Keeping Your Waffle Cake Happy
This cake is best kept in the fridge. It stays firm and the flavors get even better. You can keep it there for up to five days. Just cover it with plastic wrap.
You can also freeze it! Wrap the whole cake tightly. It will keep for one month. Thaw it slowly in the fridge before serving.
I once left a slice out overnight. It got very soft and messy. The fridge is its best friend. Storing food well means less waste and more joy.
You can make the cream ahead of time. Store it in the fridge for two days. This makes assembly so fast later. Have you ever tried storing it this way? Share below!
Simple Fixes for Common Hiccups
Is your cream too runny? Your butter might have been too soft. Just pop the bowl into the fridge for ten minutes. It will thicken right up.
Are the wafers not sticking together? You might not be using enough cream. Spread it all the way to the edges. This helps every layer connect.
I remember when my cake slid apart. I did not press it. The press is key for a neat slice. It squeezes the layers into one perfect cake.
Getting the texture right builds your kitchen confidence. A neat slice makes everyone smile at the table. Which of these problems have you run into before?
Your Questions, My Answers
Q: Can I make this gluten-free? A: Yes! Find gluten-free wafers. The rest of the recipe is already gluten-free.
Q: How far ahead can I make it? A: Make it a full day ahead. The press time makes it even more delicious.
Q: What if I don’t have dulce de leche? A: You can use regular sweetened condensed milk. Just add a pinch more lemon juice.
Q: Can I make a smaller cake? A: Absolutely. Use fewer wafers. Just mix a smaller amount of cream.
Q: Any fun extras? A: A fun fact: In Ukraine, this is often called “Graphsky” cake. You can add chopped nuts between the layers for crunch. Which tip will you try first?
From My Kitchen to Yours
I hope you love making this simple, sweet cake. It holds so many good memories for me. I can almost hear my own grandma’s voice when I make it.
I would love to see your creation. Sharing food stories connects us all. Have you tried this recipe? Tag us on Pinterest! You can find me at @LenasKitchenTable.
Happy cooking!
—Lena Morales.

Ukrainian Waffle Cake with Dulce de Leche
Description
A classic, easy no-bake dessert with layers of crisp wafers and a rich, creamy dulce de leche filling.
Ingredients
Instructions
- Combined cooked condensed milk, 1/2 stick softened butter and 1 tsp lemon juice in the electric stand mixer and whisk attachment. Beat on high speed for 3 minutes.
- Spread cream on the wafers, making sure to reach the edges. Don’t be concerned with filling each square or you will have too much frosting on the cake. Just put enough to have the layers stick. You may make 2 skinny cakes or 1 tall one. They do stack nicely when they aren’t as tall.
- Place cake under a heavy cutting board or make a press using a cutting board with a bowl of water on top. Let it sit under the press at least 2 hours. Then, slice it up (Ukrainian style) and make sure you grab a slice. They go quickly!!


Leave a Reply