The Day I Made a Messy Masterpiece
Let me tell you about the first time I made this braid. I was so proud of my dough. Then I cut the strips. Oh my. They were all different sizes. My braid looked like a sleepy caterpillar. I still laugh at that. But you know what? It baked up golden and everyone ate it all.
This is why it matters. Cooking is not about being perfect. It is about making something with your hands. That feels good. What was your first kitchen mess? I bet it turned out fine too.
Let’s Talk Dough
First, we wake up the yeast. Mix it with warm water and sugar. Wait five minutes. You will see little bubbles. That means it is alive and happy. Doesn’t that smell amazing? That yeasty smell is my favorite.
Now, mix in the flour, salt, and oil. The dough should feel soft. It might stick to your fingers a little. That is okay. Let it rest in a bowl. Cover it with a towel. It will get big and puffy. Fun fact: the yeast eats the sugar and makes tiny bubbles. That is what makes the dough rise!
The Heart of the Braid
While the dough naps, make the filling. Use leftover chicken or a store-bought rotisserie one. Mix the soft cream cheese with the chicken and broccoli. Add garlic powder and pepper. This creamy mix is the secret.
Here is why this matters. You are hiding vegetables in a creamy, cheesy hug. My grandkids never say no to broccoli here. Do you have a veggie you like to hide in meals? Tell me your best trick.
Braiding is Easier Than Hair
Roll your dough into a big rectangle. Pile the filling down the middle. Now, get your scissors or knife. Cut strips along the sides. Just like making a paper fan. Fold the strips over the filling, left then right.
It does not have to be perfect. Just tuck the ends under at the bottom. See? It looks fancy already. Brush it with a little egg wash. This makes it shiny and golden. A sprinkle of salt on top is the final touch.
Warm From the Oven
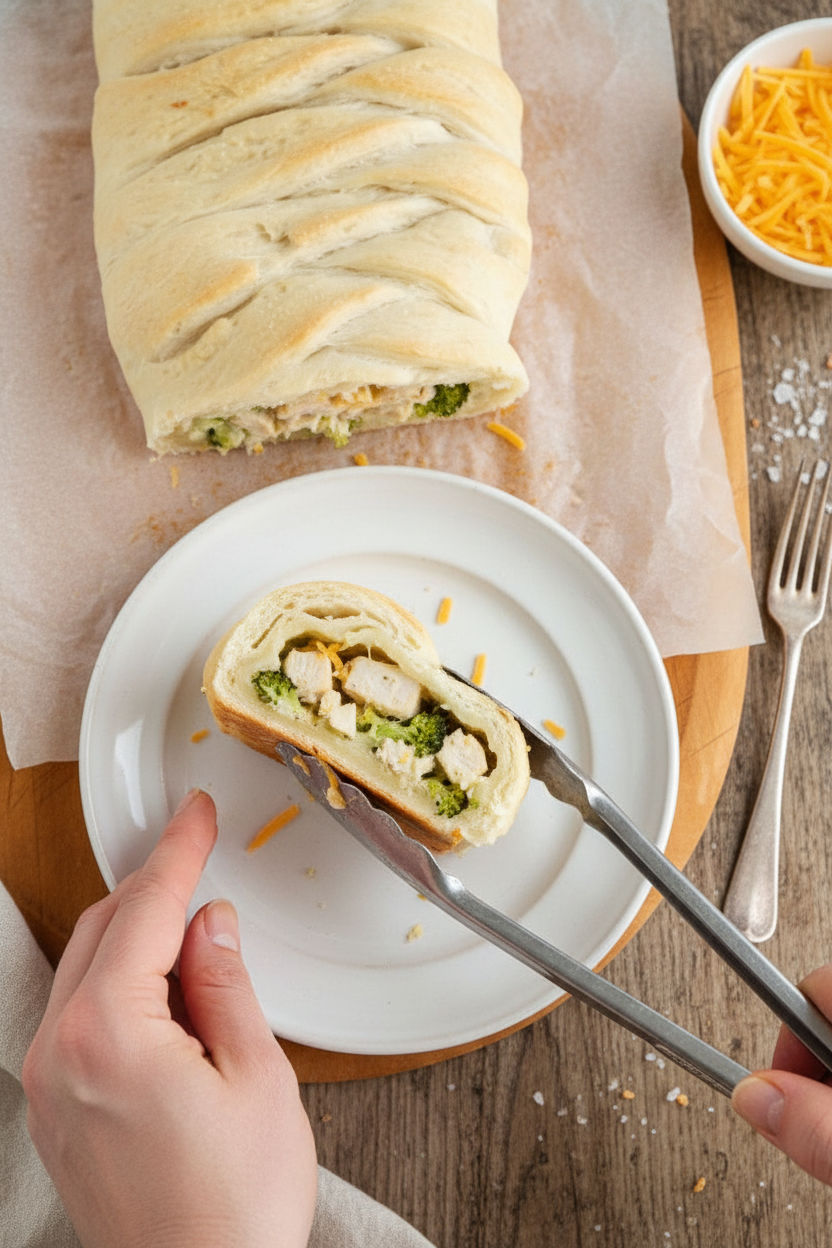
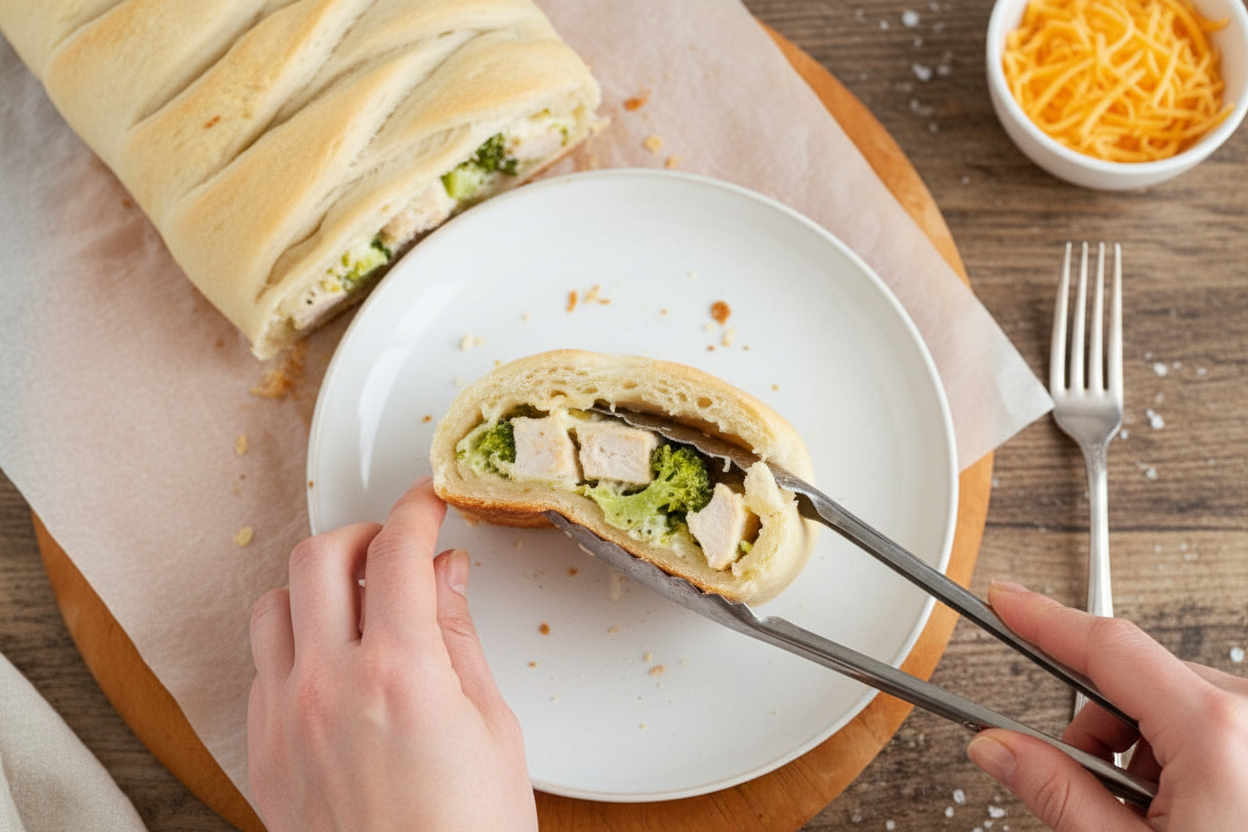
Bake it until it is golden brown. Your whole house will smell wonderful. Let it cool for just a few minutes. Then slice it. You will see the beautiful layers. The cheese will be all melty.
This dish is perfect for sharing. It feels special. Would you make this for a weekend dinner or to bring to a friend? I love hearing how you share your food.
Ingredients:
| Ingredient | Amount | Notes |
|---|---|---|
| Yeast | 2 1/4 tsp | For the crust |
| Warm Water | 1 cup | For the crust |
| Sugar | 2 tsp | For the crust |
| All-Purpose Flour | 2-2 1/2 cups | For the crust |
| Salt | 1 tsp | For the crust |
| Olive Oil | 2 tbsp | For the crust |
| Cream Cheese | 8 oz | Softened; for the filling |
| Chicken | 2 cups | Cooked and diced; for the filling |
| Broccoli | 2 cups | Steamed, cooled, and chopped; for the filling |
| Garlic Powder | 1/2 tsp | For the filling |
| Pepper | 1/4 tsp | For the filling |
| Cheese, shredded | 1 cup | Divided; for the filling |
| Egg | 1 | For egg wash |
| Water | 1 tsp | For egg wash |
| Sea Salt | To taste | For garnish |
My Cheesy Chicken Broccoli Braid Story
Hello, my dear! Come sit. Let’s make my cheesy chicken broccoli braid. It’s like a warm, cozy hug from your oven. I first made this for my grandson’s soccer team. They gobbled it up in minutes! I still laugh at that. It looks fancy, but it’s just fun, simple folding. Doesn’t that smell amazing already? Let’s begin.
Step 1: Activate the Yeast
Wake up your yeast. Mix it with warm water and sugar. Let it sit for 5 minutes. It should get all bubbly and happy. This is the magic start. (Hard-learned tip: If your water is too hot, it will hurt the yeast. Think warm bath, not hot tea!).
Step 2: Make the Dough
Now, make your dough. Add two cups of flour, salt, and oil to the yeast. Stir until it comes together. Add a little more flour if it’s too sticky. You want it soft and smooth. Knead it for a minute. Then let it rest in a greased bowl. It needs a little nap to grow.
Step 3: Prepare the Filling
While dough naps, make the filling. Mix the soft cream cheese, chicken, and broccoli. Add garlic powder and pepper. Stir in half of your shredded cheese. This creamy mix is the heart of the braid. Do you think the broccoli or the chicken is the star? Share below!
Step 4: Braid It!
Time to braid! Roll your dough into a big rectangle. Pile the filling down the middle. Sprinkle the rest of the cheese on top. Now, cut strips along the sides. Fold them over the filling, left then right. It’s like giving your filling a woven blanket. Tuck the ends in at the bottom.
Step 5: Bake & Serve
The final touches. Brush the top with a beaten egg. This makes it shine golden. Sprinkle a tiny bit of sea salt. Now, into the oven it goes! Bake until it’s beautiful and golden brown. Let it cool just a bit before slicing. The smell will drive everyone crazy!
Cook Time: 25–30 minutes
Total Time: About 1 hour 15 minutes
Yield: 6 servings
Category: Dinner, Main Dish
Three Fun Twists to Try
This recipe loves to play dress-up. You can change it so easily! Here are my favorite twists. They make it feel like a whole new meal. Cooking should be fun, don’t you think?
- Pizza Party Braid: Use marinara, pepperoni, and mozzarella. Skip the broccoli. It’s a pull-apart pizza!
- Thanksgiving Leftovers Braid: Fill it with shredded turkey, a little stuffing, and cranberry sauce. So cozy.
- Veggie Garden Braid: No chicken! Use extra broccoli, carrots, and corn. It’s colorful and delicious.
Which one would you try first? Comment below!
Serving It Up Just Right
This braid is a full meal by itself. But I love to add a little something. A simple green salad with a lemony dressing is perfect. It cuts through the richness. A bowl of tomato soup for dipping is also wonderful. My grandkids love that.
For drinks, a crisp apple cider is lovely. It tastes like fall. For the grown-ups, a chilled glass of sauvignon blanc pairs nicely. It’s light and fresh. Which would you choose tonight? Now, go make some memories in your kitchen.
Keeping Your Braid Beautiful for Later
Let’s talk about keeping your cheesy braid tasty. Cool it completely first. Wrap slices tightly for the fridge. They stay good for three days. For the freezer, wrap the whole braid or pieces well. It keeps for two months. Thaw it in the fridge overnight.
Reheat slices in the oven or toaster oven. This keeps the crust crisp. I once microwaved a slice. It got soggy! Now I always use the oven. Batch cooking this is a smart move. Make two braids and freeze one. You’ll thank yourself on a busy night.
Having a ready-made meal matters. It turns a stressful evening into a cozy one. It feels like a gift from your past self. Have you ever tried storing it this way? Share below!
Simple Fixes for Common Braid Troubles
Sometimes our cooking needs a little help. Your dough might not rise. Check that your water is warm, not hot. Hot water can hurt the yeast. Your filling could be too wet. Always steam and cool the broccoli well. Squeeze out any extra water with your hands.
The braid might leak filling while baking. I remember when mine did! Just make sure your strips are sealed over the filling. Fixing these small issues builds your confidence. You learn how ingredients work together. It also makes sure every bite is perfect and flavorful.
Fun fact: Yeast is a living thing! That’s why it gets bubbly and makes dough rise. Which of these problems have you run into before?
Your Quick Questions, Answered
Q: Can I make this gluten-free?
A: Yes! Use your favorite gluten-free flour blend for the dough.
Q: Can I make it ahead?
A: Assemble the braid and refrigerate it unbaked. Bake it just before dinner.
Q: What are easy ingredient swaps?
A: Try cooked turkey or ham. Use cauliflower instead of broccoli.
Q: Can I make a smaller batch?
A: Absolutely. Just cut all the ingredients in half.
Q: Any optional tips?
A: Add a sprinkle of dried herbs to the dough for extra flavor. Which tip will you try first?
From My Kitchen to Yours
I hope you love making this cheesy braid. It is such a comforting meal. I would love to see your creation. Sharing food stories connects us all. Please show me your beautiful braid. Have you tried this recipe? Tag us on Pinterest! You can find me at @LenasCozyKitchen. I can’t wait to see what you make.
Happy cooking!
—Lena Morales.

Cheesy Chicken Broccoli Braid
Description
A beautiful and delicious braided bread filled with creamy chicken, broccoli, and cheese.
Ingredients
Instructions
- In a medium bowl or the bowl of a stand mixer, dissolve the yeast in warm water with the sugar. Allow it to sit for 5 minutes, or until bubbly. Mix in two cups of flour, the salt, and the olive oil to form a smooth dough. Add additional flour as needed to reach a dough consistency that is slightly tacky to the touch, but not overly sticky. Let the dough rise in a greased bowl for 30 minutes.
- While the dough is rising, mix together the cream cheese, cubed chicken, broccoli, garlic powder, salt, pepper, and 1/2 cup cheese.
- When the dough has risen, gently punch down, then roll out on a piece of parchment paper or silpat forming a rough rectangle approximately 15 by 20 inches.
- Spread chicken and broccoli mixture down middle of dough, then sprinkle with the remaining cheese. Using a pizza cutter or sharp knife, cut one inch strips at a diagonal from outside of the rectangle to filling in the center. Fold the strips of dough over filling, alternating sides to make braid pattern. When you get to end of braid, tuck in ends.
- Move parchment or silpat to baking sheet. Beat egg lightly with water and brush egg mixture over braid. Sprinkle lightly with sea salt.
- Bake at 350 degrees for 25-30 minutes, or until light golden brown.
Notes
- Nutrition per serving: Calories: 467kcal | Carbohydrates: 47g | Protein: 15g | Fat: 25g | Saturated Fat: 12g | Cholesterol: 61mg | Sodium: 642mg | Potassium: 269mg | Fiber: 3g | Sugar: 3g | Vitamin A: 886IU | Vitamin C: 27mg | Calcium: 198mg | Iron: 3mg


Leave a Reply