The Best Kind of Kitchen Mess
Hello, my dear. Come sit. Let’s talk about peanut butter balls. These are my favorite treats to make. They are simple and fun. You get to use your hands. I still laugh at that. My grandkids always have sticky fingers and big smiles.
Making them together matters. It is not just about the food. It is about the time spent. You are making a sweet memory. That is the most important ingredient. Do you have a favorite treat you make with your family? Tell me about it.
A Little Crunch of History
These treats are very old-fashioned. My own Nana made them. She did not have fancy tools. She used a big wooden spoon. Her arms would get tired from mixing. But she never minded.
She taught me a good lesson. Good food does not need to be complicated. Simple ingredients can make the happiest bites. That is why this recipe matters. It connects us to the past. Fun fact: The Rice Krispies cereal was invented in 1927! People have been enjoying that snap for a long time.
Let’s Get Our Hands Sticky
First, mix the peanut butter and soft butter. Doesn’t that smell amazing? Add the powdered sugar. It will look like sweet, sandy dough. Now, the fun part! Gently fold in the Rice Krispies. Listen to that quiet crackle.
Then, pop the bowl in the freezer. Wait 30 minutes. This chill helps you roll the balls. They will not stick as much. Roll them small, about one inch. Place each little ball in a paper cup. What is your favorite part so far? Mixing or shaping?
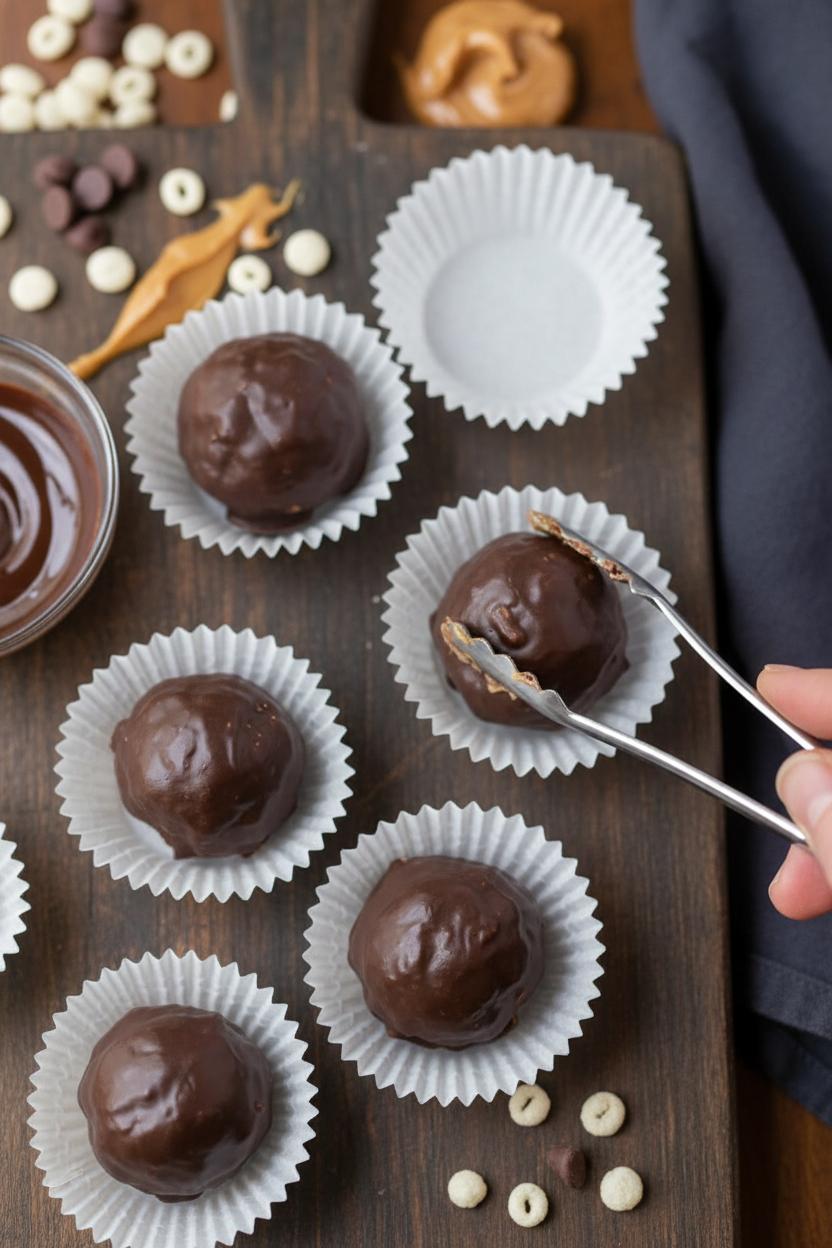
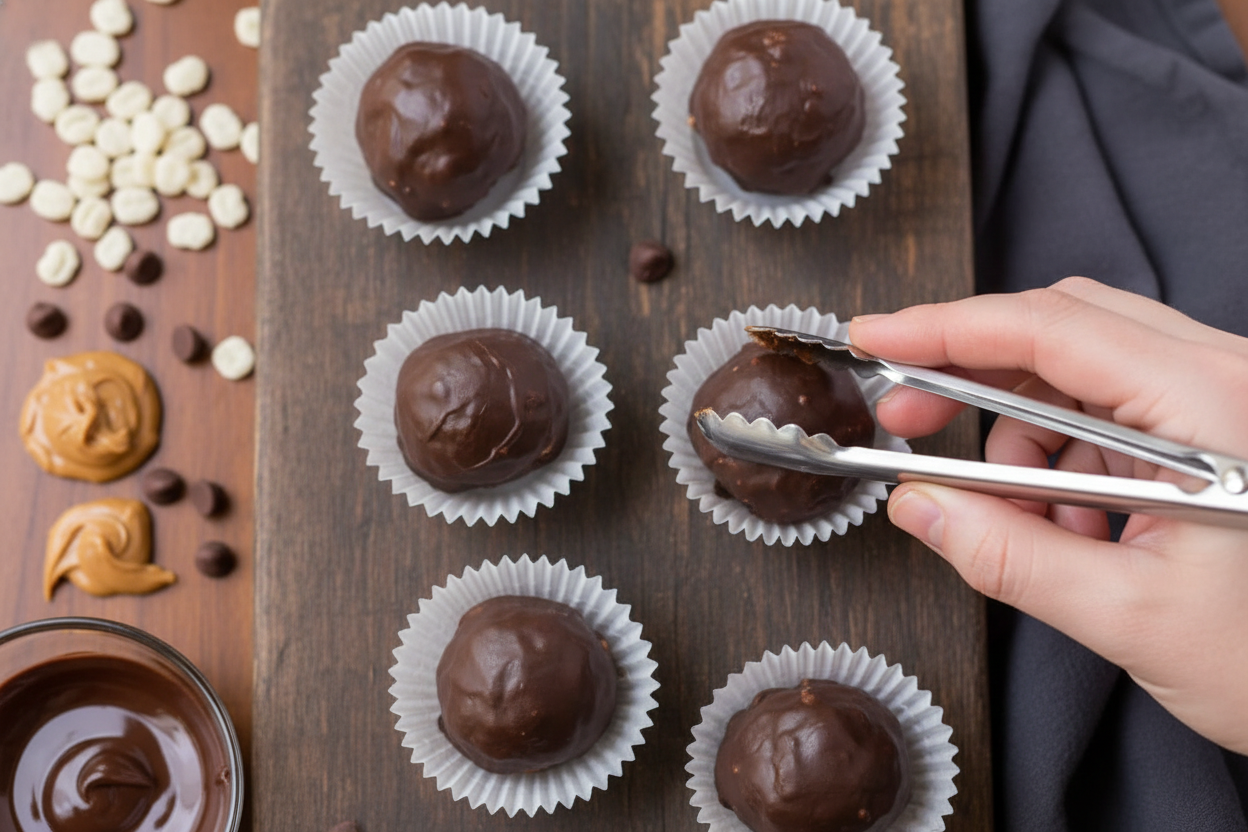
The Magic Chocolate Coat
Now for the magic. Melt the candy coating slowly. Stir it all the time. Be patient. Then, dip each ball. I use a fork to let the extra chocolate drip off. This makes a nice thin shell.
Lay them on wax paper to set. The fridge finishes the job. The chocolate gets firm and shiny. You get a perfect crunch outside. Inside, it is soft and peanut buttery. Which do you like better, milk chocolate or dark chocolate coating?
A Sweet Little Package
Keep your finished balls in the fridge. Store them in a sealed container. They are a wonderful little gift. I love to put a few in a small box. I give them to a neighbor or a friend having a hard day.
This matters too. Sharing food is sharing love. It is a small act of kindness. It says, “I was thinking of you.” That is the real recipe. A bit of peanut butter, a bit of crunch, and a whole lot of heart.
Ingredients:
| Ingredient | Amount | Notes |
|---|---|---|
| Crunchy peanut butter | 1 cup | |
| Butter | 1/4 cup | softened |
| Powdered sugar | 1 cup | |
| Rice Krispies cereal | 2 cups | |
| Chocolate candy coating | As needed | For dipping |
| Mini muffin paper cups | 54 | For serving |
Crunchy Peanut Butter Rice Krispie Balls: A Sweet Little Secret
Hello, my dear. Come sit at the counter. Let’s make a treat my grandkids always beg for. These little balls are pure joy. They are crunchy, sweet, and just a tiny bit messy. Doesn’t that sound perfect? I love how simple they are. You don’t even need to turn on the oven. We just mix, roll, and dip. The best part is licking the spoon. I still laugh at that.
Here is how we make our sweet secret balls. Follow these steps with me.
- Step 1: Grab your big mixing bowl. Put the crunchy peanut butter, soft butter, and powdered sugar inside. Use your hand mixer to beat them together. Mix until it looks smooth and creamy. This part is easy and fun. (A hard-learned tip: Make sure your butter is soft! If it’s too hard, the mix will be lumpy.)
- Step 2: Now, pour in the Rice Krispies cereal. Gently fold them in with a big spoon. You want every flake to get a little coat of peanut butter. Listen to that snap, crackle, pop! It’s a happy sound. Then, pop the whole bowl into the freezer for thirty minutes.
- Step 3: Time to get your hands dirty! Scoop out some dough. Roll it into a one-inch ball between your palms. Place each ball into a mini paper cup. This keeps them from sticking later. My grandson once tried to make a giant ball. It was bigger than his fist! What silly shape would you make? Share below!
- Step 4: Let’s melt the chocolate coating. Use a small saucepan on very low heat. Stir it constantly until it’s smooth and shiny. Be patient here. If the heat is too high, the chocolate will get thick. Doesn’t that smell amazing? It reminds me of a candy shop.
- Step 5: Here is the dipping dance. Place a ball on a fork. Dip it into the warm chocolate. Let the extra drip back into the pot. Then set it on wax paper. Repeat with all the balls. Finally, chill them until the chocolate is hard. Then try not to eat them all at once!
Cook Time: 30 minutes (freezing) + 15 minutes (setting)
Total Time: 1 hour 15 minutes
Yield: About 54 balls
Category: Dessert, Snack
Three Fun Twists to Try
Once you master the basic recipe, you can play! Here are three of my favorite twists. They are all simple and delicious.
- Pretzel Power: Add a handful of crushed pretzel pieces with the cereal. You get a sweet and salty crunch.
- Berry Surprise: Poke a dried cranberry or raisin into the center of each ball before dipping. It’s a fruity little secret inside.
- Cookie Swirl: Use chocolate chip peanut butter instead of plain. It gives you tiny chocolate bits in every single bite.
Which one would you try first? Comment below!
Serving Them With Style
These treats are wonderful all on their own. But you can make them extra special. For a party, stack them in a tall glass bowl. They look like little jewels. You could also drizzle them with white chocolate. It makes a pretty pattern on top.
What should you drink with them? A cold glass of milk is the classic choice. It’s perfect for kids. For the grown-ups, a small cup of coffee is lovely. The bitter coffee tastes great with the sweet peanut butter. Which would you choose tonight?
Keeping Your Treats Tasty
These little balls love the cold. Always store them in the fridge. Use an airtight container so they stay fresh. They will keep for about one week this way.
You can also freeze them for a month. I wrap the whole container in foil. This stops freezer smells from getting in. Thaw them in the fridge overnight when you want one.
I once left a batch on the counter. The chocolate got soft and messy. Now I never skip the fridge step. It keeps everything crunchy and perfect.
Making a big batch saves so much time. Mix once, enjoy for weeks. This matters for busy families. You always have a sweet bite ready. Have you ever tried storing it this way? Share below!
Simple Fixes for Common Hiccups
Is your mixture too sticky to roll? Your hands might be too warm. Wash them in cold water and dry well. The cold helps the peanut butter firm up.
Is the chocolate coating too thick? Your heat might be too high. Melt it slowly on low heat. Stir it constantly until it is smooth. I remember when I rushed this once. The chocolate turned lumpy and dull.
Are the balls falling off the fork? Try using two forks to roll them. Let extra chocolate drip back into the pot. This gives you a nice, thin coating. Getting this right builds your kitchen confidence. A smooth finish also tastes much better. Which of these problems have you run into before?
Your Quick Questions, Answered
Q: Can I make these gluten-free? A: Yes! Just use a certified gluten-free rice cereal. Check your peanut butter label too.
Q: How far ahead can I make them? A: They are perfect for making ahead. Follow the storage tips above for best results.
Q: What if I only have smooth peanut butter? A: That works just fine. You will miss a little crunch, but they are still delicious.
Q: Can I double the recipe? A: Absolutely. Use a very large bowl for mixing. This is great for parties or gifts.
Q: Any fun extra tips? A: Try a sprinkle of sea salt on top before the chocolate sets. *Fun fact: Salt makes sweet things taste even sweeter!* Which tip will you try first?
From My Kitchen to Yours
I hope you love making these sweet bites. Cooking is about sharing joy with others. I would love to see your creations.
Share a picture of your finished treats. It makes this old grandma’s heart so happy. Have you tried this recipe? Tag us on Pinterest! You can find me at @LenasCozyKitchen.
Thank you for spending time with me today. I am so glad we could cook together.
Happy cooking!
—Lena Morales.

Crunchy Peanut Butter Rice Krispie Balls
Description
A sweet and crunchy no-bake treat combining peanut butter, crispy cereal, and a chocolate coating.
Ingredients
Instructions
- Add peanut butter, butter and sugar to a large bowl and beat with a hand mixer on medium speed until combined. Mix in Rice Krispies until fully incorporated.
- Freeze the mixture for 30 minutes. Shape into 1 inch balls. Place each ball in a mini muffin paper cup. Refrigerate.
- In a small saucepan, over low heat, melt candy coating while stirring constantly.
- One at a time, place a rice krispies ball on a fork and dip in the chocolate until fully coated. Place on a baking sheet, lined with wax paper and refrigerate until set. Store in an airtight container in the refrigerator.
Notes
- Nutrition per serving (1 ball): Calories: 104 kcal, Carbohydrates: 8 g, Protein: 2 g, Fat: 7 g, Saturated Fat: 2 g, Cholesterol: 4 mg, Sodium: 75 mg, Potassium: 69 mg, Sugar: 5 g, Vitamin A: 205 IU, Vitamin C: 1.4 mg, Calcium: 5 mg, Iron: 0.9 mg.


Leave a Reply