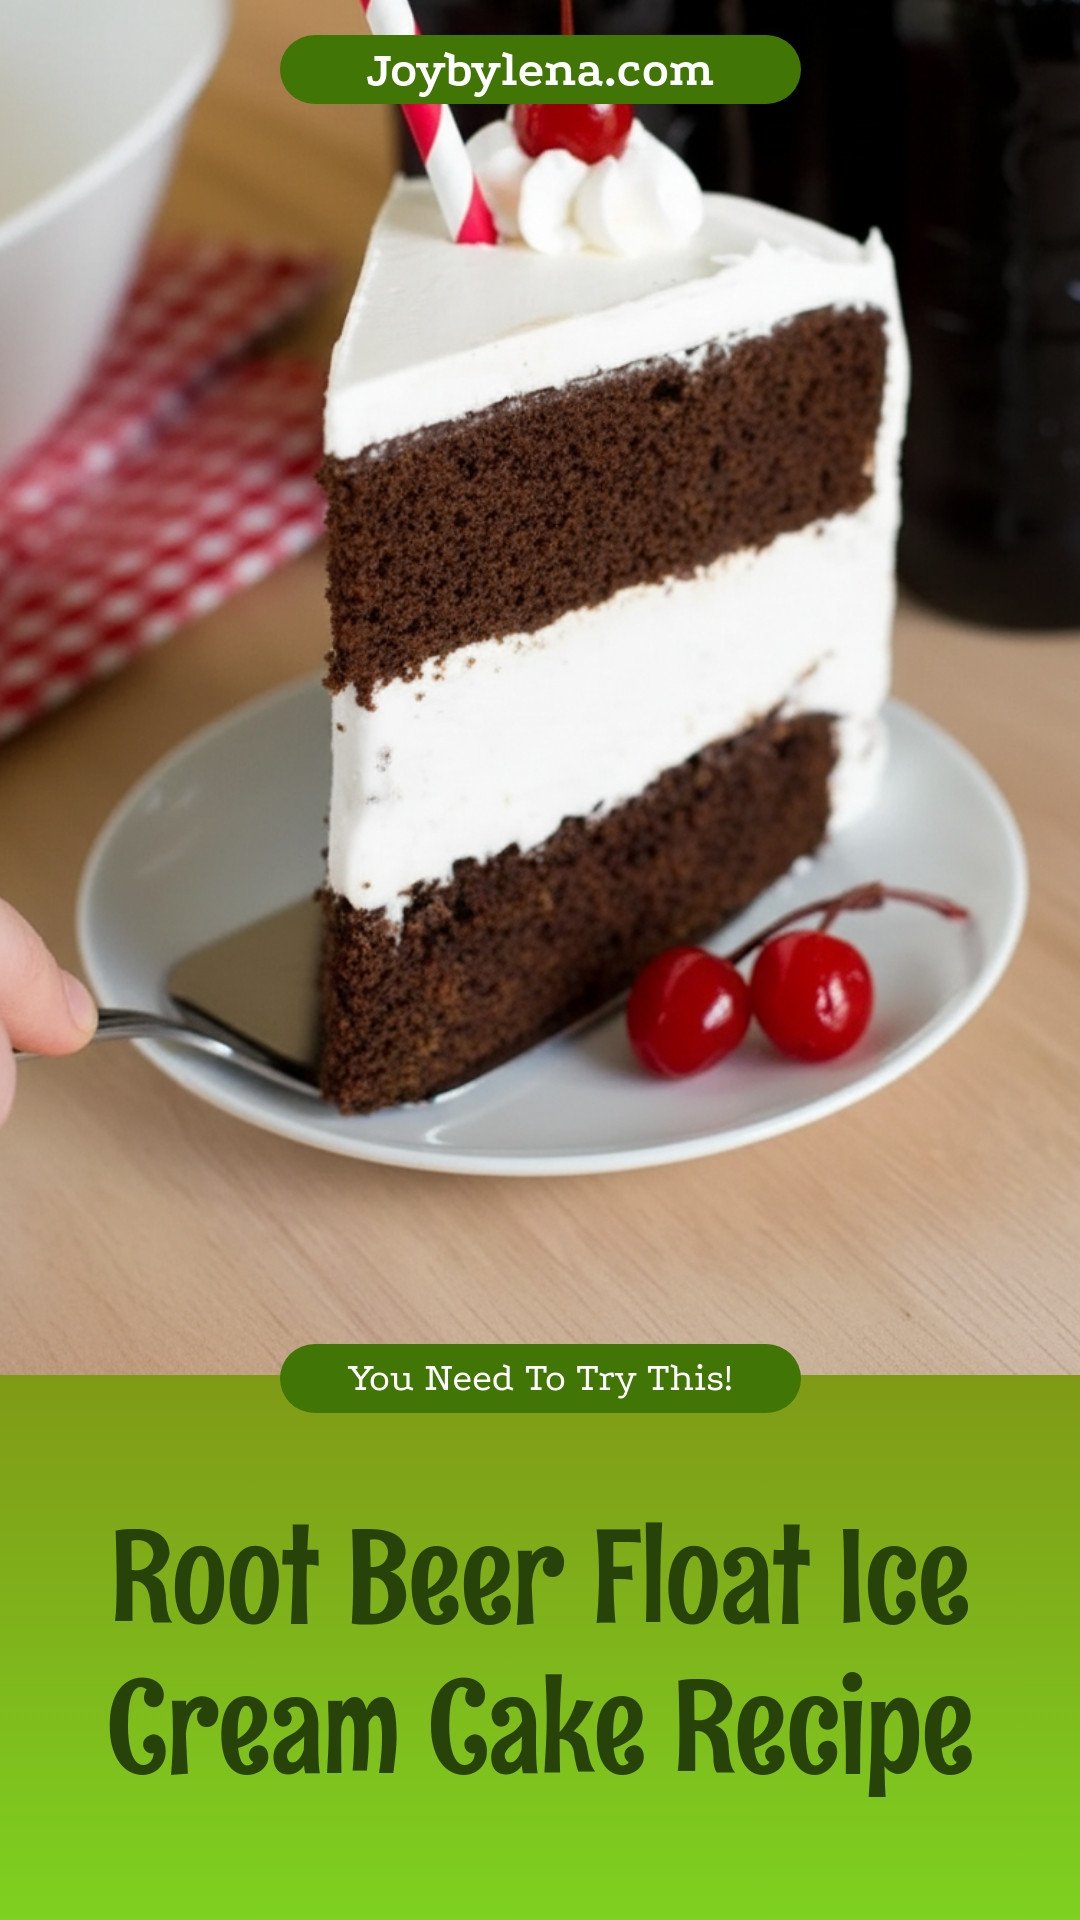
The Soda Pop Cake Secret
My grandson Leo asked for a root beer float for his birthday. I wanted the whole party in one bite. So I baked the float right into a cake. His face when he tasted it? Pure magic. I still laugh at that.
This cake matters because it turns a simple drink into a celebration. It shows how fun food can be. What was your favorite birthday treat growing up? I would love to hear your story.
Let’s Talk About That Batter
Now, the cake part is special. You mix cocoa and sugar with real root beer. You melt the butter right in the pan. Doesn’t that smell amazing? It will look a little lumpy when you add the flour. That is perfectly okay. Trust your grandma on this one.
Fun fact: The baking soda reacts with the soda pop. This makes the cake super fluffy and light. It is like a little science experiment in your kitchen.
The Icy Heart of the Cake
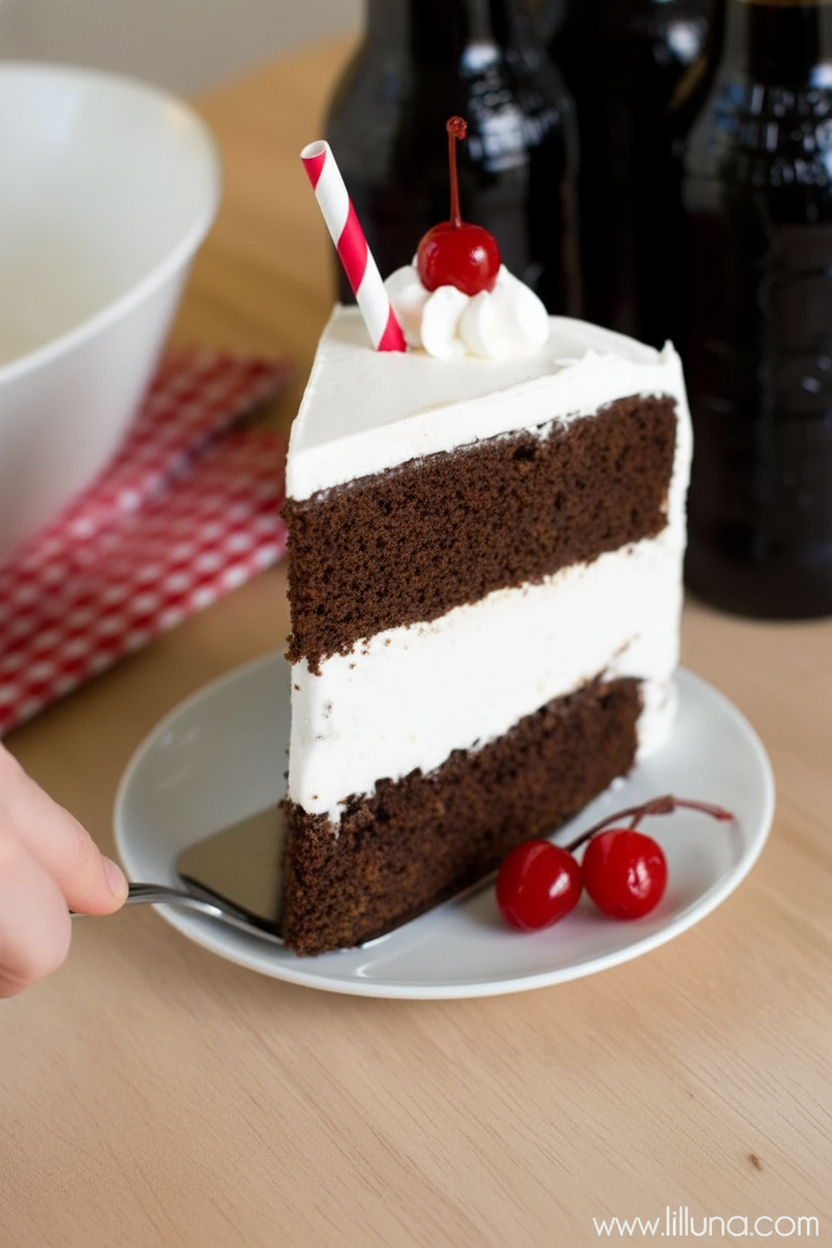
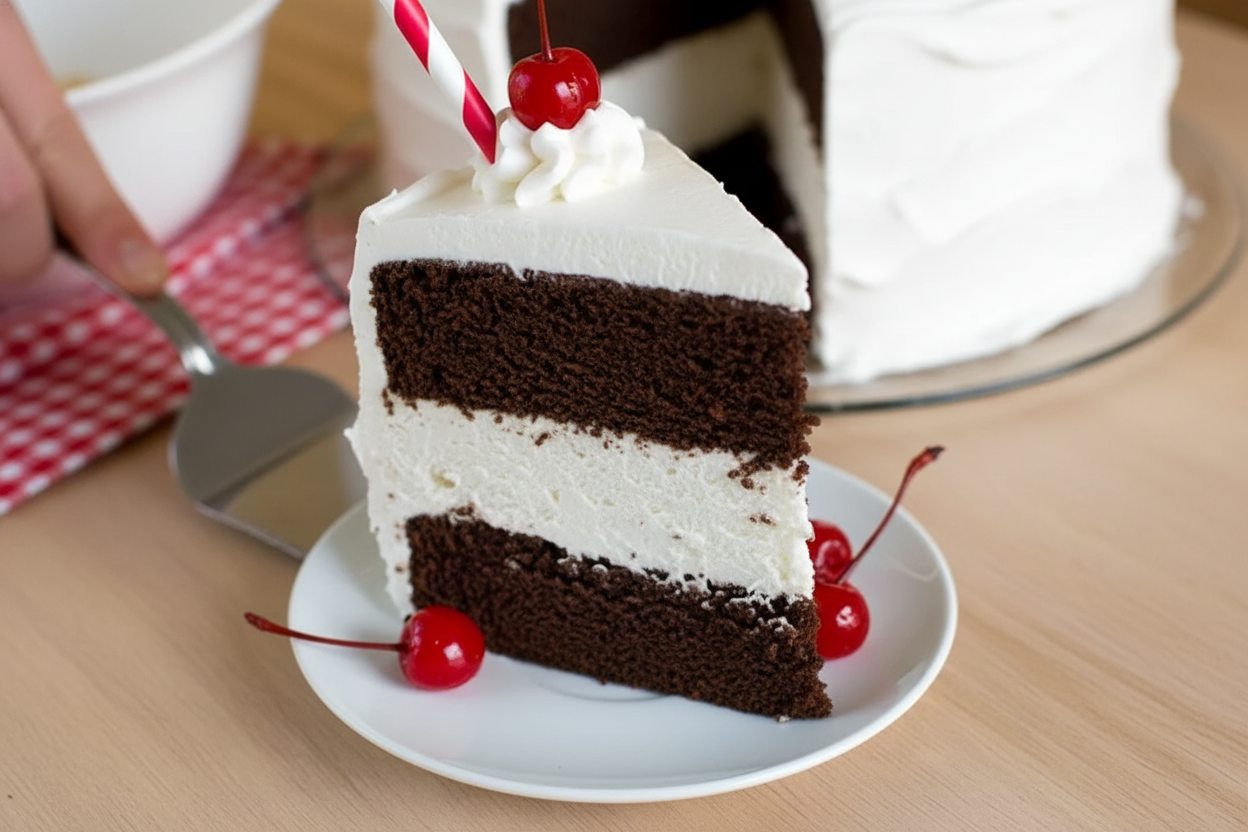
Here is the trick. You must soften the ice cream first. Spread it in a pan lined with plastic wrap. Then freeze it solid. This ice cream layer matters. It keeps everything cold and gives you that true float feeling.
It is like making a frozen puzzle piece. Do you usually prefer vanilla ice cream or chocolate? I am a vanilla fan myself. It lets the root beer flavor shine.
Putting It All Together
Assembly is the fun part. Cake, then your ice cream disk, then more cake. Now, the whipped cream frosting. Make sure you whip it until it forms stiff peaks. This sweet cloud holds everything together.
Frost the whole thing quickly. Top it with bright red cherries. Then, back into the freezer it goes. This waiting is the hardest part. But it makes slicing so much easier.
Why We Make Food Like This
This cake is not for every day. It is for birthdays and big wins. It is about creating a memory. The work you put in becomes part of the love you serve.
That is the second reason this matters. Food connects us. It tells a story. What food reminds you of someone you love? For me, this cake will always remind me of Leo’s smile.
Ingredients:
| Ingredient | Amount | Notes |
|---|---|---|
| all purpose flour | 2 cups | |
| natural unsweetened cocoa powder | 1 cup | |
| sugar | 1 1/4 cup | |
| brown sugar | 1/2 cup | |
| root beer or cherry coke | 2 cups | not diet |
| unsalted butter | 1/2 cup | |
| eggs | 2 | |
| root beer extract or cherry extract | 1 tbsp | |
| baking soda | 1 1/2 tsp | |
| salt | 1 tsp | |
| vanilla ice cream | 1 quart | |
| heavy whipping cream | 3 cups | |
| powdered sugar | 2/3 cup | |
| vanilla extract | 1 tsp | |
| salt | pinch | |
| cherries | on top | for garnish |
My Root Beer Float Cake Adventure
Hello, my dear! Come sit. Let me tell you about this silly cake. It started with my grandson, Miguel. He loved root beer floats more than anything. One hot day, I thought, why not make it a cake? I still laugh at that. My first try was a drippy mess! But we ate it with spoons and laughed. Now, it’s our favorite summer celebration treat. It tastes like a party in a slice. Doesn’t that sound fun? Let’s make it together.
Step 1: The Ice Cream Layer
First, let’s soften the ice cream. Take it out of the freezer. Let it sit on the counter for a bit. We need it to be spreadable, not soup! Line a pan with plastic wrap. Leave extra hanging over the sides. Now, spread the ice cream smoothly. This is the cake’s chilly middle. Pop it back in the freezer. It needs to get firm again. (My hard-learned tip: Use the same size pan as your cake pans. It makes stacking so much easier later!).
Step 2: The Chocolate Cake
Time for the chocolate cake! Preheat your oven to 325°F. Get your cake pans ready. I always use parchment paper. It’s like a little bed for the cake. Now, the fun part. In a pot, mix cocoa, sugars, root beer, and butter. Heat it until the butter melts. Oh, that smell is amazing! It’s like a chocolate soda shop. Let it cool a little. Then stir in the root beer extract. This gives it that special fizzy flavor.
Step 3: Baking the Cake
Crack two eggs into your big bowl. Pour in that warm chocolate mixture. Mix it well. Now, add your flour, baking soda, and salt. The batter might look a little lumpy. That’s perfectly okay, I promise. It bakes up beautifully. Pour it into your waiting pans. Slide them into the oven. They’ll bake for about 30 minutes. Your kitchen will smell like a dream. What’s your favorite baking smell? Share below!
Step 4: Whipped Cream Frosting
Let the cakes cool completely. Patience is a cook’s secret ingredient! While you wait, make the whipped cream. Pour the heavy cream into a cold bowl. Add powdered sugar, vanilla, and a tiny pinch of salt. Whip it until it forms soft, fluffy peaks. Don’t walk away! Cream turns to butter if you whip it too long. I learned that the hard way. Taste a little spoonful. It’s a cloud of sweetness.
Step 5: Assembly & Freezing
Time to build our masterpiece! Place one chocolate cake layer on a plate. Unwrap your firm ice cream disk. Place it right on top. Doesn’t that look wild? Top it with the second cake layer. Now, frost the whole thing with your whipped cream. Be generous! Top it with bright red cherries. Finally, freeze the whole cake. This lets everything set up nicely. Then, just slice and serve. It’s a cold, creamy, chocolaty miracle.
| Cook Time | 30 minutes |
| Total Time | 5 hours (includes freezing) |
| Yield | 10 servings |
| Category | Dessert, Cake |
Three Fun Twists to Try
This cake is like a blank canvas. You can paint it with different flavors! Here are a few ideas from my kitchen. I love playing with recipes. It makes them your own.
- Cherry Cola Carnival: Use cherry cola and cherry extract. Add chopped maraschino cherries to the ice cream layer. It’s a burst of red in every bite.
- Ginger Cream Dream: Use ginger beer instead of root beer. Add a pinch of cinnamon to the cake. Use ginger snap cookies crumbled on top. It’s warm and spicy.
- Chocolate Malt Madness: Use malted milk powder in the whipped cream. Use chocolate ice cream instead of vanilla. Top with malted milk balls. It’s like an old-fashioned soda fountain.
Which one would you try first? Comment below!
Serving It Up With Style
This cake is a star all by itself. But a little presentation makes it extra special. For a party, I drizzle a little chocolate sauce on each plate first. Then place the slice on top. A tiny sprinkle of crushed peanuts adds a nice crunch. It reminds me of a sundae!
What to drink with it? For the grown-ups, a small glass of bourbon or a coffee liqueur is nice. It sips like a dessert itself. For everyone, a frosty glass of cold milk or, of course, more root beer! The bubbles cut through the richness perfectly. Which would you choose tonight?
Keeping Your Ice Cream Cake Happy
This cake lives in the freezer. Wrap it tight with plastic wrap. This keeps ice crystals away. You can store it for up to a week. Let it sit on the counter for 10 minutes before slicing. This softens it just right.
You can bake the chocolate layers ahead. Wrap them and freeze for a month. Thaw them at room temperature before building. This is a great batch-cooking trick. It makes party day so much easier.
I once forgot to wrap a cake tightly. It tasted like frost! Now I am very careful. Storing food well shows care for your work. It means every bite is as good as the first. Have you ever tried storing it this way? Share below!
Simple Fixes for Common Cake Troubles
Is your cake layer stuck? Run a knife around the edge. Place a warm towel on the pan bottom. The cake will slide right out. I remember when my first cake broke. I just patched it with whipped cream!
Is your whipped cream too soft? Make sure your bowl and cream are cold. Whip it just until peaks stand up. Over-whipping makes butter. Getting this right builds your kitchen confidence. A stable frosting holds your beautiful layers together.
Is the ice cream layer melting fast? Work quickly and keep everything cold. Pre-freeze your cake plate. This matters for flavor and texture. You want distinct, creamy layers. Which of these problems have you run into before?
Your Quick Questions, Answered
Q: Can I make this gluten-free? A: Yes! Use your favorite gluten-free flour blend. The results are wonderful.
Q: How far ahead can I make it? A: Assemble the whole cake a day before. The flavors get even better.
Q: What if I don’t have root beer extract? A: Use vanilla extract. The cake will still taste chocolatey and good.
Q: Can I make a smaller cake? A: Halve the recipe. Use two 6-inch cake pans. Baking time may be less.
Q: Any fun topping ideas? A: Try crushed root beer barrels or chocolate sprinkles. *Fun fact: The first root beer floats were called “black cows.”* Which tip will you try first?
From My Kitchen to Yours
I hope you love making this special cake. It is pure joy to share. I would love to see your creation. Your kitchen stories make my day.
Show me your masterpiece. Have you tried this recipe? Tag us on Pinterest! You can find me at @LenasCozyKitchen. I will be looking for your photos.
Happy cooking!
—Lena Morales.
Root Beer Float Ice Cream Cake: Root Beer Float Ice Cream Cake Recipe
Description
Experience the nostalgic flavors of a classic root beer float in a decadent ice cream cake form, featuring rich chocolate cake and creamy vanilla ice cream.
Ingredients
Instructions
- ICE CREAM. Remove the vanilla ice cream from the freezer and allow it to soften at room temperature. Line a 9″x2″ cake pan with plastic wrap, making sure that you have a fair amount of overhang. Using a spatula, carefully spread the ice cream so that you have a nice even layer. Cover and place in the freezer to firm up, about 2 hours.
- PREP. Preheat your oven to 325°F. Line the bottoms of 2 9″x2″ cake pans with parchment paper and then lightly coat with baking spray, set aside.
- WET INGREDIENTS. Meanwhile, in a saucepan set over medium heat, combine the cocoa powder, sugars, root beer and butter. Heat until the butter has melted. Remove from the heat and add the root beer extract. Allow to cool while preparing the remaining ingredients.
- DRY INGREDIENTS. In a large mixing bowl, combine slightly warm butter mixture with the eggs. Mix until the eggs are incorporated. Gradually add the flour, salt and baking soda. The batter will look slightly lumpy but that’s ok.
- BAKE. Pour into the prepared pans and bake for 30 minutes. Remove from the oven and allow the cakes to cool in the pans for 30 minutes, then remove them and allow them to cool completely on a wire rack.
- WHIPPED CREAM. Whip the cream along with the powdered sugar, vanilla and salt until it is stiff.
- ASSEMBLE. To assemble the cake, place one layer of chocolate cake onto a plate, cake stand, or cake round. Place the ice cream (with plastic wrap removed) onto the top of the cake. Place the other layer on top of the ice cream. Using a spatula, frost the top and sides of the cake with the whipped cream. Garnish with cherries and freeze until you’re ready to eat it.
Notes
- For best results, use a full-sugar root beer or cherry cola, as diet versions can alter the texture and flavor. Allow the cake to sit at room temperature for 5-10 minutes before slicing for easier serving.


Leave a Reply