The Magic of a Cast Iron Skillet
My old cast iron skillet is my best friend in the kitchen. It has seen so many cakes and cobblers. I love how it goes from the stove to the oven. It makes everything taste better.
This pan holds heat so well. That is why our pineapple dessert gets such a perfect crust. It feels solid and dependable, just like a good recipe. Do you have a favorite pan you love to cook with?
A Sweet, Sticky Beginning
We start with butter and brown sugar in the warm skillet. You stir until it becomes a sweet, bubbly syrup. It smells like caramel and happiness. This is the secret to our dessert.
This buttery layer is so important. It soaks into the cake while it bakes. This keeps every single bite moist and full of flavor. I still laugh at how I almost burned it my first time. I was talking to my neighbor and forgot to stir!
Creating a Tropical Sunset
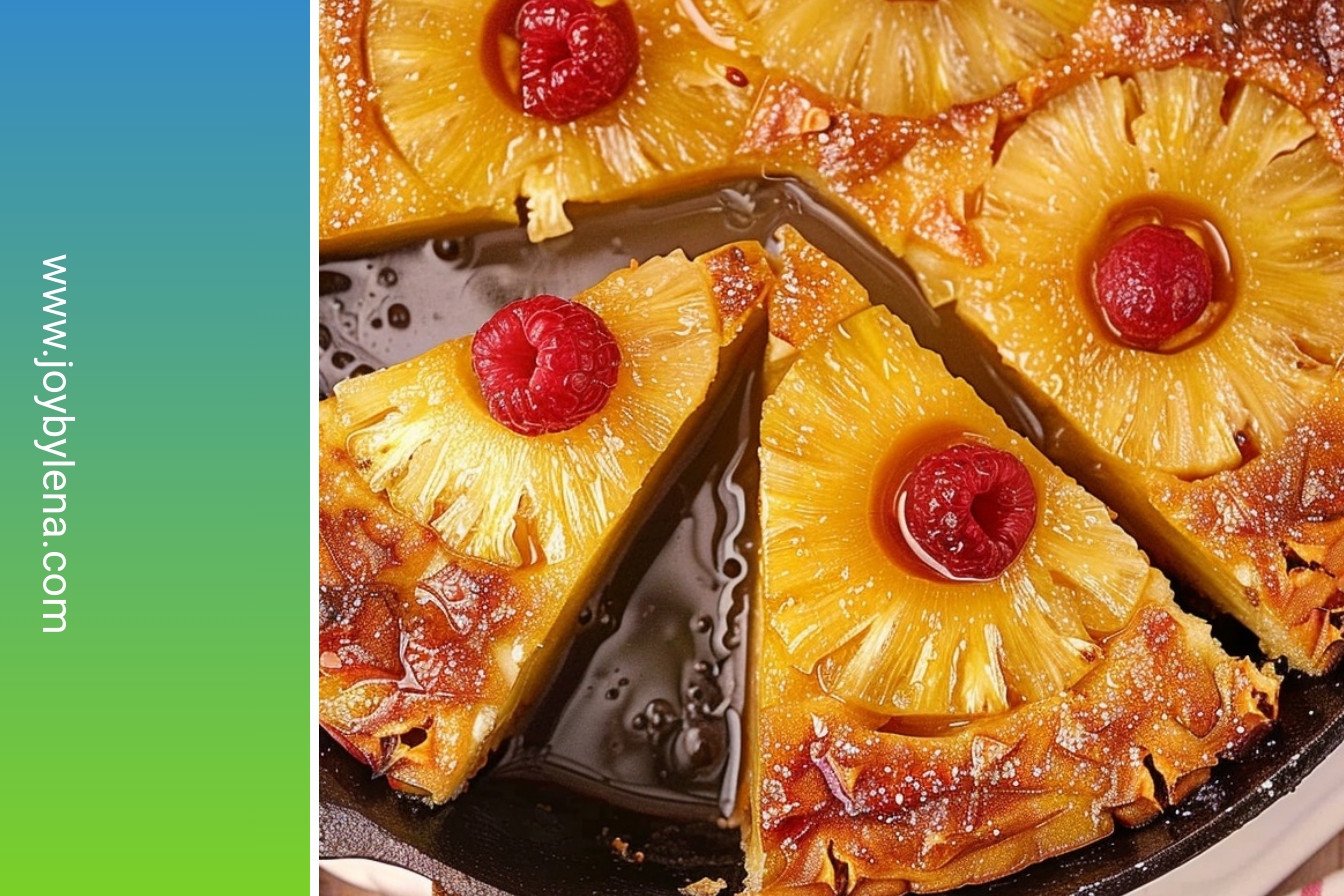
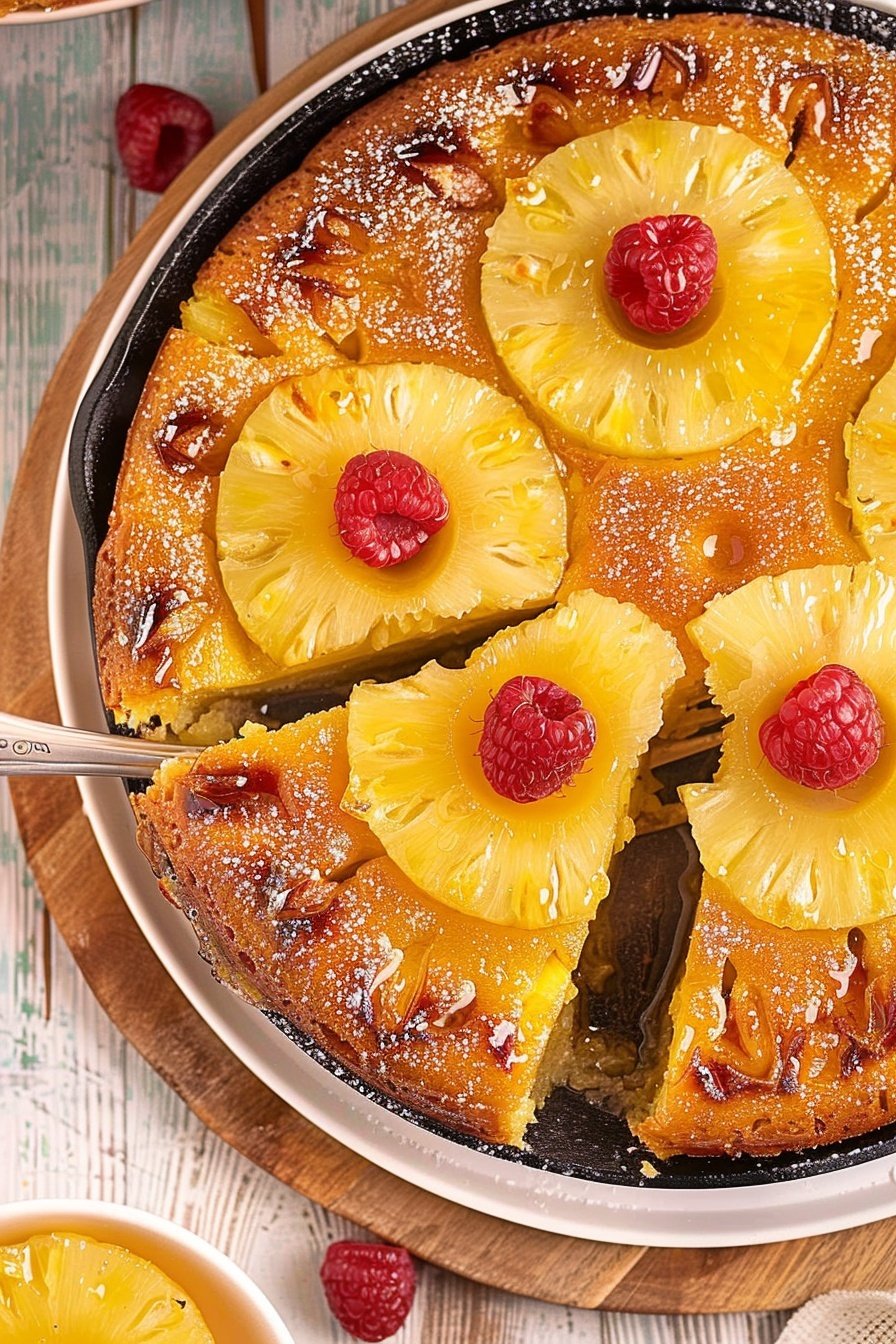
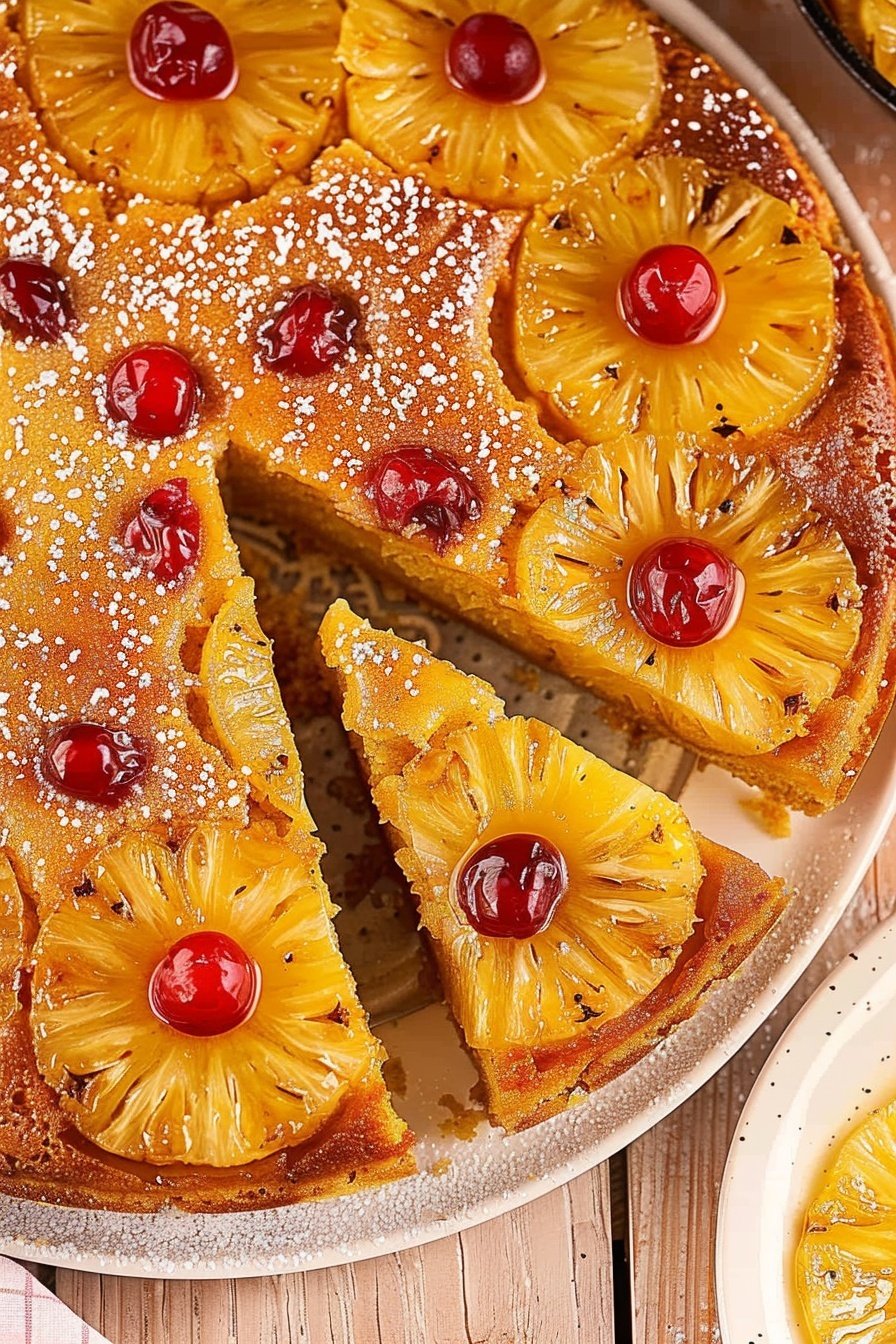
Next, we arrange the pineapple rings and cherries. They sit in that golden syrup. It looks like a bright, sunny flower at the bottom of the pan. It’s almost too pretty to cover up.
*Fun fact*: The cherry in the center of the pineapple ring is a classic look. It makes the cake a beautiful surprise when you flip it over. What is your favorite fruit to bake with? I’d love to know.
Why We Flip the Cake
After baking, we let the cake cool for just five minutes. Then comes the exciting part. You place a plate over the skillet and flip the whole thing over. You have to be brave and do it quickly.
This flip matters because it shows off the beautiful fruit. The caramel becomes a shiny, delicious glaze on top. It turns a simple cake into something special. It shows you care about the little details.
Sharing Warmth With Others
This dessert is best shared warm. The sweet pineapple and soft cake are so comforting. It fills your kitchen with the most amazing smell. Doesn’t that smell amazing?
Food is about more than just eating. It is a way to show love. Sharing a warm slice of this cake creates a happy memory. That is why cooking for people matters so much. Tell me, what is a food that always makes you feel loved?
Ingredients:
| Ingredient | Amount | Notes |
|---|---|---|
| unsalted butter | 1 cup | divided |
| light brown sugar | 1 cup | firmly packed |
| pineapple slices in juice | 1 (14 to 20-ounce) can | juice reserved |
| maraschino cherries | ||
| butter or yellow cake mix | 1 (15.25-ounce) box | |
| large eggs | 3 |
My Cast Iron Pineapple Dream
Hello, my dear! Come sit with me. I want to share a special recipe today. It is my Cast Iron Pineapple Dessert. This cake is pure, warm sunshine. It always reminds me of family picnics and happy chatter. The smell fills the whole house with sweetness. Doesn’t that sound wonderful?
We will make a gooey caramel right in the skillet. Then we arrange pineapple rings and cherries on top. They look like little golden flowers. Finally, we pour a simple cake batter over it all. The magic happens in the oven. It bakes into a beautiful, upside-down cake. I still laugh at the first time I flipped one. I held my breath!
Step 1: Make the Caramel Base
First, let’s get our skillet warm. Preheat your oven to 325°F. Now, put half the butter and all the brown sugar in the skillet. Heat it on the stove until it melts together. Stir it the whole time. This makes our caramel base. It will be bubbly and rich. (Hard-learned tip: Don’t walk away from the butter and sugar! It can burn in a blink.)
Step 2: Prepare the Liquid
Next, we need our liquid. Open the can of pineapple slices. Drain the juice into a measuring cup. Now, add just enough water to make one full cup. Melt the rest of your butter in a small bowl. I like to use the microwave for this. It is so easy. See? We are getting everything ready.
Step 3: Create the Batter
Time to make the cake batter. Put the cake mix in a big bowl. Add the eggs, your juice mixture, and the melted butter. Now, use a mixer to beat it all. Mix for about two minutes. The batter will become smooth and lovely. Why do we add the eggs? Share below!
Step 4: Assemble the Design
Let’s create our design. Take your drained pineapple rings. Place them gently on the caramel in the skillet. Put a cherry in the center of each ring. It is like making a picture. Then, slowly pour the cake batter over everything. Spread it evenly with a spoon.
Step 5: Bake to Perfection
Now, the oven does its work. Bake your creation for about 50 minutes. You will know it is done when a toothpick poked in the center comes out clean. The top will be a beautiful golden brown. Your kitchen will smell amazing. I love this part.
Step 6: The Grand Reveal
Be patient for five minutes while it cools. Then, take a big plate and put it over the skillet. Carefully, flip the whole thing over. Lift the skillet slowly. Ta-da! Your gorgeous cake is revealed. Serve it warm. It is pure happiness.
| Cook Time | 50 minutes |
| Total Time | 1 hour 10 minutes |
| Yield | 10 servings |
| Category | Dessert |
Three Fun Twists to Try
This recipe is wonderful as it is. But you can also play with it! Here are some fun ideas. They make the cake feel new every time. My grandkids love choosing a different version.
- Tropical Escape: Use canned peach slices along with the pineapple. It tastes like a summer vacation.
- Nutty Delight: Sprinkle chopped pecans or walnuts over the caramel before adding the fruit. It adds a lovely crunch.
- Spiced Warmth: Mix a teaspoon of cinnamon into the brown sugar and butter. It makes the whole house smell even cozier.
Which one would you try first? Comment below!
Serving Your Sunshine Cake
This cake is a star all by itself. But a little extra touch makes it perfect. I love serving a warm slice with a scoop of vanilla ice cream. The cold ice cream melts into the warm pineapple. It is a little bite of heaven. A dollop of whipped cream is also wonderful.
What should we drink with it? A cup of hot coffee is my favorite. The bitter taste balances the sweet cake. For a special treat, a sweet dessert wine is nice. For the kids, a tall glass of cold milk is the best partner. It is the perfect way to end a meal. Which would you choose tonight?
Keeping Your Pineapple Dessert Happy
This dessert is best eaten warm from the oven. But it keeps well in the fridge. Just cover the skillet tightly with a lid or foil. It will stay good for up to five days. You can also freeze it for a month. Wrap slices well in plastic wrap.
To reheat, I like using my oven. It makes the topping crispy again. I warm a slice at 300 degrees for ten minutes. I once used a microwave and it got soggy. The oven is always better for bringing back that magic.
This is a great dessert for batch cooking. You can make two and freeze one. It saves so much time for a surprise guest. Having a sweet treat ready matters. It makes your home feel welcoming and cozy. Have you ever tried storing it this way? Share below!
Simple Fixes for Common Hiccups
Sometimes the cake can stick to the pan. Make sure your cast iron is well-seasoned. I remember when my first one stuck terribly. Greasing the skillet well before the butter and sugar helps a lot. This matters because a clean flip makes you feel like a pro.
The fruit might all move to one side. Pour your batter slowly over the back of a spoon. This gentle method stops the fruit from shifting. A beautiful pattern makes the dessert extra special for your family.
Your cake might be gooey in the middle. Just bake it a few minutes longer. Use a toothpick to check if it comes out clean. This step matters for the perfect texture. Which of these problems have you run into before?
Your Quick Questions, Answered
Q: Can I make this gluten-free? A: Yes! Just use a gluten-free cake mix. It works just as well.
Q: Can I make it ahead? A: You can prepare the batter an hour before. Keep it in the fridge until you are ready.
Q: What if I don’t have pineapple? A: Try canned peaches or pears. They caramelize beautifully with the brown sugar.
Q: Can I make a smaller portion? A: Halve the recipe. Use a smaller eight-inch skillet.
Q: Any optional tips? A: A sprinkle of cinnamon in the batter is lovely. Fun fact: Cinnamon was once more valuable than gold! Which tip will you try first?
Until Next Time, My Friend
I hope this recipe brings warmth to your kitchen. It always reminds me of Sunday dinners with my grandkids. The smell of caramelized pineapple is pure happiness.
I would love to see your creation. Sharing food is how we share our hearts. Have you tried this recipe? Tag us on Pinterest! I look at every single photo.
Happy cooking!
—Lena Morales.
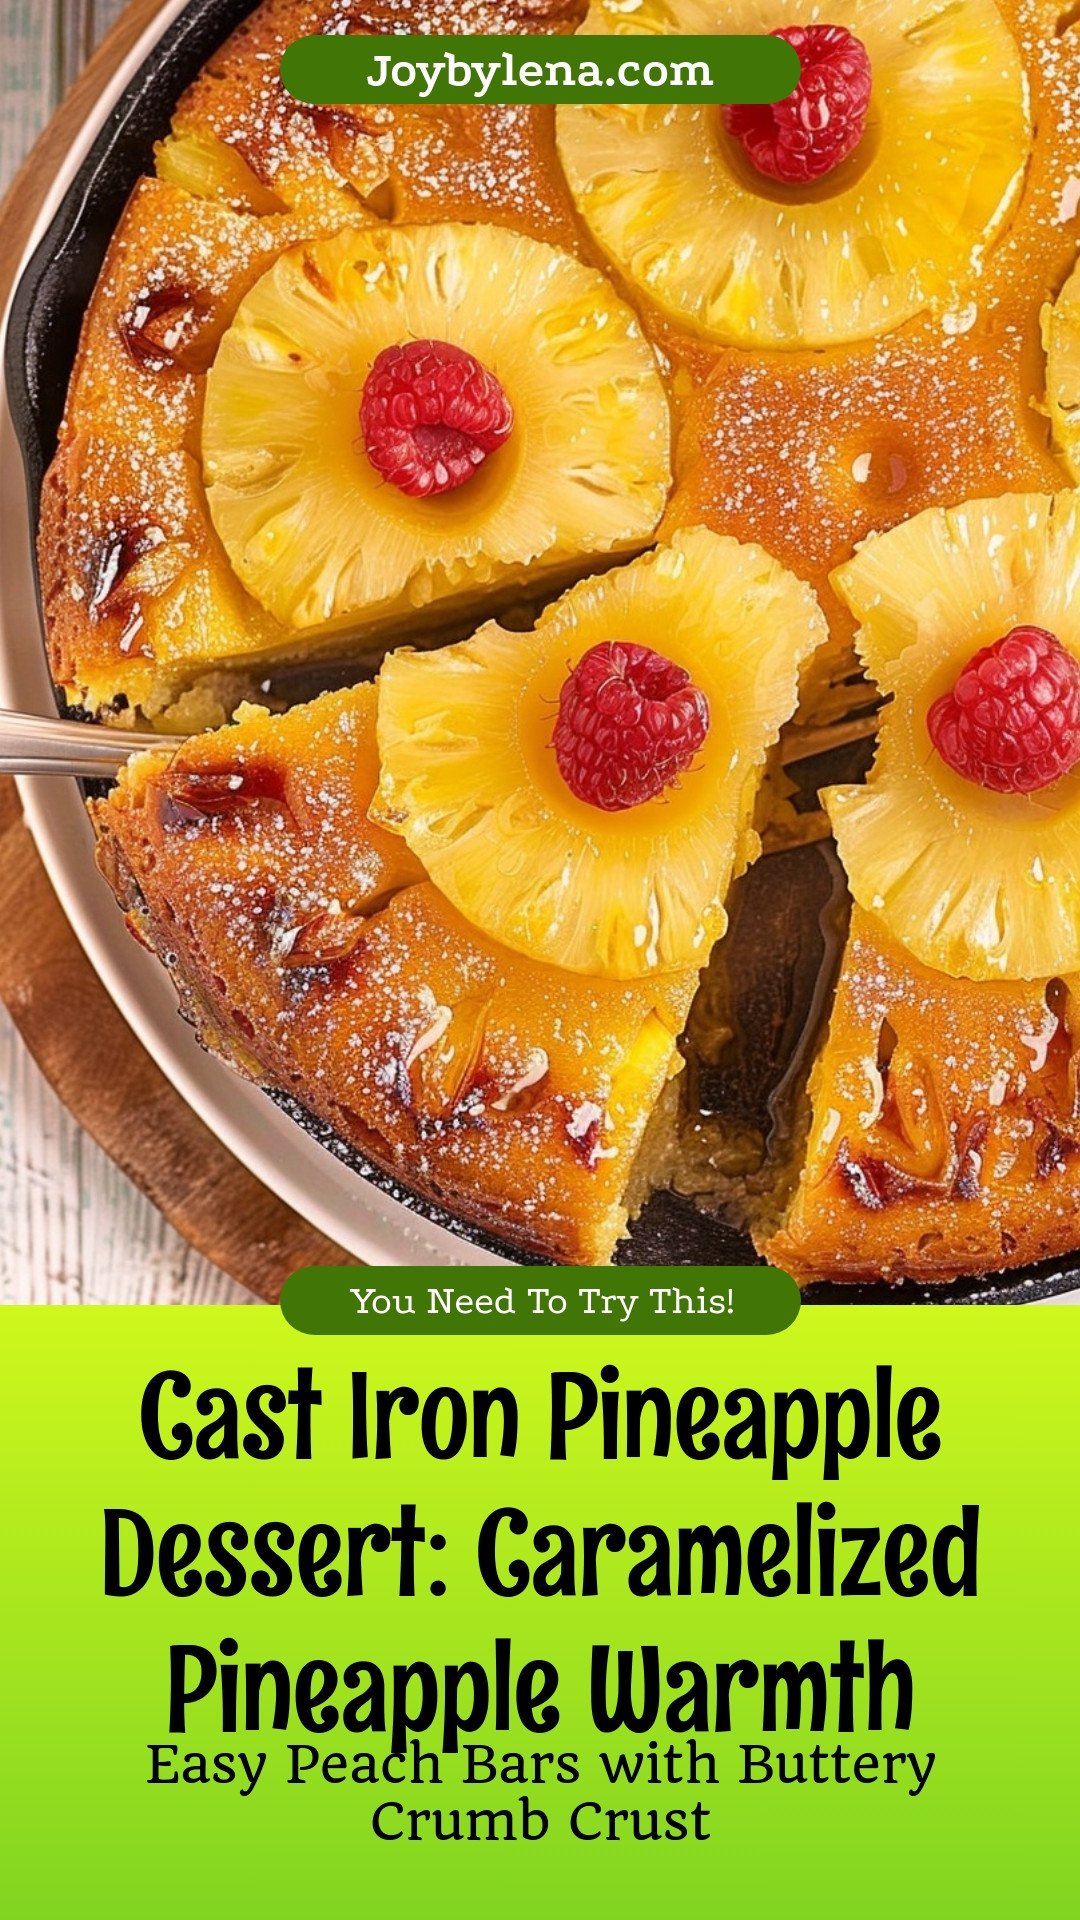
Cast Iron Pineapple Dessert: Caramelized Pineapple Warmth:
Description
Discover the ultimate cast iron pineapple dessert! Experience the magic of caramelized pineapple warmth in this easy, stunning, and delicious skillet recipe.
Ingredients
Instructions
- Preheat the oven to 325°F. In a well-seasoned, 10.5-inch cast iron skillet, heat 1/2 cup butter and brown sugar on the stovetop over medium heat until butter is melted; stir constantly. Remove from heat and set aside.
- Drain pineapple juice into a measuring cup and add enough water to make 1 cup of liquid. Melt the remaining 1/2 cup of butter.
- In a large bowl, add the cake mix, eggs, juice mixture, and the melted butter. Use a mixer to mix for about 2 minutes. Set aside.
- Place drained pineapple rings and maraschino cherries in the bottom of the skillet on top of the melted butter/sugar mixture. Pour the cake batter over the the pineapple and cherries.
- Bake for 45 to 50 minutes or until a toothpick inserted in the center comes out clean.
- Allow the cake to cool for about 5 minutes, then cover the skillet with a serving platter and carefully invert to remove the cake. Serve warm or at room temperature. Store tightly covered in the refrigerator for up to 5 days.


Leave a Reply