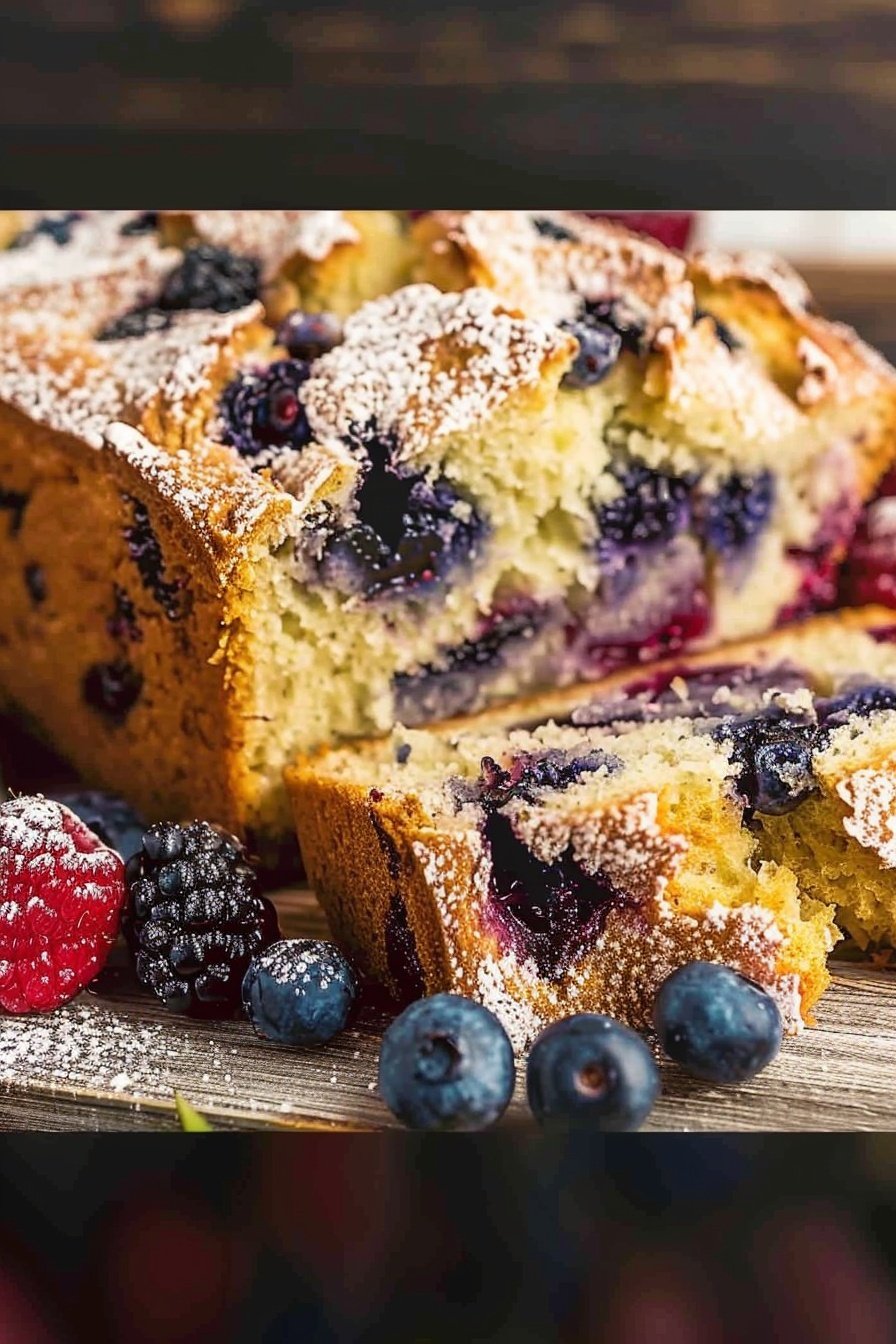
Why We Coat the Berries
Let me tell you a little secret. We coat the berries in flour for a very good reason. It keeps them from sinking to the bottom of the loaf. I learned this the hard way. My first berry loaf had all the fruit in one soggy layer at the bottom. I still laugh at that.
This small step makes a big difference. It gives you a perfect berry in every single bite. That is why it matters. It turns a good loaf into a great one. Have you ever had fruit sink in your baking? What did you do?
The Magic of Simple Ingredients
Look at your bowl. Flour, sugar, eggs, milk. These are simple things. But together, they create something wonderful. The vanilla and berries will make your kitchen smell like a happy summer day. Doesn’t that smell amazing?
This matters because cooking is like magic. You start with plain items. Then you mix them with care. You end up with a sweet, juicy loaf to share. It shows us that simple can be special. What is your favorite simple recipe?
A Trick for a Golden Top
Do not skip the melted butter at the end. I know the loaf is done and you want to eat it. But wait. Brushing that butter on the warm bread is my favorite part. It gives the top a beautiful, shiny finish.
It also makes the crust a little softer. And it adds a rich, buttery flavor you will love. This little trick makes it look like it came from a fancy bakery. *Fun fact: This butter trick works on almost any warm bread you bake.*
Patience is a Sweet Ingredient
The recipe says to let the bread cool. I know, it is the hardest part. You want to cut a big, warm slice right away. But if you wait, you get a cleaner slice. The bread sets and the flavors settle.
This is a small lesson in patience. Good things are worth waiting for. I think about this when I bake with my grandkids. We talk and set the table while it cools. Do you find it hard to wait for baked goods to cool?
Making It Your Own
This loaf is a wonderful friend. It is happy to change. You can use raspberries instead of blueberries. You could add a little lemon zest to the batter. My neighbor likes to use a mix of all the berries she has.
That is the joy of baking. You can make a recipe your own. It becomes a part of your family’s story. This matters because it is how new traditions start. What fruit would you try in this loaf?
Ingredients:
| Ingredient | Amount | Notes |
|---|---|---|
| fresh blueberries | 2 cups | washed and dried |
| all-purpose flour | 2 teaspoons | to coat the blueberries |
| all-purpose flour | 2 cups | |
| granulated sugar | ¾ cup | |
| baking powder | 2½ teaspoons | |
| baking soda | ½ teaspoon | |
| salt | ½ teaspoon | |
| large eggs | 2 | |
| whole milk | ½ cup plus 2 teaspoons | |
| vegetable oil | ½ cup | |
| pure vanilla extract | 2 teaspoons | |
| granulated sugar | 2 teaspoons | for garnish (optional) |
| melted butter | 1 tablespoon | to brush on bread after removing from the oven |
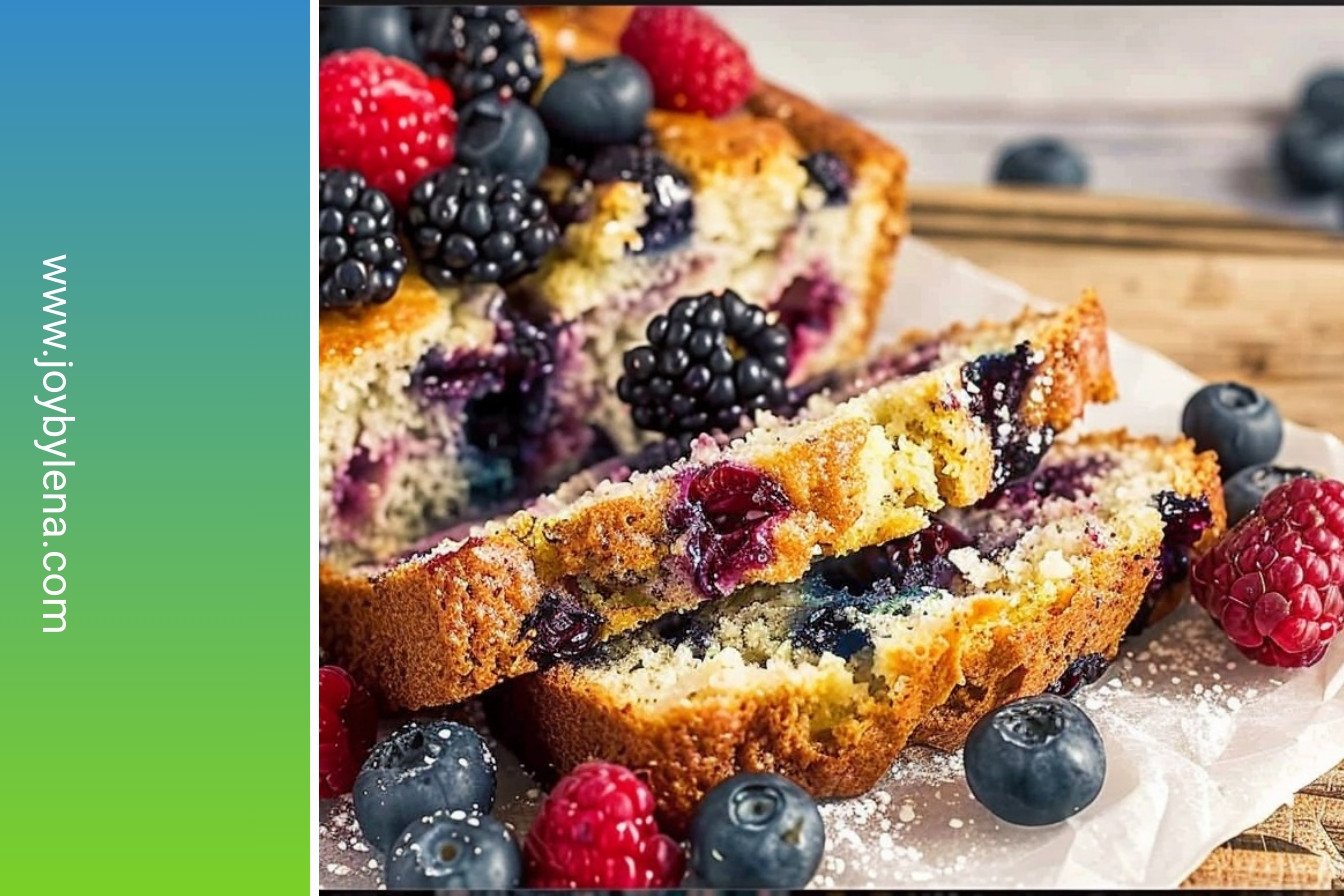
My Summer Berry Loaf: A Taste of Sunshine
Hello, my dear! Come sit with me. The sun is out, and the berries are sweet. This is the perfect time for my Summer Berry Loaf. It is my favorite thing to bake in July. My grandkids call it “purple bread.” I still laugh at that.
It is a simple, happy recipe. The juicy berries burst in your mouth. The top is just a little bit crunchy. Doesn’t that smell amazing? Let me show you how it’s done. We will make some wonderful memories together.
Ingredients
- 2 cups all-purpose flour
- 1 cup granulated sugar
- 2 teaspoons baking powder
- 1/2 teaspoon baking soda
- 1/2 teaspoon salt
- 2 large eggs
- 1 cup milk
- 1/2 cup vegetable oil
- 1 teaspoon vanilla extract
- 1 1/2 cups fresh blueberries
- 2 teaspoons additional flour (for coating berries)
- Extra sugar for sprinkling on top
Instructions
Step 1: First, turn your oven on to 350°F. This gets it ready for our loaf. Lightly spray your loaf pan with nonstick spray. This keeps the bread from sticking. I use my old metal pan for this. It has seen many loaves.
Step 2: Now, let’s take care of our blueberries. Toss them with two teaspoons of flour. This little coat of flour is our secret. It stops the berries from sinking to the bottom. (This is a hard-learned tip from a few soggy-bottomed loaves!).
Step 3: Grab a big bowl for the dry things. Whisk together your flour, sugar, baking powder, baking soda, and salt. Just mix them until they are friends. In another bowl, mix the wet things. That’s the eggs, milk, oil, and vanilla. Whisk until it’s all one color.
Step 4: Time to bring it all together. Slowly stir the wet mix into the dry mix. Use a wooden spoon for this. Stir just until you see no more white flour. A few lumps are just fine, I promise. Over-mixing makes the bread tough.
Step 5: Now, gently fold in your floured blueberries. Be kind to them so they don’t get crushed. Then, spoon all that beautiful batter into your pan. Sprinkle a little sugar on top. It gives the crust a lovely sparkle and crunch.
Step 6: Bake your loaf for about 50 minutes. You will know it’s done when a knife poked in the middle comes out clean. The hardest part is waiting. Let it rest in the pan for 20 minutes. Then, move it to a rack to cool completely. What’s your favorite part of baking? The mixing or the eating? Share below!
Cook Time: 50 minutes
Total Time: 1 hour 15 minutes
Yield: 10 slices
Category: Dessert, Snack
Three Fun Twists on Our Berry Loaf
This recipe is like a good friend. It is always happy to try something new. Here are a few ways to play with it. I think you will love these ideas.
Lemon Zest Sparkle: Add the zest of one lemon to the batter. It makes the berries taste even brighter and sunnier.
Triple Berry Mix: Use a mix of blueberries, raspberries, and chopped strawberries. You get a rainbow of flavors in every single bite.
Cinnamon Crunch: Mix your sprinkle-top sugar with a pinch of cinnamon. It smells like heaven while it bakes, my dear.
Which one would you try first? Comment below!
Serving Your Berry Loaf with Style
A warm slice of this bread is a treat all by itself. But you can make it extra special, too. I love to see my family’s faces light up.
For a simple dessert, toast a slice lightly. Then, spread a little cream cheese on top. The creamy and sweet combo is divine. You could also add a scoop of vanilla ice cream. It melts right into the warm bread. Oh my.
This loaf pairs beautifully with a hot cup of tea. My favorite is a simple chamomile. For a cooler day, a tall glass of iced tea is perfect. If you are feeling fancy, a sweet Moscato wine is a lovely match. Which would you choose tonight?
Keeping Your Berry Loaf Fresh
Let’s talk about keeping your berry loaf yummy. Once it’s cool, wrap it tightly in plastic wrap. It will stay fresh on the counter for two days. I like to put mine in a bread box.
You can also freeze this loaf for later. Wrap the whole loaf or individual slices in foil. Then pop them into a freezer bag. It will be perfect for up to three months.
I once gave a frozen loaf to my neighbor. She thawed it for a surprise visit. She said it tasted just-baked! This is why batch cooking matters. A little work now brings joy later.
To reheat, warm a slice in the toaster. Or warm the whole loaf in a 300°F oven for 10 minutes. It makes your kitchen smell wonderful again. Have you ever tried storing it this way? Share below!
Simple Fixes for Common Berry Loaf Troubles
Sometimes baking can be tricky. But do not worry. I have simple fixes for common problems. You can solve them easily.
First, if your berries sink, coat them in flour. This little step helps them stay put. I remember when I forgot to do this once. My berries all fell to the bottom!
Second, do not over mix your batter. Stir just until the flour disappears. A lumpy batter is a good batter. This matters because gentle mixing keeps the loaf soft and tender.
Third, if your bread is browning too fast, tent it with foil. Just lay a piece loosely on top. This matters because it protects the top from burning. The inside keeps baking perfectly. Which of these problems have you run into before?
Your Berry Loaf Questions Answered
Q: Can I make this gluten-free?
A: Yes! Use your favorite gluten-free flour blend. It works very well.
Q: Can I make it ahead?
A: Absolutely. Bake it the night before. It is perfect for breakfast.
Q: What can I use instead of blueberries?
A: Raspberries or chopped strawberries are lovely. Fun fact: I used blackberries from my garden last week!
Q: Can I double the recipe?
A: You can. Just use two loaf pans. Then you can share one with a friend.
Q: Is the butter brush at the end needed?
A: It is optional. But it gives the crust a lovely, soft finish. Which tip will you try first?
A Little Note From My Kitchen
I hope you love baking this summer berry loaf. It always reminds me of sunny days. Sharing food is a way to share love.
I would be so happy to see your creation. It makes my day to see your kitchen adventures. Please share a picture with me.
Have you tried this recipe? Tag us on Pinterest! I cannot wait to see your beautiful berry loaves. Happy cooking!
—Lena Morales.
Summer Berry Loaf: Juicy berry-studded perfection.:
Description
Juicy berry-studded perfection! This easy Summer Berry Loaf is the ultimate moist & flavorful quick bread, bursting with fresh seasonal berries. Perfect for breakfast or a sweet snack.
Ingredients
Instructions
- Preheat the oven to 350°F. Lightly spray a 9×5-inch loaf pan with nonstick spray, and set it aside.
- Sprinkle the 2 teaspoons of flour on top of the fresh blueberries, and gently stir them. Remove the excess flour and set the coated berries aside.
- In a large mixing bowl, whisk together 2 cups of flour, sugar, baking powder, baking soda, and salt until combined.
- In a medium-sized mixing bowl, whisk together the eggs, milk, oil, and vanilla until all the wet ingredients are incorporated.
- Using a wooden spoon, slowly stir the wet ingredients into the dry ingredients. Stir until no flour streaks are visible. Be careful not to over mix.
- Carefully fold in the blueberries, taking care not to crush the berries while mixing.
- Spoon the blueberry batter into the prepared loaf pan. Sprinkle the 2 teaspoons of granulated sugar on top of the bread for garnish, this is optional.
- Bake for 45 to 50 minutes or until a knife inserted comes out clean.
- Allow the blueberry bread to rest in the pan for 20 minutes before removing the bread and transferring it to a cooling rack.
- Using a pastry brush, brush on 1 tablespoon of melted butter. Allow the bread to cool completely before slicing and serving.
Notes
- Nutrition per serving: Calories: 300kcal | Carbohydrates: 41g | Protein: 4g | Fat: 14g | Saturated Fat: 3g | Polyunsaturated Fat: 7g | Monounsaturated Fat: 3g | Trans Fat: 0.1g | Cholesterol: 37mg | Sodium: 199mg | Potassium: 183mg | Fiber: 1g | Sugar: 20g | Vitamin A: 118IU | Vitamin C: 3mg | Calcium: 69mg | Iron: 2mg


Leave a Reply